Removal Procedure
- Recover the refrigerant from the system. Refer to Refrigerant Recovery and Recharging .
- Drain the engine coolant if necessary. Refer to Cooling System Draining and Filling (Static Fill)
or Cooling System Draining and Filling (Vac-N-Fill)
.
 Courtesy of GENERAL MOTORS CORP.
- Raise the vehicle. Refer to Lifting and Jacking the Vehicle
.
- Remove the right assist step if necessary. Refer to Assist Step Replacement (w/WS2, BVX)
or Assist Step Replacement (Tubular BVE)
.
- Remove the rear wheelhouse liner. Refer to Wheelhouse Panel Replacement
.
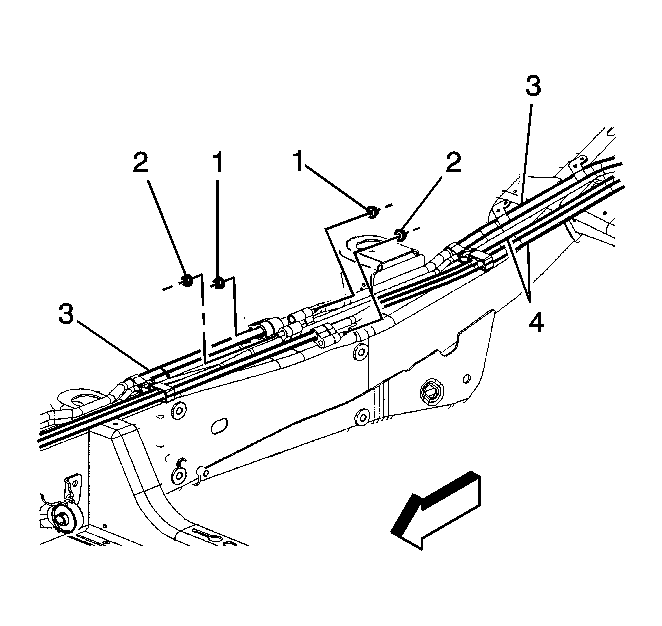
- Remove the auxiliary A/C evaporator tubes connector nuts (1) from the intermediate connection point.
- Remove the auxiliary heater tubes connector nuts (2) if necessary.
 Courtesy of GENERAL MOTORS CORP.
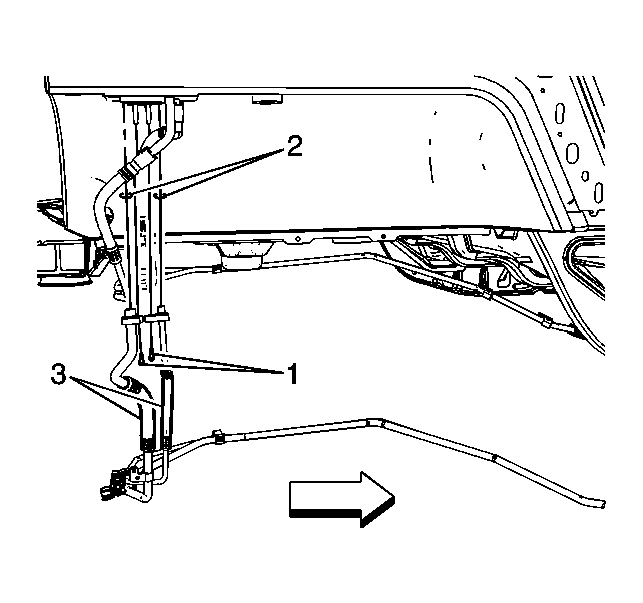
- Remove the retaining nut (1) and the auxiliary A/C evaporator tubes (3) from the auxiliary HVAC module.
 Courtesy of GENERAL MOTORS CORP.
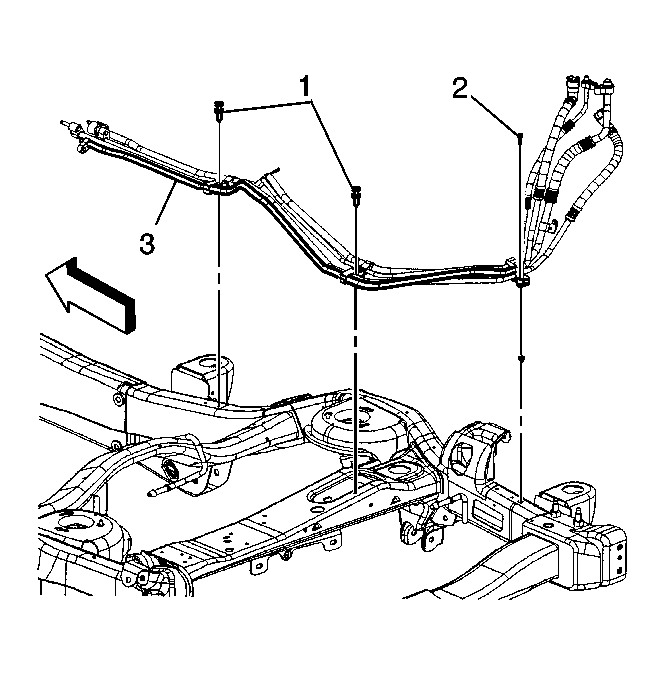
- Remove the heater - A/C tubes retaining push pins (1) at the frame locations.
- Remove the heater - A/C tubes retaining bolt (2) at the frame location.
- Remove the auxiliary A/C evaporator tubes (3) from the frame.
- Remove the auxiliary A/C evaporator tubes from the vehicle.
 Courtesy of GENERAL MOTORS CORP.
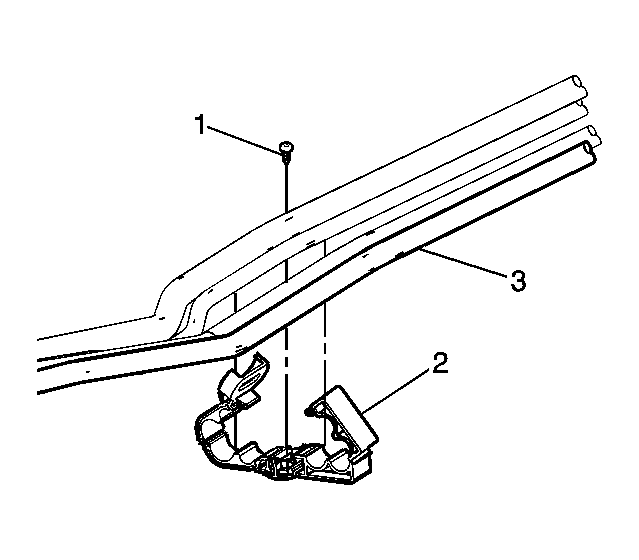
- Remove auxiliary heater - A/C tubes clip retaining push pin/bolt (1) if necessary.
- Use a flat-bladed release tool to open retaining clips (2).
- Remove auxiliary A/C tubes from vehicle.