Hatch Weatherstrip Replacement
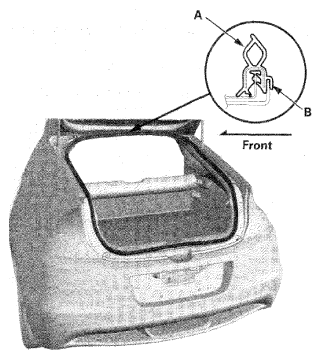
- Remove the hatch weatherstrip (A) by pulling it out.
 Courtesy of AMERICAN HONDA MOTOR CO., INC.
- Locate the painted alignment mark (B) on the hatch weatherstrip. Align the painted mark with the alignment tab in the center of the hatch opening, then install the hatch weatherstrip all the way around.
NOTE:
- Make sure it's seated completely and facing in the direction shown.
- Make sure there are no wrinkles in the weatherstrip.
- Check for water leaks (see step 8 on
DOOR GLASS ADJUSTMENT
).