Crankshaft Pulley Removal and Installation: Installation
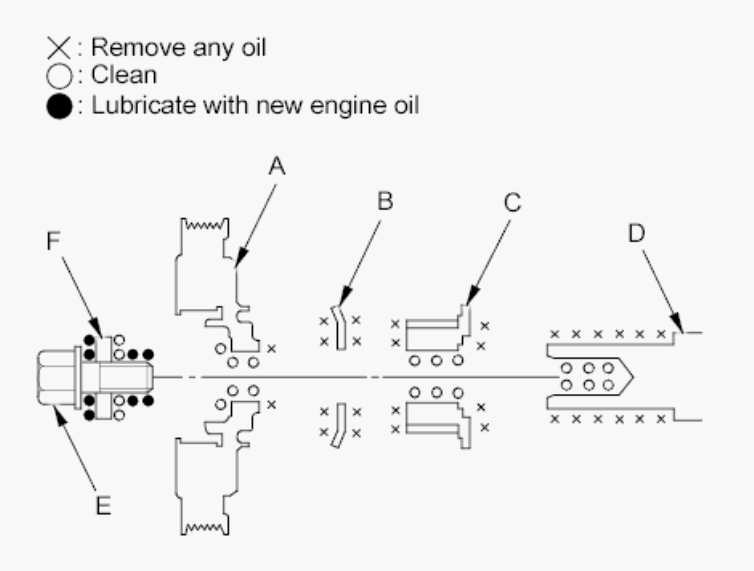
- Remove any oil and clean the crankshaft pulley (A), the timing belt guide plate (B), the timing belt drive pulley (C), the crankshaft (D), the crankshaft pulley bolt (E), and the washer (F). Lubricate with new engine oil as shown.
 Courtesy of AMERICAN HONDA MOTOR CO., INC.
- Install the crankshaft pulley, and tighten the bolt. Do not use an impact wrench.
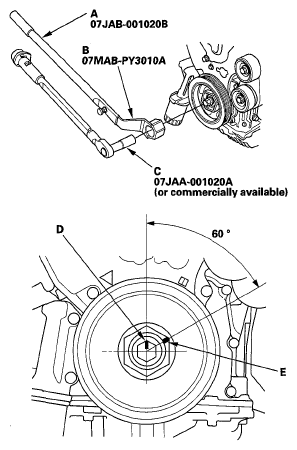
- -1 Hold the pulley with the holder handle (A) and the holder attachment (B). Tighten the bolt to 65 N.m (6.6 kgf.m, 48 lbf.ft) with a torque wrench and a 19 mm socket (C).
- -2 Mark the bolt head (D) and the crankshaft pulley (E) as shown, then tighten the bolt an additional 60° (The mark on the bolt head lines up with the mark on the crankshaft pulley).
 Courtesy of AMERICAN HONDA MOTOR CO., INC.
- Install the drive belt (see DRIVE BELT INSPECTION
).
- Install the front splash shield (see FRONT SPLASH SHIELD REPLACEMENT
).
- Install the right front wheel.