EVAP Bypass Solenoid Valve Test
- Disconnect vacuum hose from EVAP 2-way valve as illustrated. See Fig 1
. Using backprobe set, connect a fused jumper wire between ground and PCM 32-pin connector "A" terminal No. 3 (Blue wire). Turn ignition on. Using vacuum pump, slowly apply vacuum to EVAP 2-way valve as illustrated. See Fig 1
. If vacuum holds, go to next step. If vacuum does not hold, EVAP bypass solenoid valve and EVAP 2-way valve are okay at this time. Perform EVAP control canister vent shut valve test. See EVAP CONTROL CANISTER VENT SHUT VALVE TEST
.
- Turn ignition off. Disconnect EVAP bypass solenoid valve connector. Check for continuity between ground and EVAP bypass solenoid valve harness connector terminal No. 2 (Blue wire). If continuity exists, go to next step. If continuity does not exist, repair open in Blue wire between EVAP bypass solenoid valve and PCM 32-pin connector "A" terminal No. 3.
- Turn ignition on. Measure voltage between ground and EVAP bypass solenoid valve harness connector terminal No. 1 (Black/White wire). If battery voltage exists, replace EVAP bypass solenoid valve and "O" rings. If battery voltage does not exist, repair open in Black/White wire between EVAP bypass solenoid valve and No. 15 ALTERNATOR SP SENSOR (7.5-amp) fuse, located in driver's side under dash fuse/relay box.
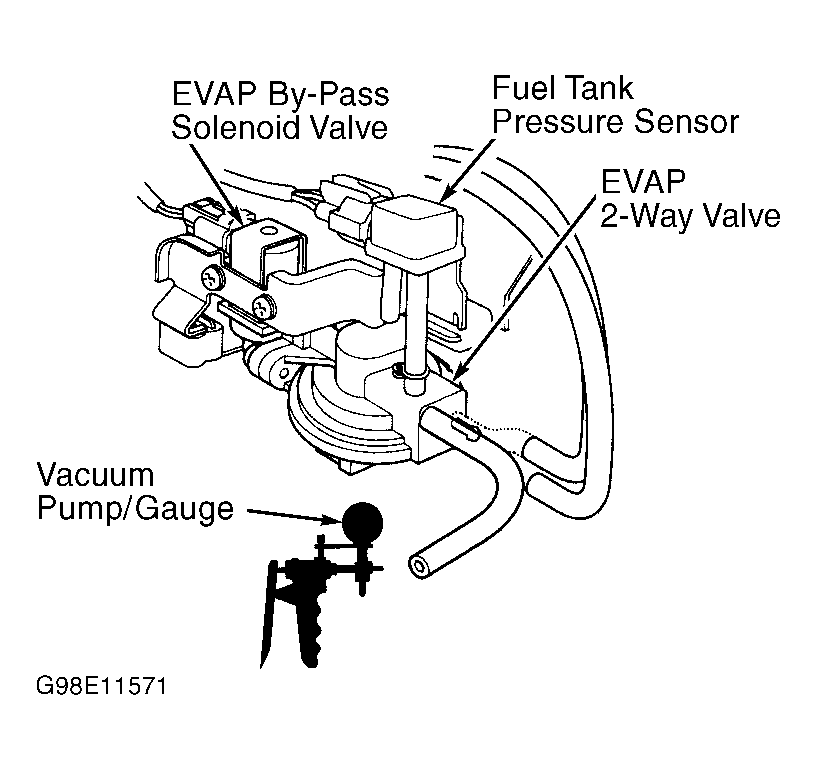 Courtesy of AMERICAN HONDA MOTOR CO., INC.