Instrument Panel Lower Trim Panel Replacement
WARNING: This page is about a different car, the 2008 Cadillac CTS. However, it is still accessible from the selected car via links, so may be relevant.
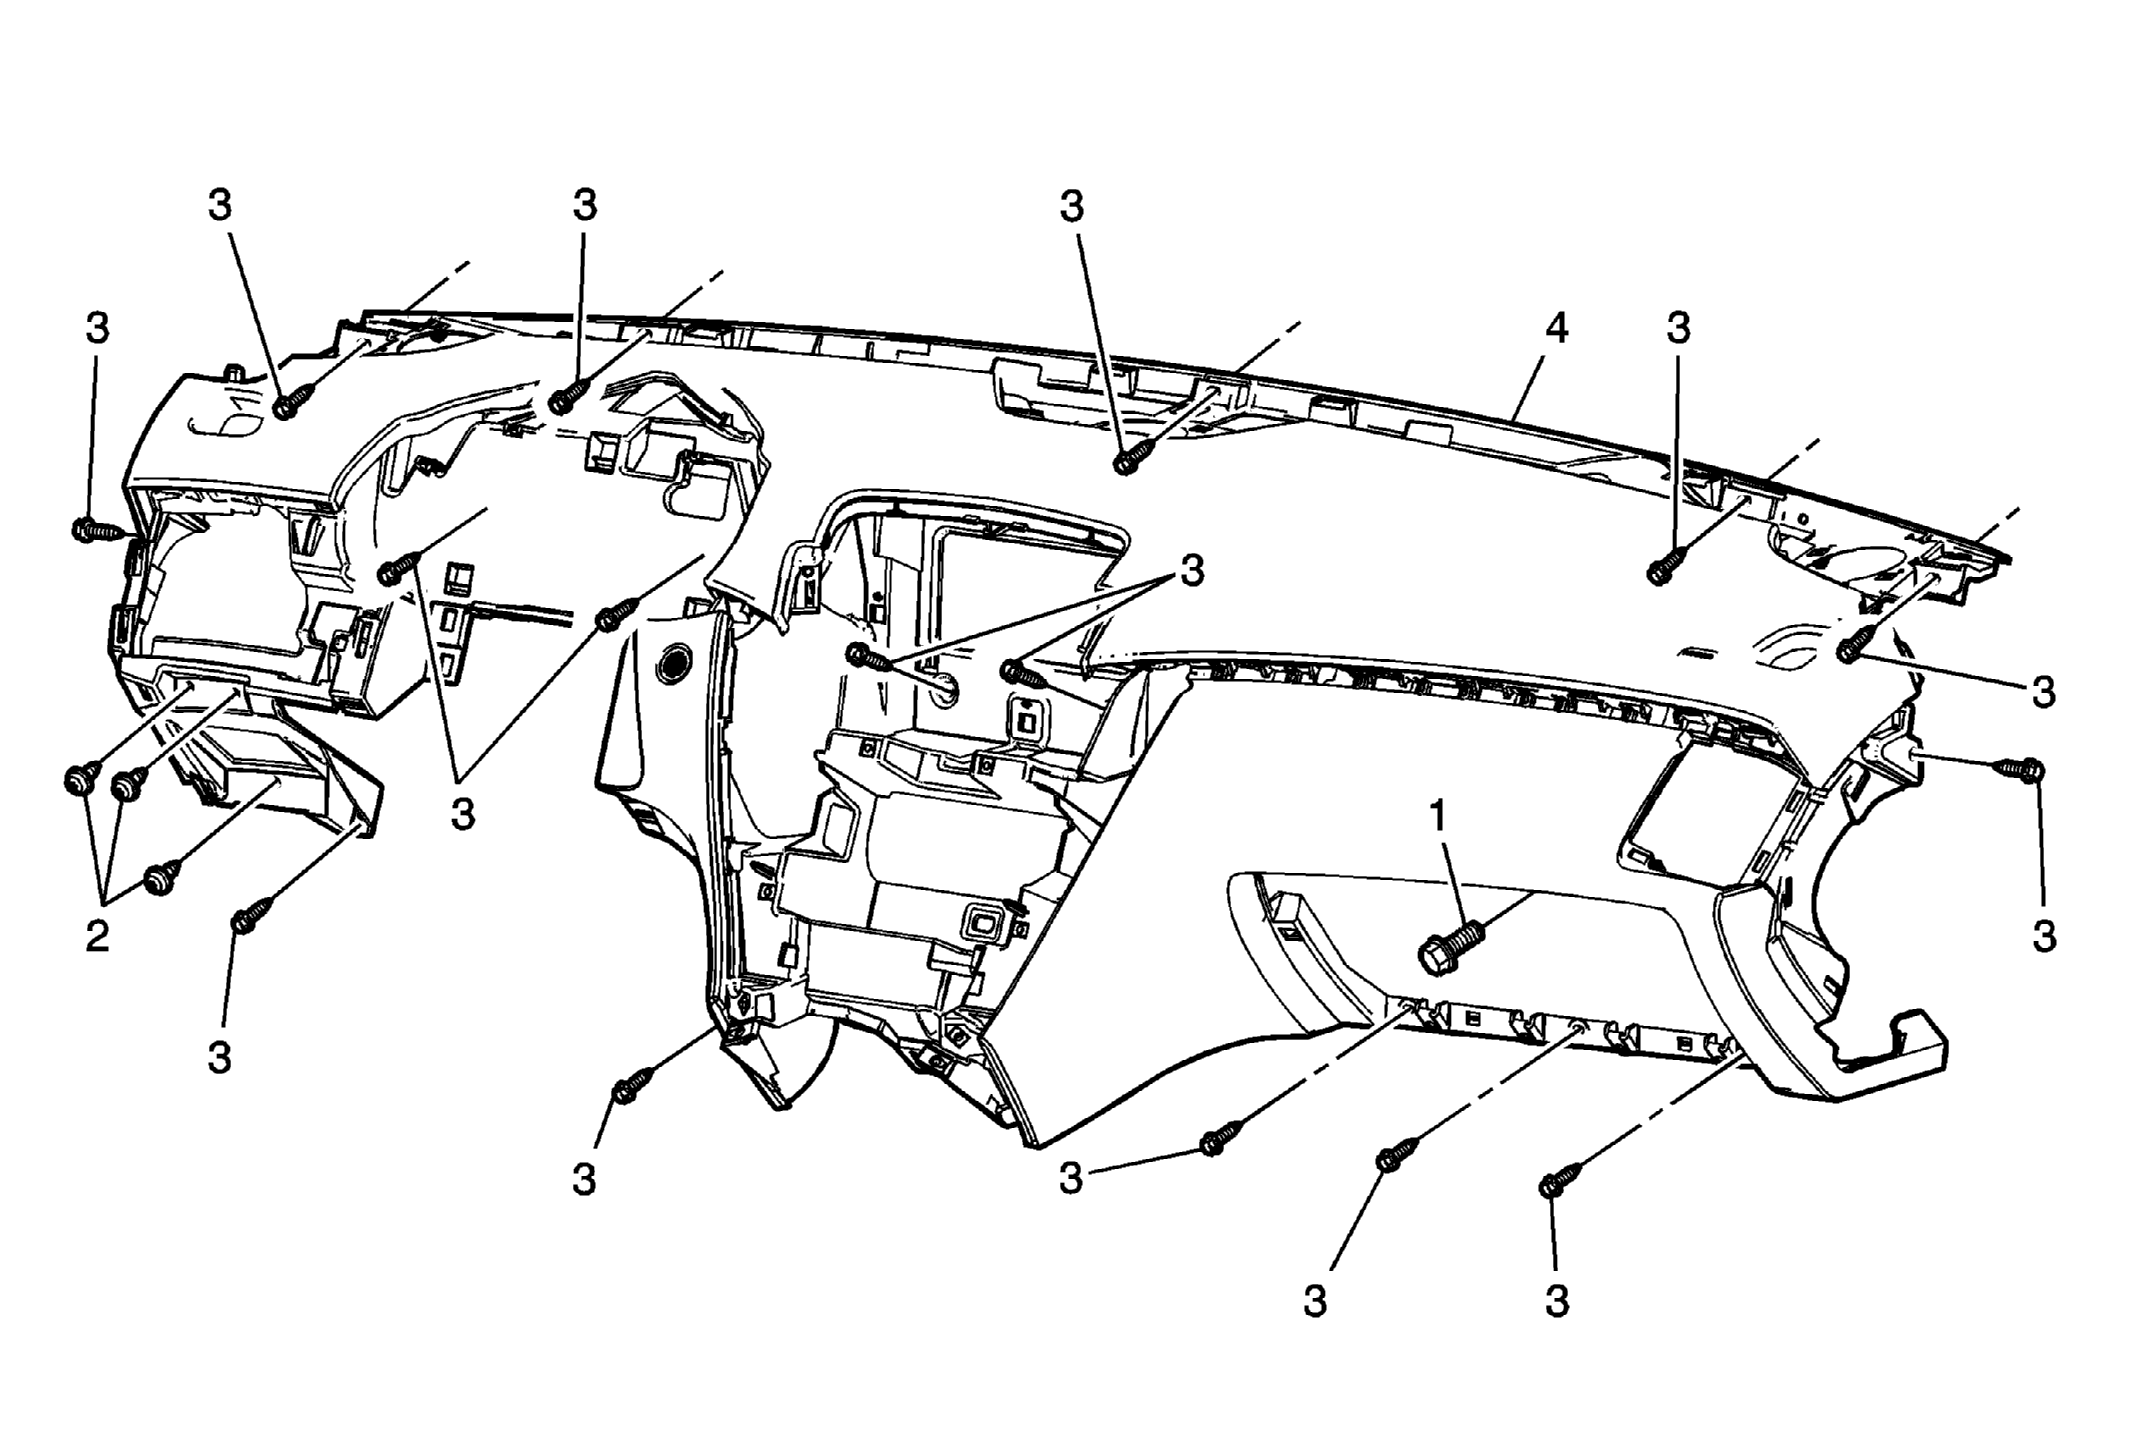 Courtesy of GENERAL MOTORS CORP.
| Callout |
Component Name |
|
Preliminary Procedure
- Disable the SIR system. Refer to SIR Disabling and Enabling
.
- Remove the radio front speakers. Refer to Radio Front Speaker Replacement
.
- Remove the radio. Refer to Radio Replacement
.
- Remove the radio, video, audio disc player, and navigation information display assembly, if equipped. Refer to Radio, Video, Audio Disc Player, and Navigation Information Display Replacement
.
- Remove the left and right instrument panel insulators. Refer to Instrument Panel Insulator Replacement - Left Side and Instrument Panel Insulator Replacement - Right Side .
- Remove the front floor console assembly. Refer to Front Floor Console Replacement .
- Remove the steering column assembly. Refer to Steering Column Replacement
.
- Remove the instrument panel cluster assembly. Refer to Instrument Cluster Replacement
.
- Remove the instrument panel compartment assembly. Refer to Instrument Panel Compartment Replacement .
- Remove the right, left, and center instrument panel trim panel appliques. Refer to Instrument Panel Trim Plate Applique Replacement - Right Side and Instrument Panel Trim Plate Applique Replacement - Left Side and Instrument Panel Trim Plate Applique Replacement - Center .
- Remove the right and left instrument panel flood lamp assemblies. Refer to Instrument Panel Flood Lamp Replacement - Left Side
and Instrument Panel Flood Lamp Replacement - Right Side
.
- Remove the left and right instrument panel air outlet deflector assemblies. Refer to Instrument Panel Outer Air Outlet Deflector Replacement - Left Side
and Instrument Panel Outer Air Outlet Deflector Replacement - Right Side
.
- Prior to removal of the instrument panel lower trim panel assembly, note the routing of the instrument panel wiring harness and connector locations to ensure proper reinstallation.
|
| 1 |
Instrument Panel Inflatable Restraint Bolt (Qty: 1)
Tighten:
10 N.m (89 lb in)
|
| 2 |
Parking Brake Lever Bracket Reinforcement Screw (Qty: 3) Tighten:
2.5 N.m (22 lb in)
|
| 3 |
Instrument Panel Lower Trim Panel Bolt (Qty: 16) Tighten:
2.5 N.m (22 lb in)
|
| 4 |
Instrument Panel Lower Trim Panel Assembly Procedure
- Disconnect the instrument panel wiring harness from the instrument panel lower trim panel assembly and position out of the way.
- When replacing the instrument panel lower trim panel assembly, transfer all necessary components.
|