Cylinder Head: Installation
- Ensure all bolt holes in cylinder block are clean. Install gaskets and cylinder heads. Install NEW cylinder head bolts. Tighten cylinder head bolts in sequence to specification in Step 1. Refer to Fig 1. See TORQUE SPECIFICATIONS .
- Install lower intake manifold. See INTAKE MANIFOLD . Tighten lower intake manifold bolts to Step 1. See TORQUE SPECIFICATIONS . Tighten cylinder head bolts to Step 2. Tighten lower intake manifold bolts to Step 2. See TORQUE SPECIFICATIONS .
- Tighten cylinder head bolts to Step 3. Tighten lower intake manifold bolts to Steps 3 and 4. See TORQUE SPECIFICATIONS .
- Coat push rods with Oil Conditioner (D9AZ-19579-CA) and install in original position. Install rocker arm shaft assembly to cylinder head. Guide rocker arms onto push rods.
- Tighten rocker arm bolts evenly to specification. To complete installation, reverse removal installation. Fill and bleed cooling system. See COOLING SYSTEM BLEEDING .
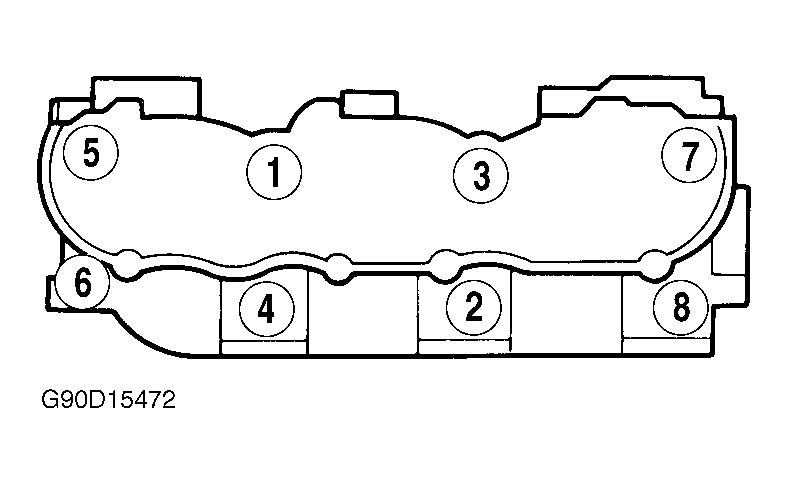 Courtesy of FORD MOTOR CO.