Interior & Exterior: Interior: Headliner: Removal
CAUTION:
Special Tool 6967 is needed to remove the rear locating clip attached to the headlining just forward of the rear window.
- Remove the door opening weatherstrips. (Refer to BODY/WEATHERSTRIP/SEALS/DOOR OPENING WEATHERSTRIP - REMOVAL)
- Remove instrument panel end cap/fuse cover.
- Remove the sun visors. (Refer to BODY/INTERIOR/SUN VISOR - REMOVAL)
- Remove sun visor supports. (Refer to BODY/INTERIOR/SUN VISOR SUPPORT - REMOVAL)
- Remove left A-pillar trim. (Refer to BODY/INTERIOR/A-PILLAR TRIM - REMOVAL)
- Remove front/rear assist handles and/or coat hooks.
- Remove right and left upper B-pillar trim. (Refer to BODY/INTERIOR/UPPER B-PILLAR TRIM - REMOVAL)
- Remove upper quarter trim, as necessary. (Refer to BODY/INTERIOR/UPPER QUARTER TRIM - REMOVAL)
- Disconnect headliner electrical connector along instrument panel bracket.
- Disconnect headliner electrical connector from fuse panel. See Fig 1.
- Pull down on the rear of the map lamp and sun roof switch to disengage clips from roof panel, if equipped.
- Using Special Tool 6967, disengage headline rear locating clip holding headlining to roof above rear window. See Fig 2.
- Pull down on headliner around sun roof to disengage hook and loop fastener, if equipped.
- Disconnect the sunroof module electrical connector, if equipped.
- Recline front seats.
- Tilt steering wheel fully up.
- Move shifter fully rearward.
- Lower headliner.
- Remove headliner through passenger front door opening.
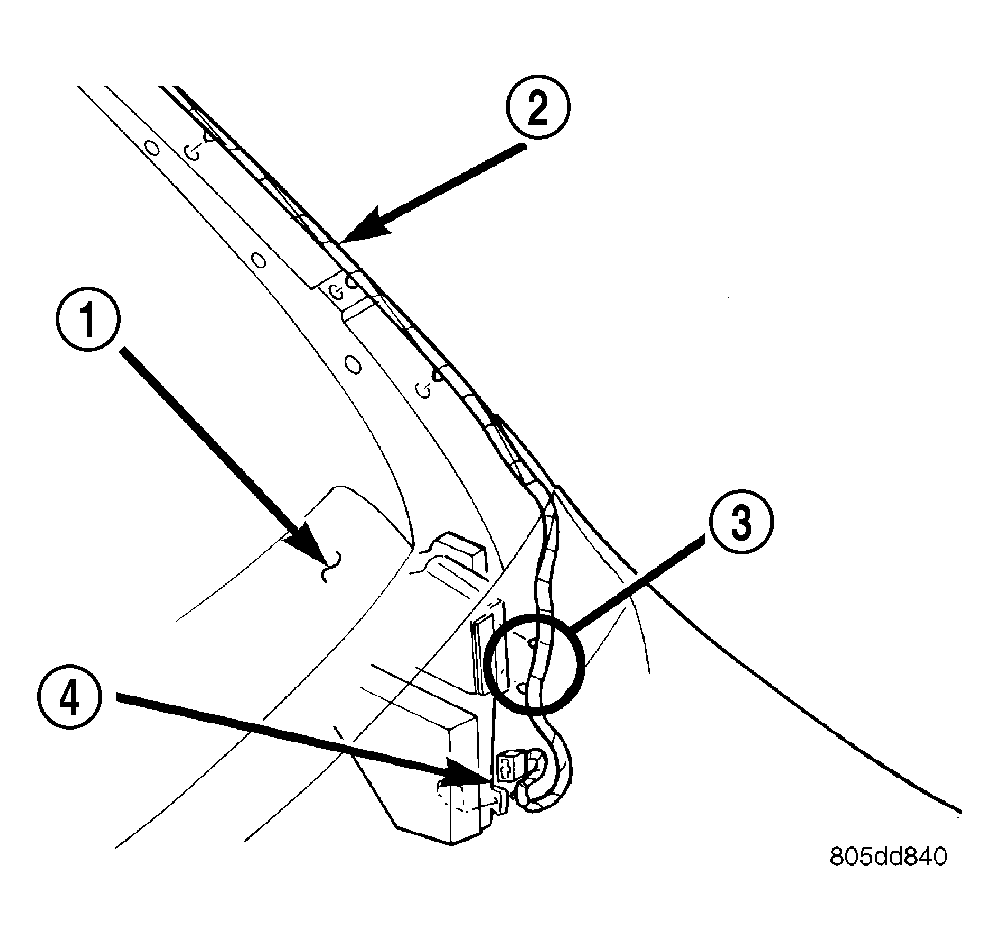 Courtesy of DAIMLERCHRYSLER CORP.
| 1 - INSTRUMENT PANEL |
| 2 - LEFT A-PILLAR |
| 3 - WRAP FASTENERS WITH FOAM |
| 4 - FUSE PANEL |
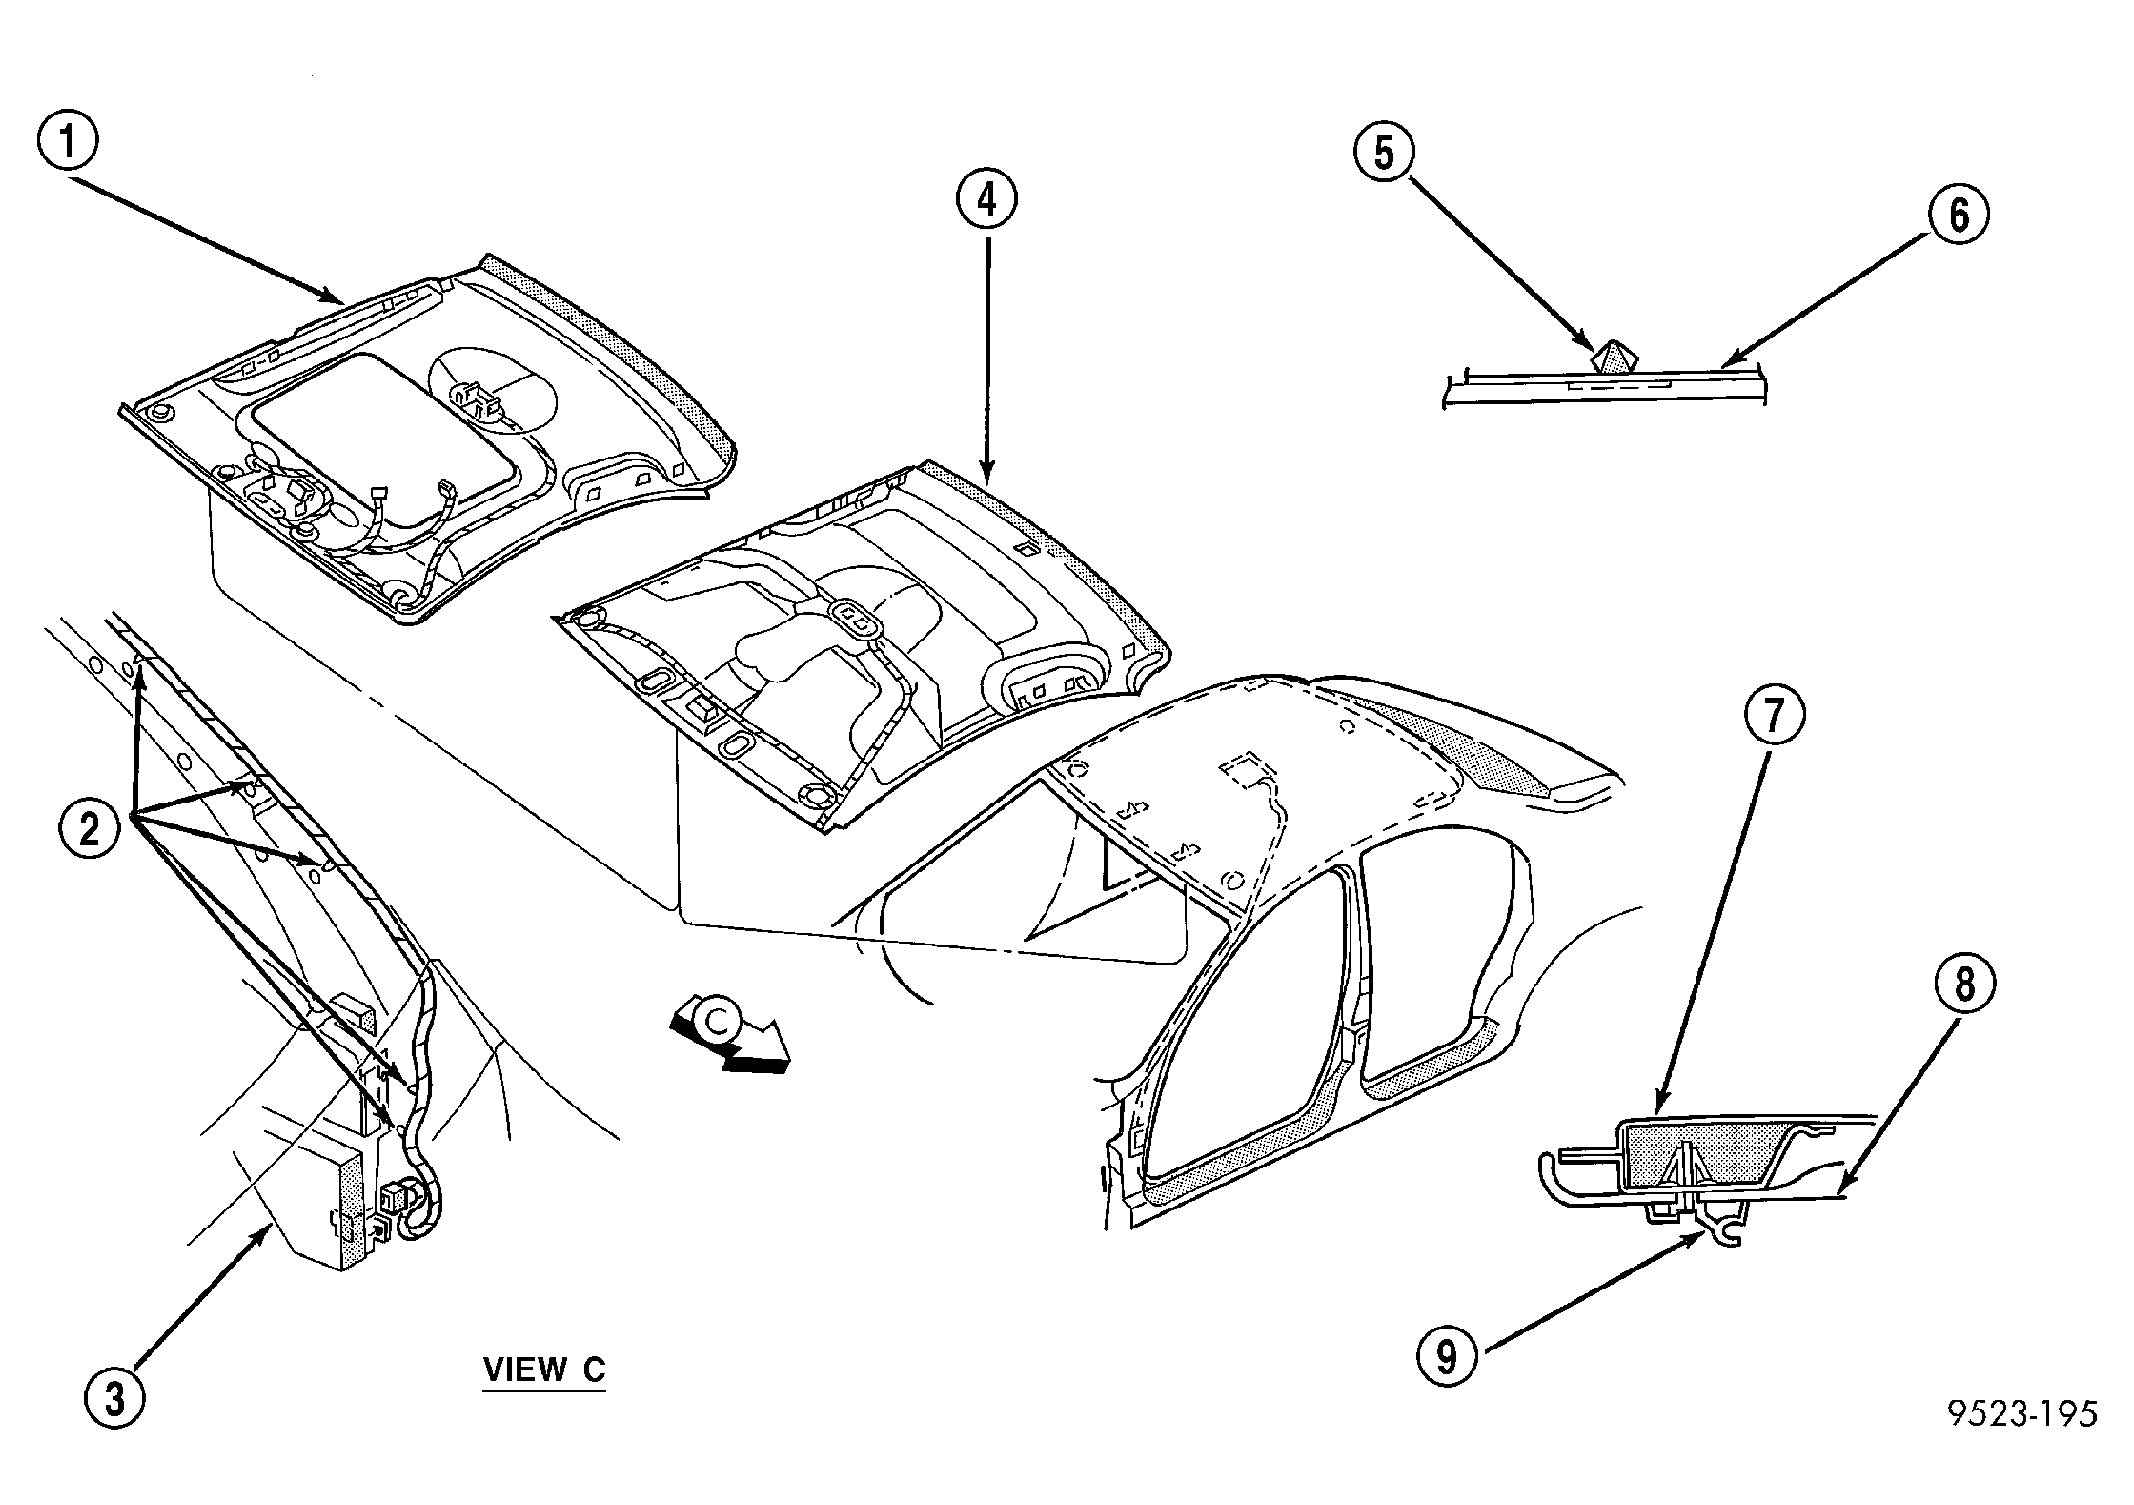 Courtesy of DAIMLERCHRYSLER CORP.
| 1 - HEADLINING W/SUNROOF |
| 2 - PUSH-IN FASTENERS |
| 3 - JUNCTION BLOCK |
| 4 - HEADLINING |
| 5 - CLIP |
| 6 - REAR WINDOW HEADER |
| 7 - WINDSHIELD HEADER |
| 8 - HEADLINING |
| 9 - SUNVISOR SUPPORT |