Intermediate Side Door Replacement
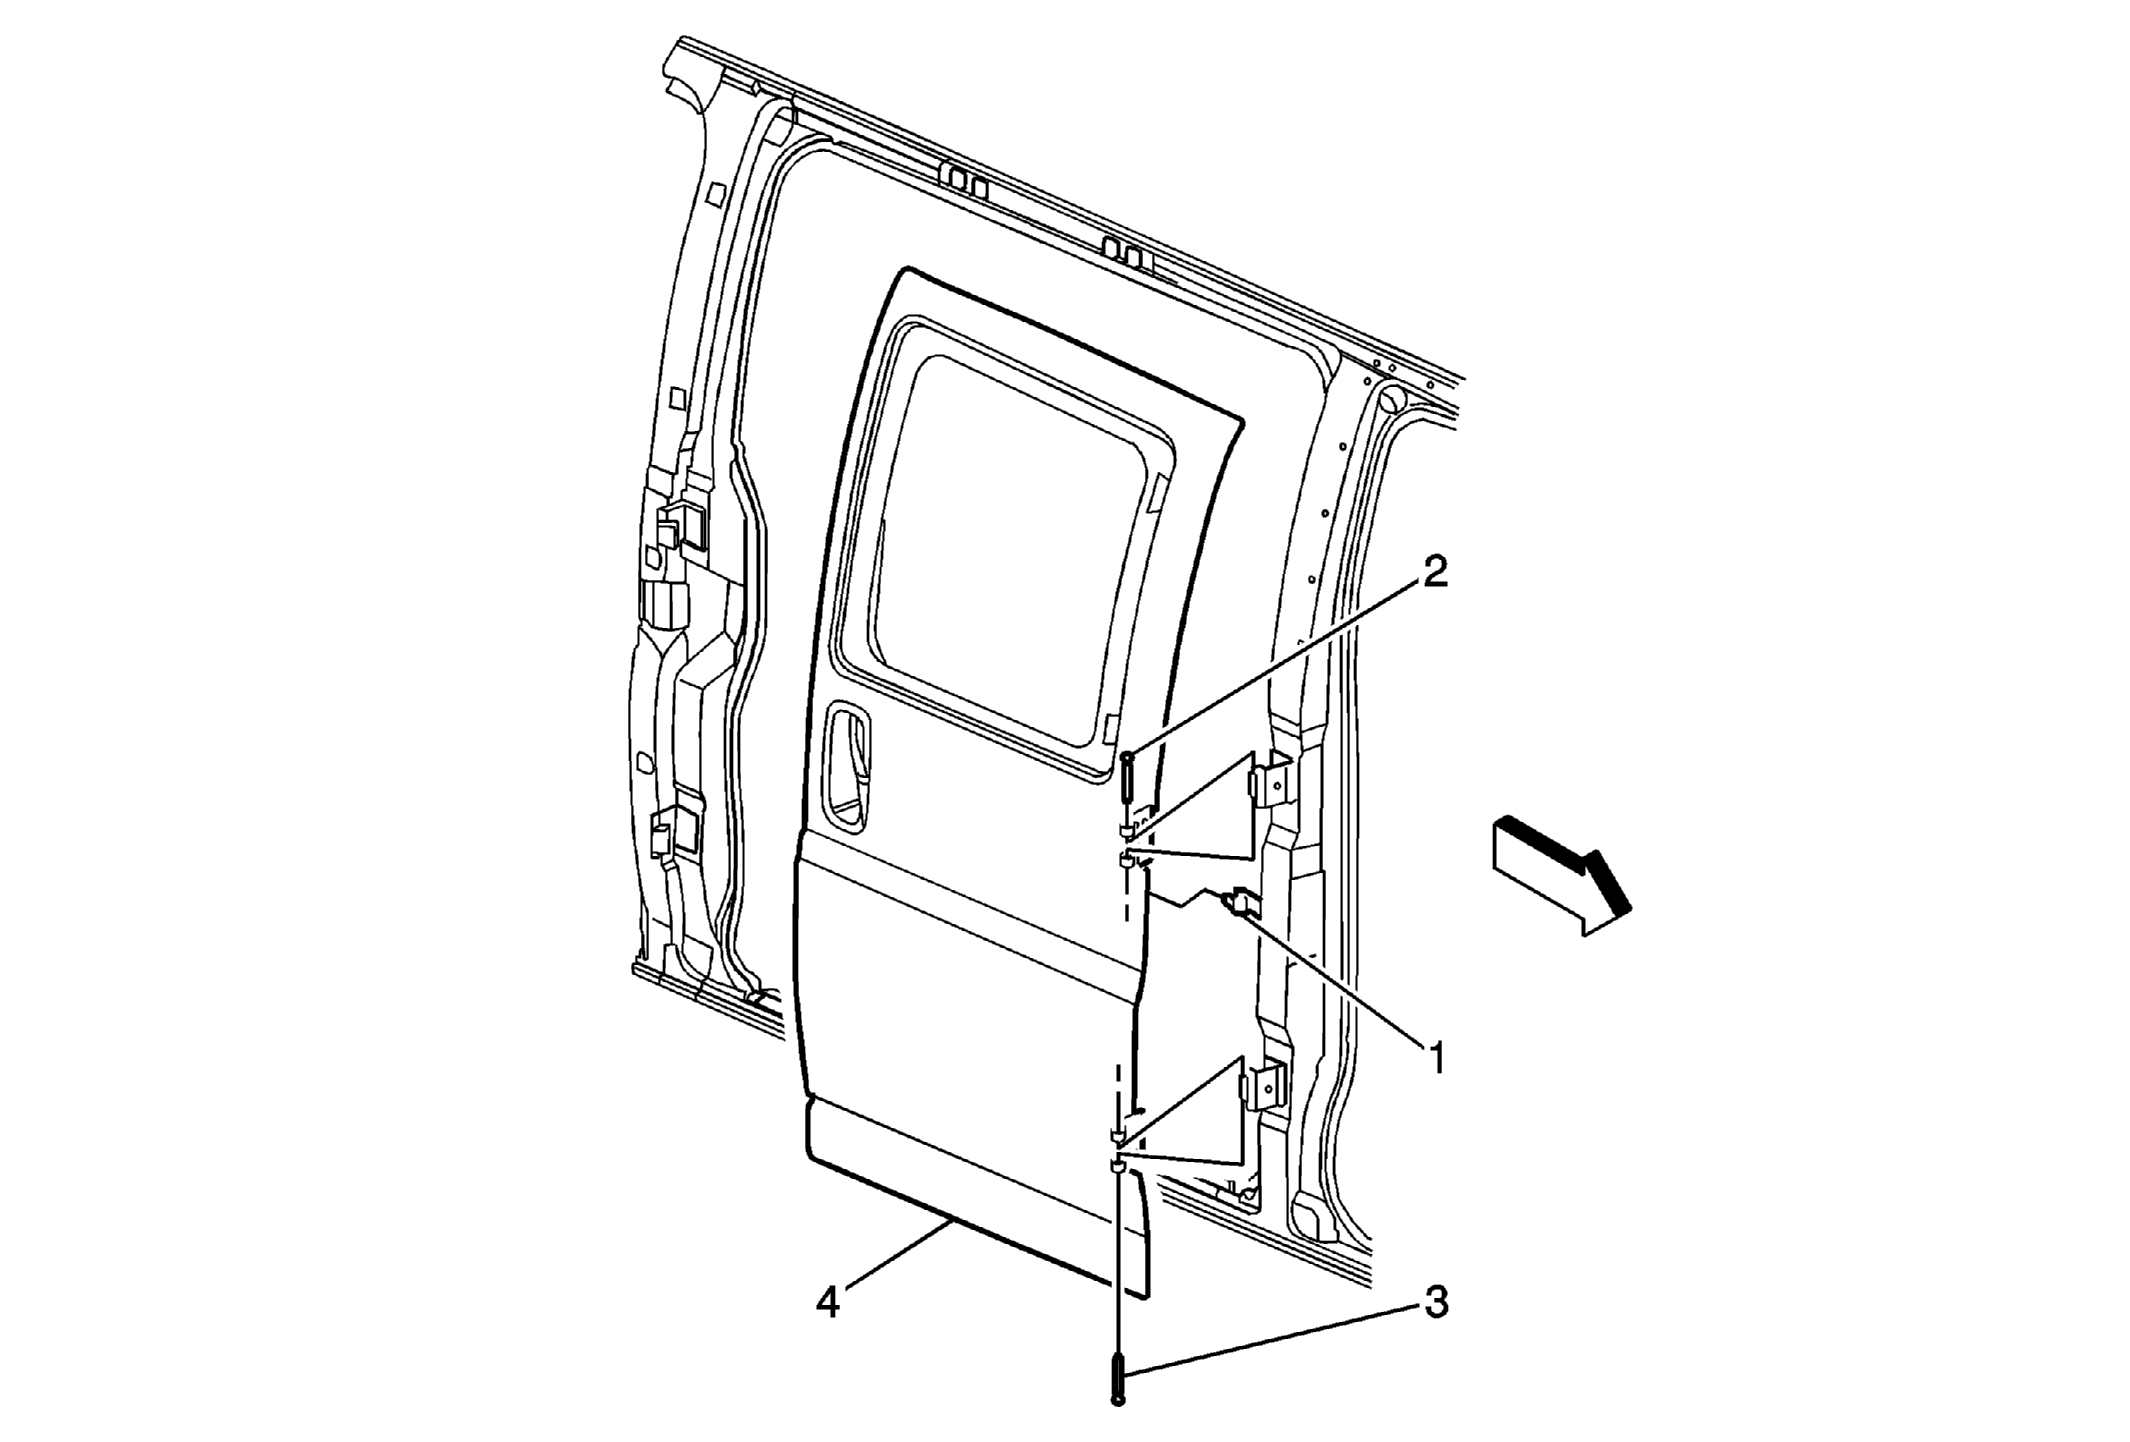 Courtesy of GENERAL MOTORS COMPANY
 Intermediate Side Door Replacement
| Callout |
Component Name |
|
Preliminary Procedure
- Remove the intermediate side rear door trim panel. Refer to Rear Side 60/40 Door Trim Panel Replacement - Right Side (E24, 40 Door)
, Rear Side 60/40 Door Trim Panel Replacement - Right Side (E24, 60 Door)
or Rear Side 60/40 Door Trim Panel Replacement - Left Side (E26, 40 Door)
, Rear Side 60/40 Door Trim Panel Replacement - Left Side (E26, 60 Door)
.
- Remove the hinged intermediate side window or the stationary side window. Refer to Body Side Window Replacement (Stationary)
, Body Side Window Replacement (Swing Out)
.
- Remove the intermediate weatherstrips, if needed. Refer to Intermediate Side Door Window Weatherstrip Replacement
.
- Remove the intermediate side rear door upper and lower door wedges from the door. Refer to Intermediate Side Door Wedge Replacement - Door Side .
|
| 1 |
Intermediate Side Door Check Link
Procedure
Under hook the check link from the center pillar. |
| 2 |
Intermediate Side Door Upper Hinge Pin Procedure
- Use masking tape to tape off around the door and body before removing pins
- Open door fully, unhook the check link.
- Disconnect the door electrical connector, if equipped
- Support the door before removing the hinge pins.
Special Tools
- J 41226
Door Hinge Pin Drillout Kit
- J 41226-50
Door Hinge Pin Adapter Kit
|
| 3 |
Intermediate Side Door Lower Hinge Pin
Procedure
Follow the upper pin removal |
| 4 |
Intermediate Side Door Assembly
Procedure
When replacing the door it is necessary to transfer all the internal components. |