Roof Panel Molding Retainer Replacement
WARNING: This page is about a different car, the 2016 GMC Acadia, 2016 Chevrolet Traverse, and 2016 Buick Enclave. However, it is still accessible from the selected car via links, so may be relevant.
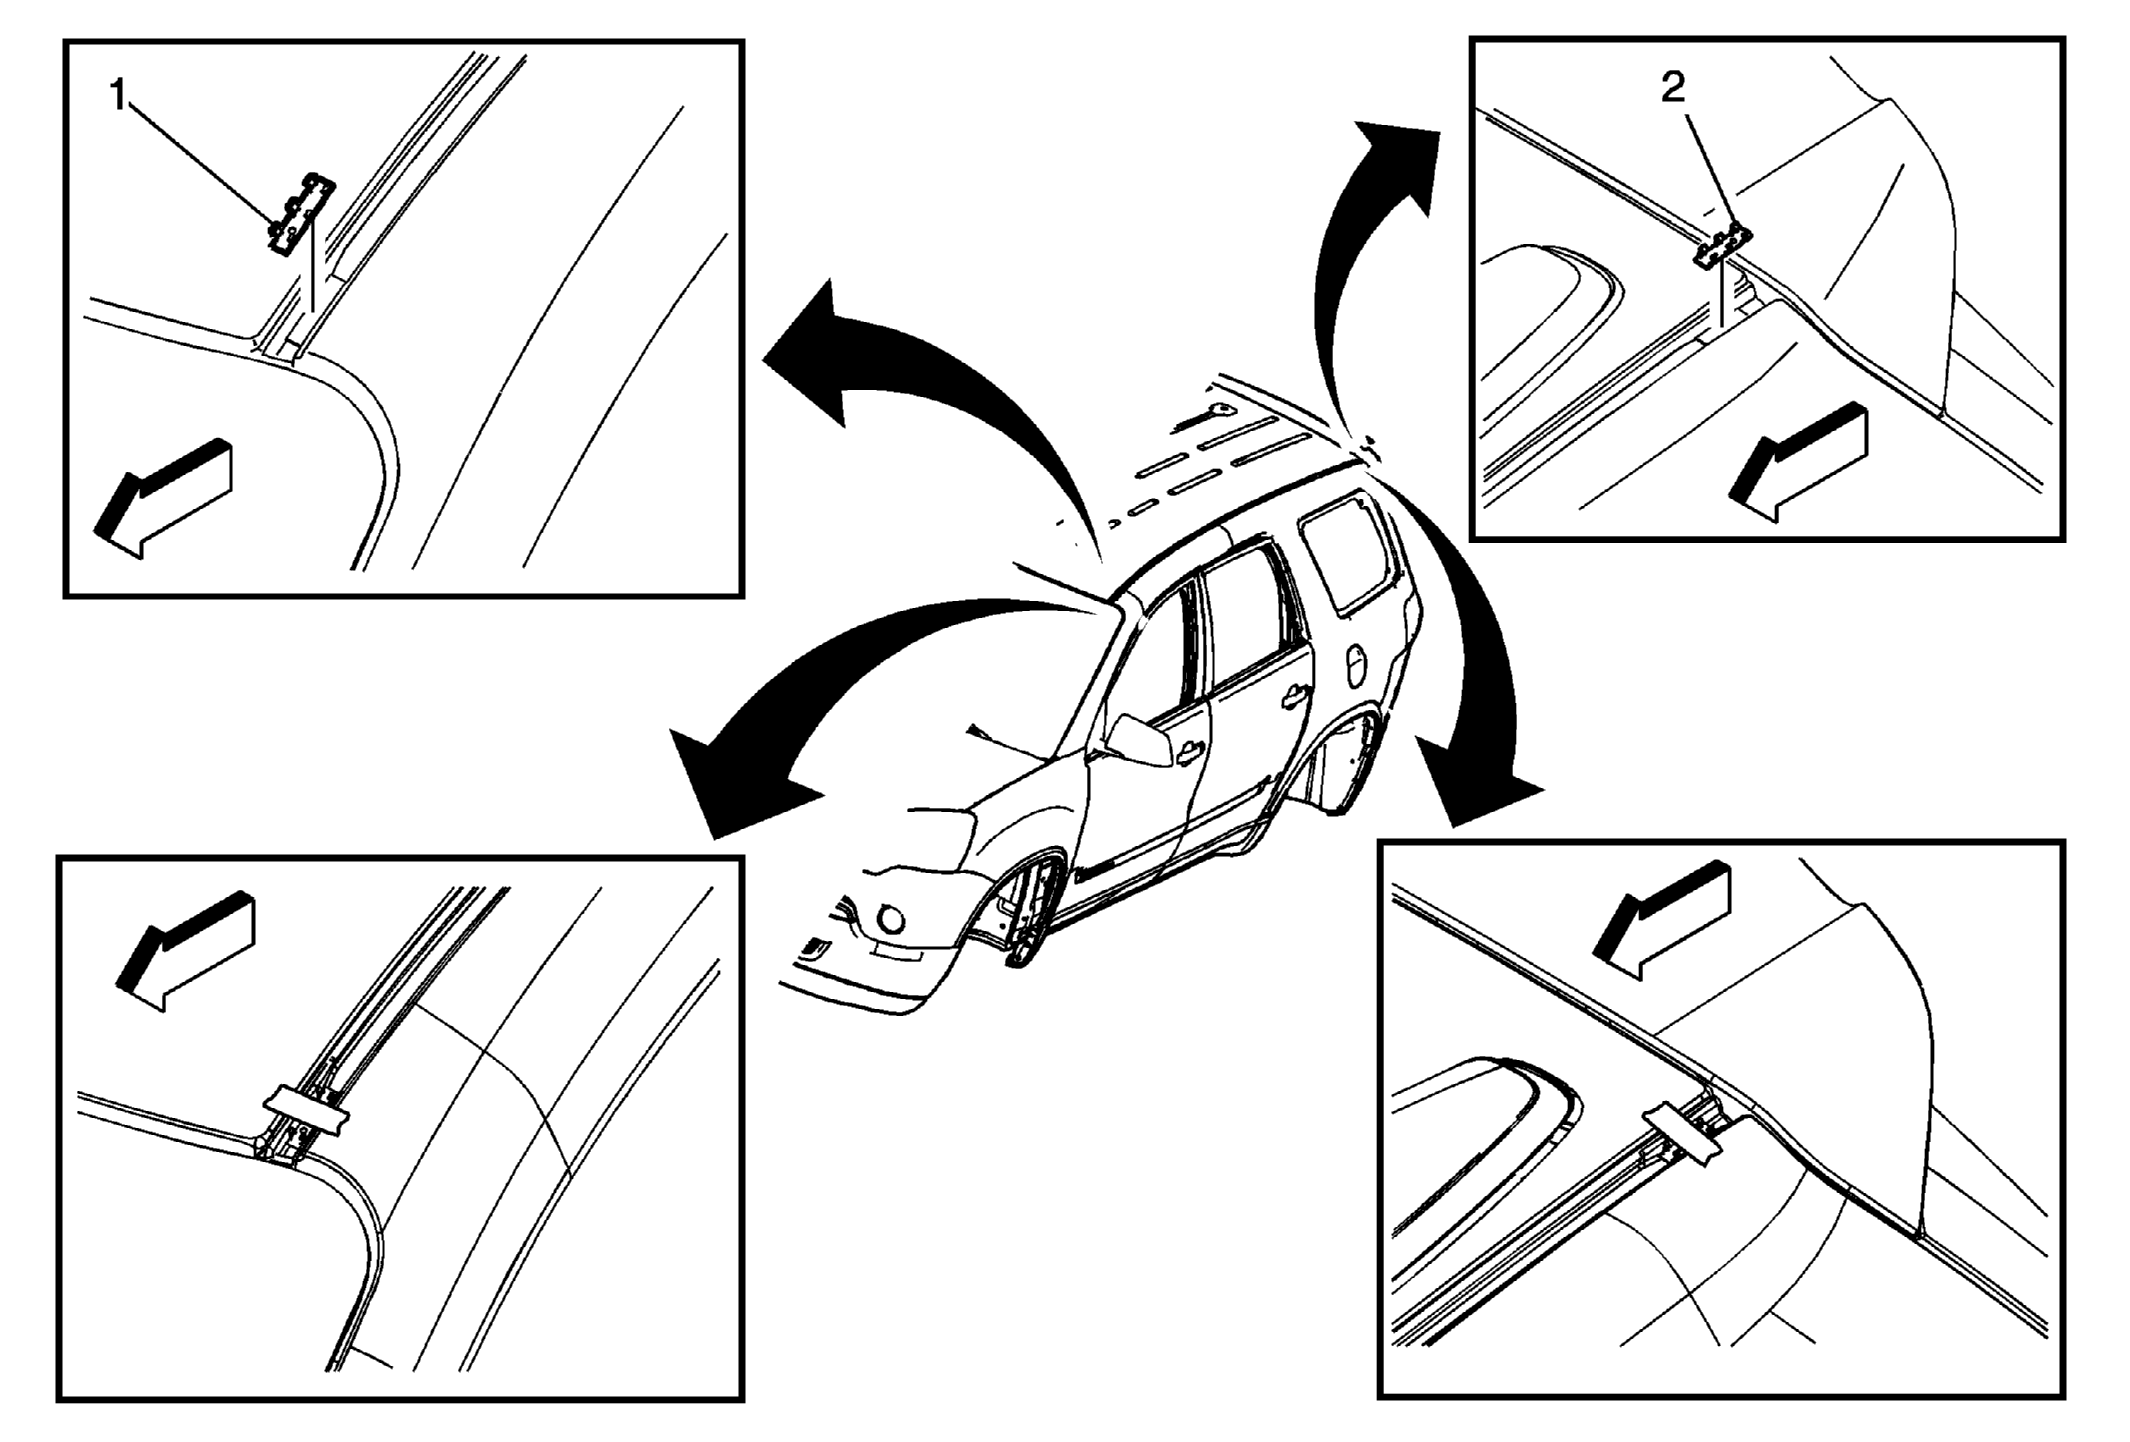 Courtesy of GENERAL MOTORS COMPANY
| Callout |
Component Name |
|
Preliminary Procedure
- Remove roof panel joint finish molding. Refer to Roof Panel Joint Finish Molding Replacement (Acadia)
- Mark the front and rear edge of the current roof panel molding retainer location
- Carefully cut the epoxy bond at both edges of the roof panel molding retainer using a sharp tool.
- Cut far enough into the epoxy in order to help release the roof panel molding retainer and not damage the painted surface of the ditch.
- Protect the painted surface of the ditch using a clean towel when releasing the roof panel molding retainer from the ditch.
- Clean the remaining epoxy using a 50/50 mixture by volume of isopropyl alcohol and clean drinkable water.
- Use fine grit sand paper to scuff the bonding surface where the new roof panel molding retainer will be installed.
|
| 1 |
Roof Panel Molding Retainer (Front) Procedure
- Ensure that a new pre-cured roof panel molding retainer is being used and discard old retainer.
- Apply 3M DURAMIX Super-Fast Adhesive 4747 or equivalent to the cured structural bonding on the new roof panel molding retainer.
- The front roof panel molding retainer is placed 25 mm from the front edge of the window frame, centered side to side in the ditch channel and secured with masking tape.
- Apply an overlapping drop of adhesive on the front and rear edge of the roof panel molding retainer to the ditch channel.
- Allow time for sufficient bonding strength.
- Minimum 15 minutes at 23°C (73°F)
- Minimum 30 minutes at 10-23°C (50-73°F)
- Minimum 60 minutes at 5-10°C (41-50°F)
- Remove the masking tape after the bonding time has elapsed.
- Please allow adhesive to fully cure prior to installing roof panel joint finish molding.
|
| 2 |
Roof Panel Molding Retainer (Rear) Procedure
- Ensure that a new pre-cured roof panel molding retainer is being used and discard old retainer.
- Apply 3M DURAMIX Super-Fast Adhesive 4747 or equivalent to the cured structural bonding on the new roof panel molding retainer.
- The rear roof panel molding retainer is placed 25 mm from the rear edge of the roof panel, centered side to side in the ditch channel and secured with masking tape.
- Apply an overlapping drop of adhesive on the front and rear edge of the roof panel molding retainer to the ditch channel.
- Allow time for sufficient bonding strength.
- Minimum 15 minutes at 23°C (73°F)
- Minimum 30 minutes at 10-23°C (50-73°F)
- Minimum 60 minutes at 5-10°C (41-50°F)
- Remove the masking tape after the bonding time has elapsed.
- Please allow adhesive to fully cure prior to installing roof panel joint finish molding.
|