Oil Pan Replacement
WARNING: This page is about a different variant/trim than selected.
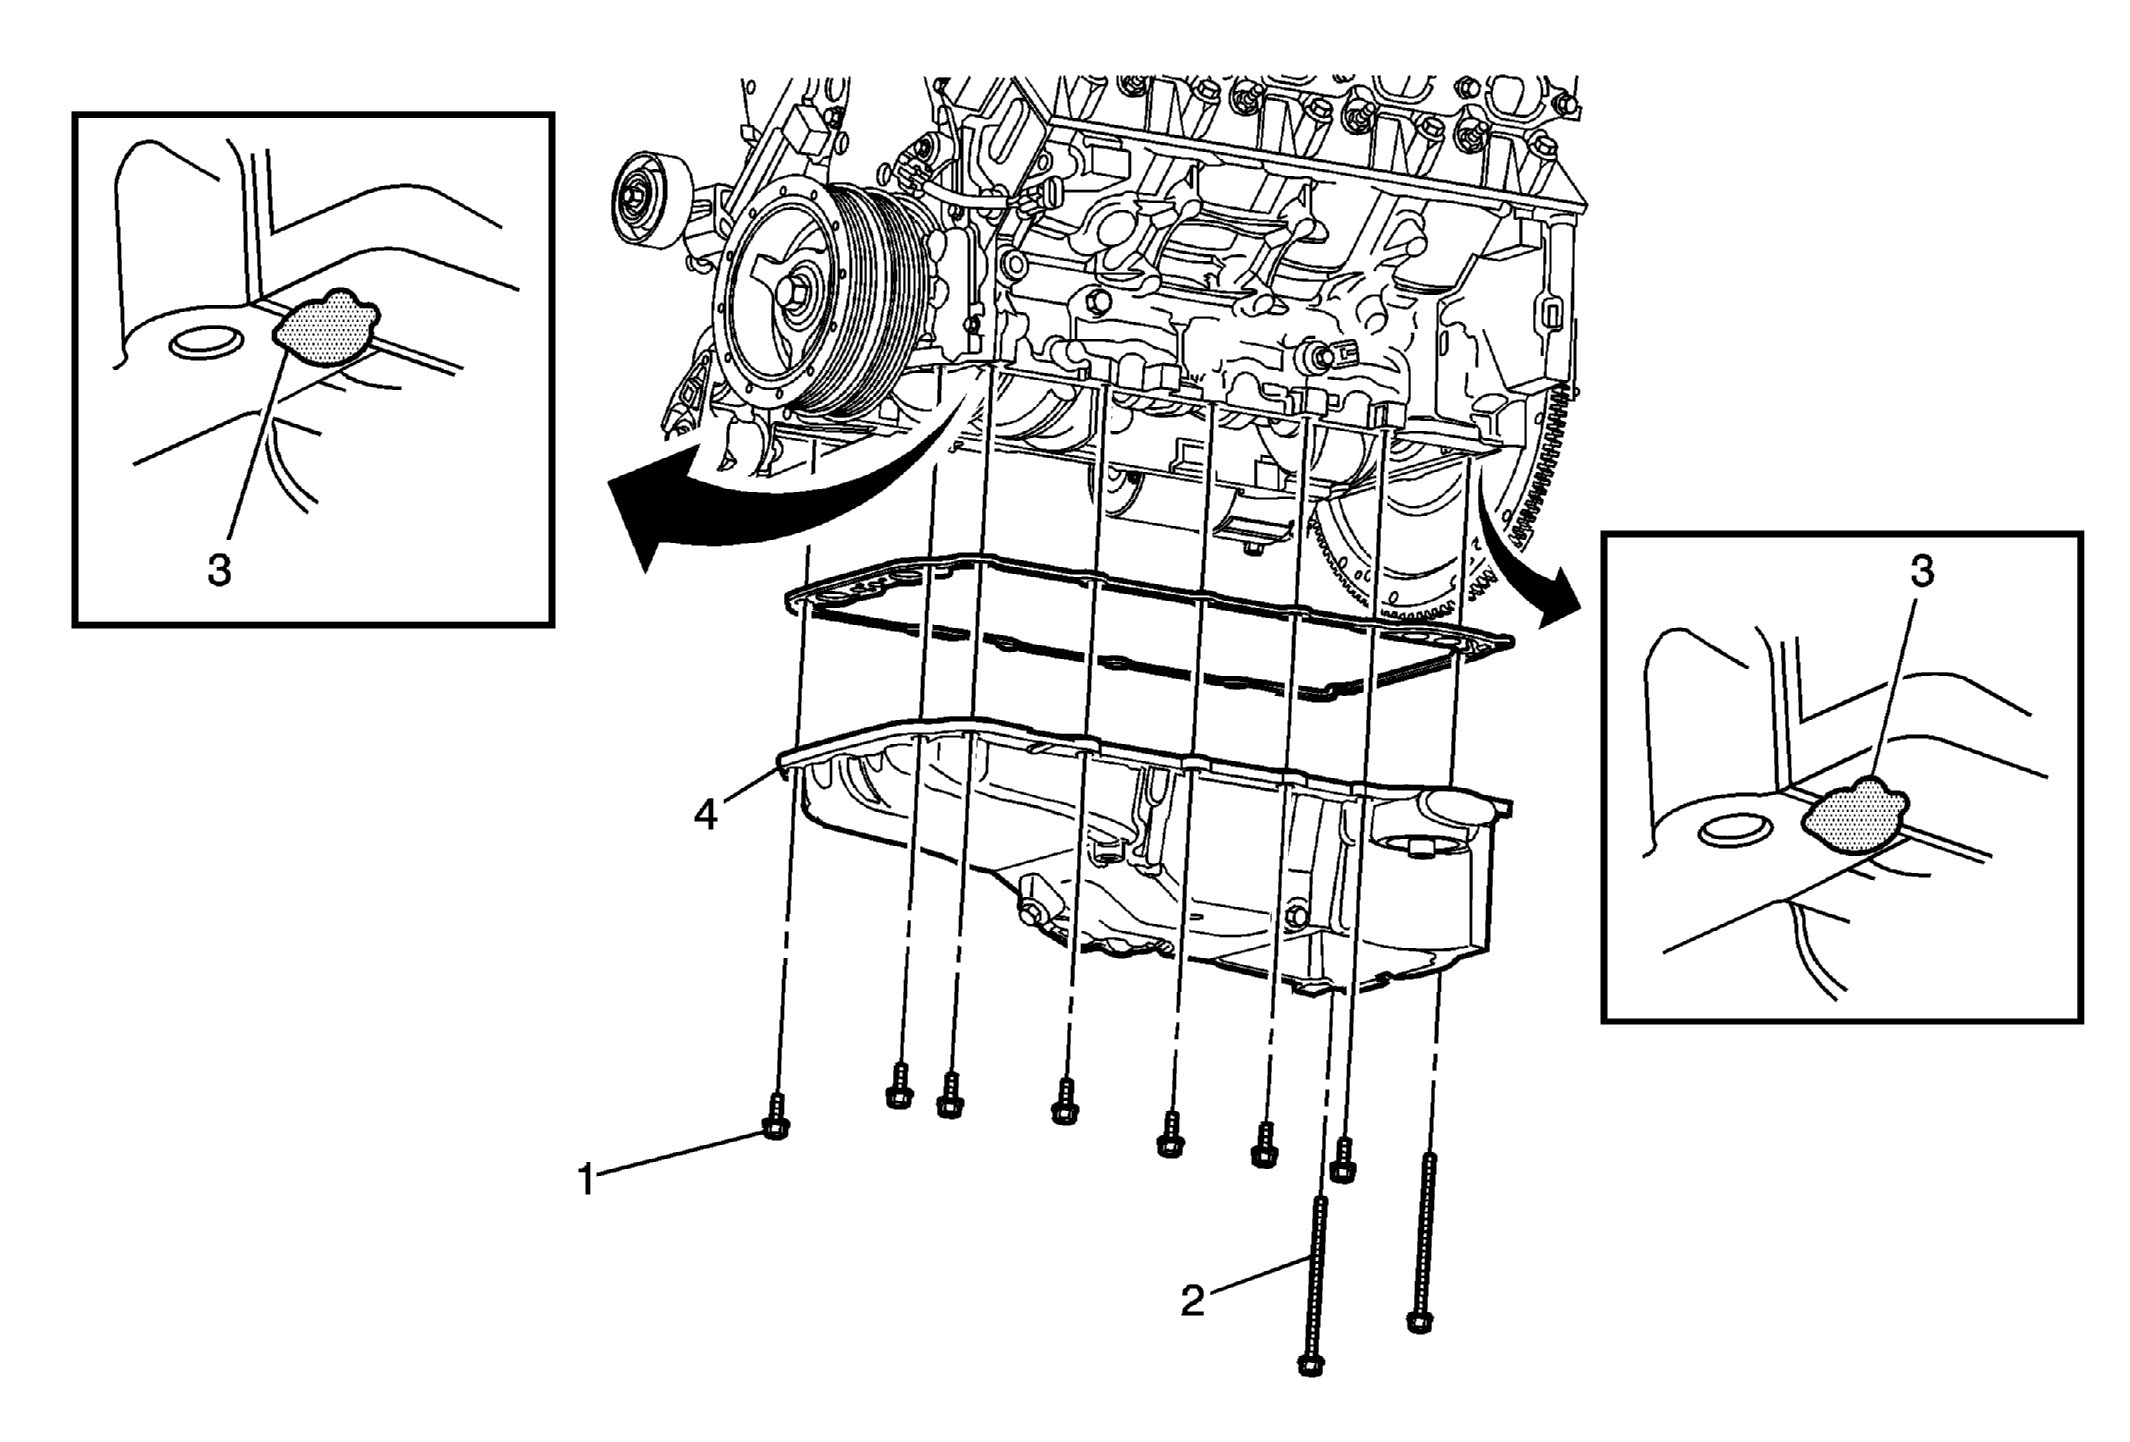 Courtesy of GENERAL MOTORS CORP.
| Callout |
Component Name |
|
Preliminary Procedures
- Remove the front frame. Refer to Drivetrain and Front Suspension Frame Replacement
.
- Remove the oil filter. Refer to Engine Oil and Oil Filter Replacement .
- Remove the starter assembly. Refer to Starter Replacement (LS3/L99)
.
- Remove the engine oil cooler. Refer to Engine Oil Cooler Replacement
.
- Remove the A/C lines from the compressor and reposition to access the harness and bolts. Refer to Air Conditioning Compressor Hose Replacement (LS3, L99)
.
- Reposition the engine wiring harness.
- Reposition the oil cooler lines as needed.
|
| 1 |
Oil Pan Fastener (Qty: 12)
Tighten:
25 N.m (18 lb ft)
|
| 2 |
Oil Pan Fastener (Qty: 2) Tighten:
12 N.m (106 lb in)
|
| 3 |
Oil Pan Sealant Procedure
- Apply a 5 mm (0.2 in) bead of sealant 20 mm (0.8 in) long to the engine block. Refer to Adhesives, Fluids, Lubricants, and Sealers
.
- Apply the sealant directly onto the tabs of the front cover gasket that protrude into the oil pan surface.
Tip:
- The alignment of the structural oil pan is critical. The rear bolt hole locations of the oil pan provide mounting points for the transmission housing. To ensure the rigidity of the powertrain and correct transmission alignment, it is important that the rear of the block and the rear of the oil pan are flush or even. The rear of the oil pan must NEVER protrude beyond the engine block and the transmission housing plane.
- A new oil pan gasket should be used whenever the oil pan is removed from the engine assembly.
|
| 4 |
Oil Pan Procedure
- Disconnect any electrical connectors.
- Transfer components as necessary.
|