Transfer Case Rear Extension Bushing Replacement
WARNING: This page is about a different car, the 2018 GMC Yukon XL, 2018 GMC Yukon, 2018 Chevrolet Tahoe, and 2018 Chevrolet Suburban. However, it is still accessible from the selected car via links, so may be relevant.
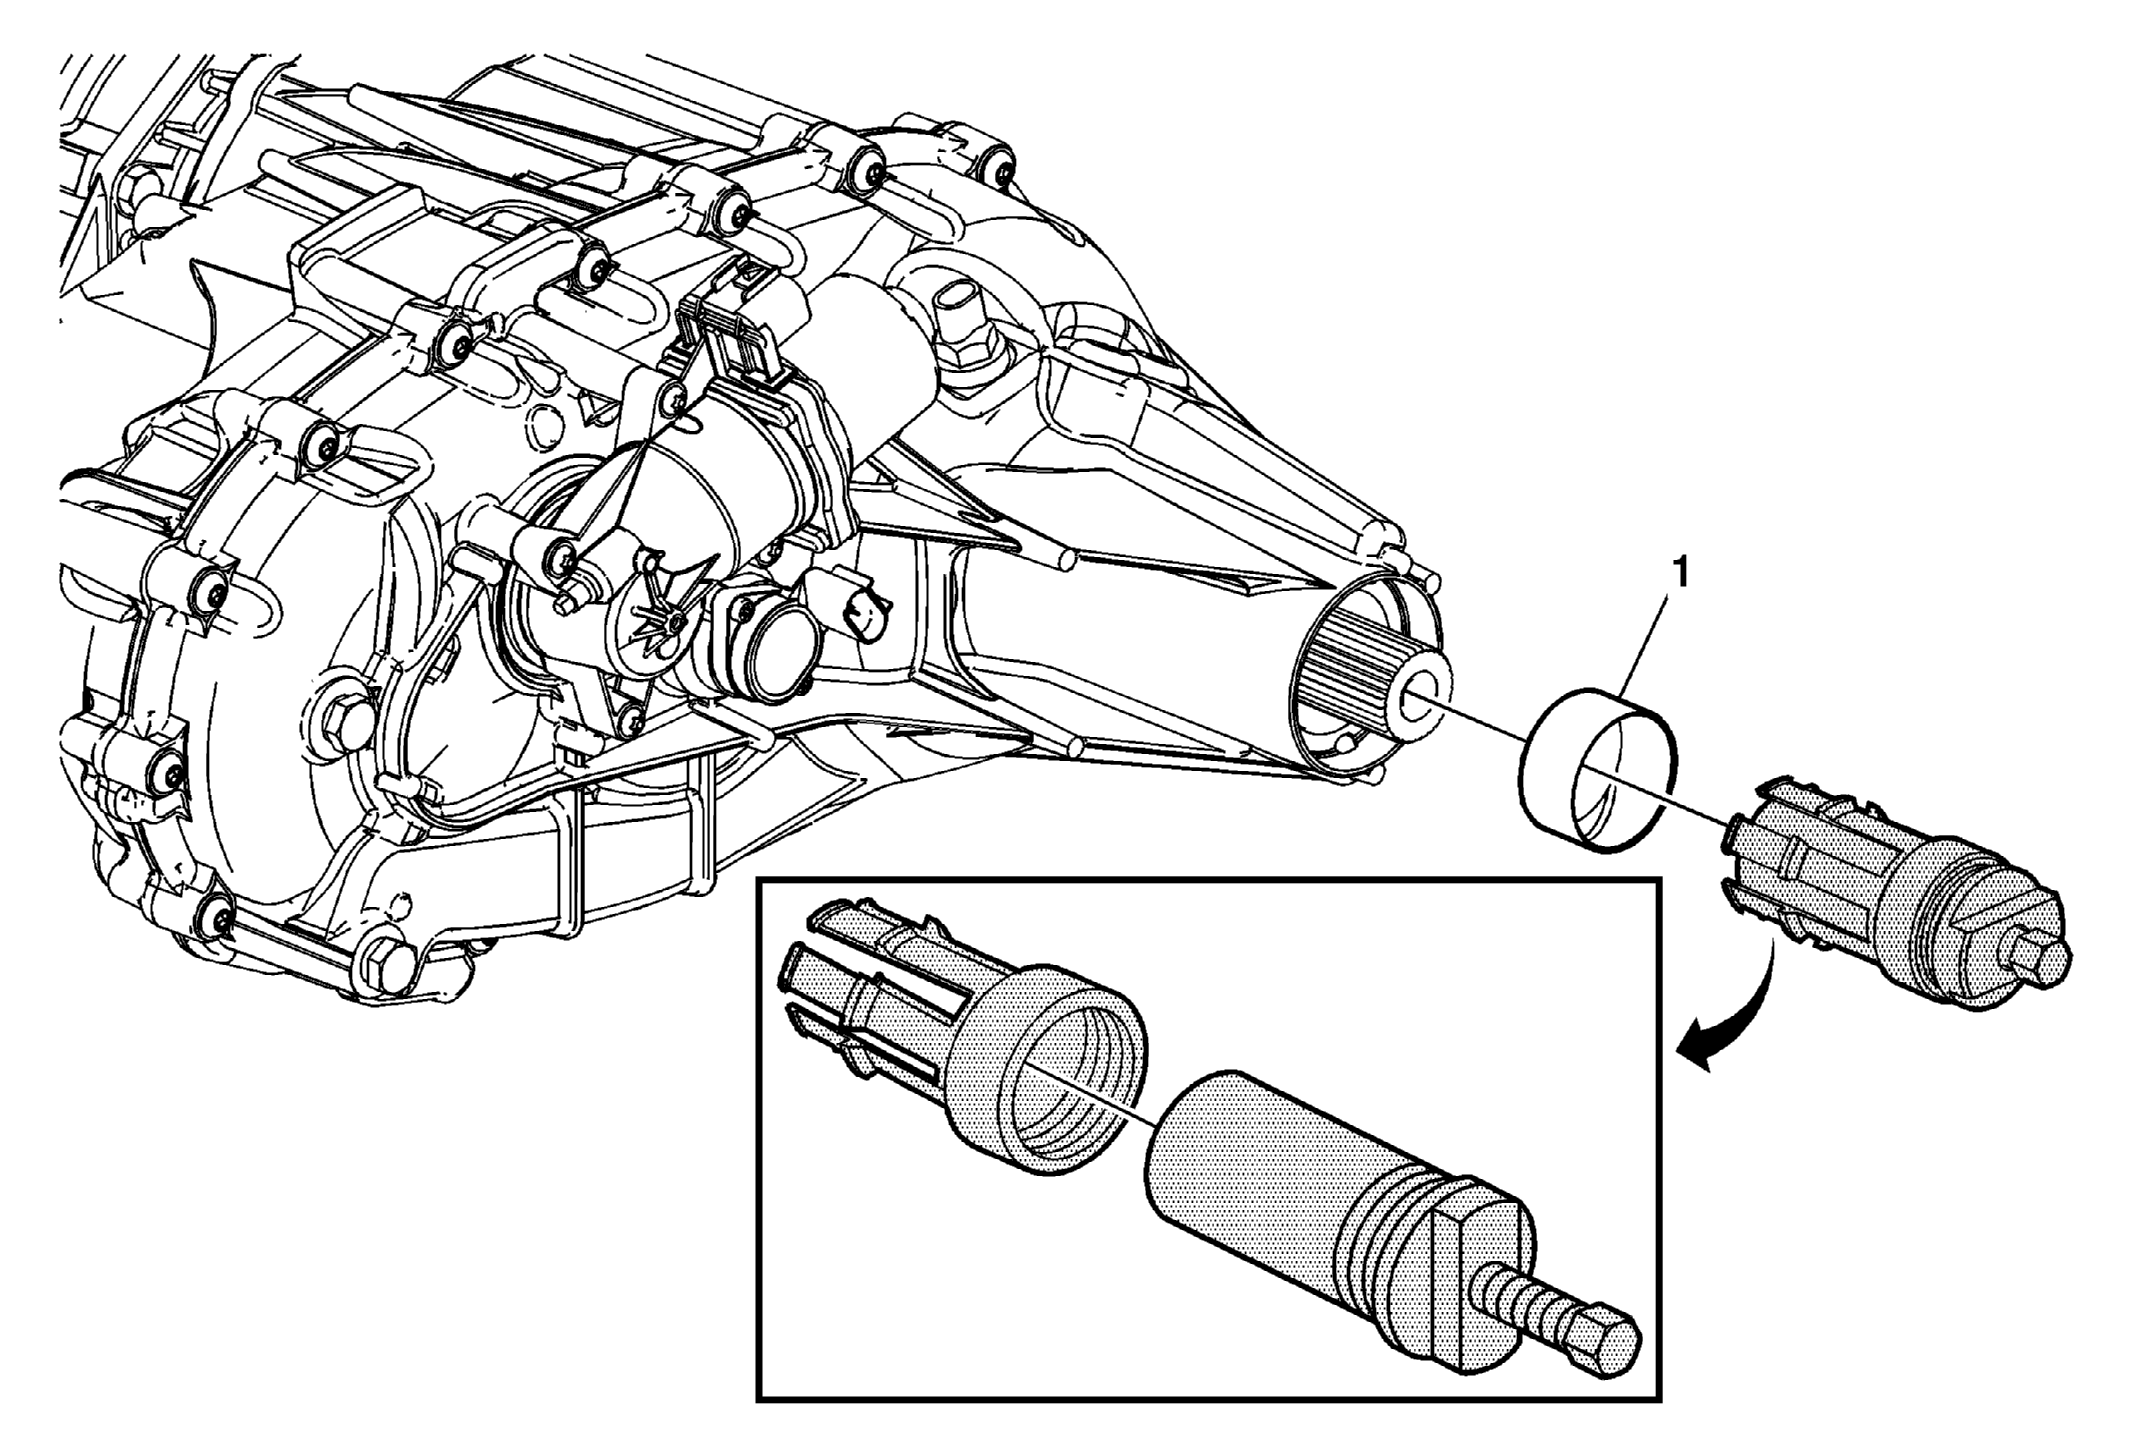 Courtesy of GENERAL MOTORS COMPANY
| Callout |
Component Name |
|
Preliminary Procedure Remove the transfer case rear output shaft seal. Refer to Rear Output Shaft Seal Replacement
. |
| 1 |
Transfer Case Rear Output Shaft Bushing Procedure
- Install the finger section of the J-45380
transfer case rear bushing remover and installer in front of the bushing.
- Install the forcing tube assembly into the finger section. Ensure the forcing screw is backed out.
- Using a wrench on the forcing screw, remove the bushing.
- Remove the old bushing from the J-45380
transfer case rear bushing remover and installer.
- Install the NEW bushing on the finger section of the J-45380
transfer case rear bushing remover and installer.
- Install the finger section to the forcing tube assembly of the J-45380
transfer case rear bushing remover and installer.
- Position the bushing and tool to the rear case half.
- Install the bushing until the tool bottoms on the rear case half.
NOTE:
- Only remove the bushing if faulty.
- If the bushing was removed, a new bushing must be installed.
- Ensure the bushing is installed squarely into the bushing bore.
Special Tools
J-45380
Transfer Case Rear Bushing Remover and Installer
For equivalent regional tools, refer to Special Tools . |