Combination Light Switch Test/Replacement
- Remove the driver's dashboard undercover (see
DRIVER'S DASHBOARD UNDERCOVER REMOVAL/INSTALLATION
), then remove the dashboard lower cover (see
DRIVER'S DASHBOARD LOWER COVER REMOVAL/INSTALLATION
).
- Remove the steering column covers (see
COLUMN COVER REMOVAL/INSTALLATION
).
- Disconnect the 12P connector (A) from the combination light switch (B).
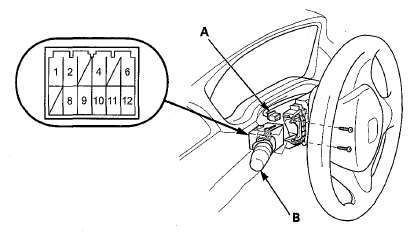 Courtesy of AMERICAN HONDA MOTOR CO., INC.
- Remove the two screws, then slide out the combination light switch.
- Inspect the connector terminals to be sure they are all making good contact.
- If the terminals are bent, loose or corroded, repair them as necessary, and recheck the system.
- If the terminals look OK, check for continuity between the terminals in each switch position according to the tables.
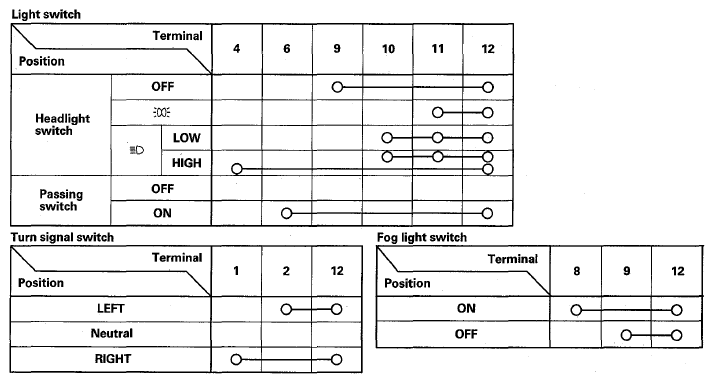 Courtesy of AMERICAN HONDA MOTOR CO., INC.
- If all the continuity is not as specified, remove the two screws and replace the switch.
- Install the parts in the reverse order of removal.