Cylinder Head Installation
Cylinder Head Installation
1. Clean the cylinder head and engine block surface.
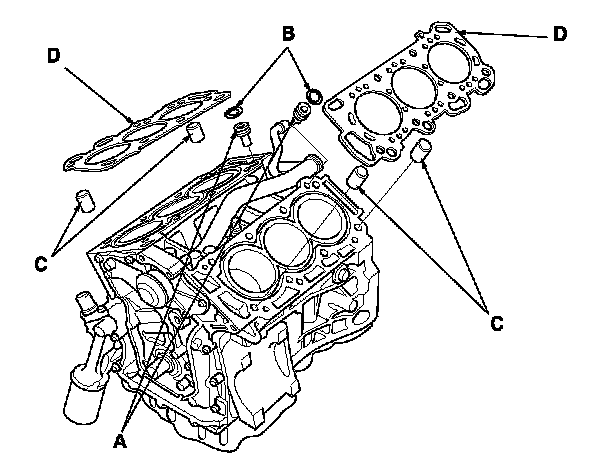
2. Clean and install the oil control orifices (A) with new O-rings (B).
3. Install the dowel pins (C) and new cylinder head gaskets (D).
4. Clean the timing belt pulleys, timing belt guide plate, and the upper and lower covers.
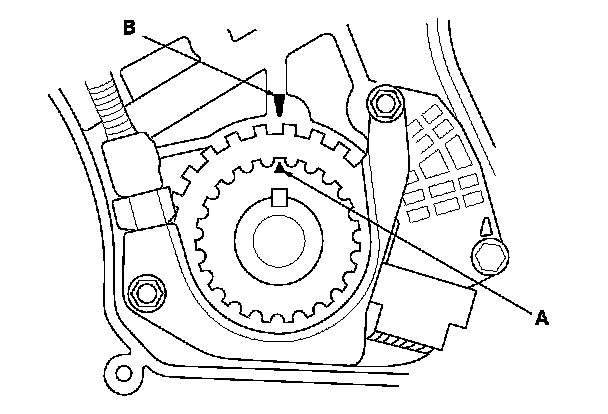
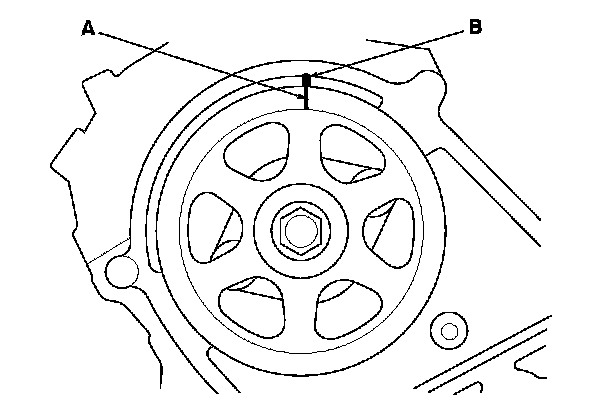
5. Set the timing belt drive pulley to top dead center (TDC) by aligning the TDC mark (A) on the tooth of the timing belt drive pulley with the pointer (B) on the oil pump.
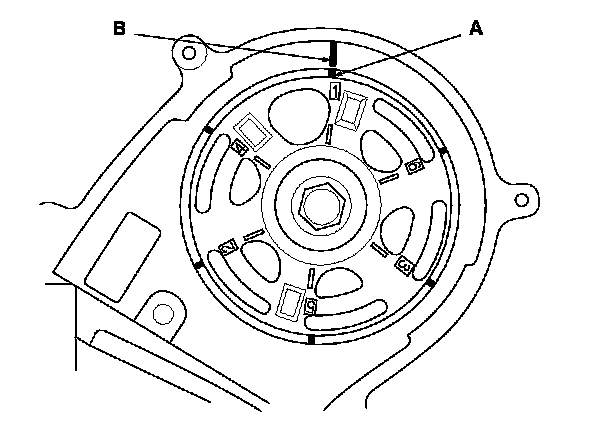
6. Set the camshaft pulleys to TDC by aligning the TDC marks (A) on the camshaft pulleys with the pointers (B) on the back covers.
7. Put the cylinder head onto the engine block.
FRONT:
REAR:
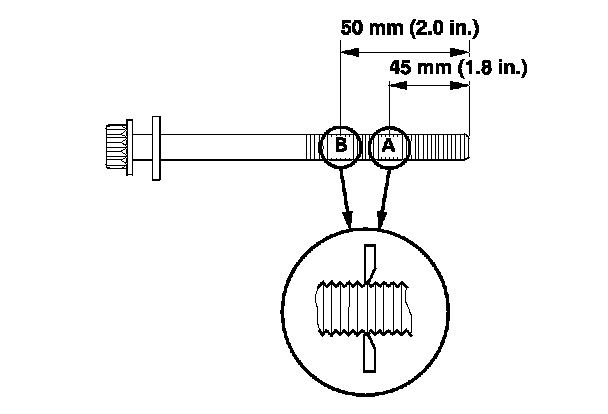
8. Measure the diameter of each cylinder head bolt at point A and point B.
9. If either diameter is less than 11.3 mm (0.44 in.), replace the cylinder head bolt.
10. Apply new engine oil to the threads and under the bolt heads of all cylinder head bolts.
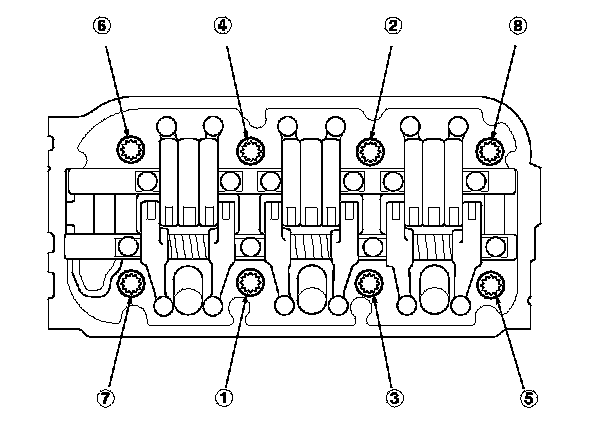
11. Tighten the cylinder head bolts in sequence to 29 N-m (3.0 kgf-m, 22 lbf-ft). Use a beam-type torque wrench. When using a preset-type torque wrench, be sure to tighten slowly and do not overtighten. If a bolt makes any noise while you are torquing it, loosen the bolt and retighten it from the first step.
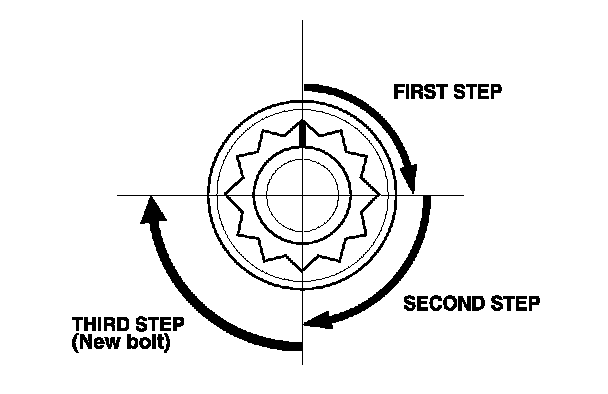
12. After torquing, tighten all cylinder head bolts in two steps (90 ° per step). If you are using a new cylinder head bolt, tighten the bolt an extra 90 °.
NOTE: Remove the cylinder head bolt if you tightened it beyond the specified angle, and go back to step 8 of the procedure. Do not loosen it back to the specified angle.
13. Install the timing belt. Timing Belt Installation
14. Adjust the valve clearance. Adjustments
15. Install the cylinder head covers. Cylinder Head Cover Installation
16. Install the water passage. Water Passage Replacement
17. Install the front warm up three way catalytic converter (front WU-TWC) Warm Up TWC Removal/Installationand rear warm up three way catalytic converter (rear WU-TWC). Warm Up TWC Removal/Installation
18. Install the fuel rails. Service and Repair
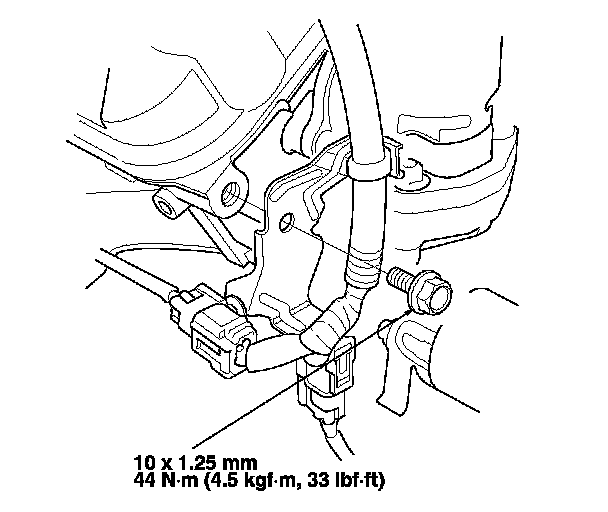
19. Install the connector bracket to the front cylinder head.
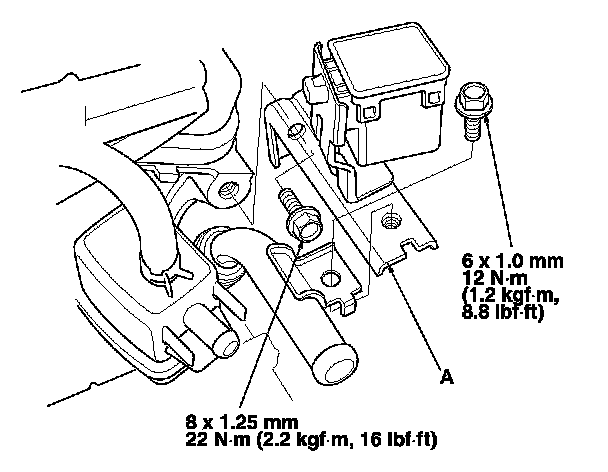
20. Install the bracket (A) to the rear cylinder head.
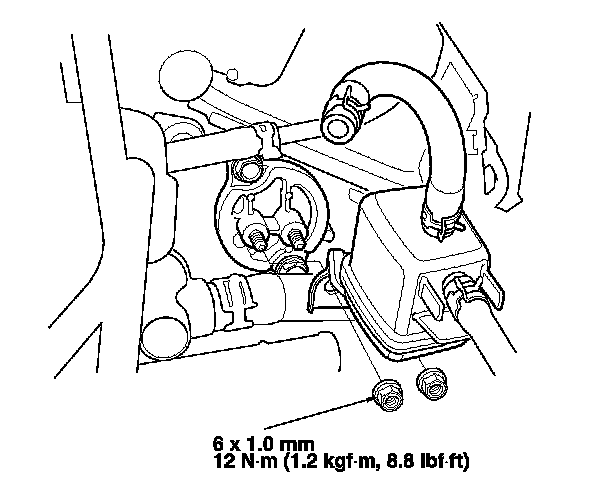
21. Install the purge joint.
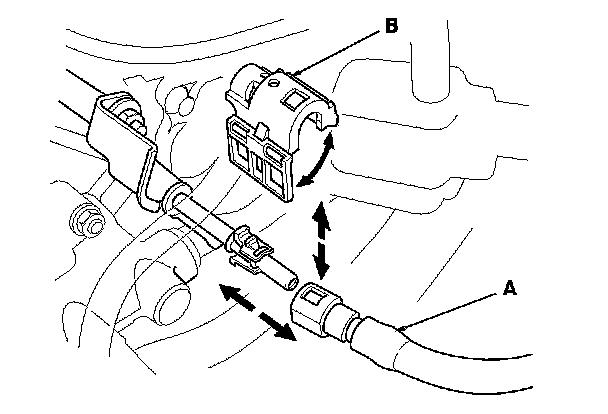
22. Connect the fuel feed hose (A), Fuel Line/Quick-Connect Fitting Installation then install the quick-connect fitting cover (B).
23. Connect the engine wire harness connectors, and install the wire harness clamps to the cylinder head.
- Six injector connectors
- Engine coolant temperature (ECT) sensor 1 connector
- Crankshaft position (CKP) sensor connector
- Exhaust gas recirculation (EGR) valve connector
- Rocker arm oil control solenoid connector
- Rocker arm oil pressure switch connector
- Oil pressure switch connector
- Two air fuel ratio (A/F) sensor connectors
- Two secondary heated oxygen sensor (secondary HO2S) connectors
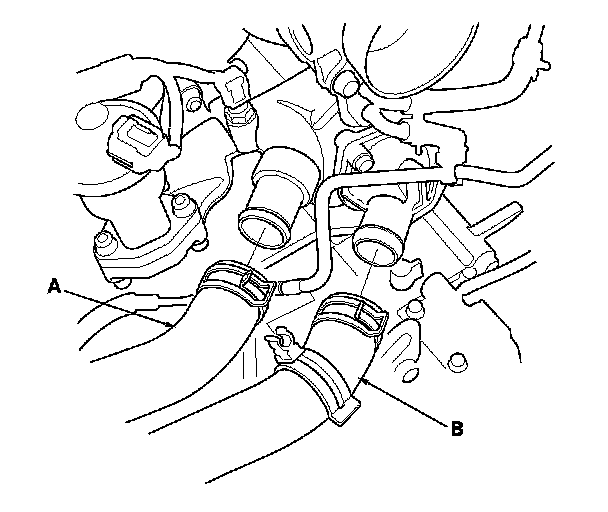
24. Install the upper radiator hose (A) and lower radiator hose (B).
25. Install the intake manifold. Intake Manifold Removal and Installation
26. Install the alternator. Removal and Replacement
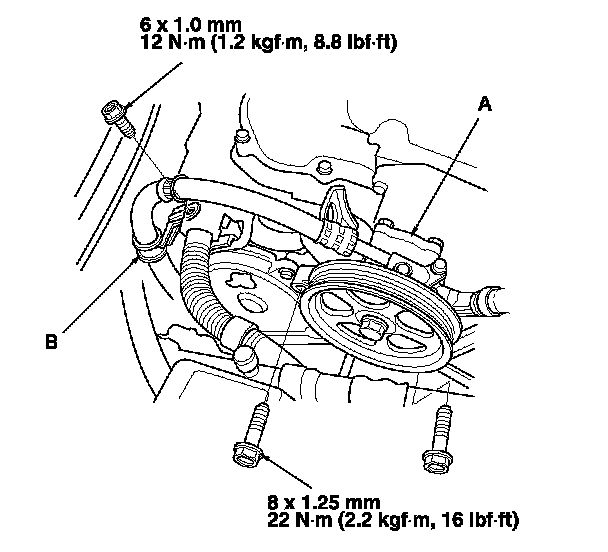
27. Install the power steering (P/S) pump (A) and P/S hose bracket (B).
28. Install the drive belt. Service and Repair
29. Do the battery terminal reconnection procedure. Procedures
30. After installation, check that all tubes, hoses and connectors are installed correctly.
31. Check for fuel leaks. Turn the ignition switch to ON (II) (do not operate the starter) so the fuel pump runs for about 2 seconds and pressurizes the fuel line. Repeat this operation three times, then check for fuel leaks at any point in the fuel line.
32. Refill the radiator with engine coolant, and bleed air from the cooling system with the heater valve open. Service and Repair
33. Do the crankshaft position (CKP) pattern clear/CKP pattern learn procedure. Initial Inspection and Diagnostic Overview
34. Inspect the idle speed. Testing and Inspection
35. Inspect the ignition timing. Testing and Inspection