Intake Manifold Removal and Installation
Intake Manifold Removal and Installation
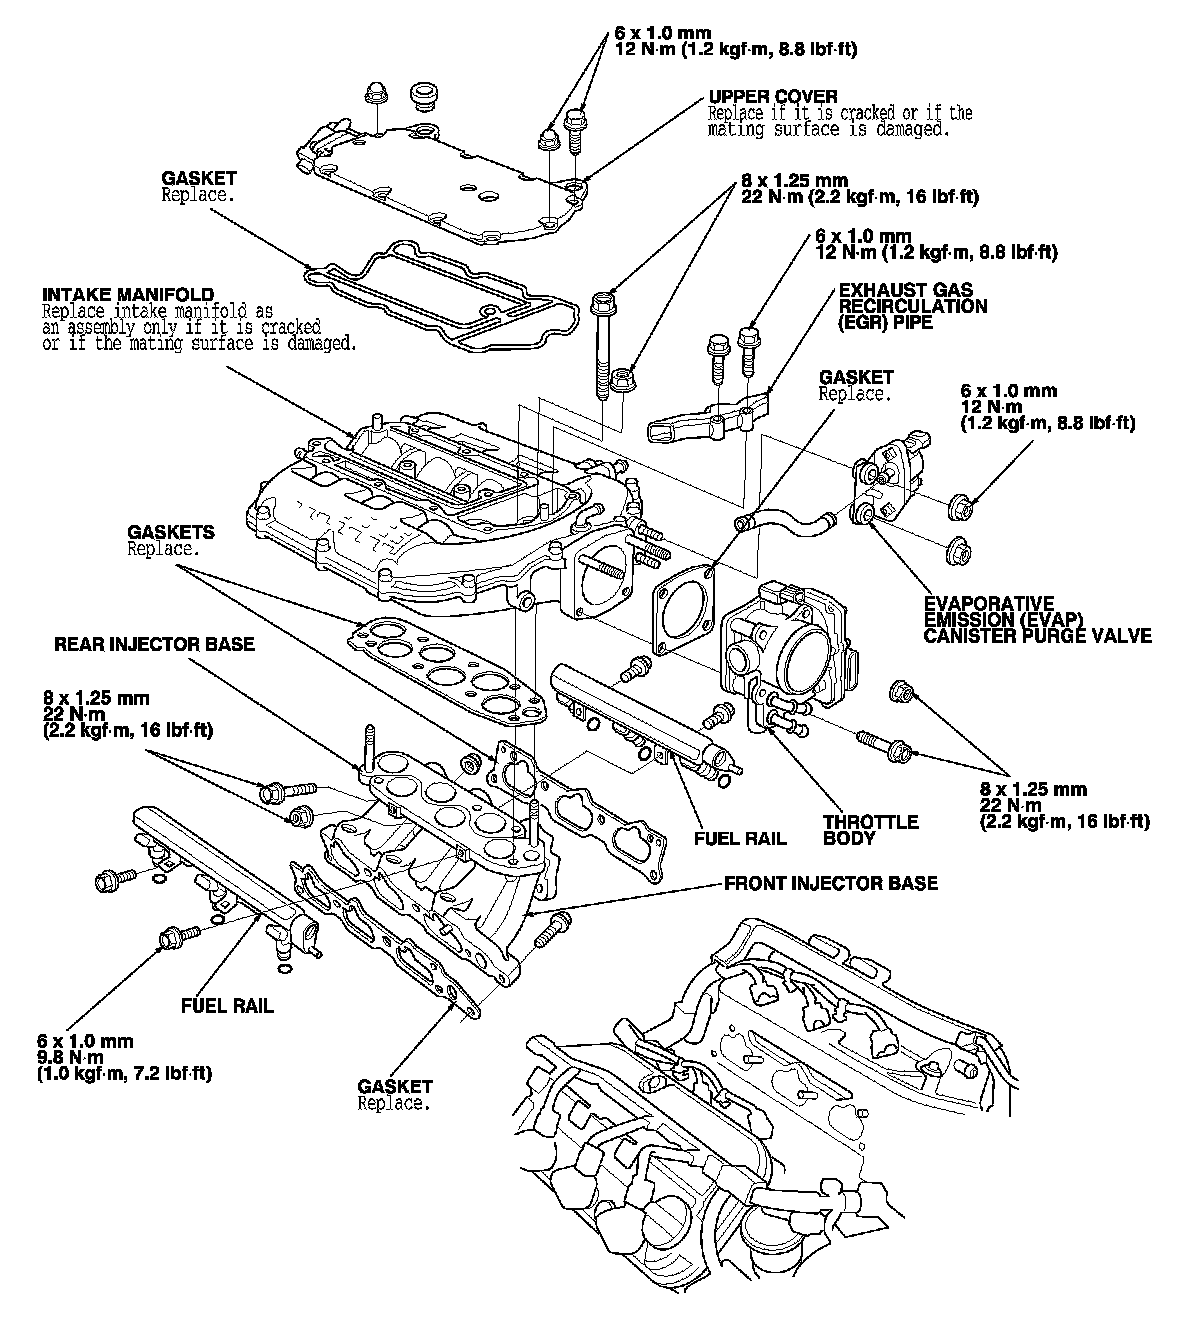
Exploded View
Intake Manifold:
Removal
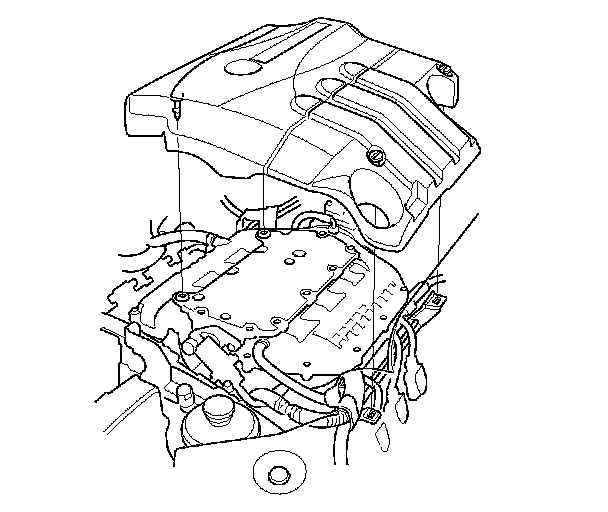
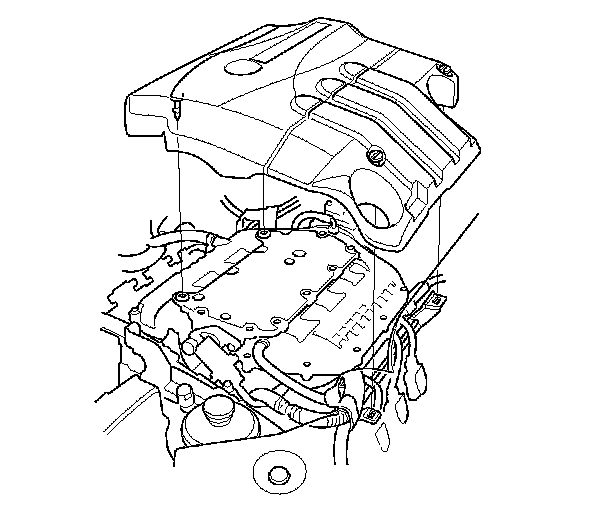
1. Remove the engine cover.
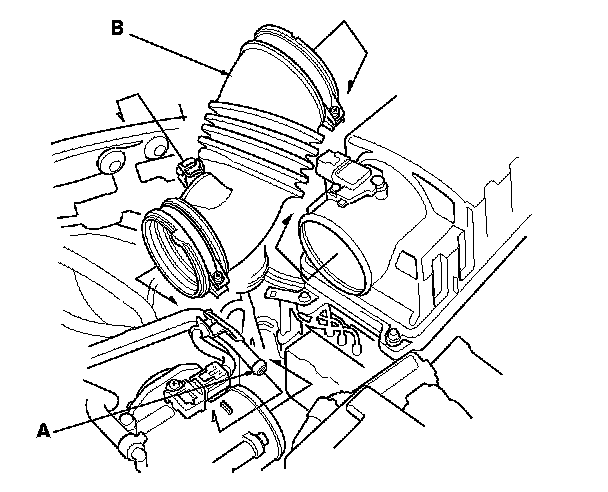
2. Disconnect the breather pipe (A), then remove the intake air duct (B).
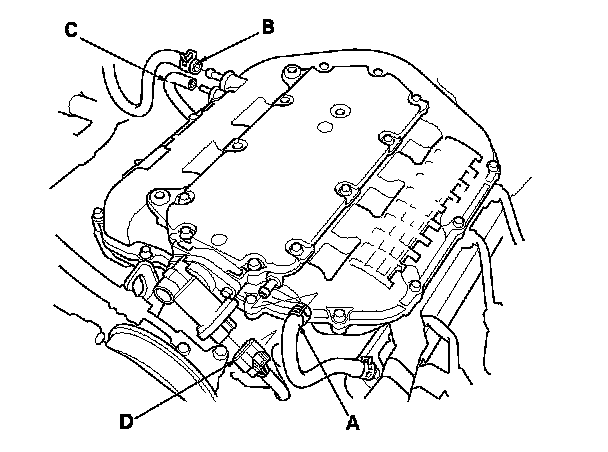
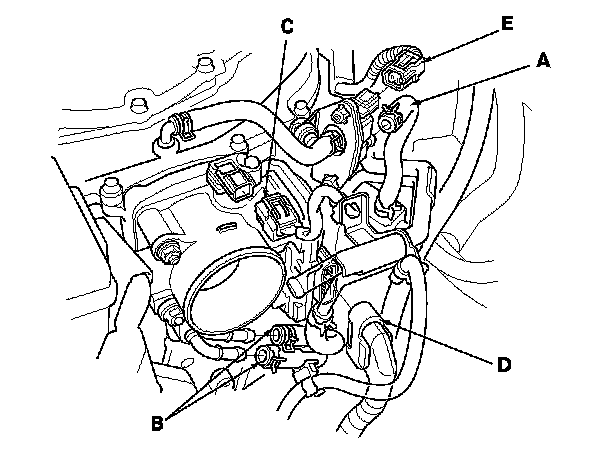
3. Disconnect the positive crankcase ventilation (PCV) hose (A), the brake booster vacuum hose (B), vacuum hose (C), and the intake manifold tuning (IMT) actuator connector (D).
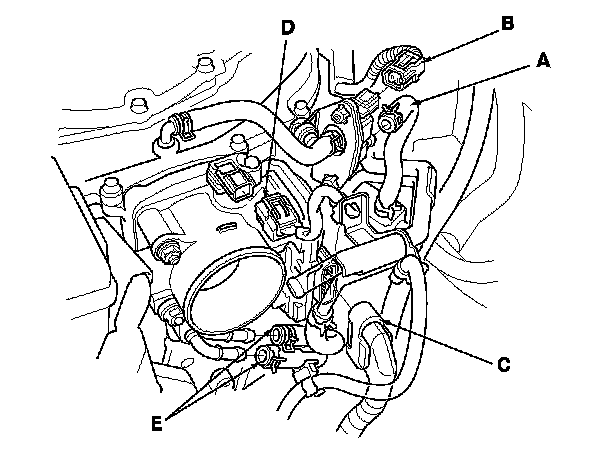
4. Disconnect the evaporative emission (EVAP) canister hose (A), EVAP canister purge valve connector (B), throttle actuator connector (C), and manifold absolute pressure (MAP) sensor connector (D).
5. Disconnect and plug the water bypass hoses (E).
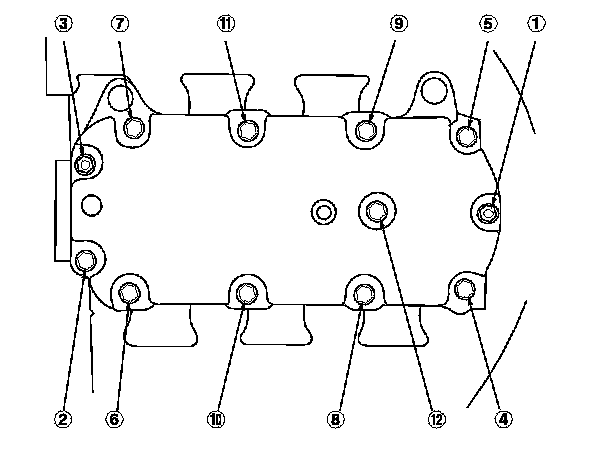
6. Remove the upper cover mounting bolts and nuts sequentially in three steps, then remove the upper cover.
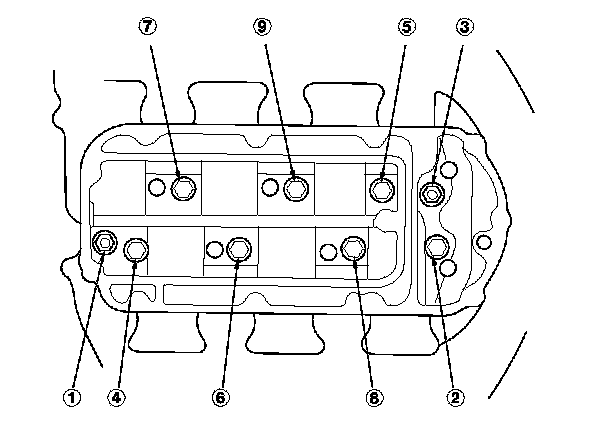
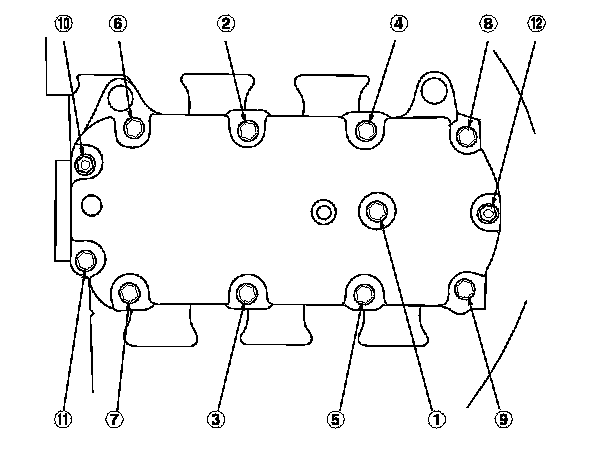
7. Remove the intake manifold mounting bolts and nuts sequentially in three steps, then remove the intake manifold.
Installation
1. Install the new intake manifold gasket on the injector base.
2. Install the intake manifold. Tighten the bolts and nuts sequentially in three steps.

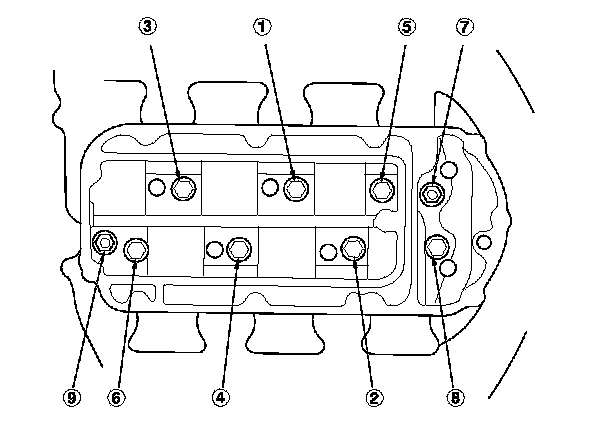
3. Install the upper cover. Tighten the bolts and nuts sequentially in three steps. Always use a new gasket.

4. Install the EVAP canister hose (A) and water bypass hoses (B).
5. Connect the MAP sensor connector (C), throttle actuator connector (D) and EVAP canister purge valve connector (E).
6. Install the PCV hose (A), brake booster vacuum hose (B), vacuum hose (C) and connect the IMT actuator connector (D).
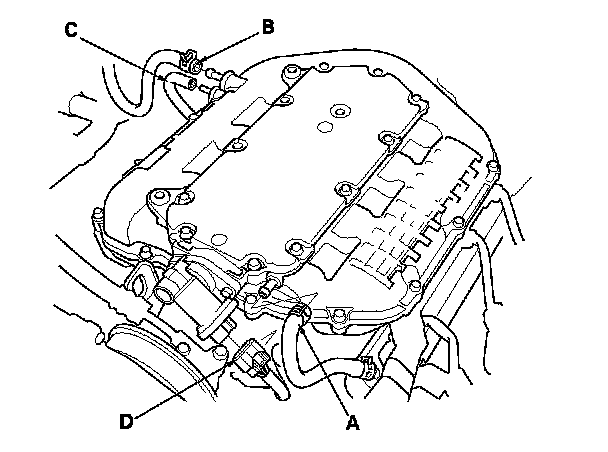
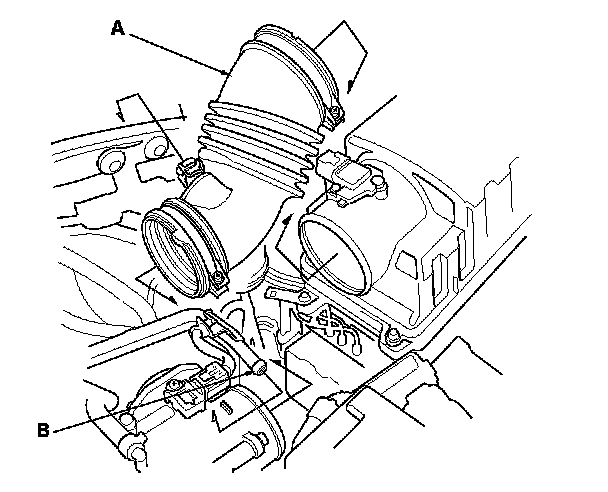
7. Install the intake air duct (A), then install the breather pipe (B).
8. Install the engine cover.
9. Clean up any spilled engine coolant.
10. After installation, check that all tubes, hoses, and connectors are installed correctly.
11. Refill the radiator with engine coolant, and bleed air from the cooling system with heater valve open. Service and Repair