Brake Booster Replacement
- Make sure you have the anti-theft code for the audio system and navigation system, then write down the audio presets.
- Disconnect the negative cable from the battery.
- Remove the master cylinder (see MASTER CYLINDER REPLACEMENT
).
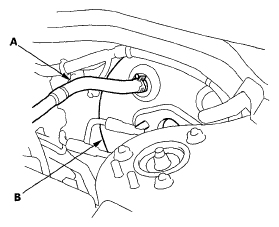
- Disconnect the brake booster vacuum hose (A) from the brake booster (B).
 Courtesy of AMERICAN HONDA MOTOR CO., INC.
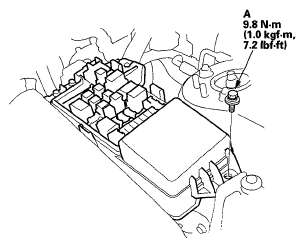
- Remove the under-hood fuse/relay box cover.
- Remove the under-hood fuse/relay box mounting bolt (A), then remove the under-hood fuse/relay box from the body.
 Courtesy of AMERICAN HONDA MOTOR CO., INC.
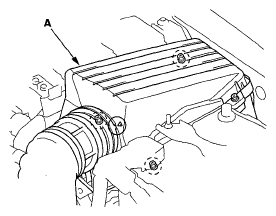
- Remove the air cleaner assembly (A).
 Courtesy of AMERICAN HONDA MOTOR CO., INC.
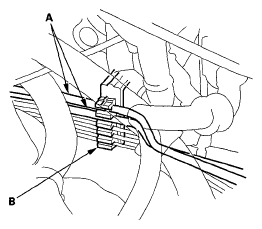
- Remove the primary and secondary brake lines (A) from the hose clamp (B).
 Courtesy of AMERICAN HONDA MOTOR CO., INC.
- Remove the lock pin (A) and the joint pin (B), then disconnect the yoke from the brake pedal.
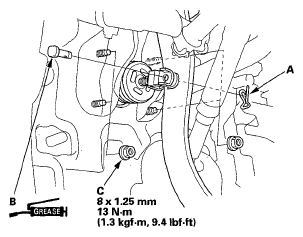 Courtesy of AMERICAN HONDA MOTOR CO., INC.
- Remove the brake booster mounting nuts (C).
- Remove the brake booster (A) from the engine compartment.
NOTE:
- Be careful not to damage the booster surfaces and threads of the booster stud bolts.
- Be careful not to bend or damage the brake lines.
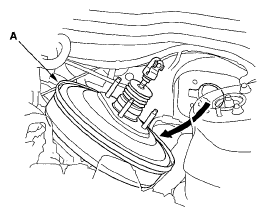 Courtesy of AMERICAN HONDA MOTOR CO., INC.
- Install the brake booster in the reverse order of removal, and note these items:
- Install the master cylinder after installing the brake booster (see MASTER CYLINDER REPLACEMENT
).
- Replace the master cylinder rod seal.
- Check the brake pedal height and free play after installing the master cylinder, and adjust it if necessary (see BRAKE PEDAL AND BRAKE PEDAL POSITION SWITCH ADJUSTMENT
).
- Bleed the brake system (see BRAKE SYSTEM BLEEDING
).
- Enter the anti-theft code for the audio system and the navigation system, then enter the client's audio presets.
- Set the clock (on vehicle without navigation).