Lower Panel Removal/Installation
LOWER PANEL REMOVAL/INSTALLATION
1. Remove the battery cover. Removal and Replacement
2. Disconnect the negative battery cable.
3. Partially peel back the seaming welt.
4. Remove the following parts:
a. Front scuff plate inner (driver's side) Front Scuff Plate Removal/Installation
b. Front side trim (driver's side) Front Side Trim Removal/Installation
c. Side wall Side Wall Removal/Installation
d. Center console (Vehicles with rear vent) Center Console Removal/Installation
e. Selector lever knob (ATX) Front Console Removal/Installation
f. Shift lever knob (MTX) Front Console Removal/Installation
g. Front console Front Console Removal/Installation
h. Hood release lever Service and Repair
5. Remove the screw.
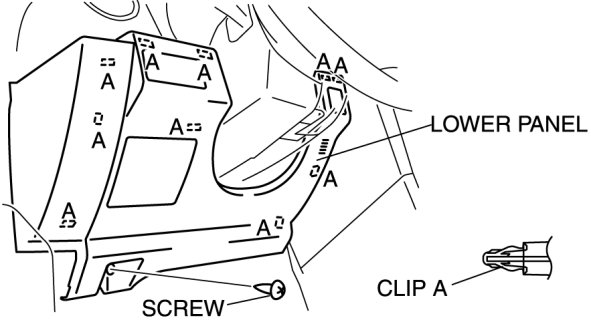
6. Pull the lower panel outward and detach clips A.
7. Remove the lower panel.
8. Install in the reverse order of removal.