Installing The Cd Drive
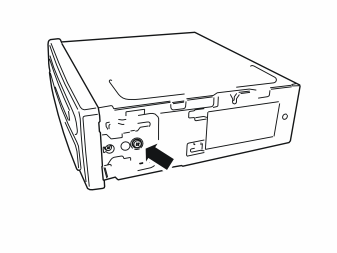 Courtesy of VOLVO CARS OF NORTH AMERICA.
- Take the CD drive from the kit. Remove the screw to the adapter, and remove the adapter on the side of the CD drive. Do this on both sides. The parts shall not be used again.
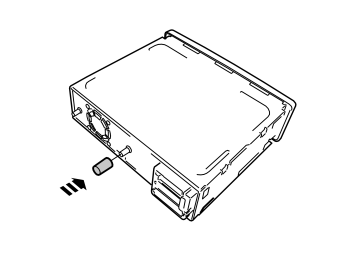 Courtesy of VOLVO CARS OF NORTH AMERICA.
- Take the rubber spacer from the kit and install it on the CD drive.
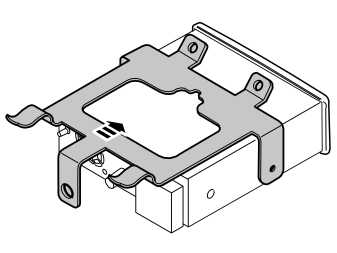 Courtesy of VOLVO CARS OF NORTH AMERICA.
- Take the bracket from the kit and install it on the CD drive.
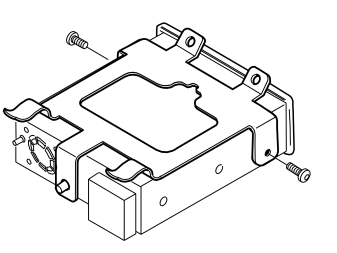 Courtesy of VOLVO CARS OF NORTH AMERICA.
- Take two small screws from the kit and tighten the bracket into the CD drive.
 Courtesy of VOLVO CARS OF NORTH AMERICA.
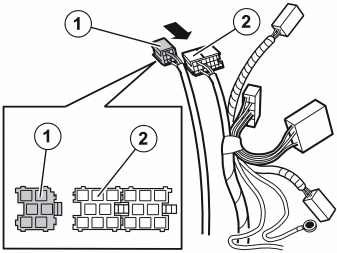
- Attach the yellow (1) connector from the screen to the green connector (2) on the routed cable harness.
 Courtesy of VOLVO CARS OF NORTH AMERICA.
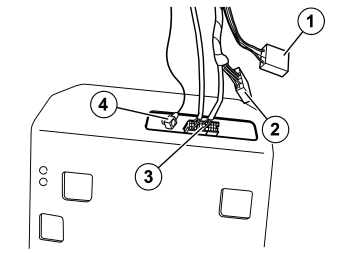
- Take the new inner glove compartment section from the kit. Insert the brown (1), black (2) and multi-coloured (3) connector, and the cable with the blank connector (4), through the hole in the rear edge of the glove compartment section.
 Courtesy of VOLVO CARS OF NORTH AMERICA.
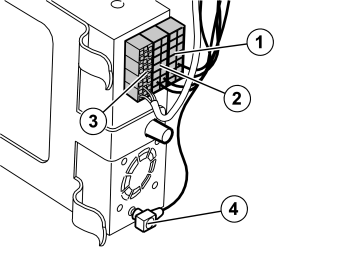
- Take the CD drive with bracket and plug in the connectors:
- Black connector (1)
- Brown connector (2)
- Multi-colored connector (3)
- Blank connector (4). A small click should be audible when this is pressed in and locked on the connector.
 Courtesy of VOLVO CARS OF NORTH AMERICA.
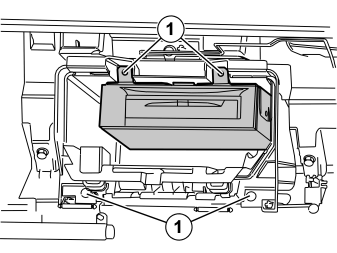
- Fit the CD drive in the inner section of the glovebox with the hooks (1).
 Courtesy of VOLVO CARS OF NORTH AMERICA.
- Fit the inner section of the glove compartment in its correct position.
- Take the screws (1) previously removed and tighten in both the CD drive bracket and the glovebox section.