Removal & Installation (Front Bushing)
- Raise and support vehicle. Remove the protective cover for the fuel filter. Remove the bracket for the parking brake cable. See Fig 1. Disconnect the cable harness for the ABS system from the mounting.
- Disconnect the tie rod in front of the toe-in for the trailing arm. Position a support under the bodywork so that the tire just touches the ground but cannot be rotated. Remove the screw from the front bushing. Pull down and secure the trailing arm.
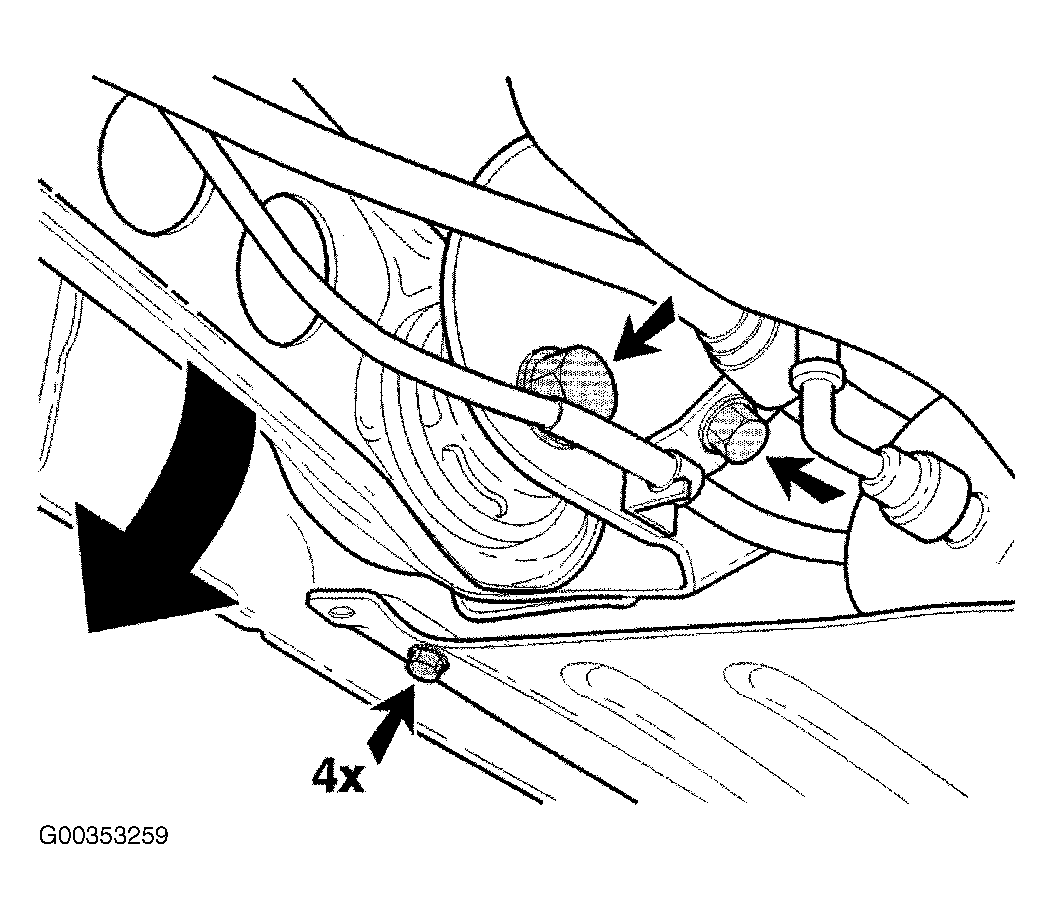 Courtesy of VOLVO CARS OF NORTH AMERICA.
- Remove the front rubber bushing from the trailing arm using hydraulic pump 999 5575 with adapters. See Fig 2. Install the shaft in the rubber bushing. Install bushing 999 5669-2. Secure the bushing using the nut. Press the rubber out of the trailing arm. Remove the rubber from the special tool.
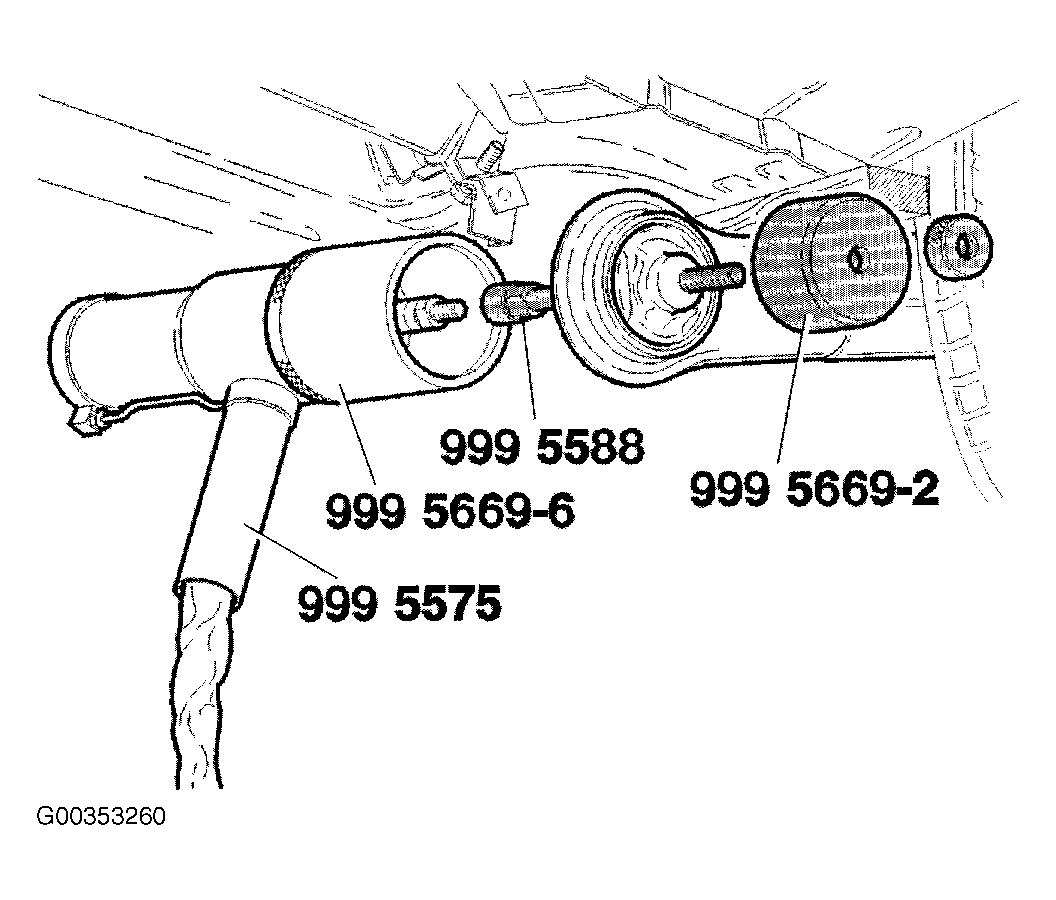 Courtesy of VOLVO CARS OF NORTH AMERICA.
- To install the trailing arm front rubber bushing, clean the trailing arm. Lubricate the rubber bushing. Use lubricant, P/N 1161427-0, or equivalent.
- Install the front rubber bushing, using hydraulic pump 999 5575 and adapters. See Fig 3. Install ring 999 5669-3B with the conical side outwards. Install the rubber bushing over the shaft with the protruding part facing inwards. The groove must be aligned vertically. Install special tool 999 5669-4B so that the larger diameter is facing the rubber bushing.
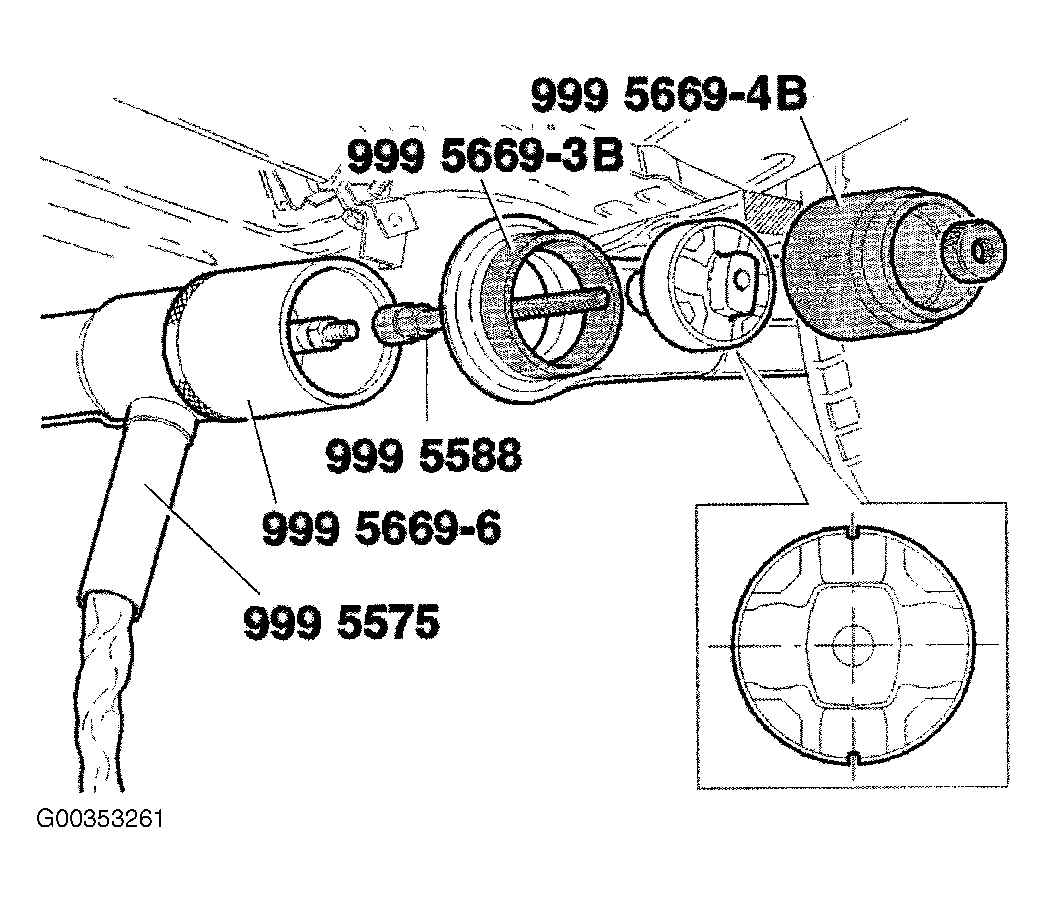 Courtesy of VOLVO CARS OF NORTH AMERICA.
- Tighten the nut by hand. Press in the rubber bushing until the tool comes into contact with the conical ring. Remove 999 5669-4B. Position the tool so that the side with the smaller diameter is facing the rubber bushing. Press the rubber into the trailing arm as far as it will go. Remove special tools. Check that the rubber bushing protrudes by an equal amount on both sides.
- Lift up the trailing arm. Install the screw, but do not final tighten yet. Remove the support. Install the tie rod for the toe-in for the trailing arm. Tighten to specification. See TORQUE SPECIFICATIONS .
- Lower car. Bounce the car a few times. Final tighten trailing arm bolt. See TORQUE SPECIFICATIONS .
- Install the bracket for the parking brake cable. Secure the cable harness for the ABS system in the mounting. Install the protective cover for the fuel filter.
- Check wheel alignment. See SPECIFICATIONS & PROCEDURES - UP TO EARLY PRODUCTION 2004
article in WHEEL ALIGNMENT. Adjust as necessary.