Valve Clearance Adjustment
- Valve clearance is adjusted with engine off, and may be done either warm or cold. Remove valve cover. Turn crankshaft center bolt until camshaft is in position for firing No. 1 cylinder. Both cam lobes should point up at equally large angles. Pulley timing mark should be on 0°.
- Using feeler gauge, check valve clearance of No. 1 cylinder, measuring between camshaft lobe and discs. Intake and exhaust valves should have same clearances:
VALVE CLEARANCES
| When Checking |
In. (mm) |
| Cold engine |
.012-.018" (.30-.45 mm) |
| When Setting |
In. (mm) |
| Cold engine |
.014-.016" (.35-.40 mm) |
| Hot engine |
.016-.018" (.40-.45 mm) |
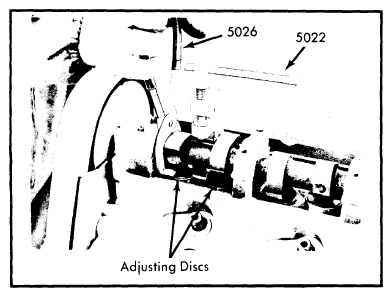
- If clearance is incorrect, line up notches in valve depressors, so they are at right angles to engine center line. Install valve adjustment tool (5022) and turn handle downward until depressor groove is just above edge of cylinder head. Remove adjusting disc with special pliers (5026).
- Using micrometer, measure thickness of disc. Then determine proper thickness required of new disc to bring clearance within specifications. For example: Measure existing clearance and subtract correct clearance. Difference should be added to thickness of old disc to determine thickness of new disc required. Discs are available in thicknesses ranging from 3.30 to 4.50 mm in increments of 0.05 mm.
- Discs should be oiled and installed with marks down. Remove valve adjustment tool (5022), rotate crankshaft to correct firing position for No. 3 cylinder and repeat procedure. Then adjust valve clearance for No. 4 and No. 2 cylinders. When all four cylinders have been adjusted, turn camshaft a few turns and recheck valve clearance at all cylinders.
- Position gasket on cylinder head and install valve cover.
 Courtesy of VOLVO CARS CORPORATION