Overview - Coolant Pump/Thermostat
WARNING: This page is about a different car, the 2016 Volkswagen Beetle, 2015 Volkswagen Beetle, 2014 Volkswagen Beetle, and 2013 Volkswagen Beetle. However, it is still accessible from the selected car via links, so may be relevant.
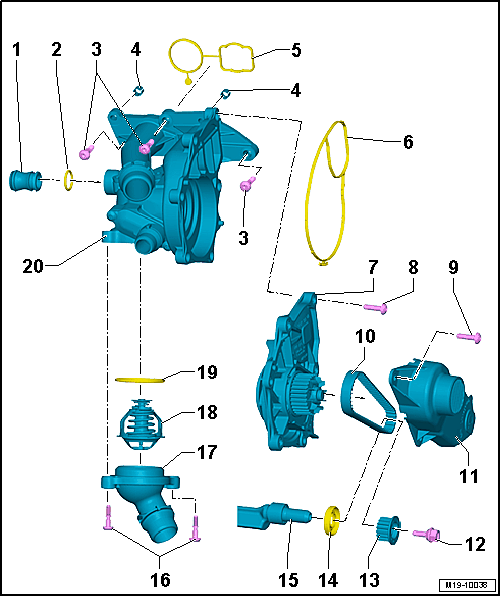 Courtesy of VOLKSWAGEN GROUP OF AMERICA, INC.
- Connection
- O-Ring
- Replace after removing
- Coat with coolant
- Bolt
- Tightening specification and sequence, refer to Fig 2.
- Centering Pin
- Seal
- Seal
- Coolant Pump
- Removing and installing, refer to COOLANT PUMP .
- With a new coolant pump, remove the protective cap
- Bolt
- Tightening sequence, refer to Fig 3
- Bolt
- Toothed Belt
- Toothed Belt Cover
- Bolt
- 10 Nm + 90°
- Replace after removing
- Left thread
- Drive Gear for Toothed Belt
- Pay attention to the installed position.
- Balance Shaft Seal Intake Side
- Balance Shaft
- Bolt
- Connecting Piece
- Thermostat
- O-Ring
- Coolant Thermostat
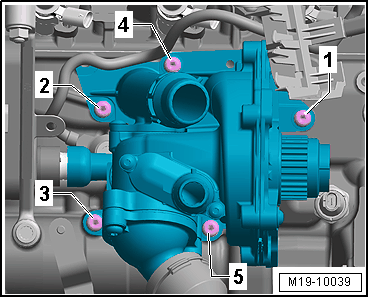 Courtesy of VOLKSWAGEN GROUP OF AMERICA, INC.
| Tightening Sequence |
Tightening Specification |
| Sequence -1- through -5- |
Tighten to 9 Nm. |
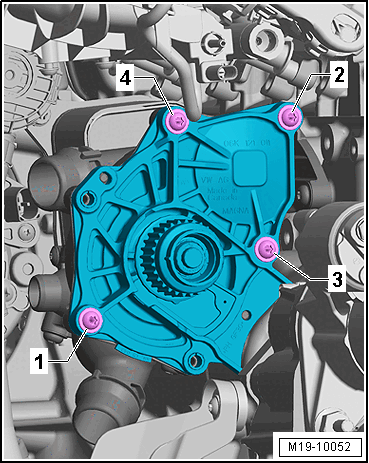 Courtesy of VOLKSWAGEN GROUP OF AMERICA, INC.
| Tightening Sequence |
Tightening Specification |
| Sequence -1- through -4- |
Tighten to 9 Nm. |