Reassembly [12/2015 - 08/2016]: Procedure
WARNING: This page is about a different car, the 2016 Toyota Sienna. However, it is still accessible from the selected car via links, so may be relevant.
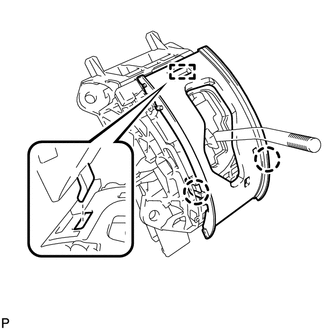
- INSTALL LOWER POSITION INDICATOR HOUSING
- Put the guide in position and engage the 2 claws to install the lower position indicator housing to the shift lock control unit assembly.
 Courtesy of © TOYOTA, LICENSE AGREEMENT TMS1002 Courtesy of © TOYOTA, LICENSE AGREEMENT TMS1002
|
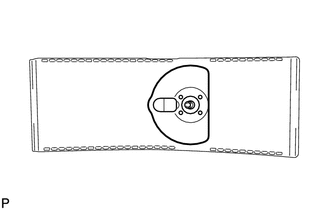
- INSTALL NO. 2 POSITION INDICATOR SLIDE COVER
- Install the No. 2 position indicator slide cover to the position indicator slide cover.
 Courtesy of © TOYOTA, LICENSE AGREEMENT TMS1002 Courtesy of © TOYOTA, LICENSE AGREEMENT TMS1002
|
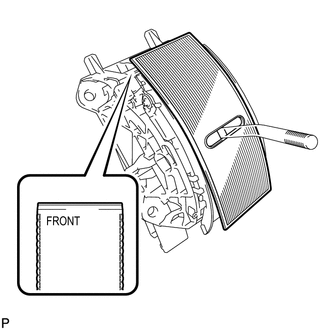
- INSTALL POSITION INDICATOR SLIDE COVER
- Install the position indicator slide cover to the lower position indicator housing as shown in the illustration.
 Courtesy of © TOYOTA, LICENSE AGREEMENT TMS1002 Courtesy of © TOYOTA, LICENSE AGREEMENT TMS1002
|
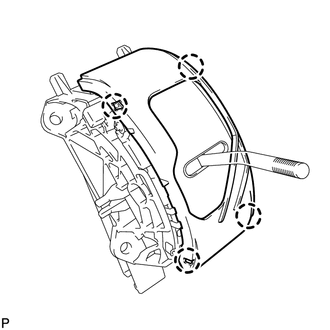
- INSTALL UPPER POSITION INDICATOR HOUSING
- Engage the 4 claws to install the upper position indicator housing to the lower position indicator housing.
 Courtesy of © TOYOTA, LICENSE AGREEMENT TMS1002 Courtesy of © TOYOTA, LICENSE AGREEMENT TMS1002
|
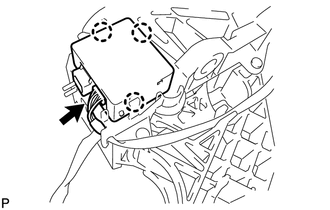
- INSTALL SHIFT LOCK CONTROL ECU SUB-ASSEMBLY
- Engage the 3 claws to install the shift lock control ECU sub-assembly to the shift lock control unit assembly.
 Courtesy of © TOYOTA, LICENSE AGREEMENT TMS1002 Courtesy of © TOYOTA, LICENSE AGREEMENT TMS1002
|
- Connect the connector.
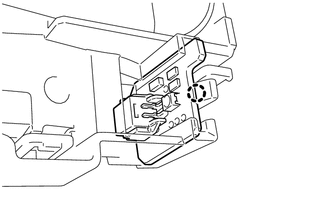
- INSTALL POSITION INDICATOR LED
- Engage the claw to install the position indicator LED to the lower No. 2 position indicator housing.
 Courtesy of © TOYOTA, LICENSE AGREEMENT TMS1002 Courtesy of © TOYOTA, LICENSE AGREEMENT TMS1002
|
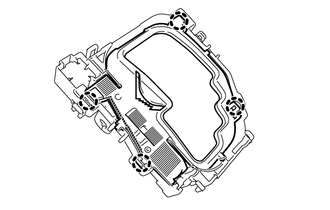
- INSTALL POSITION INDICATOR LIGHT GUIDE
- Engage the 4 claws to install the position indicator light guide to the lower No. 2 position indicator housing.
 Courtesy of © TOYOTA, LICENSE AGREEMENT TMS1002 Courtesy of © TOYOTA, LICENSE AGREEMENT TMS1002
|
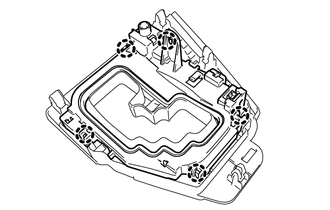
- INSTALL LOWER NO. 2 POSITION INDICATOR HOUSING
- Engage the 5 claws to install the lower No. 2 position indicator housing to the floor shift position indicator housing sub-assembly.
 Courtesy of © TOYOTA, LICENSE AGREEMENT TMS1002 Courtesy of © TOYOTA, LICENSE AGREEMENT TMS1002
|
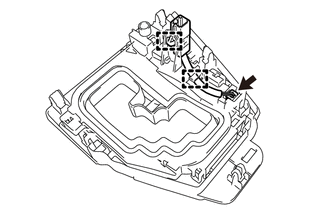
- INSTALL INDICATOR LIGHT WIRE SUB-ASSEMBLY
- Connect the connector and engage 2 clamps to install the indicator light wire sub-assembly to the lower No. 2 position indicator housing.
 Courtesy of © TOYOTA, LICENSE AGREEMENT TMS1002 Courtesy of © TOYOTA, LICENSE AGREEMENT TMS1002
|
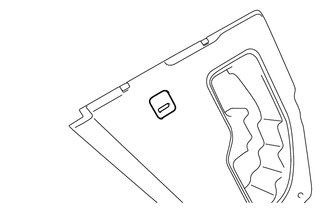
- INSTALL SHIFT LEVER CAP
- Install the shift lever cap to the floor shift position indicator housing sub-assembly.
 Courtesy of © TOYOTA, LICENSE AGREEMENT TMS1002 Courtesy of © TOYOTA, LICENSE AGREEMENT TMS1002
|