Removal [12/2015 - 08/2016]: Procedure
WARNING: This page is about a different car, the 2016 Toyota Sienna. However, it is still accessible from the selected car via links, so may be relevant.
- REMOVE AUTOMATIC TRANSAXLE ASSEMBLY (for 2WD)
(Refer to REMOVAL [12/2015 - 08/2016]
)
- REMOVE AUTOMATIC TRANSAXLE ASSEMBLY (for AWD)
(Refer to REMOVAL [12/2015 - 08/2016]
)
- REMOVE DRIVE PLATE AND RING GEAR SUB-ASSEMBLY
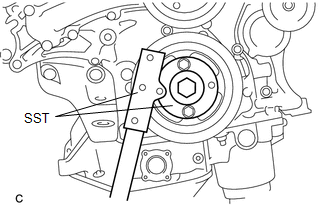
- Using SST, hold the crankshaft pulley.
 Courtesy of © TOYOTA, LICENSE AGREEMENT TMS1002 Courtesy of © TOYOTA, LICENSE AGREEMENT TMS1002
|
- SST: 09213-70011
- 09213-70020
- SST: 09330-00021
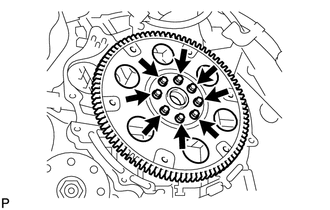
- Remove the 8 bolts, front drive plate spacer, drive plate and ring gear sub-assembly and rear drive plate spacer.
 Courtesy of © TOYOTA, LICENSE AGREEMENT TMS1002 Courtesy of © TOYOTA, LICENSE AGREEMENT TMS1002
|
- REMOVE ENGINE REAR OIL SEAL
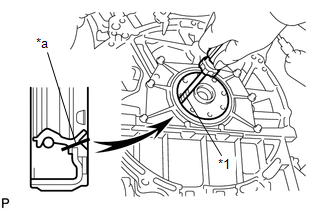
- Using a knife, cut off the engine rear oil seal lip.
 Courtesy of © TOYOTA, LICENSE AGREEMENT TMS1002 Courtesy of © TOYOTA, LICENSE AGREEMENT TMS1002
|
TEXT IN ILLUSTRATION
| *1 |
Protective Tape |
| *a |
Cut Position |
- Using a screwdriver, pry out the engine rear oil seal.
NOTE:
Be careful not to damage the crankshaft.
HINT:
Tape the screwdriver tip before use.