Installation [02/2014 - 11/2016]: Procedure
WARNING: This page is about a different variant/trim than selected.
- INSTALL LANE DEPARTURE WARNING CAMERA
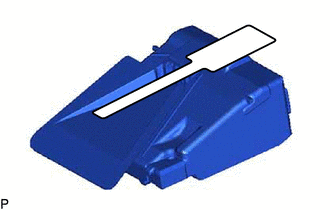
- When using a new lane departure warning camera:
- Remove the protective film.
 Courtesy of © TOYOTA, LICENSE AGREEMENT TMS1002 Courtesy of © TOYOTA, LICENSE AGREEMENT TMS1002
|
NOTE:
Do not touch the camera lens after removing the protective film.
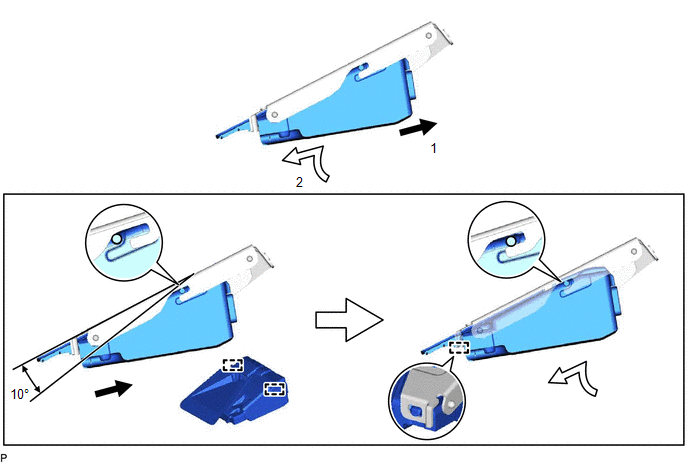
- Slide the lane departure warning camera in the direction indicated by the arrow (1) shown in the illustration to engage the 2 guides.
 Courtesy of © TOYOTA, LICENSE AGREEMENT TMS1002 Courtesy of © TOYOTA, LICENSE AGREEMENT TMS1002
|
NOTE:
Do not touch the camera lens.
- Slide the lane departure warning camera in the direction indicated by the arrow (2) shown in the illustration to engage the guide.
- Connect the connector to install the lane departure warning camera.
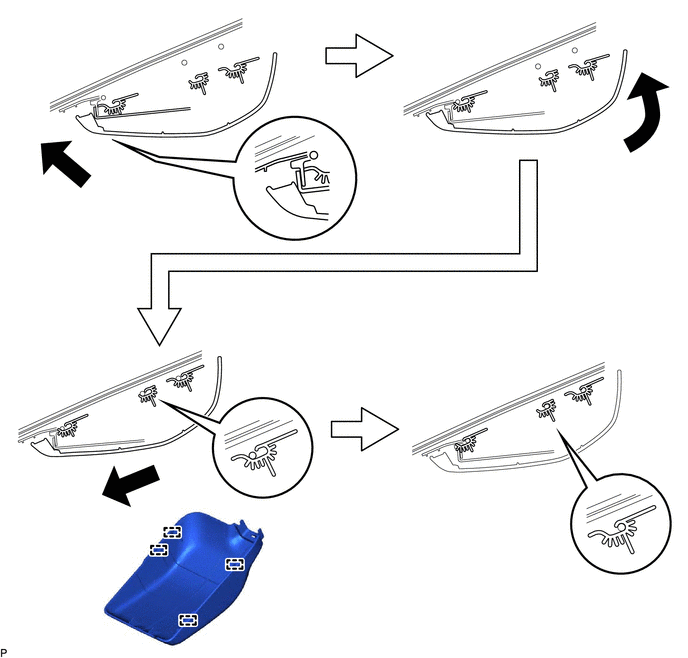
- INSTALL LANE DEPARTURE WARNING CAMERA COVER
- Engage the 4 guides to install the lane departure warning camera cover as shown in the illustration.
 Courtesy of © TOYOTA, LICENSE AGREEMENT TMS1002 Courtesy of © TOYOTA, LICENSE AGREEMENT TMS1002
|
- INSPECT LANE DEPARTURE WARNING CAMERA COVER
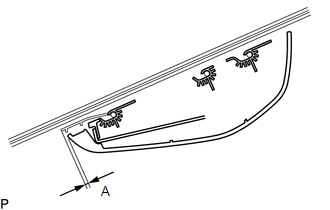
- Check the clearance of area A.
STANDARD CLEARANCE
| Area |
Measurement |
| A |
0 to 2.0 mm (0 to 0.0787 in.) |
HINT:
If the result is not as specified, the guides are not engaged properly. Reinstall the lane departure warning camera cover.
 Courtesy of © TOYOTA, LICENSE AGREEMENT TMS1002 Courtesy of © TOYOTA, LICENSE AGREEMENT TMS1002
|
- INSTALL RAIN SENSOR COVER
- Engage the 2 guides as shown in the illustration.
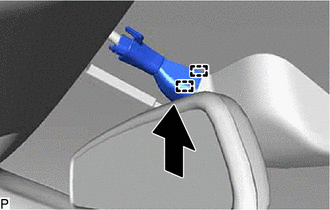 Courtesy of © TOYOTA, LICENSE AGREEMENT TMS1002 Courtesy of © TOYOTA, LICENSE AGREEMENT TMS1002
|
- Engage the 2 guides and install the rain sensor cover as shown in the illustration.
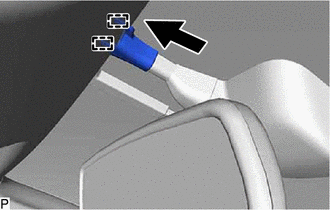 Courtesy of © TOYOTA, LICENSE AGREEMENT TMS1002 Courtesy of © TOYOTA, LICENSE AGREEMENT TMS1002
|
- ADJUST LANE DEPARTURE WARNING CAMERA
Refer to ADJUSTMENT [02/2014 - 11/2016]