- REMOVE NO. 2 ANTENNA CORD SUB-ASSEMBLY (for Normal Roof)
Refer to PROCEDURE - Step 5
- REMOVE NO. 2 ANTENNA CORD SUB-ASSEMBLY (for Sliding Roof)
Refer to PROCEDURE - Step 6
- REMOVE NO. 2 ANTENNA CORD SUB-ASSEMBLY (for Panoramic Moon Roof)
Refer to PROCEDURE - Step 7
- REMOVE NO. 1 AMPLIFIER ANTENNA ASSEMBLY
Refer to PROCEDURE - Step 2
- REMOVE REAR WASHER HOSE ASSEMBLY (for Normal Roof)
- w/ Adhesive Tape:
- Remove the adhesive tape from the roof headlining assembly.
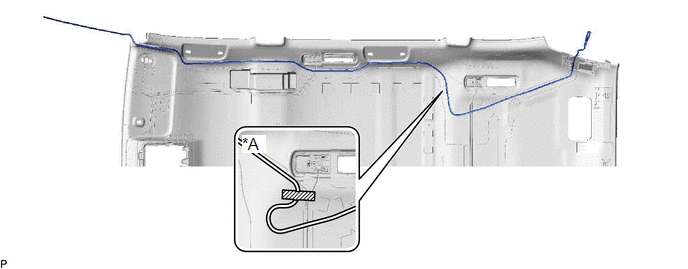 Courtesy of © TOYOTA, LICENSE AGREEMENT TMS1002 Courtesy of © TOYOTA, LICENSE AGREEMENT TMS1002
|
- Remove the rear washer hose assembly from the roof headlining assembly.
- REMOVE REAR WASHER HOSE ASSEMBLY (for Sliding Roof)
- w/ Adhesive Tape:
- Remove the adhesive tape from the roof headlining assembly.
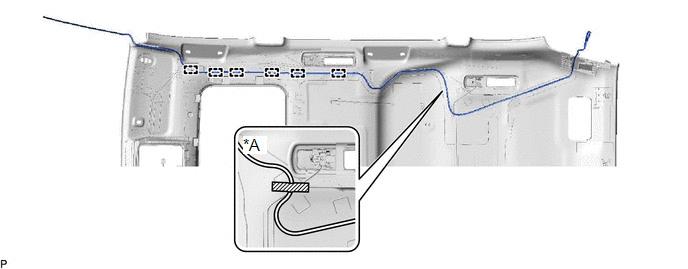 Courtesy of © TOYOTA, LICENSE AGREEMENT TMS1002 Courtesy of © TOYOTA, LICENSE AGREEMENT TMS1002
|
- Disengage each clamp and remove the rear washer hose assembly from the roof headlining assembly.
- REMOVE REAR WASHER HOSE ASSEMBLY (for Panoramic Moon Roof)
- w/ Adhesive Tape:
- Remove the adhesive tape from the roof headlining assembly.
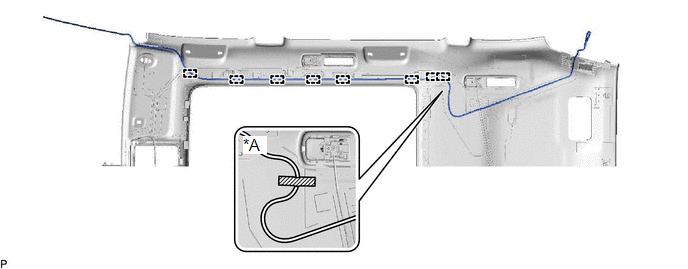 Courtesy of © TOYOTA, LICENSE AGREEMENT TMS1002 Courtesy of © TOYOTA, LICENSE AGREEMENT TMS1002
|
- Disengage each clamp and remove the rear washer hose assembly from the roof headlining assembly.
- REMOVE AIR DUCT SEAL
HINT:
Use the same procedure for all air duct seals.
- Remove the air duct seal.
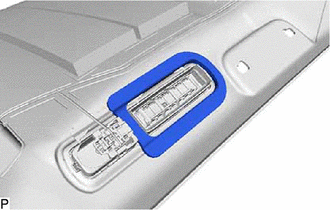 Courtesy of © TOYOTA, LICENSE AGREEMENT TMS1002 Courtesy of © TOYOTA, LICENSE AGREEMENT TMS1002
|
- REMOVE SPOT LIGHT ASSEMBLY LH
Refer to PROCEDURE - Step 3
HINT:
Use the same procedure for the front side and rear side.
- REMOVE SPOT LIGHT ASSEMBLY RH
HINT:
Use the same procedure as for the LH side.
- REMOVE ROOF HEADLINING SUPPORT PLATE (for Normal Roof)
- Remove the 2 roof headlining support plates.
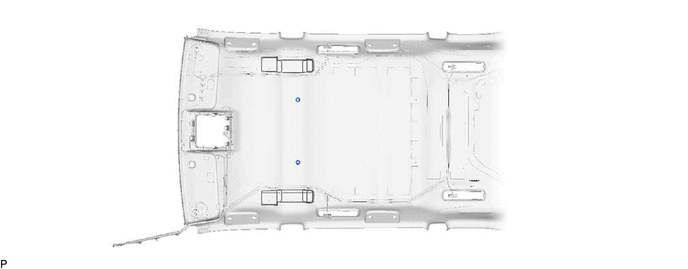 Courtesy of © TOYOTA, LICENSE AGREEMENT TMS1002 Courtesy of © TOYOTA, LICENSE AGREEMENT TMS1002
|
- REMOVE ROOF HEADLINING SUPPORT PLATE (for Sliding Roof)
- Remove the 2 roof headlining support plates.
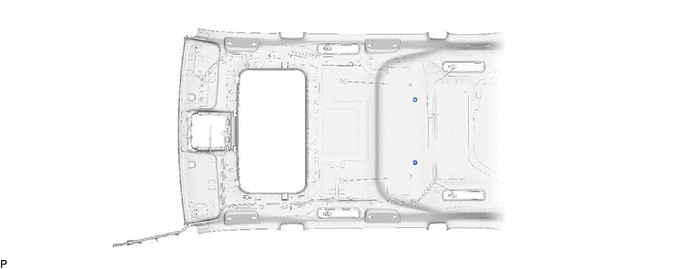 Courtesy of © TOYOTA, LICENSE AGREEMENT TMS1002 Courtesy of © TOYOTA, LICENSE AGREEMENT TMS1002
|
- REMOVE NO. 1 ROOF WIRE (for Normal Roof)
- Remove the adhesive tape from the roof headlining assembly.
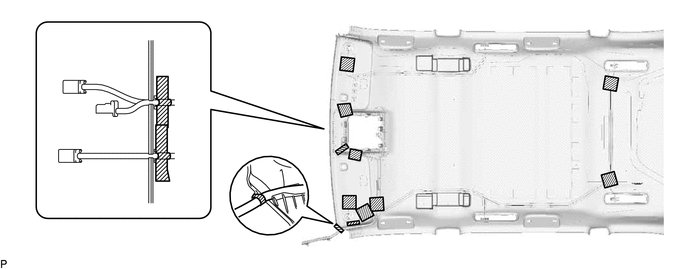 Courtesy of © TOYOTA, LICENSE AGREEMENT TMS1002 Courtesy of © TOYOTA, LICENSE AGREEMENT TMS1002
|
 |
Adhesive Tape |
- |
- |
- Turn the 2 visor connectors counterclockwise approximately 45° and remove them from the roof headlining assembly.
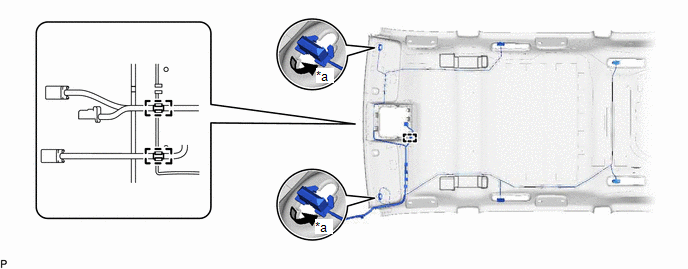 Courtesy of © TOYOTA, LICENSE AGREEMENT TMS1002 Courtesy of © TOYOTA, LICENSE AGREEMENT TMS1002
|
- Disengage the 3 clamps and remove the No. 1 roof wire from the roof headlining assembly.
- REMOVE NO. 1 ROOF WIRE (for Sliding Roof)
- Remove the adhesive tape from the roof headlining assembly.
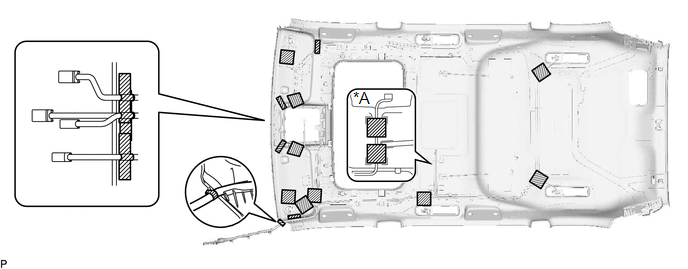 Courtesy of © TOYOTA, LICENSE AGREEMENT TMS1002 Courtesy of © TOYOTA, LICENSE AGREEMENT TMS1002
|
| *A |
w/ Rear Seat Entertainment System |
- |
- |
|
Adhesive Tape |
- |
- |
- Turn the 2 visor connectors counterclockwise approximately 45° and remove them from the roof headlining assembly.
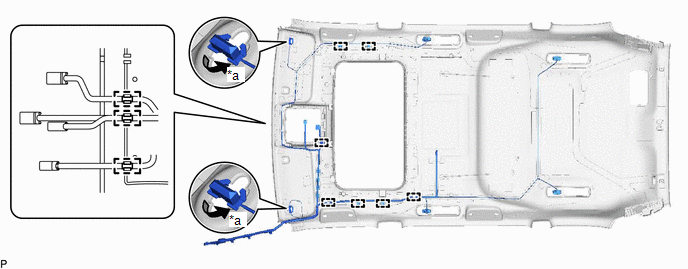 Courtesy of © TOYOTA, LICENSE AGREEMENT TMS1002 Courtesy of © TOYOTA, LICENSE AGREEMENT TMS1002
|
- Disengage the 10 clamps and remove the No. 1 roof wire from the roof headlining assembly.
- REMOVE NO. 1 ROOF WIRE (for Panoramic Moon Roof)
- Remove the adhesive tape from the roof headlining assembly.
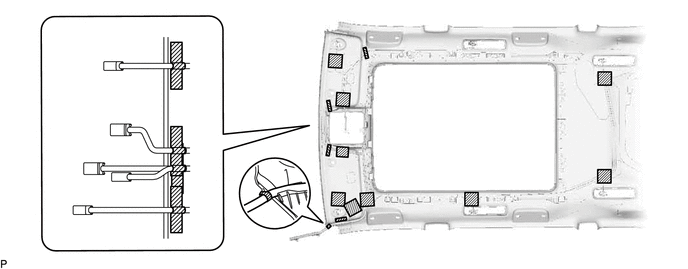 Courtesy of © TOYOTA, LICENSE AGREEMENT TMS1002 Courtesy of © TOYOTA, LICENSE AGREEMENT TMS1002
|
|
Adhesive Tape |
- |
- |
- Turn the 2 visor connectors counterclockwise approximately 45° and remove them from the roof headlining assembly.
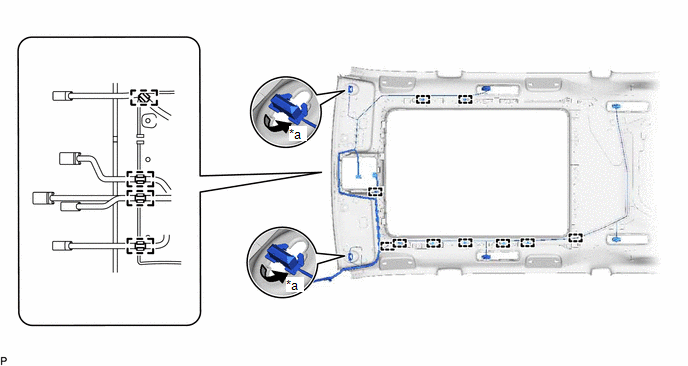 Courtesy of © TOYOTA, LICENSE AGREEMENT TMS1002 Courtesy of © TOYOTA, LICENSE AGREEMENT TMS1002
|
- Disengage the 14 clamps and remove the No. 1 roof wire from the roof headlining assembly.