Combination Meter: Reassembly: Reassembly
- INSTALL NO. 3 COMBINATION METER CASE
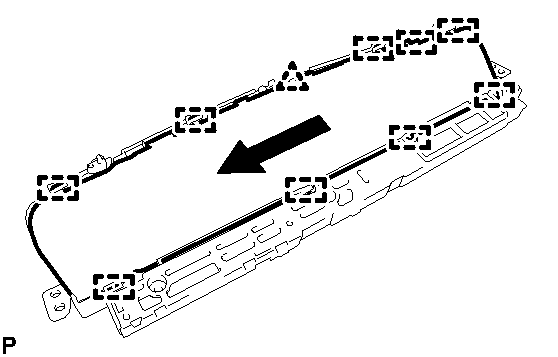
- INSTALL NO. 1 COMBINATION METER REFLECTOR
- Engage the clip and 9 guides to install the No. 1 combination meter reflector as shown in the illustration.
 Courtesy of © TOYOTA, LICENSE AGREEMENT TMS1002
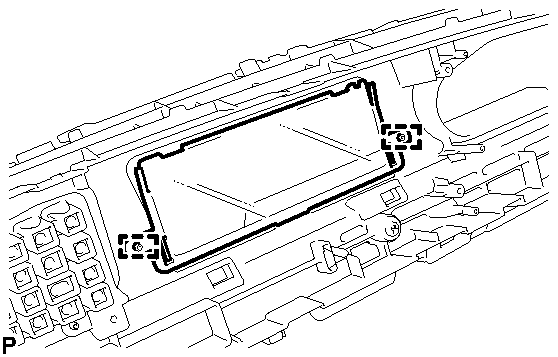
- INSTALL NO. 3 METER LENS
- Engage the 2 guides to install the No. 3 meter lens.
 Courtesy of © TOYOTA, LICENSE AGREEMENT TMS1002
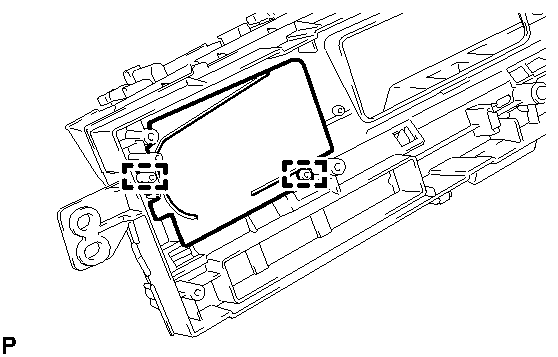
- INSTALL NO. 2 METER LENS
- Engage the 2 guides to install the No. 2 meter lens.
 Courtesy of © TOYOTA, LICENSE AGREEMENT TMS1002
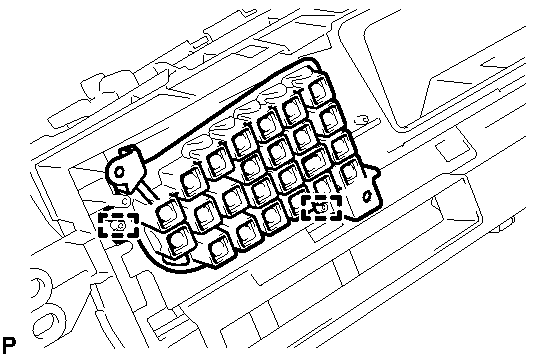
- INSTALL COMBINATION METER CASE
- Engage the 2 guides to install the combination meter case.
 Courtesy of © TOYOTA, LICENSE AGREEMENT TMS1002
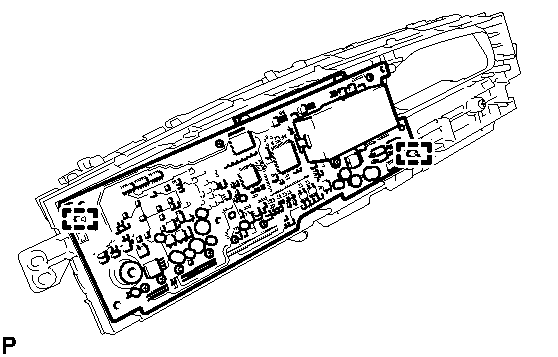
- INSTALL NO. 3 METER CIRCUIT PLATE
- Engage the 2 guides to install the No. 3 meter circuit plate.
 Courtesy of © TOYOTA, LICENSE AGREEMENT TMS1002
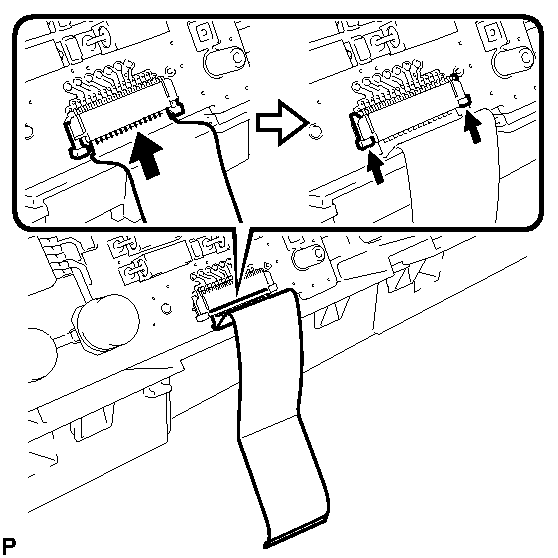
- INSTALL NO. 4 METER CIRCUIT PLATE
- Connect the connector to install the No. 4 meter circuit plate to the No. 3 meter circuit plate.
 Courtesy of © TOYOTA, LICENSE AGREEMENT TMS1002
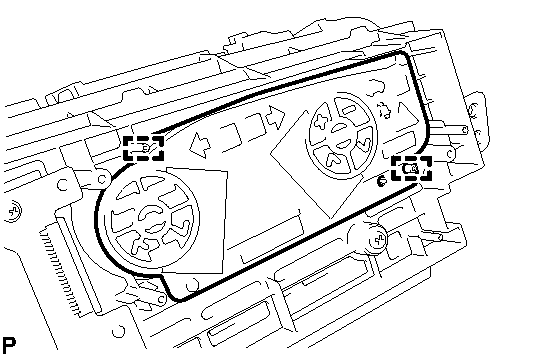
- INSTALL NO. 1 METER LENS
- Engage the 2 guides to install the No. 1 meter lens.
 Courtesy of © TOYOTA, LICENSE AGREEMENT TMS1002
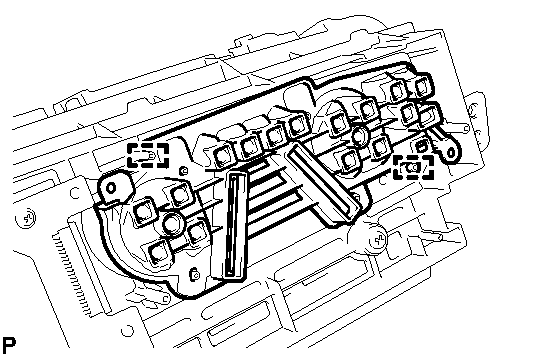
- INSTALL NO. 2 COMBINATION METER CASE
- Engage the 2 guides to install the No. 2 combination meter case.
 Courtesy of © TOYOTA, LICENSE AGREEMENT TMS1002
- INSTALL NO. 2 METER CIRCUIT PLATE
- Connect the connector to install the No. 5 meter circuit plate to the No. 2 meter circuit plate.
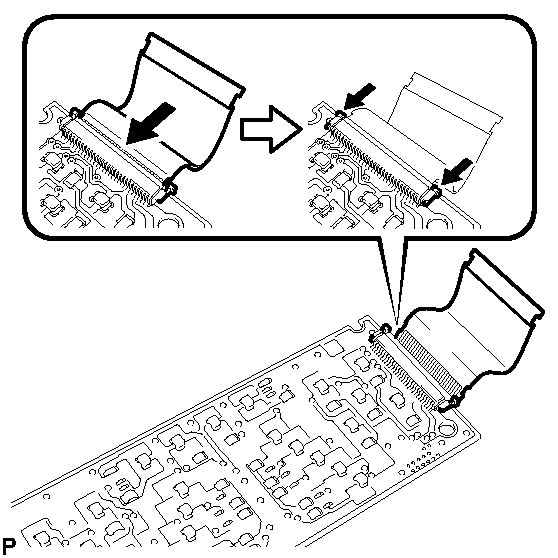 Courtesy of © TOYOTA, LICENSE AGREEMENT TMS1002
- Engage the 2 guides to install the No. 2 meter circuit plate.
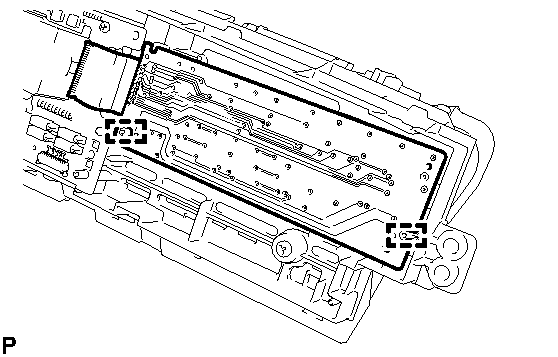 Courtesy of © TOYOTA, LICENSE AGREEMENT TMS1002
- Connect the connector as shown in the illustration.
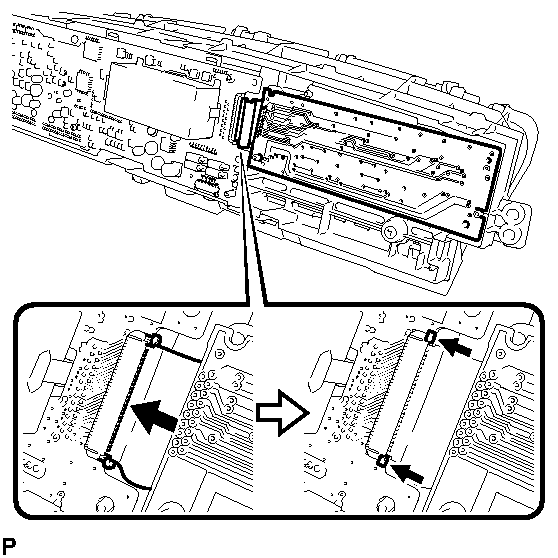 Courtesy of © TOYOTA, LICENSE AGREEMENT TMS1002
- INSTALL NO. 4 COMBINATION METER COVER
- Engage the 6 claws.
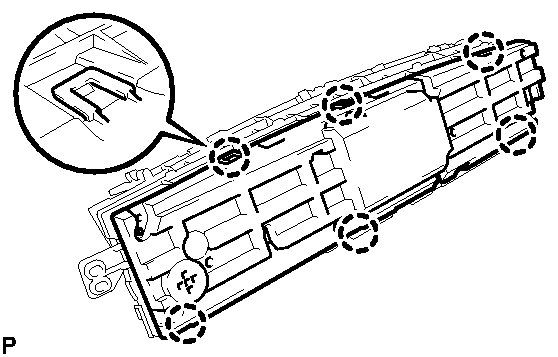 Courtesy of © TOYOTA, LICENSE AGREEMENT TMS1002
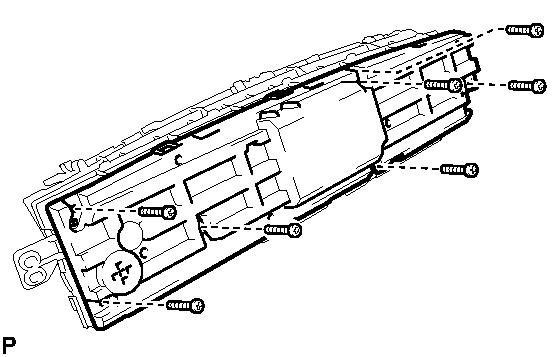
- Install the No. 4 combination meter cover with the 7 screws.
 Courtesy of © TOYOTA, LICENSE AGREEMENT TMS1002
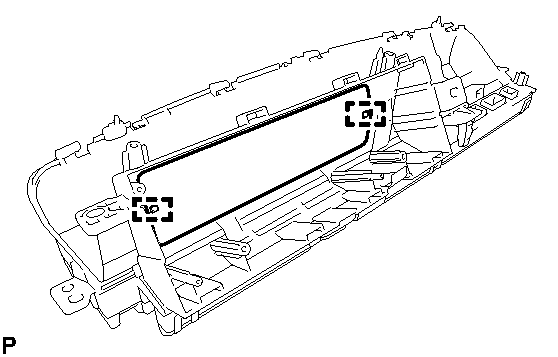
- INSTALL NO. 1 COMBINATION METER COVER
- Engage the 2 guides to install the No. 1 combination meter cover.
 Courtesy of © TOYOTA, LICENSE AGREEMENT TMS1002
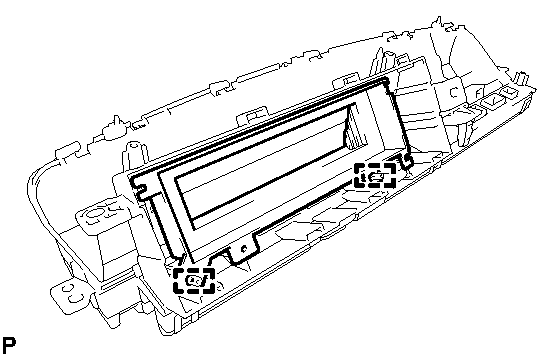
- INSTALL NO. 2 COMBINATION METER COVER
- Engage the 2 guides to install the No. 2 combination meter cover.
 Courtesy of © TOYOTA, LICENSE AGREEMENT TMS1002
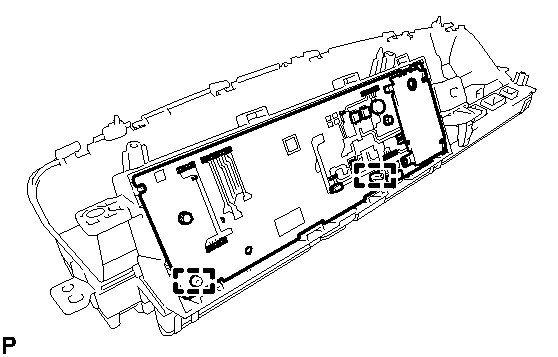
- INSTALL METER CIRCUIT PLATE
- Engage the 2 guides to install the meter circuit plate.
 Courtesy of © TOYOTA, LICENSE AGREEMENT TMS1002
- Connect the connector as shown in the illustration.
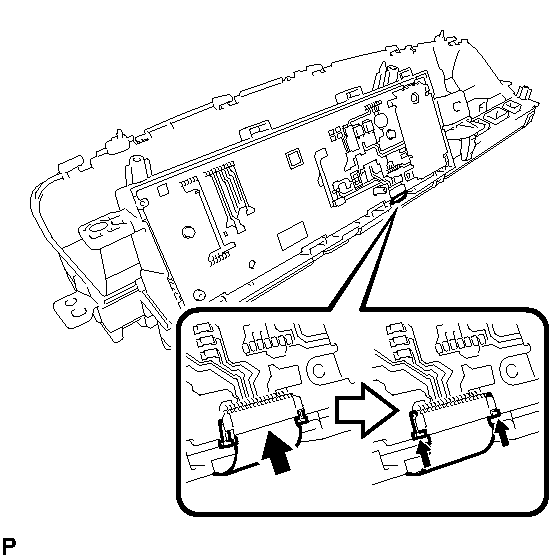 Courtesy of © TOYOTA, LICENSE AGREEMENT TMS1002
- INSTALL NO. 3 COMBINATION METER COVER
- Engage the 7 claws and 2 guides.
 Courtesy of © TOYOTA, LICENSE AGREEMENT TMS1002
- Install the No. 3 combination meter cover with the 3 screws.
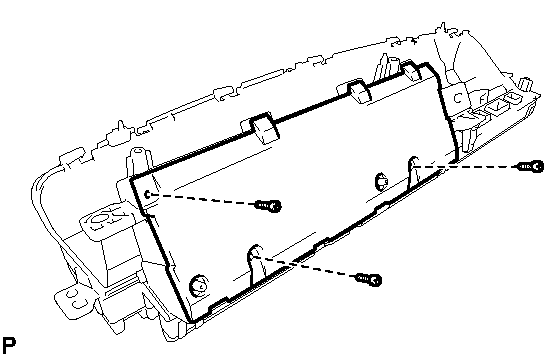 Courtesy of © TOYOTA, LICENSE AGREEMENT TMS1002
- INSTALL INSTRUMENT PANEL FINISH PANEL SUB-ASSEMBLY
- Install the instrument panel finish panel sub-assembly with the 6 screws.
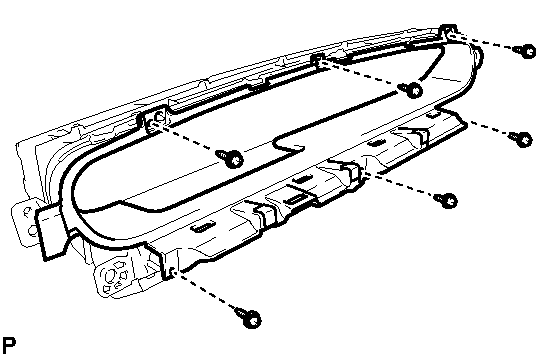 Courtesy of © TOYOTA, LICENSE AGREEMENT TMS1002