Fuel Pump: Disassembly
- REMOVE FUEL SENDER GAUGE ASSEMBLY
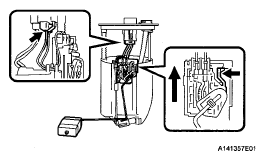
- Disconnect the connector and remove the fuel sender gauge from the fuel suction tube.
 Courtesy of © TOYOTA, LICENSE AGREEMENT TMS1002
- REMOVE FUEL SUCTION PLATE SUB-ASSEMBLY
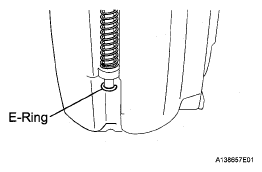
- Using needle nozzle pliers, remove the E-ring.
 Courtesy of © TOYOTA, LICENSE AGREEMENT TMS1002
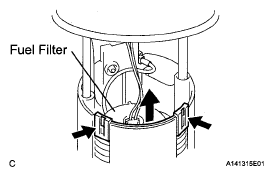
- Disengage the 2 claws of the No. 1 fuel suction support and remove the fuel suction plate with the fuel filter from the No. 1 fuel sub-tank.
- Remove the spring from the fuel suction plate.
 Courtesy of © TOYOTA, LICENSE AGREEMENT TMS1002
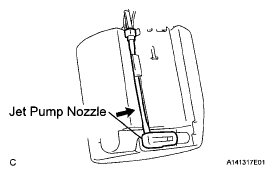
- Disengage the claw of the jet pump nozzle.
- Separate the fuel pump filter hose.
 Courtesy of © TOYOTA, LICENSE AGREEMENT TMS1002
- DISCONNECT FUEL PUMP HARNESS
- Disconnect the fuel pump harness connector.
NOTE:
Do not separate the tube indicated in the illustration (See
FUEL SYSTEM ).
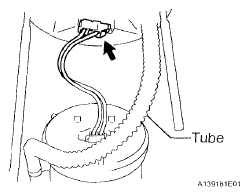 Courtesy of © TOYOTA, LICENSE AGREEMENT TMS1002
- REMOVE FUEL PUMP
- Using a screwdriver with its tip wrapped in protective tape, disengage the 5 claws on the filter and remove the fuel pump from the fuel filter.
NOTE:
- Do not damage the fuel filter.
- Do not remove the suction filter.
- Do not use either the fuel pump or the suction filter if the suction filter is removed from the fuel pump.
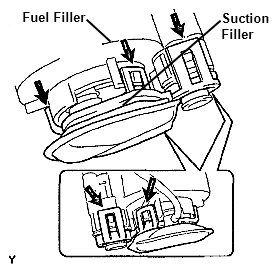 Courtesy of © TOYOTA, LICENSE AGREEMENT TMS1002
- Disconnect the fuel pump connector.
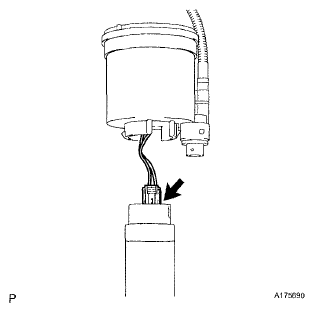 Courtesy of © TOYOTA, LICENSE AGREEMENT TMS1002
- Remove the O-ring from the fuel filter.
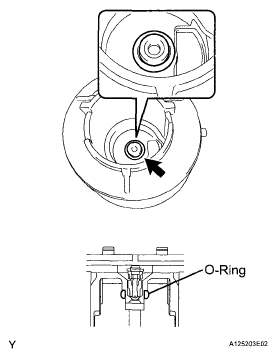 Courtesy of © TOYOTA, LICENSE AGREEMENT TMS1002
- REMOVE FUEL PRESSURE REGULATOR ASSEMBLY
- Remove the fuel pressure regulator from the fuel filter.
 Courtesy of © TOYOTA, LICENSE AGREEMENT TMS1002
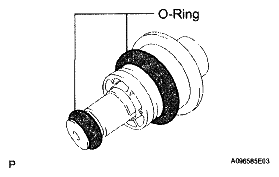
- Remove the 2 O-rings from the fuel pressure regulator.
 Courtesy of © TOYOTA, LICENSE AGREEMENT TMS1002
- REMOVE NO. 1 FUEL SUCTION SUPPORT
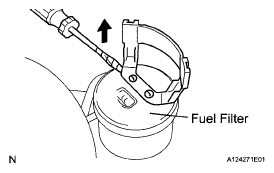
- Using a screwdriver with the tip taped, disengage the claw and remove the fuel No. 1 suction support.
 Courtesy of © TOYOTA, LICENSE AGREEMENT TMS1002