LEMON Manuals: Even more car manuals for everyone
Home >> Toyota >> 2007 >> Highlander Hybrid Limited, AWD >> Repair and Diagnosis >> Drivelines & Axles >> Driveshaft & Universal Joints >> Drive Shaft ( Hybrid) >> REAR DRIVE SHAFT (for 4WD) >> Disassembly

REAR DRIVE SHAFT (for 4WD): Disassembly

  1. REMOVE REAR DRIVE SHAFT INBOARD JOINT BOOT NO.2 CLAMP 
    1. Using a screwdriver, remove the inboard joint boot No.2 clamp as shown in the illustration.
      Fig 1: Removing Inboard Joint Boot No. 2 Clamp
      G05202384Courtesy of © TOYOTA, LICENSE AGREEMENT TMS1002
  2. REMOVE REAR DRIVE SHAFT INBOARD JOINT BOOT CLAMP 
    1. Using a screwdriver, remove the inboard joint boot clamp as shown in the illustration.
  3. SEPARATE REAR DRIVE SHAFT INBOARD JOINT BOOT 
    1. Separate the rear drive shaft inboard joint boot from the inboard joint assembly.
      Fig 2: Removing Inboard Joint Boot No. 2 Clamp
      G05202384Courtesy of © TOYOTA, LICENSE AGREEMENT TMS1002
  4. REMOVE REAR DRIVE SHAFT INBOARD JOINT ASSEMBLY 
    1. Remove the grease from the inboard joint.
    2. Put matchmarks on the inboard joint assembly and outboard joint shaft.
      NOTE: Do not use a punch for the marks.
    3. Remove the rear drive shaft inboard joint assembly.
      NOTE: Be careful not to drop the inboard joint assembly.
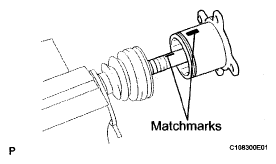
      Fig 3: Aligning Matchmarks
      G05202386Courtesy of © TOYOTA, LICENSE AGREEMENT TMS1002
    4. Put matchmarks on the outboard joint shaft, inner race and cage.
      NOTE: Do not use a punch for the marks.
    5. Remove the 6 balls.
      NOTE: Be careful not to drop the balls.
    6. Slide the cage to the outboard joint side.
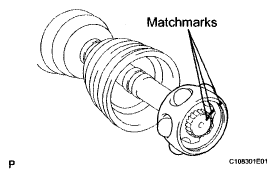
      Fig 4: Aligning Matchmarks
      G05202387Courtesy of © TOYOTA, LICENSE AGREEMENT TMS1002
    7. Using a snap ring expander, remove the rear drive shaft snap ring.
    8. Hold the outboard joint shaft assembly between aluminum plates in a vise.
      NOTE: Do not overtighten the vise.
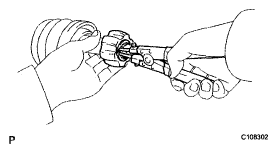
      Fig 5: Installing New Rear Drive Shaft Snap Ring
      G05202388Courtesy of © TOYOTA, LICENSE AGREEMENT TMS1002
    9. Using a brass bar and hammer, remove the inner race.
    10. Remove the cage.
    11. Remove the inboard joint boot No.2 clamp and inboard joint boot clamp.
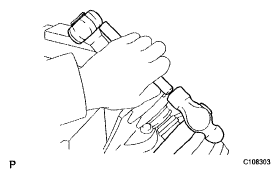
      Fig 6: Removing Inner Race
      G05202389Courtesy of © TOYOTA, LICENSE AGREEMENT TMS1002
  5. REMOVE REAR DRIVE SHAFT OUTBOARD JOINT BOOT NO.2 CLAMP 
    1. Using a screwdriver, remove the outboard joint boot No.2 clamp as shown in the illustration.
      Fig 7: Removing Outboard Joint Boot No. 2 Clamp
      G05202390Courtesy of © TOYOTA, LICENSE AGREEMENT TMS1002
  6. REMOVE REAR DRIVE SHAFT OUTBOARD JOINT BOOT CLAMP 
    1. Using a screwdriver, remove the outboard joint boot clamp as shown in the illustration.
  7. REMOVE REAR DRIVE SHAFT OUTBOARD JOINT BOOT 
    1. Remove the outboard joint boot from the rear drive shaft outboard joint shaft assembly.
    2. Remove the grease from the outboard joint.
      Fig 8: Identifying Outboard Joint Boot Clamp
      G05202391Courtesy of © TOYOTA, LICENSE AGREEMENT TMS1002