Removal and Replacement
REMOVALNOTE:
- If the wiring connector of the seat belt pretensioner is disconnected with the ignition switch at ON or ACC, diagnostic trouble codes will be recorded.
- Never use seat belt pretensioner from another vehicle. When replacing parts, replace them with new parts.
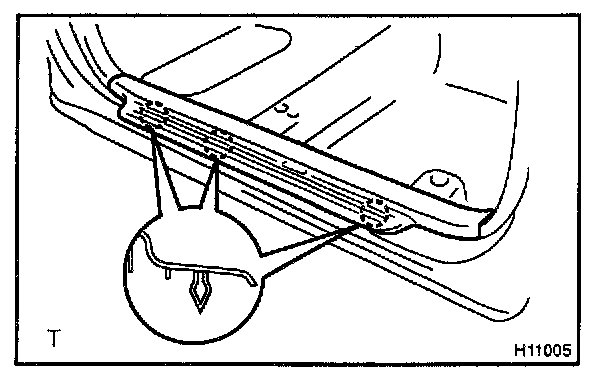
1. REMOVE FRONT DOOR SCUFF PLATE
Insert a screwdriver between the front door scuff plate and body to pry it out.
HINT: Tape the screwdriver tip before use.
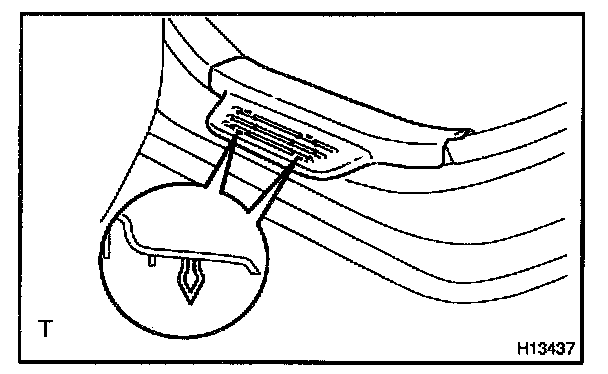
2. 4-Door vehicle:
REMOVE REAR DOOR SCUFF PLATE
Insert a screwdriver between the rear door scuff plate and body to pry it out.
HINT: Tape the screwdriver tip before use.
3. 2-Door vehicle:
REMOVE FRONT DOOR OPENING TRIM
Remove the front door opening trim except cowl side trim part.
4. 2-Door vehicle:
REMOVE REAR SEAT CUSHION
5. 2-Door vehicle:
REMOVE REAR SEATBACK
6. 2-Door vehicle:
REMOVE QUARTER TRIM
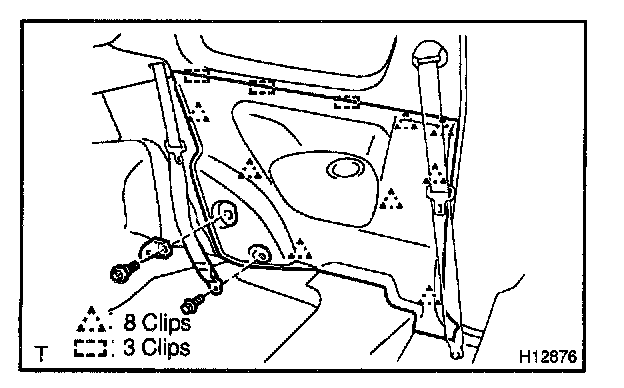
a. Remove the bolt and rear seat outer belt floor anchor.
b. w/ Split type rear seat:
Remove the bolt and seatback hinge.
c. Insert a screwdriver between the quarter trim and body to pry it.
HINT: Tape the screwdriver tip before use.
7. 4-Door vehicle:
REMOVE CENTER PILLAR LOWER GARNISH
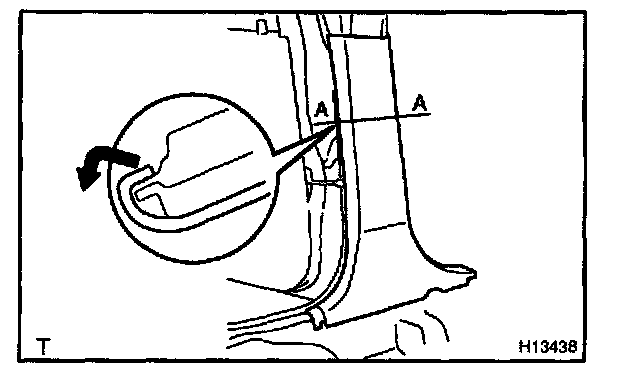
a. Using a screwdriver, remove the front seat outer belt floor anchor cover cap.
HINT: Tape the screwdriver tip before use.
b. Remove the bolt and front seat outer belt floor anchor.
c. Insert a screwdriver between the garnish and body to pry it out.
HINT: Tape the screwdriver tip before use.
8. 2-Door vehicle:
REMOVE ROOF SIDE INNER GARNISH
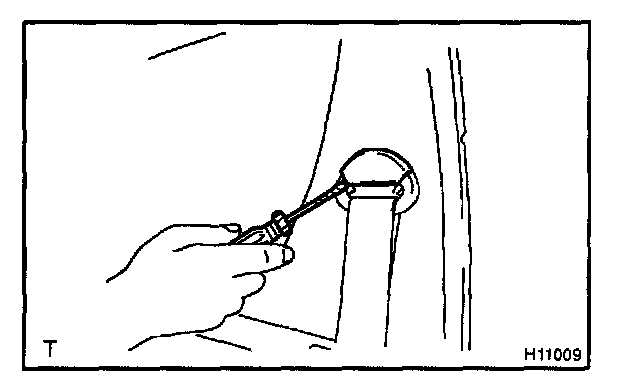
a. Using a screwdriver, open the seat belt shoulder anchor cover cap.
HINT: Tape the screwdriver tip before use.
b. Remove the bolt and front seat outer belt shoulder anchor.
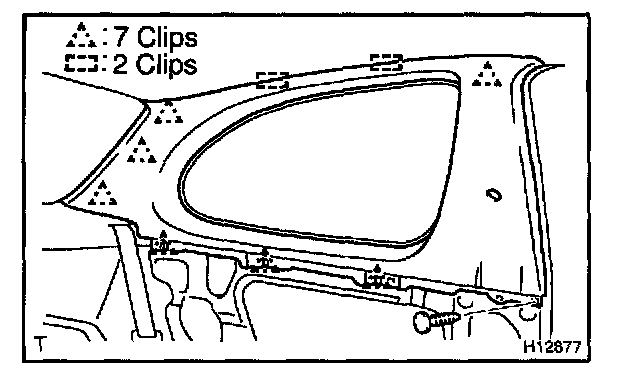
c. Remove the clip.
d. Insert a screwdriver between the roof side inner garnish and body to pry it out.
HINT: Tape the screwdriver tip before use.
9. 2-Door vehicle:
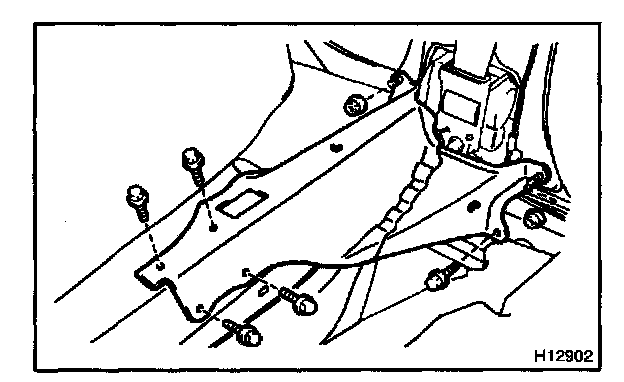
REMOVE CENTER PILLAR TO FLOOR REINFORCEMENT
Remove the 5 bolts, 2 nuts and center pillar to floor reinforcement.
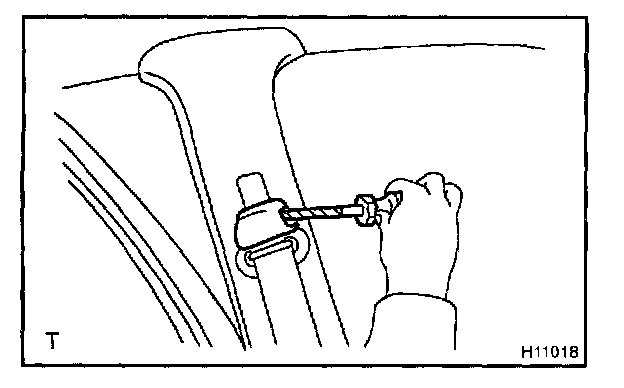
10. REMOVE FRONT SEAT OUTER BELT
CAUTION: Never disassemble the front seat outer belt.
NOTE: When removing the retractor of front seat outer belt, take care not to pull the seat belt pretensioner wire harness.
a. 4-Door vehicle:
Using a screwdriver, remove the seat belt shoulder anchor cover cap.
HINT: Tape the screwdriver tip before use.
b. 4-Door vehicle:
Remove the bolt and front seat outer belt shoulder anchor.
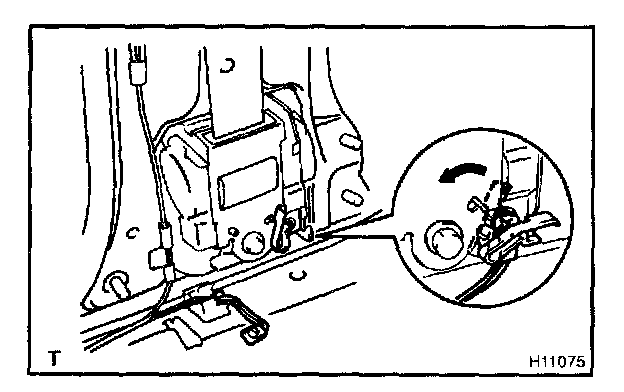
c. Disconnect the pretensioner connector as shown in the illustration.
CAUTION: When removing the seat belt pretensioner, work must be started 90 seconds after the ignition switch is turned to the "LOCK" position and the negative (-) terminal cable is disconnected from the battery.
d. Remove the 2 bolts and retractor of front seat outer belt.
REPLACEMENT
REPLACE REQUIREMENTS
In the following cases, replace the seat belt pretensioner.
- If the seat belt pretensioner has been activated.
- If the seat belt pretensioner has been found to be faulty in troubleshooting.
- If the front seat outer belt has been found to be faulty during checking item 1-(b) or 2-(b).
- If the front seat outer belt has been dropped.
CAUTION: For removal and installation of the seat belt pretensioner, see seat belt pretensioner. Be sure to follow the correct procedure.
INSTALLATION
NOTE:
- Never use seat belt pretensioner from another vehicle. When replacing parts, replace them with new parts.
- Make sure that the front seat outer belt is installed with the specified torque.
- If the front seat outer belt has been dropped, or there are cracks, dents or other defects in the case or connector, replace the front seat outer belt with a new one.
- When installing the front seat outer belt, take care that the wiring does not interfere with other parts and is not pinched between other parts.
1. INSTALL FRONT SEAT OUTER BELT
a. Install the retractor of front seat outer belt with the 2 bolts.
Torque:
Upper bolt: 4.7 N.m (48 kgf.cm, 42 in.lbf)
Lower bolt: 41 N.m (420 kgf.cm, 30 ft.lbf)
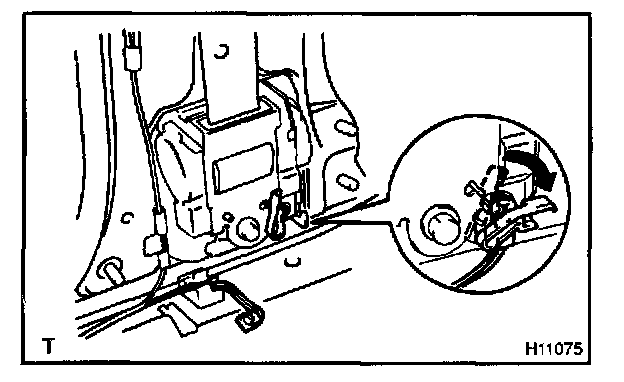
b. Connect the pretensioner connector as shown in the illustration.
c. 4-Door vehicle:
Install the front seat shoulder anchor with the bolt.
Torque; 41 N.m (420 kgf.cm, 30 ft.lbf)
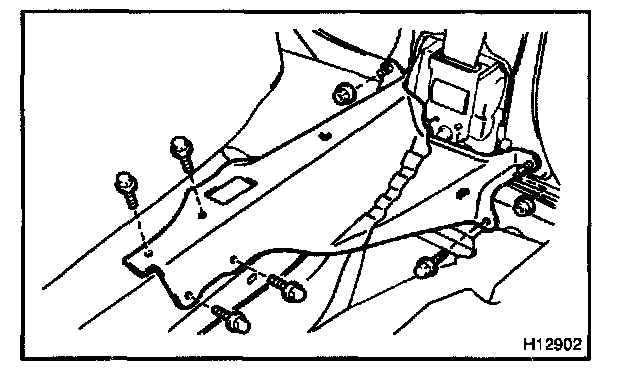
2. 2-Door vehicle:
INSTALL CENTER PILLAR TO FLOOR REINFORCEMENT
Install the center pillar to floor reinforcement with the 5 bolts and 2 nuts.
3. 2-Door vehicle:
INSTALL ROOF SIDE INNER GARNISH
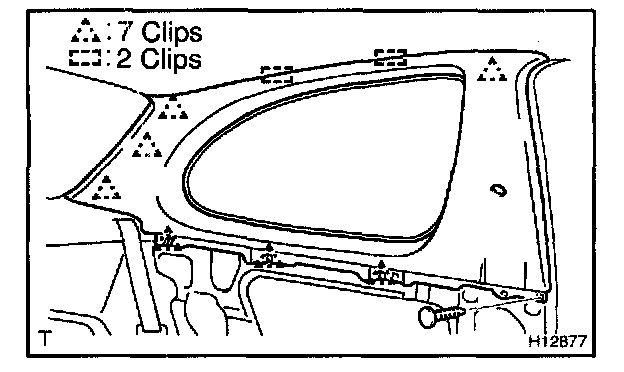
a. Install the roof side inner garnish to the body.
b. Install the clip.
c. Install the front seat outer belt shoulder anchor with the bolt.
Torque: 41 N.m (420 kgf.cm, 30 ft.lbf)
4. 4-Door vehicle:
INSTALL CENTER PILLAR LOWER GARNISH
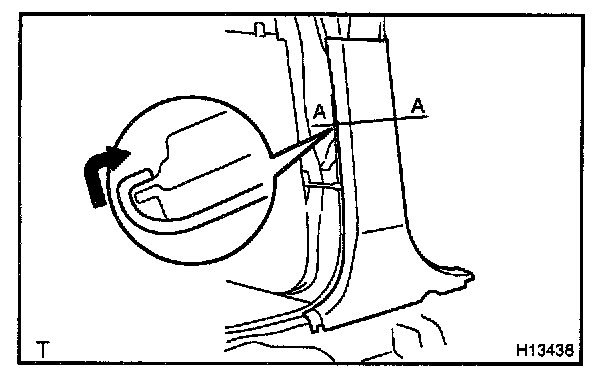
a. Install the center pillar lower garnish to the body.
b. Install the front seat outer belt floor anchor with the bolt.
Torque: 41 N.m (420 kgf.cm, 30 ft.lbf)
c. Install the front seat outer belt floor anchor cover cap.
5. 2-Door vehicle:
INSTALL QUARTER TRIM
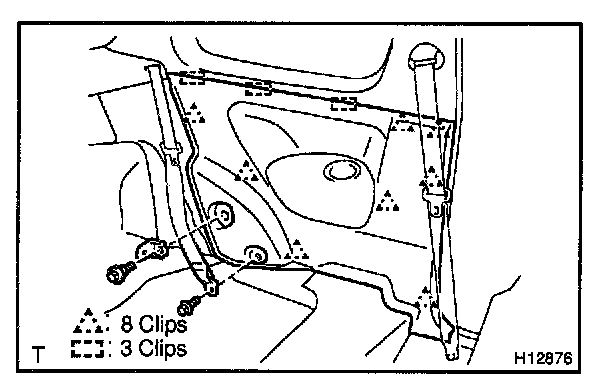
a. Install the quarter trim to the body.
b. w/ Split type rear seat:
Install the rear seatback hinge with the bolt.
Torque: 41 N.m (420 kgf.cm, 30 ft.lbf)
c. Install the rear seat outer belt floor anchor with the bolt.
Torque: 41 N.m (420 kgf.cm, 30 ft.lbf)
6. 2-Door vehicle:
INSTALL REAR SEATBACK
7. 2-Door vehicle:
INSTALL REAR SEAT CUSHION
8. 2-Door vehicle:
INSTALL FRONT DOOR OPENING TRIM
9. 4-Door vehicle:
INSTALL REAR DOOR SCUFF PLATE
10. INSTALL FRONT DOOR SCUFF PLATE