Removal & Installation (Toyota Sequoia, Sienna & Tundra)
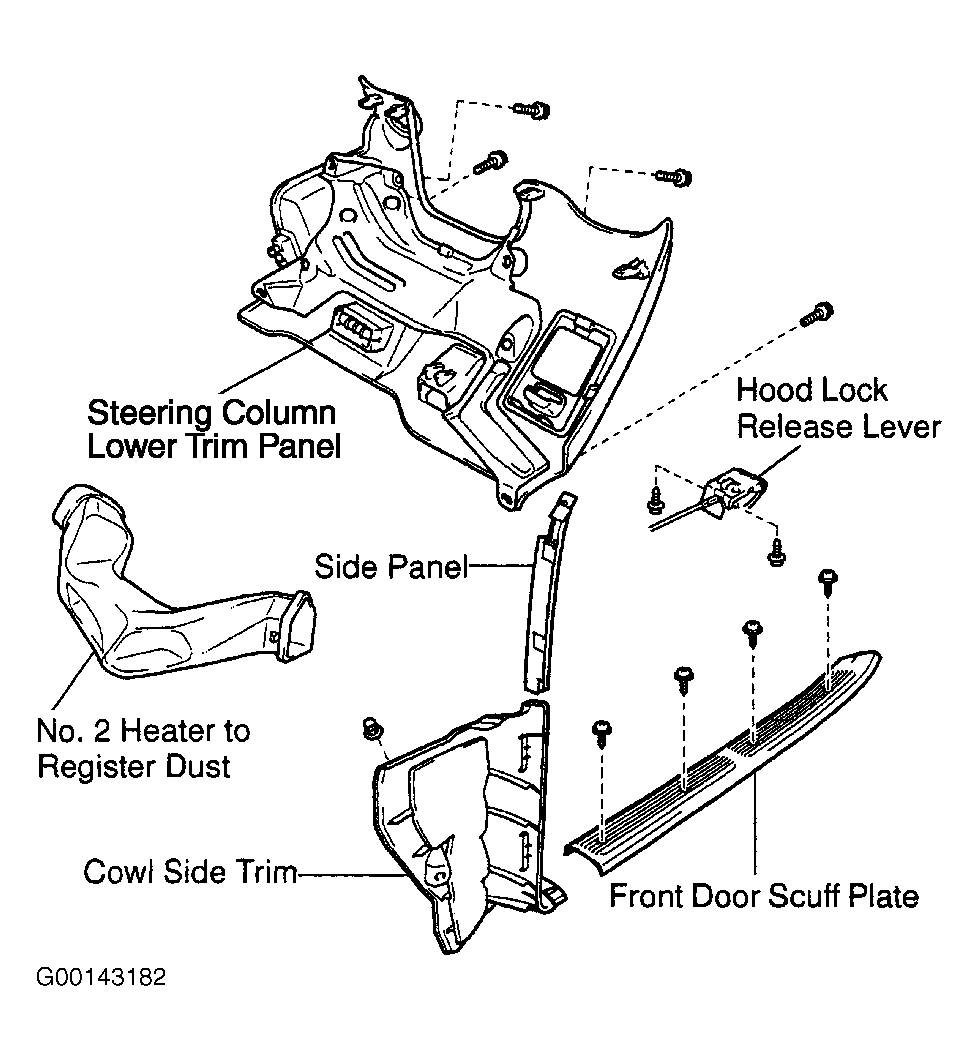
- Remove left front door scuff plate and cowl side trim. Remove lower steering column trim panel. See Fig 1. Remove steering column assembly. See REMOVAL & INSTALLATION in appropriate STEERING COLUMNS article in STEERING.
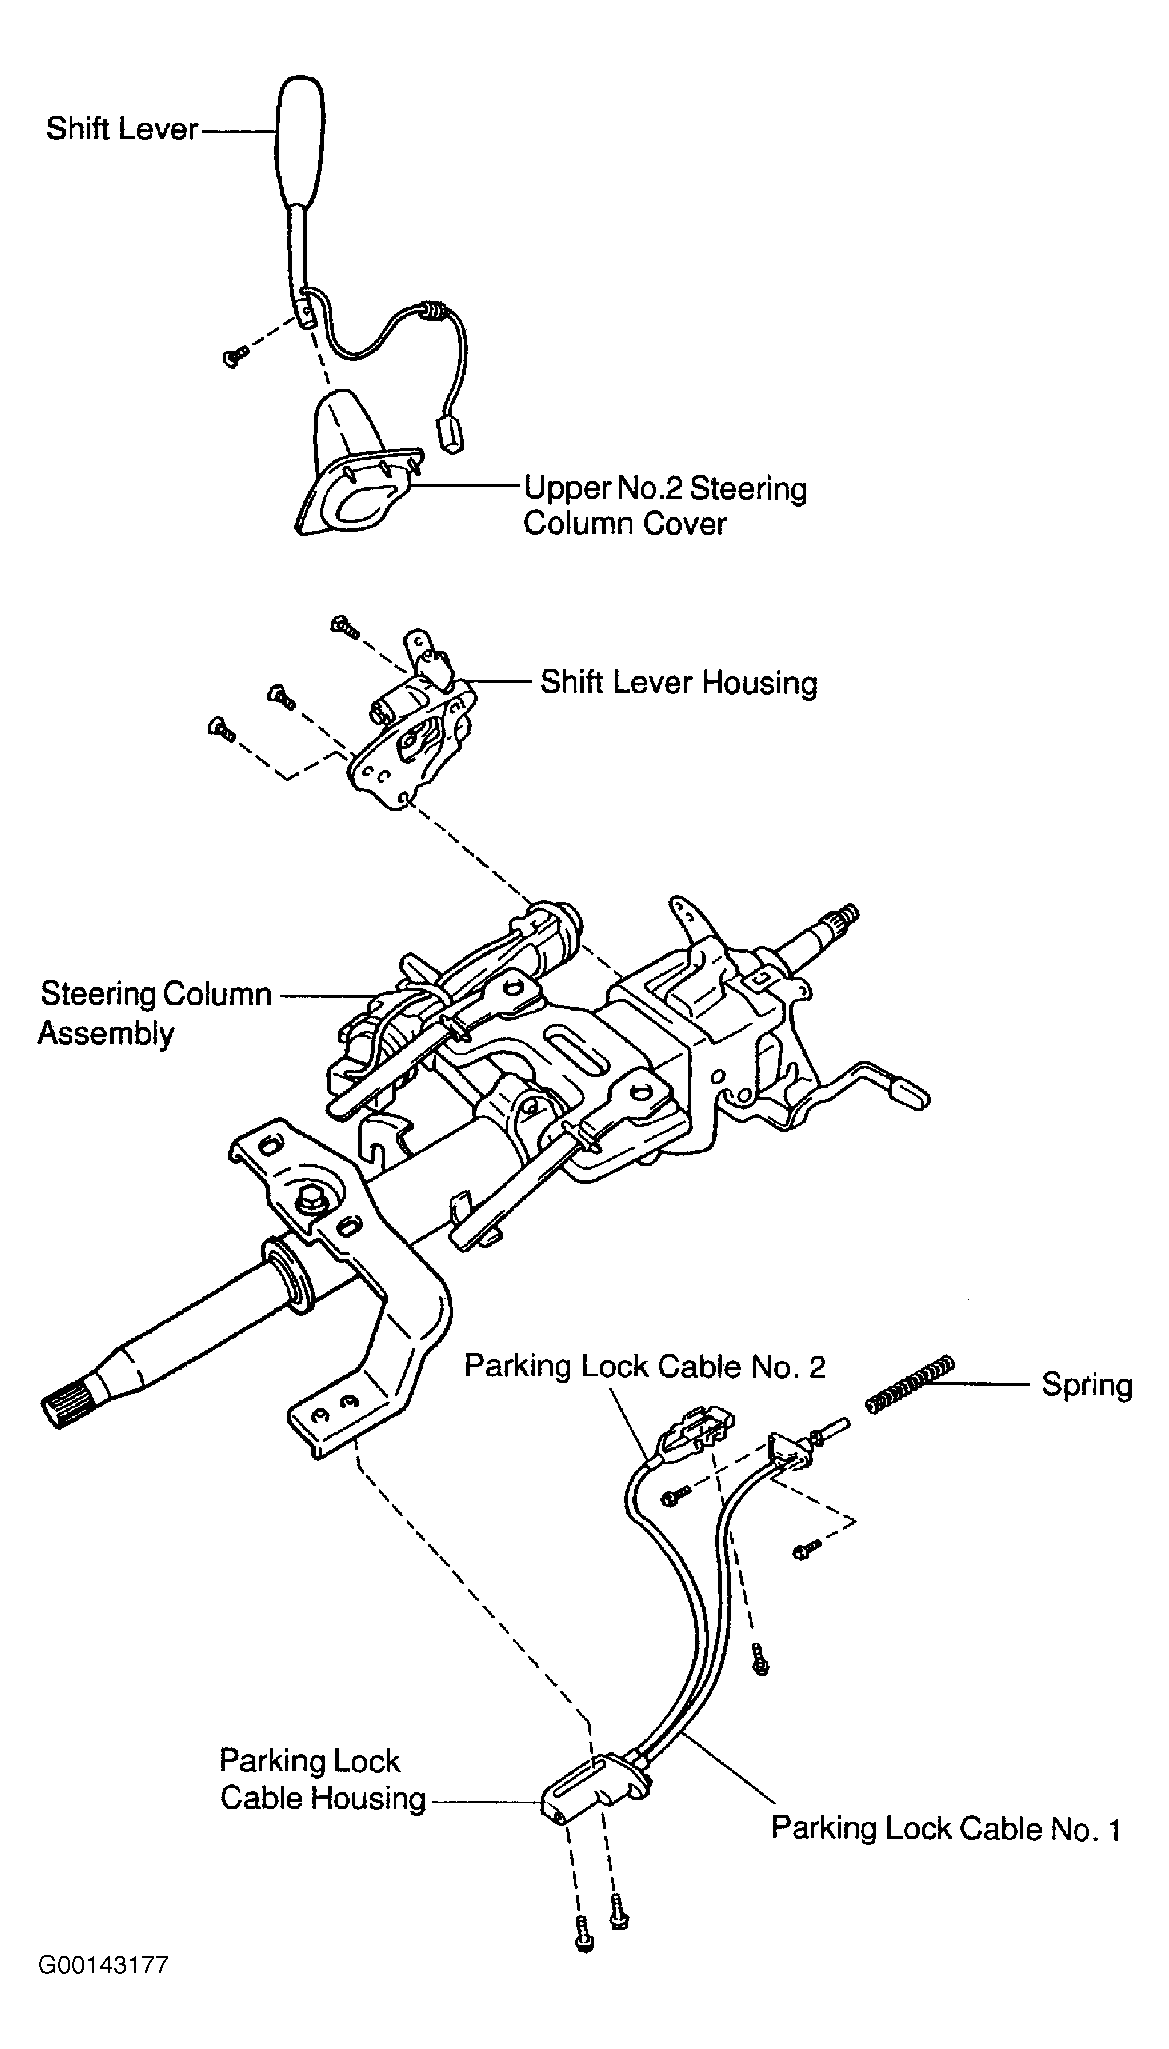
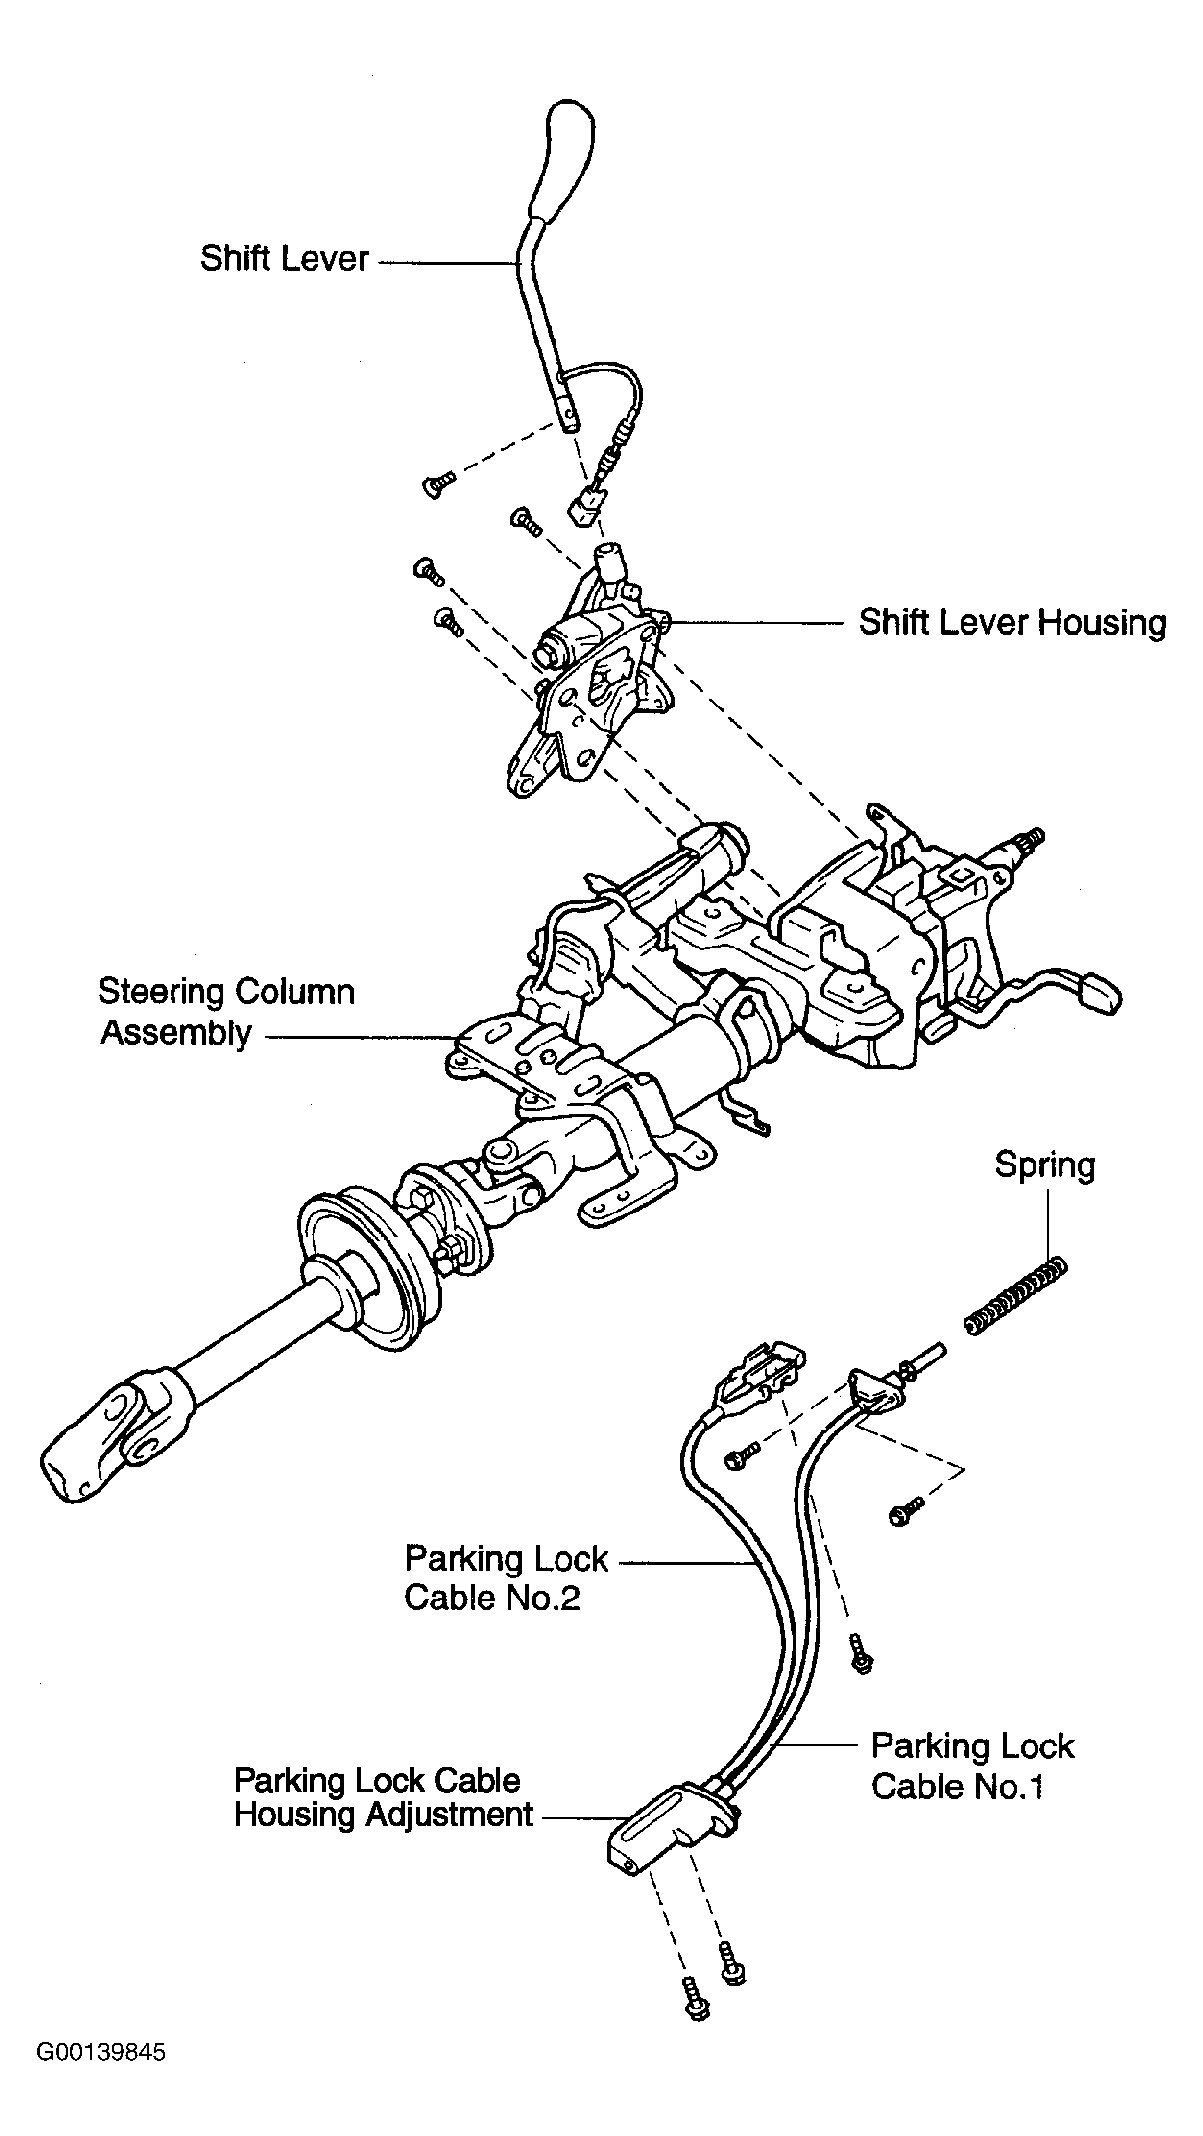
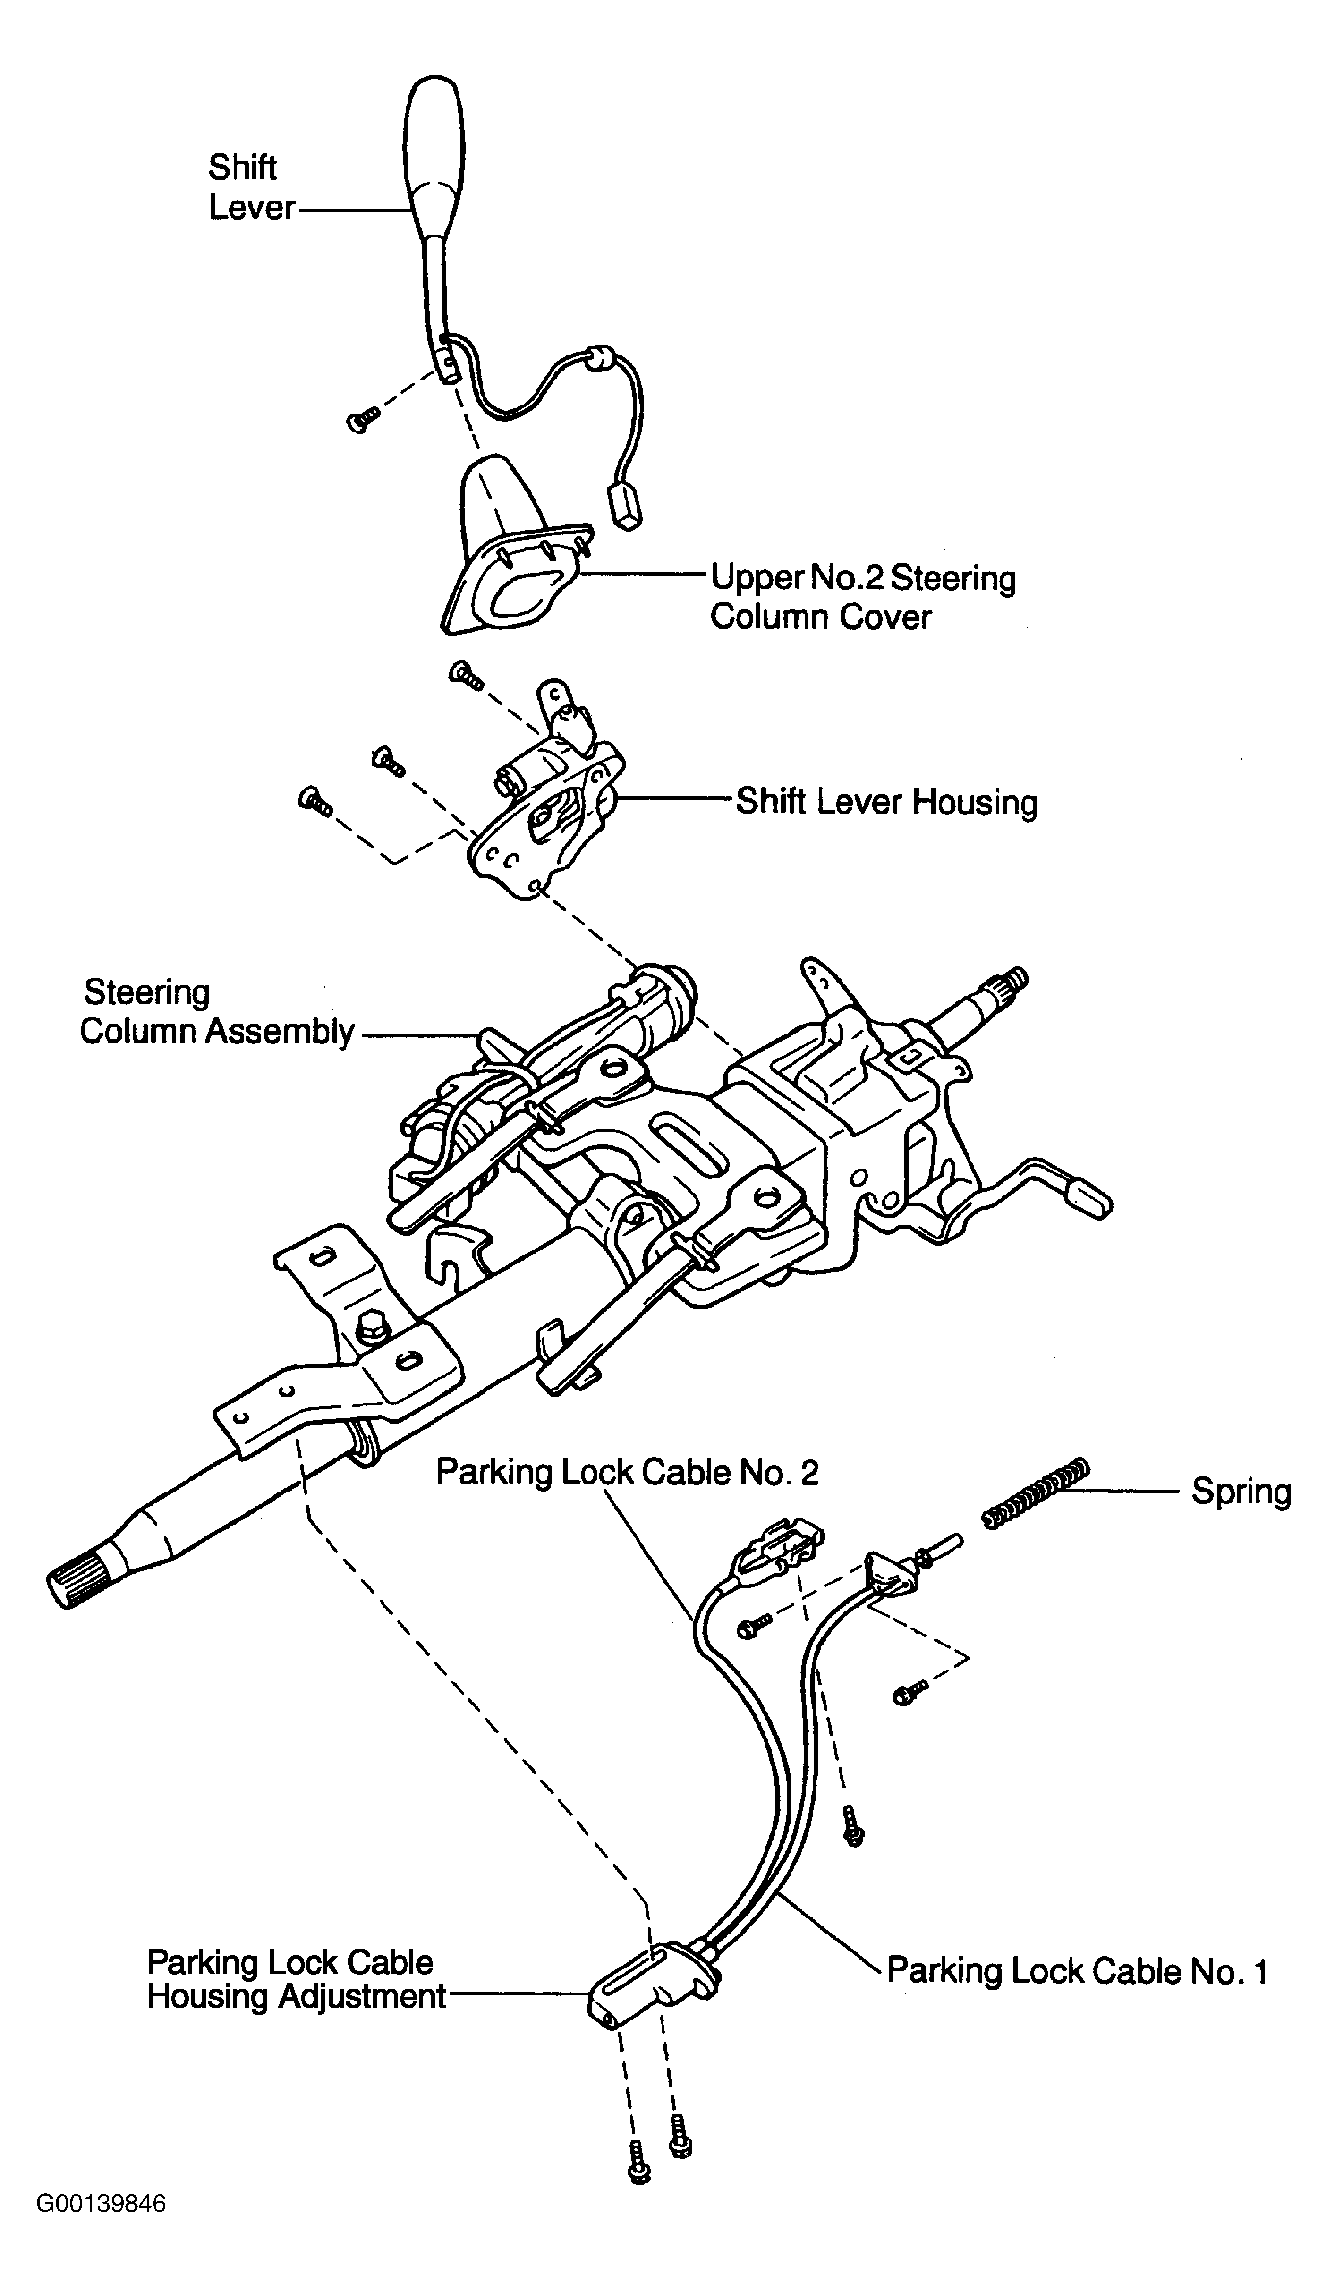
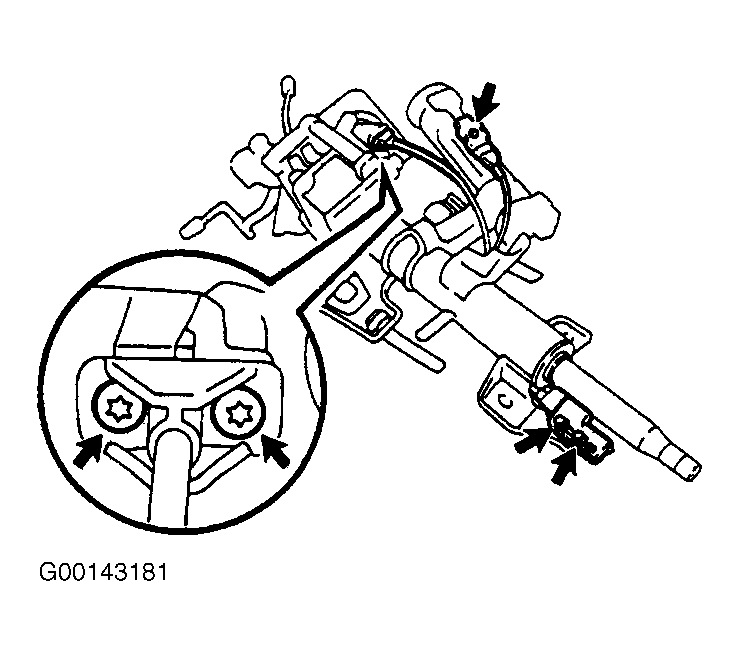
- Remove the screw and parking lock cable No. 2. See Fig 2-Fig 4
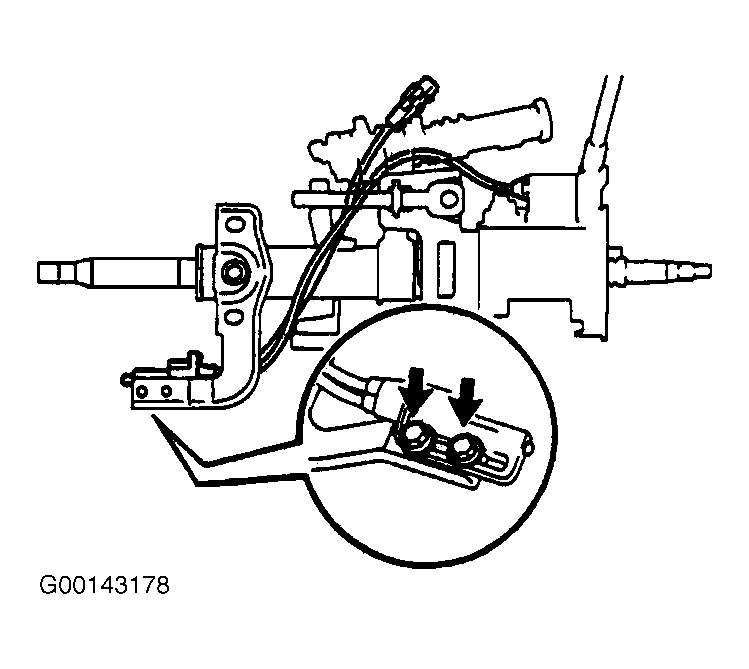
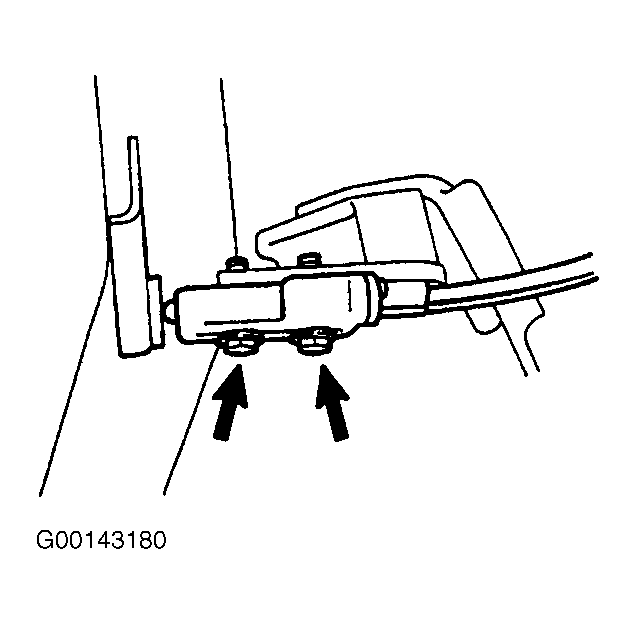
. Using a Torx® socket wrench, remove the 2 screws and parking lock cable No. 1. Remove the spring. Remove the 2 bolts and parking lock cable housing. See Fig 5.
- Disconnect the connector. Using Torx® socket wrench, remove the screw and shift lever. Remove the upper No. 2 steering column cover. Using a Torx® socket wrench, remove the 3 screws and shift lever housing.
- To assemble, install the shift lever housing with 3 NEW screws. Tighten to specification. See TORQUE SPECIFICATIONS . Install the upper No. 2 steering column cover. Using a Torx® socket wrench, install the shift lever with a NEW screw. Connect the connector. Apply grease on the lock pin and internal surface of shift lever housing.
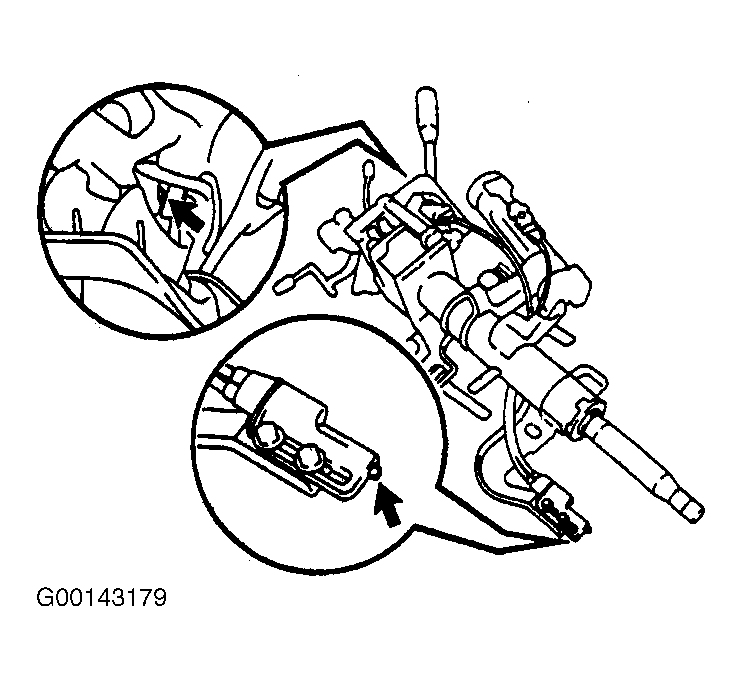
- Install the spring and parking lock cable No. 1 into the shift lever housing. Using a Torx® socket wrench, install 2 NEW screws. Route the cable, No. 1 and 2, as shown. See Fig 6. Install the cable housing to steering column assembly with 2 new bolts. After installation, confirm then following items:
- When the shift lever is in Park position and the pedal button is pushed by 0.28 in. (7 mm.), shift lever should be locked by lock pin. See Fig 7.
- When the pedal button is released, the shift lever should be able to be shifted from Park position to other positions.
- When the shift lever is in Neutral or Drive positions and the pedal button is pushed by 0.28 in. (7 mm.), the shift lever should be able to be shifted.
- To assemble, install the parking lock cable No. 2 to column upper bracket with the clip. Install the cable end to the sliding block of the column upper bracket with the screw. See Fig 8. Tighten to specification. See TORQUE SPECIFICATIONS . After installation, check the following items:
- When the pedal button is pushed, shift lever should be locked.
- When the pedal button is released, shift lever should be unlocked.
- Install steering column assembly. Install lower steering column trim panel, cowl side trim and left front door scuff plate.
 Courtesy of © TOYOTA, LICENSE AGREEMENT TMS1002
 Courtesy of © TOYOTA, LICENSE AGREEMENT TMS1002
 Courtesy of © TOYOTA, LICENSE AGREEMENT TMS1002
 Courtesy of © TOYOTA, LICENSE AGREEMENT TMS1002
 Courtesy of © TOYOTA, LICENSE AGREEMENT TMS1002
 Courtesy of © TOYOTA, LICENSE AGREEMENT TMS1002
 Courtesy of © TOYOTA, LICENSE AGREEMENT TMS1002
 Courtesy of © TOYOTA, LICENSE AGREEMENT TMS1002