Tacoma & 4Runner
- Disconnect negative battery cable. Remove actuator plastic cover, if equipped. Disconnect electrical connector. Remove bolts and actuator.
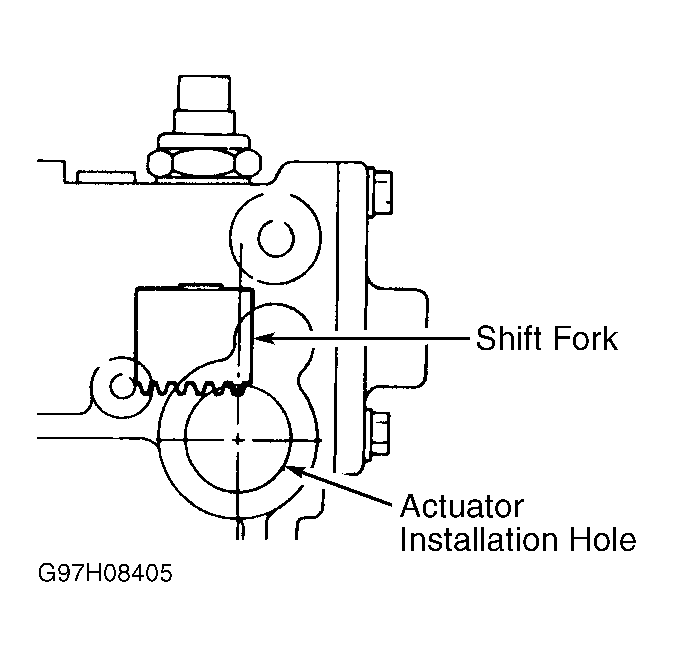
- To install actuator, ensure that outermost rack tooth of shift fork is above center line of actuator installation hole. See Fig 1.
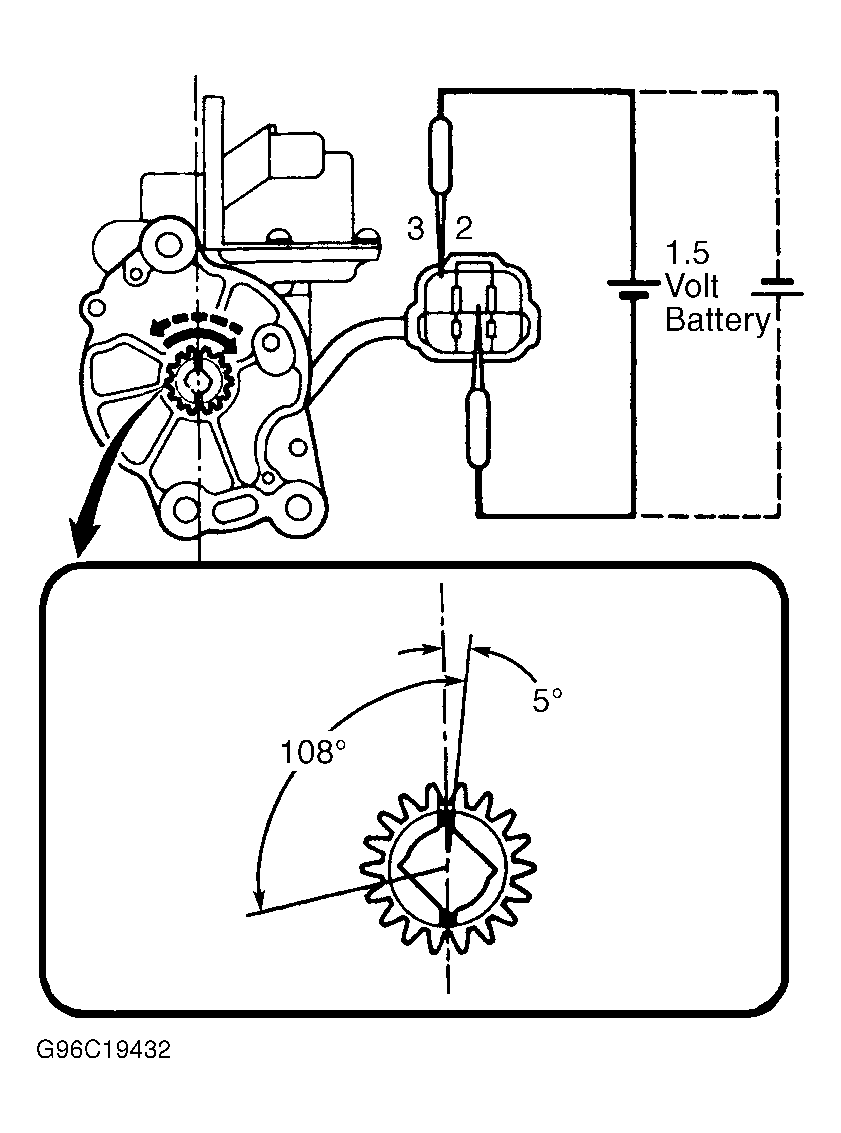
- Ensure matchmarks of actuator pinion are between 0 and 5 degrees clockwise above center line of actuator. See Fig 2. If needed, use 1.5 volt dry cell battery to rotate pinion to correct position.
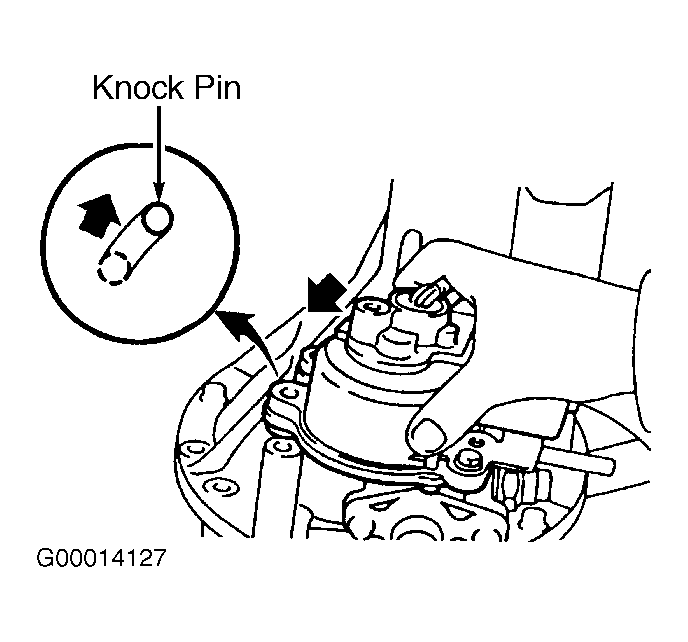
- Coat new "O" ring with gear oil. Install "O" ring to actuator. Apply grease to pinion. Install actuator with elongated slot on actuator aligned with knock pin on side of carrier. Ensure pinion meshes with rack tooth of shift fork. With actuator installed, rotate actuator counterclockwise until knock pin contacts right hand side. See Fig 3. Install bolts and tighten to 20 ft. lbs. (26 N.m).
 Courtesy of © TOYOTA, LICENSE AGREEMENT TMS1002
 Courtesy of © TOYOTA, LICENSE AGREEMENT TMS1002
 Courtesy of © TOYOTA, LICENSE AGREEMENT TMS1002