Removal (Celica 1.8L 7A-FE)
- Disconnect negative battery cable. Remove transaxle oil dipstick and battery. Disconnect throttle cable valve from throttle body. Remover air cleaner assembly. Remove transaxle-to-mount nut from top of transaxle at driver's side end of transaxle.
- Remove throttle valve cable mounting bracket and wiring harness clamp bolts from top of transaxle. Remove upper mounting bolt from starter. Remove the 2 upper transaxle-to-cylinder block bolts located at top of transaxle.
- Remove transaxle oil dipstick tube and "O" ring from transaxle. Raise and support vehicle. Remove lower engine covers. Disconnect necessary electrical connectors and ground cables for transaxle removal. Disconnect oil cooler lines for transaxle.
- Support engine with hoist. Steering gear assembly must be supported in place during transaxle removal. Secure steering gear assembly to the engine hoist using an attaching strap placed at each end of steering gear assembly.
- Remove front wheels. Drain transaxle fluid. Remove axle shafts from transaxle. See FWD AXLE SHAFTS article in DRIVE AXLES.
- Support transaxle with transmission jack. Remove rear (firewall side) engine mount through-bolt. Remove front exhaust pipe-to-front exhaust pipe support bracket bolts. Front exhaust pipe is located between exhaust manifold and rear exhaust pipe. Remove front exhaust pipe support bracket located between front exhaust pipe and front suspension crossmember.
- Remove steering gear assembly-to-suspension crossmember bolts. Remove front exhaust pipe. Remove shift cable brackets and the A/C pipe from suspension crossmember. Suspension crossmember is located below the engine and fits between both lower control arms. See Fig 1.
- Remove engine mount crossmember located below the oil pan. Engine mount crossmember holds the front and rear engine mounts, and is bolted to the body and suspension crossmember.
- Support suspension crossmember with floor jack. Remove suspension crossmember bolts. See Fig 1. Remove suspension crossmember. Remove starter. Disconnect shift cable and electrical connectors at transaxle.
- Remove torque converter cover from front of transaxle. Remove torque converter bolts. Remove transaxle-to-mount bolts from top of transaxle at driver's side end of transaxle. Remove the 5 lower transaxle-to-cylinder block bolts. See Fig 2. Lower transaxle from vehicle.
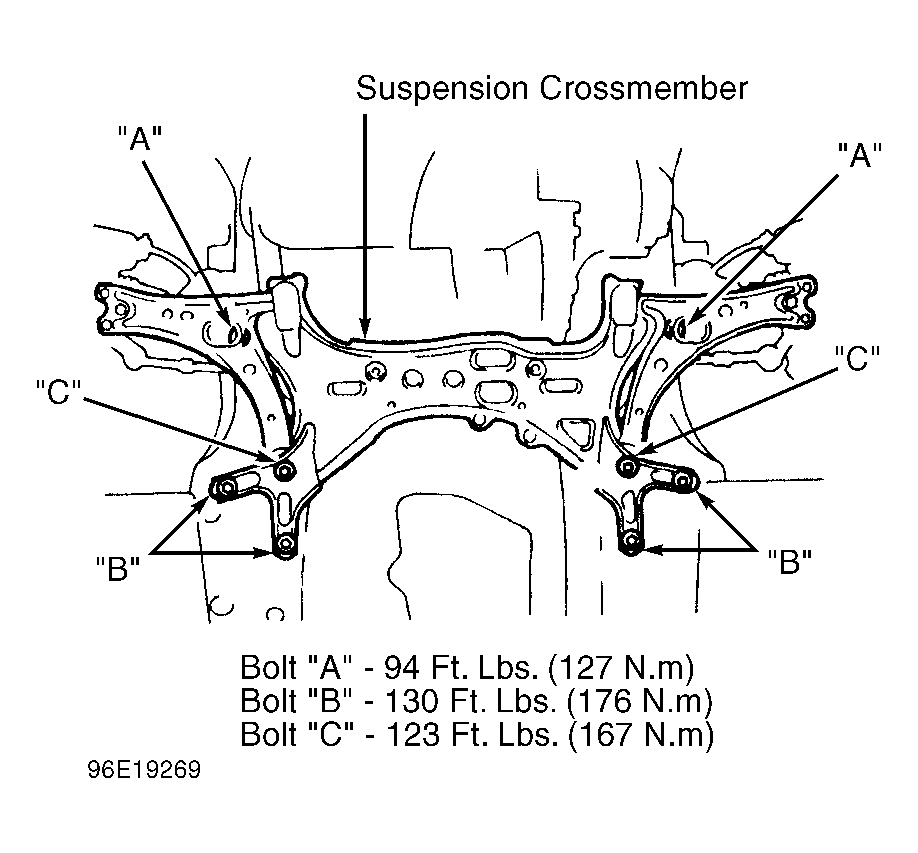 Courtesy of © TOYOTA, LICENSE AGREEMENT TMS1002
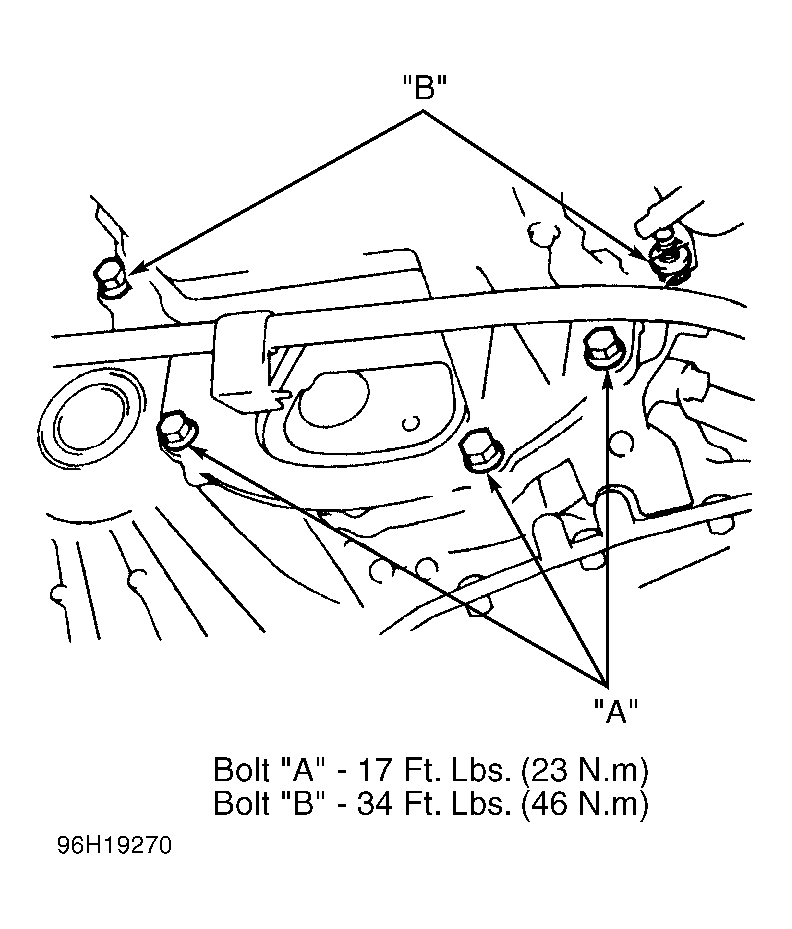 Courtesy of © TOYOTA, LICENSE AGREEMENT TMS1002