Reassembly (Valve Body Assembly A-540E)
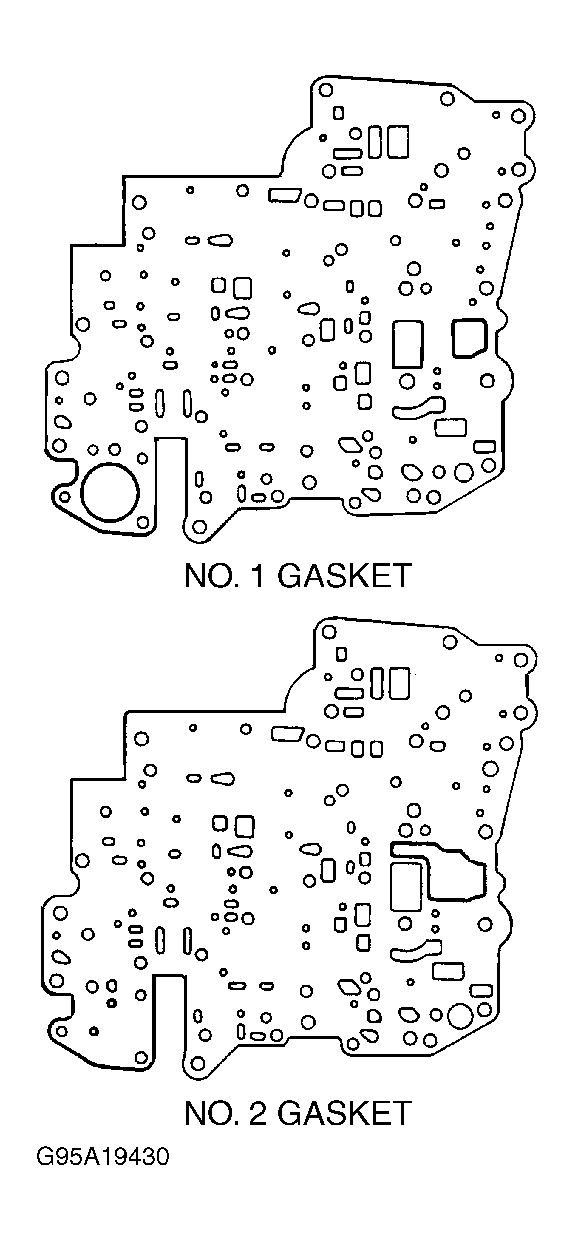
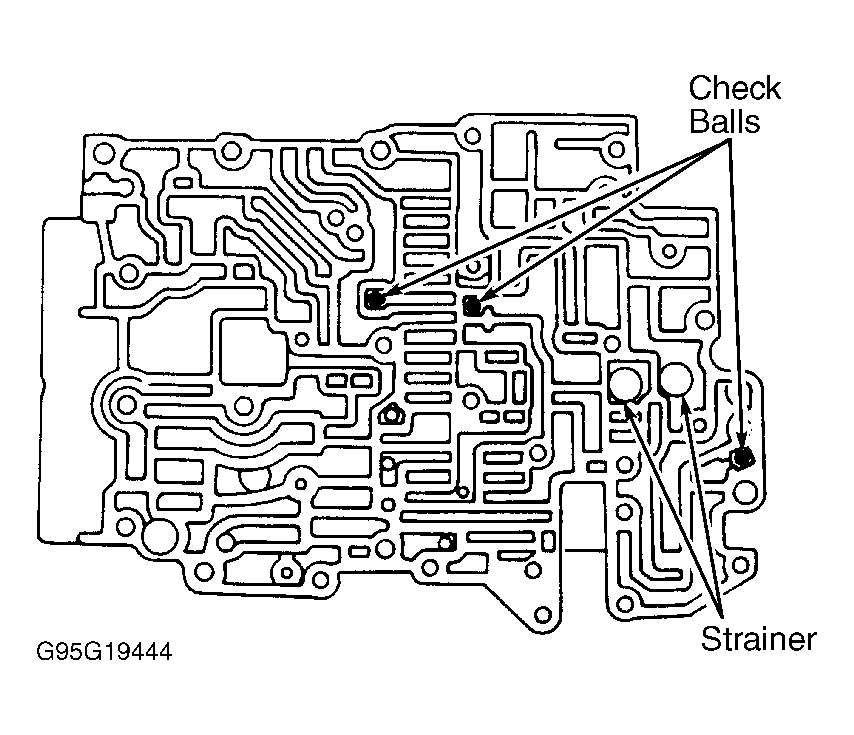
- Position NEW No. 1 gasket, No. 1 separator plate and NEW No. 2 gasket on upper valve body. For gasket identification, see Fig 1. Ensure check balls are correctly installed in lower valve body (bottom). See Fig 3. Place upper valve body with No. 1 plate and gaskets on lower valve body.
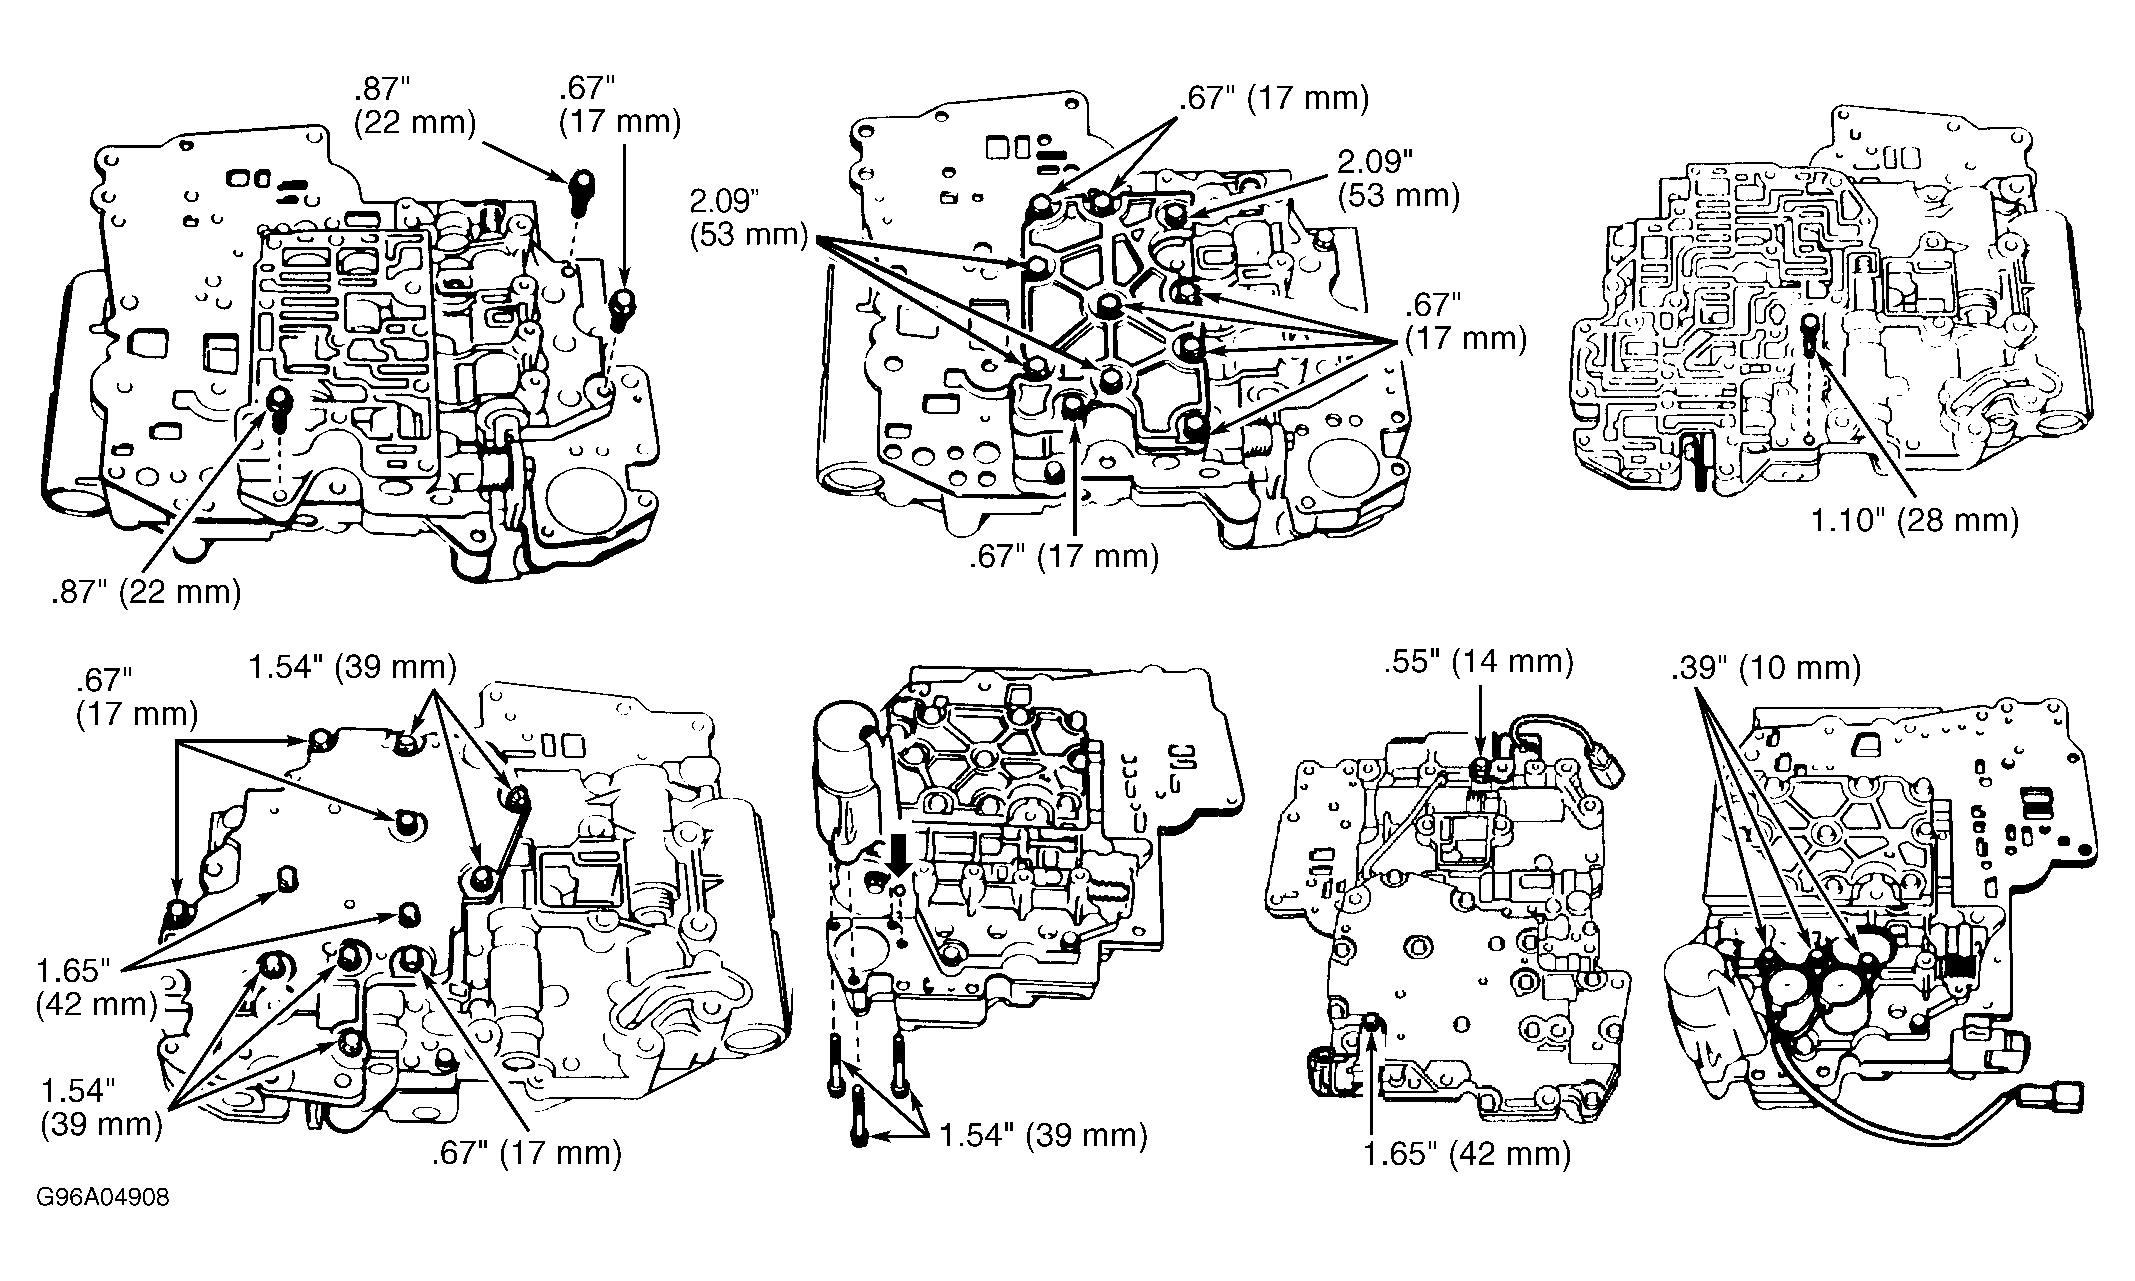
- Hold upper valve body, No. 1 plate and gaskets so they do not separate. Align each bolt hole in valve bodies with gaskets and plate. Note length and location of bolts. Install and finger tighten 3 bolts in upper valve body to secure lower valve body. See Fig 4.
- Install lock-up relay valve sleeve stopper. Install upper valve body cover gaskets, plate and throttle modulator oil strainer. Install upper valve body cover, and finger tighten 11 bolts in valve body cover. See Fig 4. Install and finger tighten bolts in lower valve body.
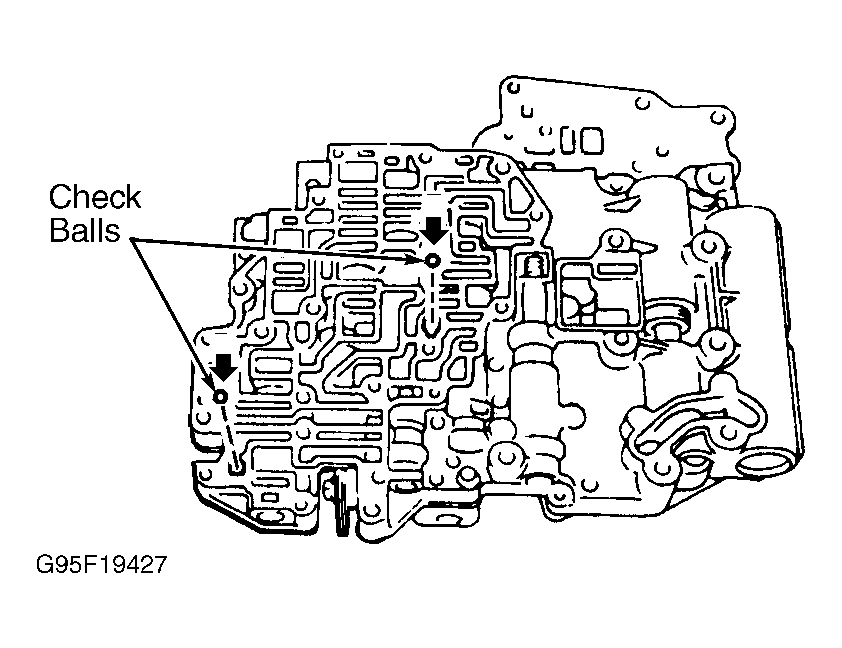
- Install check balls into lower valve body (top). See Fig 2. Install NEW lower valve body cover gaskets and No. 2 plate. Install lower valve body cover and finger tighten 12 bolts in valve body cover. Tighten bolts to specification. See TORQUE SPECIFICATIONS .
- Coat NEW "O" rings with ATF. Install "O" rings on piston. Insert spring and piston into cylinder. Place check ball on No. 1 gasket. Install accumulator. Install and tighten 3 bolts. Install lock-up solenoid. Install No. 1 and No. 2 shift solenoids.
 Courtesy of © TOYOTA, LICENSE AGREEMENT TMS1002
 Courtesy of © TOYOTA, LICENSE AGREEMENT TMS1002
 Courtesy of © TOYOTA, LICENSE AGREEMENT TMS1002
 Courtesy of © TOYOTA, LICENSE AGREEMENT TMS1002