Differential Assembly (A-540H) Disassembly & Reassembly: Disassembly
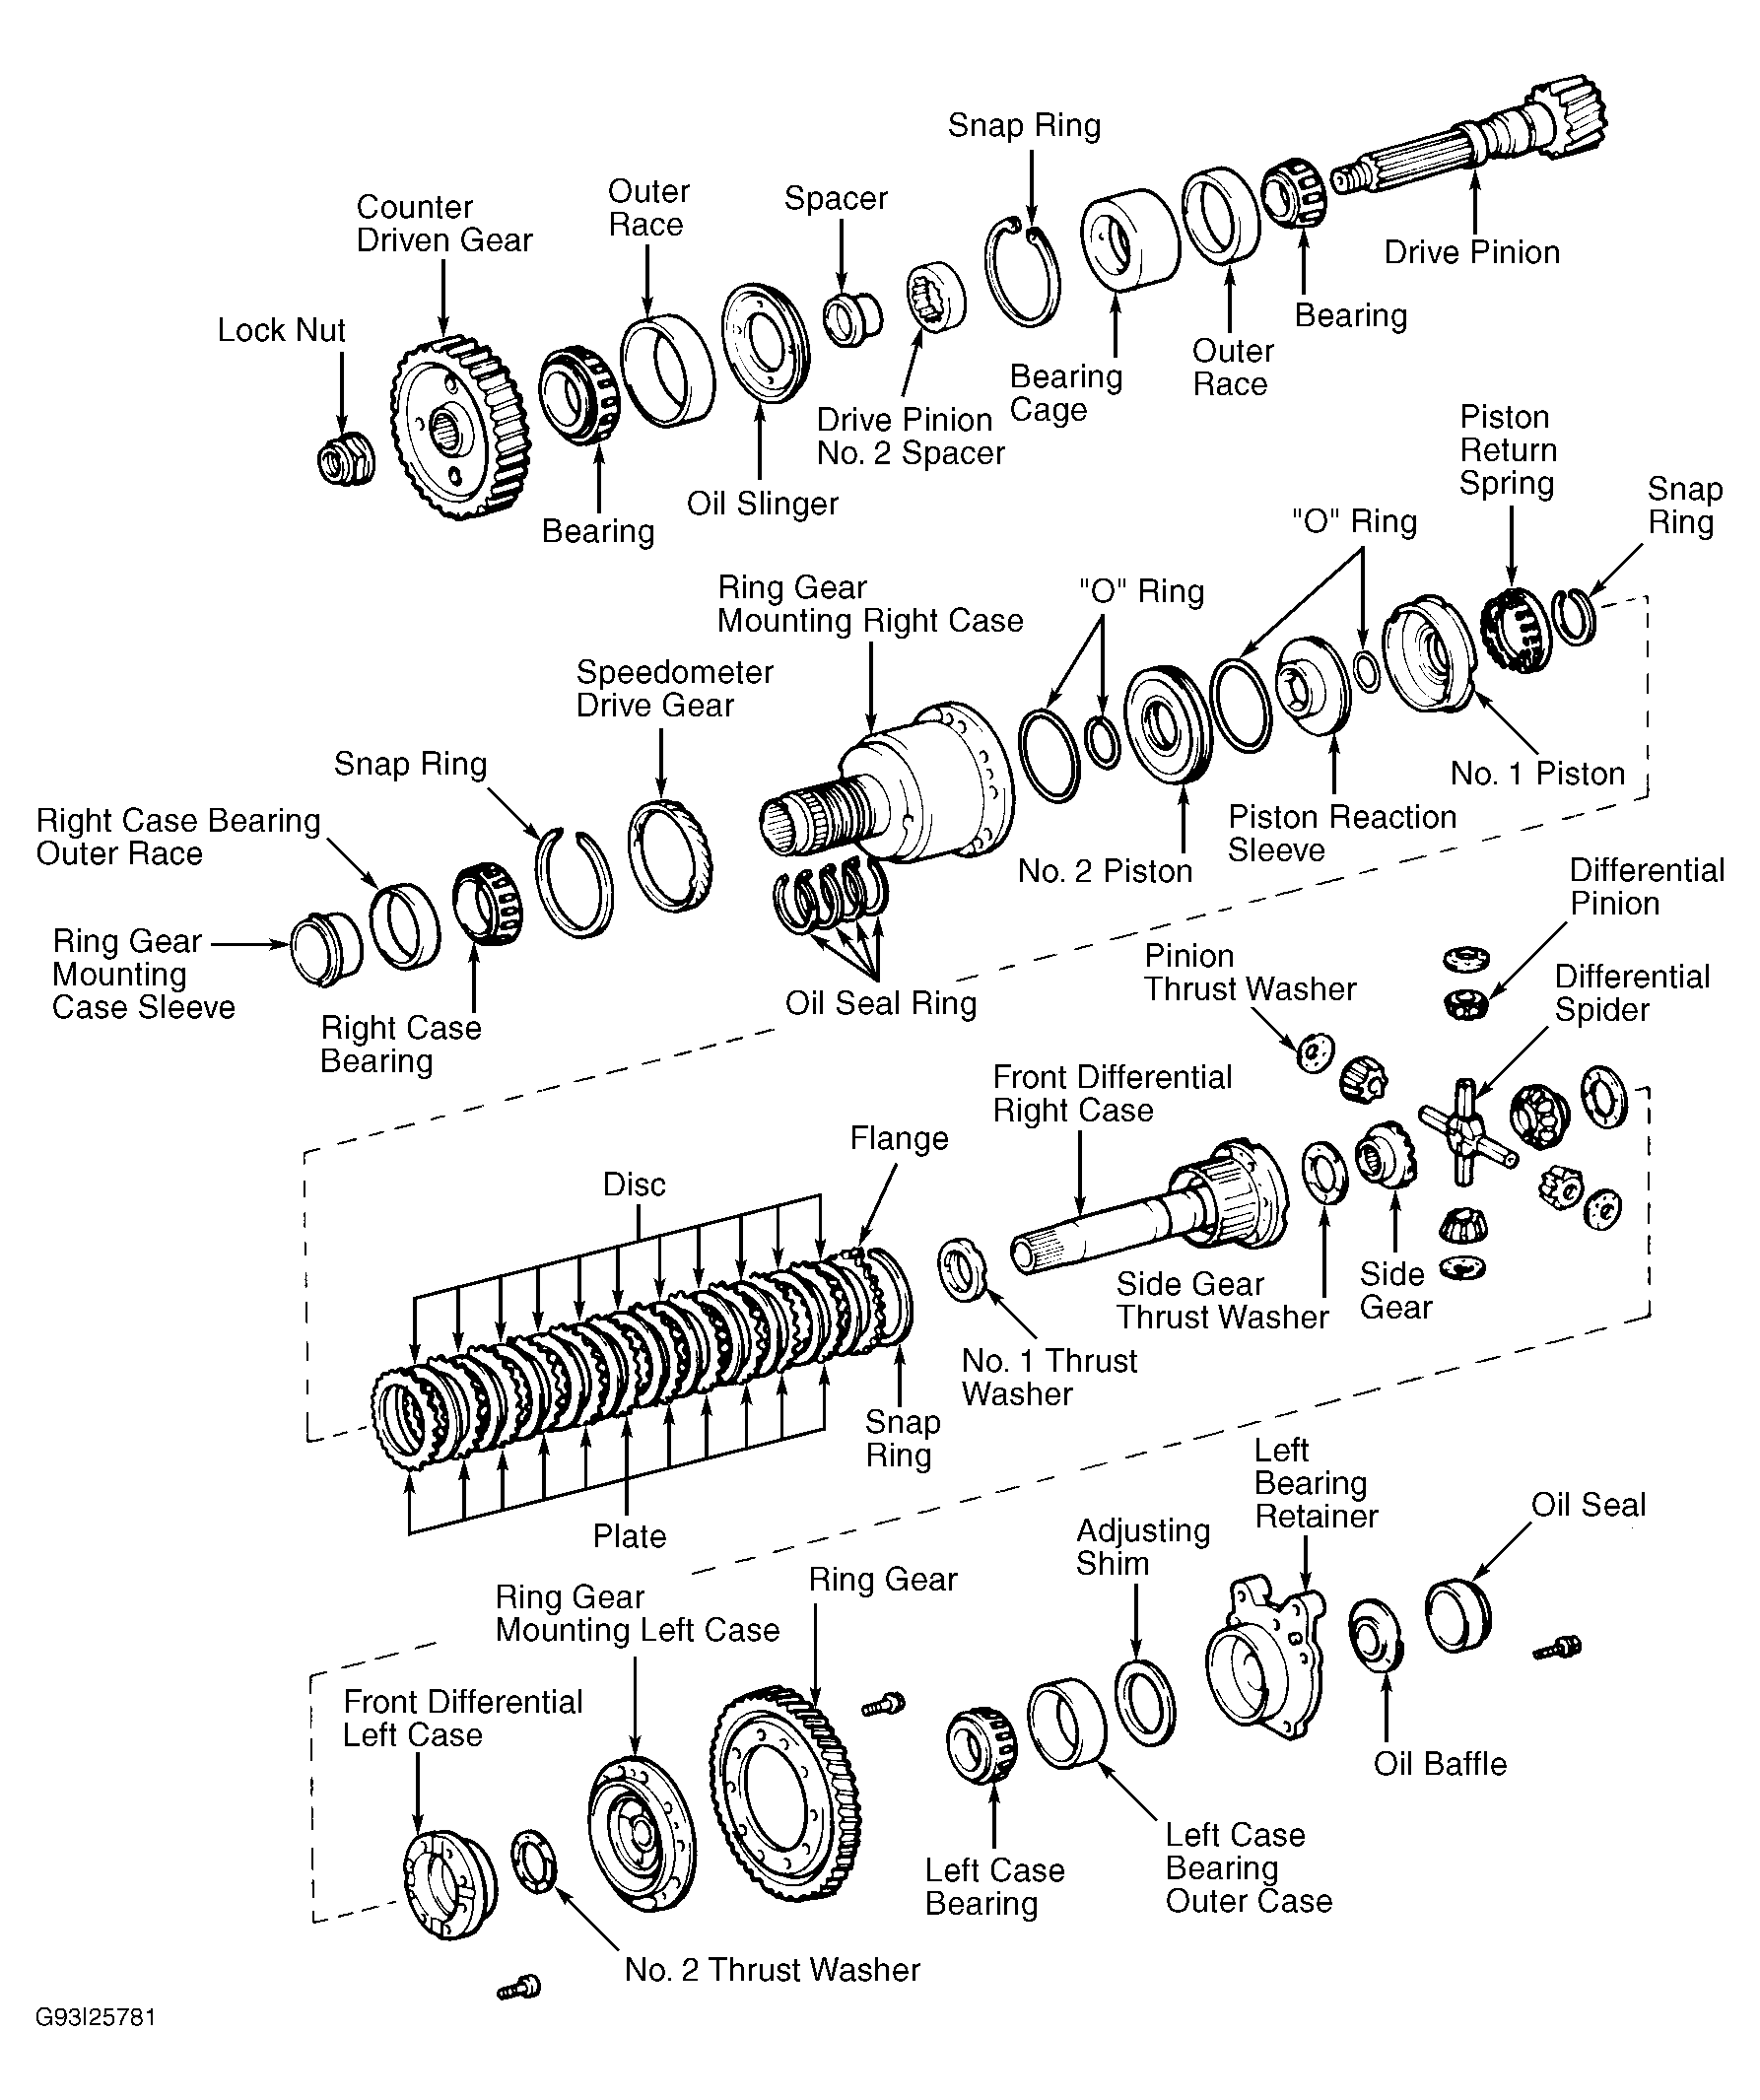
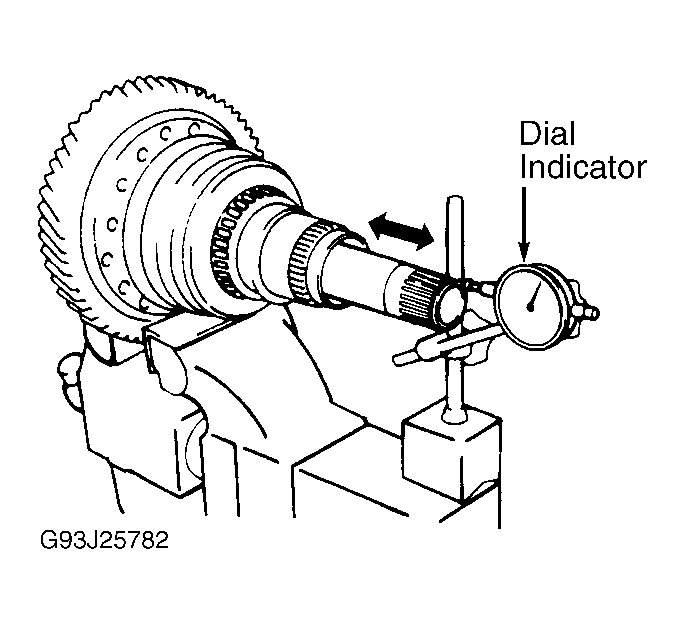
- Remove right case bearing outer race. See Fig 1. Use a dial indicator to measure differential end play. End play should be .0071-.0323" (.180-.820 mm). See Fig 2. Remove ring gear mounting case sleeve. Remove 4 oil seal rings from ring gear mounting right case. Remove snap ring and speedometer drive gear.
- Place match marks on ring gear mounting left case and right case. Remove bolts and left case. Place match marks on ring gear and left case. Place left case on A/T Tool Set (09350-32014). Using a plastic hammer, remove ring gear from left case.
- Remove No. 2 thrust washer. Remove front differential left case from ring gear mounting right case. Using a Torx wrench, remove screws from left case. Separate left and right cases. DO NOT scratch contact surface of needle bearing.
- Remove the following parts from front differential cases: 2 differential side gears and 2 side thrust washers, differential spider, 4 differential pinions and 4 pinion washers.
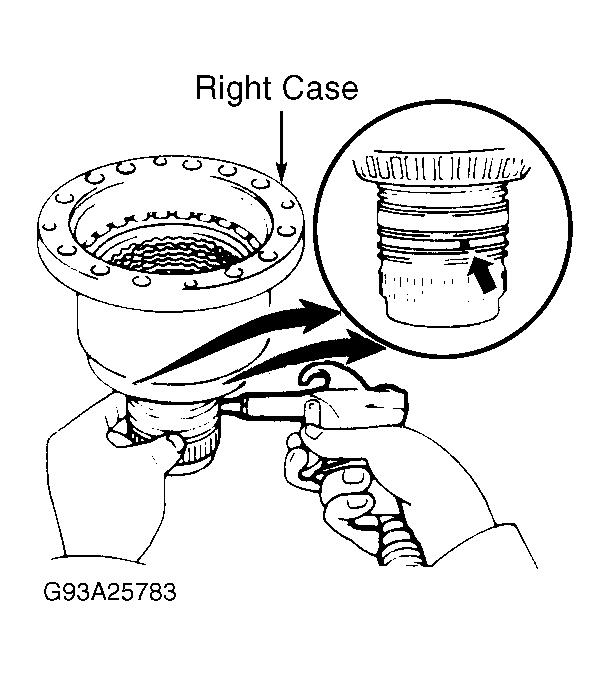
- Remove No. 1 thrust washer. Check operation of clutch pistons. Plug one hole in right case with your hand. Apply compressed air into other hole and confirm pistons move. See Fig 3.
 Courtesy of © TOYOTA, LICENSE AGREEMENT TMS1002
 Courtesy of © TOYOTA, LICENSE AGREEMENT TMS1002
 Courtesy of © TOYOTA, LICENSE AGREEMENT TMS1002
- Remove hydraulic multi-plate clutch discs and plates. Remove snap ring. Remove flange, discs and plates. Note number and location of components. Using Spring Compressor (09350-32014), compress return spring. Remove snap ring. Apply compressed air to right case hole. Remove No. 1 piston. Remove "O" ring from No. 1 piston. Using small screwdriver, remove reaction sleeve and No. 2 piston. Remove 3 "O" rings from reaction sleeve and No. 2 piston.
- Using Bearing Remover and Attachment (09950-00020, 09950-00030), remove ring gear mounting left case bearing. Using A/T Tool Set (09350-32014) and arbor press, install ring gear mounting left case bearing.
- Using a chisel and hammer, cut out ring gear mounting right case bearing cage. DO NOT damage right case. Using A/T Tool Set (09350-32014) and arbor press, remove bearing inner race. Using Bearing Replacer (09316-60010) and arbor press, install NEW ring gear mounting right case bearing.
- Use hammer and screwdriver to remove oil seal from ring gear mounting left case. Remove oil baffle from left bearing retainer. Use hammer and brass bar to drive out outer race and adjusting shim from left bearing retainer. Place adjusting shim into left bearing retainer. Use either original shim or shim with thickness of .0945" (2.400 mm). Use A/T Tool Set (09350-32014) and arbor press to install outer race and shim. Install oil baffle and oil seal after adjusting differential side bearing preload. See TRANSAXLE REASSEMBLY .