Timing Belt: Removal
- Disconnect negative battery cable. Remove coolant reservoir. On Sienna, remove cowl top panel assembly. See Figure. On all models, raise and support vehicle. Remove passenger's side front wheel. Remove right lower engine cover. Remove accessory drive belts.
- Remove engine stabilizer rod, engine mounting bracket and right engine mount brace, located near timing belt cover. Remove generator bracket for access to timing belt covers.
- Using Pulley Holder (SST 09213-54015) and Handle (SST 09330-00021), hold crankshaft pulley. Remove crankshaft pulley bolt. Using puller, remove crankshaft pulley.
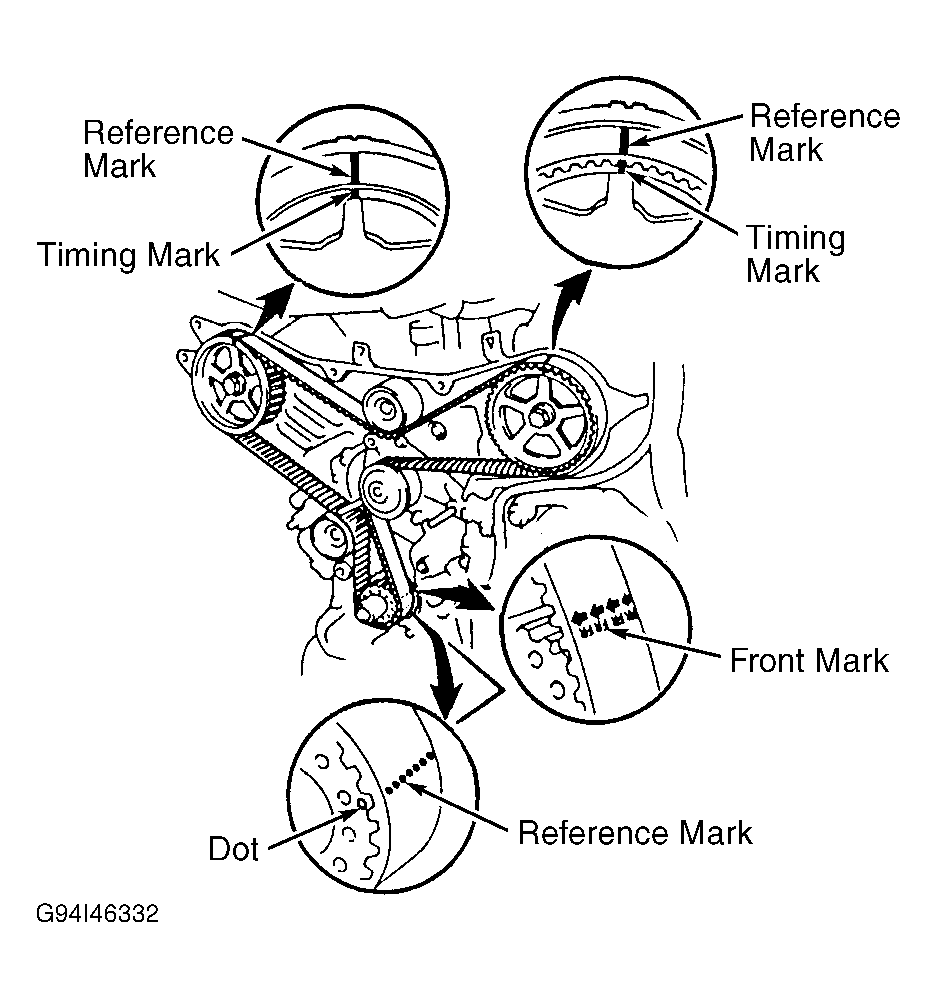
- Remove No. 1 and 2 timing belt covers and gaskets. See Fig 1. Remove engine mounting bracket. Note direction of timing belt guide installation for reassembly reference. Remove timing belt guide.
 Courtesy of © TOYOTA, LICENSE AGREEMENT TMS1002
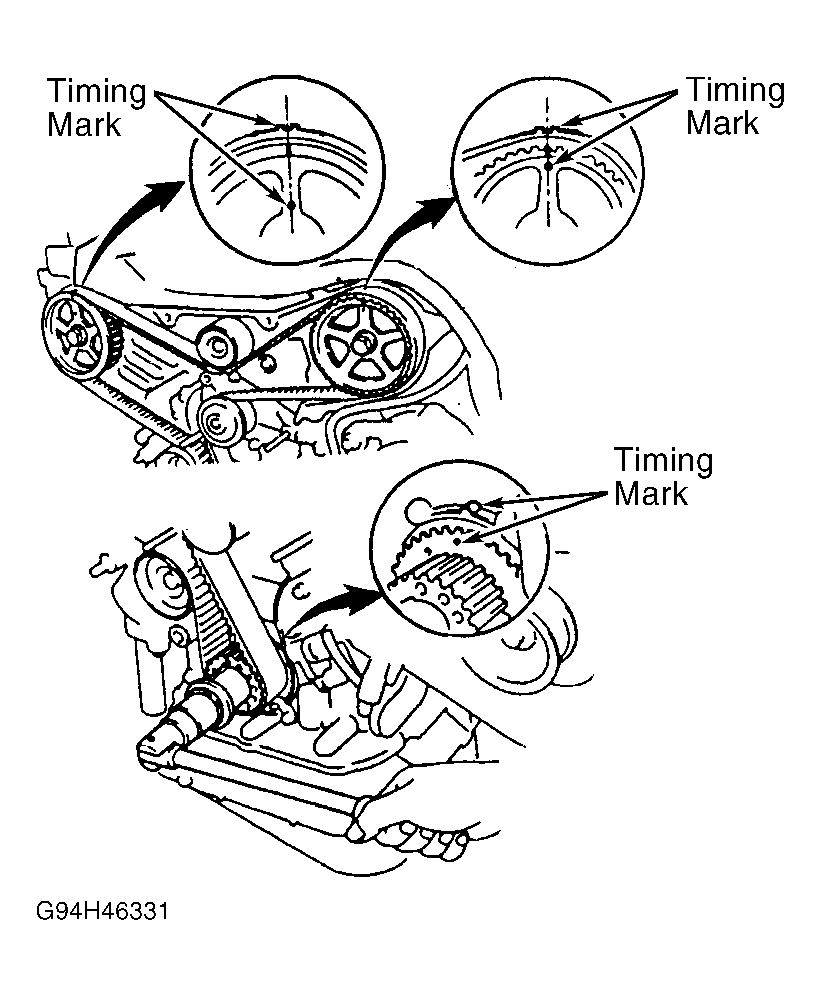
- Temporarily install crankshaft pulley bolt in crankshaft. Using crankshaft pulley bolt, rotate crankshaft clockwise until timing mark on crankshaft sprocket aligns with timing mark on oil pump body. See Fig 2.
- Ensure timing marks on camshaft sprockets are aligned with timing mark on No. 3 timing belt cover. See Fig 2. If timing marks are not aligned, rotate crankshaft clockwise one full revolution (360 degrees). Remove crankshaft pulley bolt from crankshaft.
CAUTION:
If reusing timing belt, ensure 3 reference marks and front mark are on timing belt. See Fig 1. If reference marks or front mark are not apparent, place reference mark on timing belt at timing mark area on camshaft sprockets or dot area on crankshaft sprocket for reassembly reference. Place front mark on timing belt to indicate direction of timing belt installation.
- Alternately loosen bolts and remove timing belt tensioner and dust boot. See Fig 1. Remove timing belt. Remove idler pulleys (if necessary).
- If removing camshaft sprocket, use Camshaft Sprocket Holder (SST 09960-10010) to hold camshaft sprocket. On right camshaft sprocket, Adapter (SST 09249-63010) must also be used. Remove bolt and camshaft sprocket.
- If removing crankshaft sprocket, remove timing belt plate. See Fig 1. Using puller, remove crankshaft sprocket.
 Courtesy of © TOYOTA, LICENSE AGREEMENT TMS1002
 Courtesy of © TOYOTA, LICENSE AGREEMENT TMS1002