Removal (Cressida)
- Release fuel pressure. See FUEL PRESSURE RELEASE under REMOVAL & INSTALLATION. Disconnect negative battery cable. Drain cooling system. Drain engine oil. Remove hood, battery and battery tray.
- Disconnect accelerator cable, throttle valve cable and cruise control cable. Remove air cleaner cap and airflow meter along with air cleaner hose and intake air connector pipe.
- Remove radiator. Remove A/C compressor and power steering pump with hoses attached, and secure aside. Remove windshield washer fluid reservoir.
- Remove glove box. Disconnect necessary electrical connections so engine wiring can be pulled out through firewall. See Fig 1. Pull engine wiring through firewall.
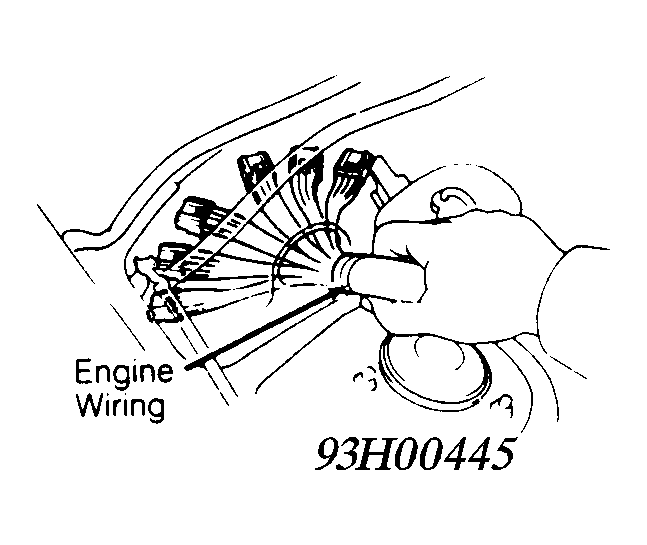 Courtesy of © TOYOTA, LICENSE AGREEMENT TMS1002
- Disconnect necessary electrical connections, coolant hoses, fuel lines and vacuum hoses. Raise and support vehicle. Remove lower engine covers. Remove front exhaust pipe, which fits between exhaust manifold and catalytic converter.
- Paint reference mark on drive shaft flange at differential for reassembly reference. Remove retaining bolts, drive shaft and center bearing. Install Cap (SST 09325-40010) in transmission to prevent oil leakage.
- Disconnect electrical connections, speedometer cable and shift linkage at transmission. Remove front wheels. Remove tie rod end nut at steering knuckle.
- Separate tie rods from steering knuckles. Remove retaining bolts and mounting clamps from steering gear. Lower steering gear slightly, and suspend it with wire. DO NOT allow steering gear to hang with pressure on hoses.
- Support transmission using floor jack. Remove crossmember located below transmission. Support engine using hoist. Remove engine mount bolts. Lift engine and transmission assembly from vehicle.