Removal & Installation: Camshaft: Removal
- Remove timing belt and camshaft timing pulley. See TIMING BELT under REMOVAL & INSTALLATION. Remove necessary components to remove No.1 valve cover, No. 2 valve cover and No. 2 timing belt cover. See Figure. Remove retaining bolt and distributor or camshaft position sensor (Supra turbo) if necessary.
NOTE:
If fuel lines must be disconnected, ensure fuel pressure is released. See FUEL PRESSURE RELEASE under REMOVAL & INSTALLATION.
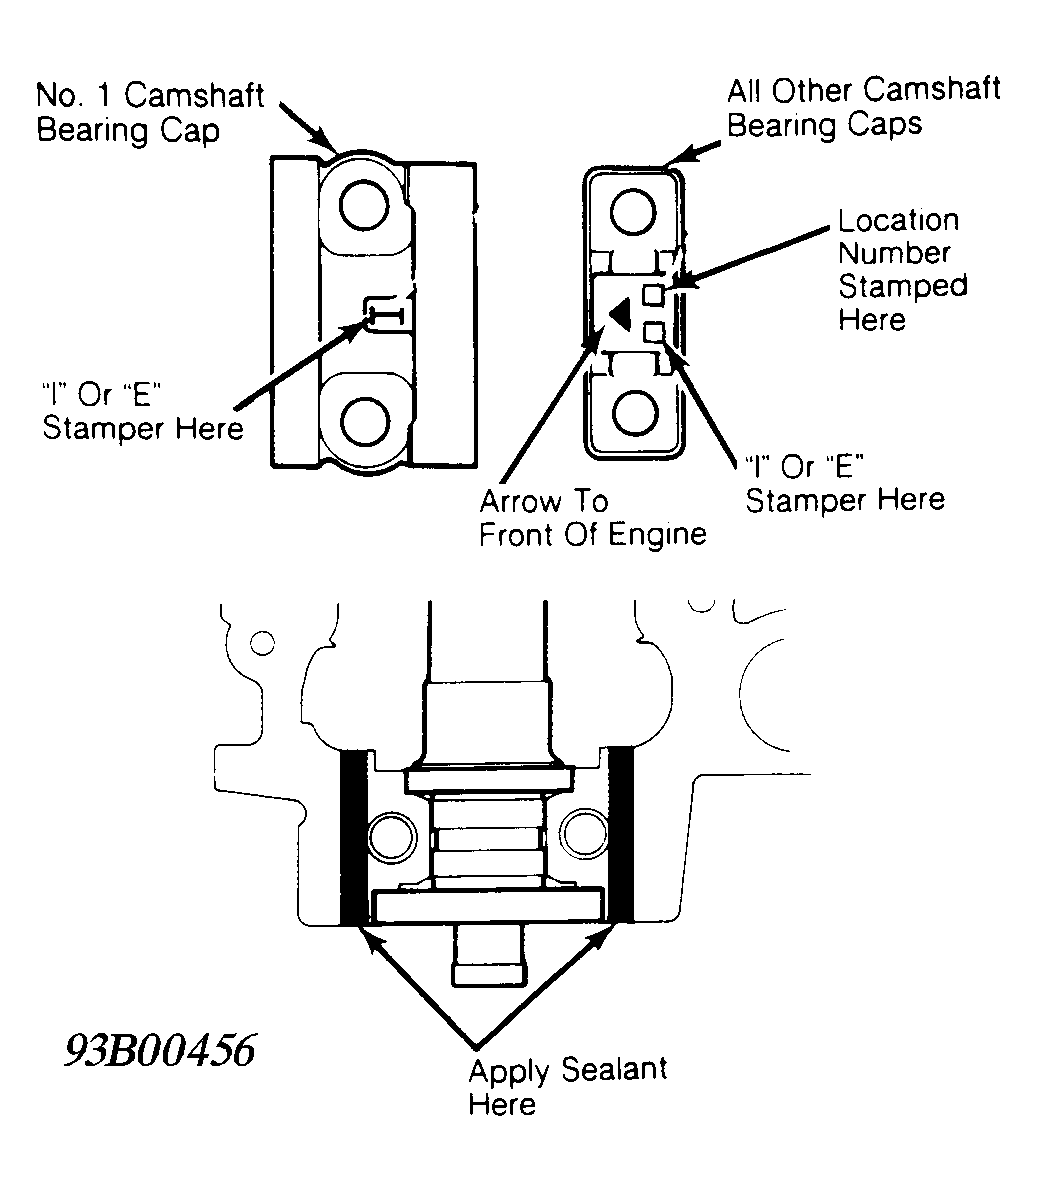
- Note direction and location of camshaft bearing cap installation for reassembly reference. Install camshaft bearing caps in proper location, with No. 1 camshaft bearing cap at front of engine.
CAUTION:
Camshaft bearing caps are identified by an "I" for intake side and "E" for exhaust side. See Fig 1. While No. 1 camshaft bearing cap is not numbered, all others are numbered to indicate location on cylinder head. Ensure arrow on camshaft bearing cap points toward front of engine. See Fig 1.
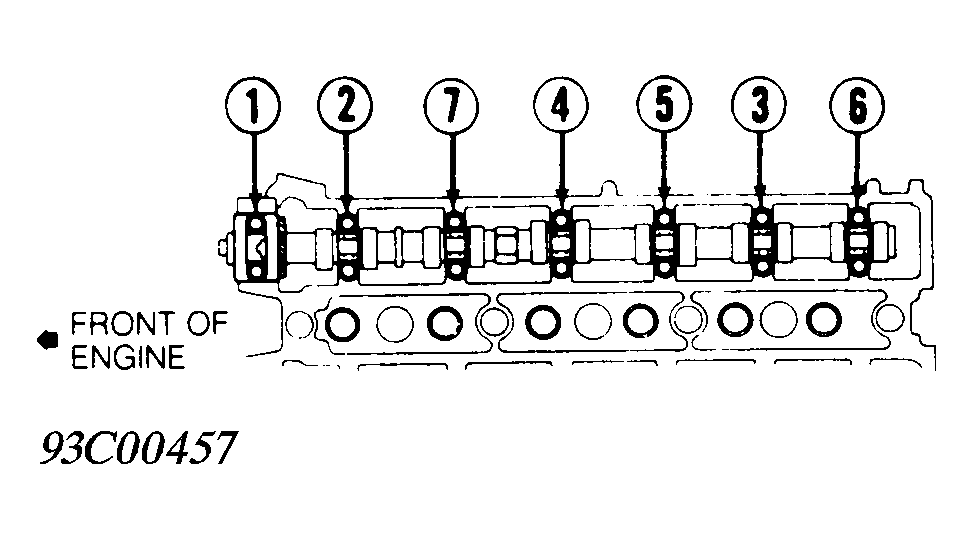
- Remove camshaft bearing cap bolts and caps in sequence using several steps. See Fig 2. Remove camshaft bearing caps, oil seal and camshaft. Remove valve lifters and adjusting shims from cylinder head. Mark component location for reassembly reference.
 Courtesy of © TOYOTA, LICENSE AGREEMENT TMS1002
 Courtesy of © TOYOTA, LICENSE AGREEMENT TMS1002