Removal & Installation: Camshaft: Inspection
- Inspect components for damage. Check camshaft journal diameter, lobe height and runout. Replace camshaft if measurements are not within specification. See CAMSHAFT table under ENGINE SPECIFICATIONS.
CAUTION:
Ensure camshaft bearing caps are installed in proper location, with arrows pointing toward front of engine. See Figure.
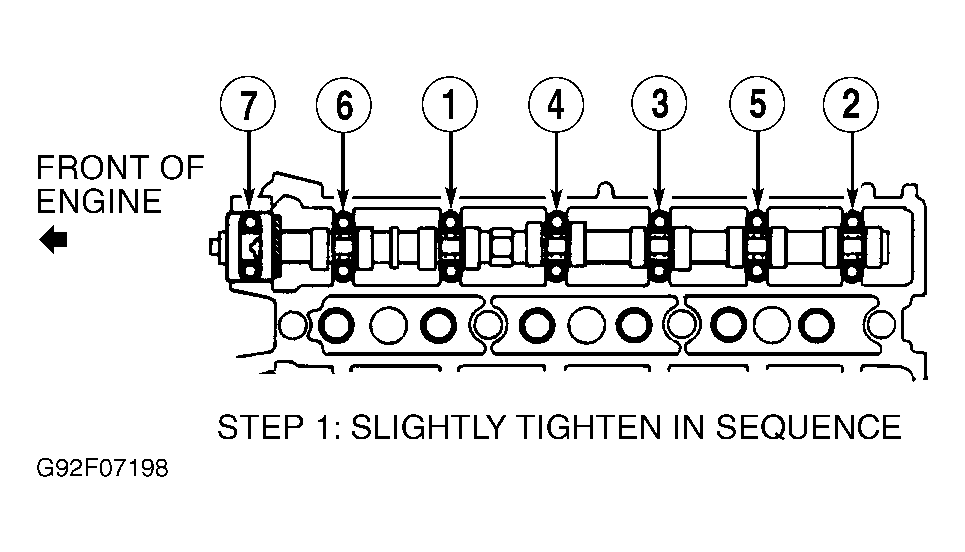
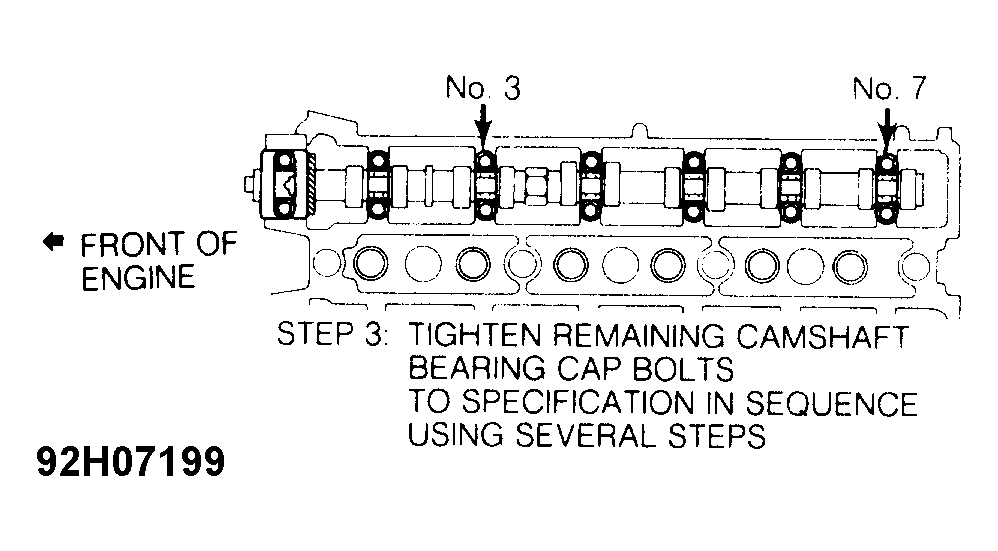
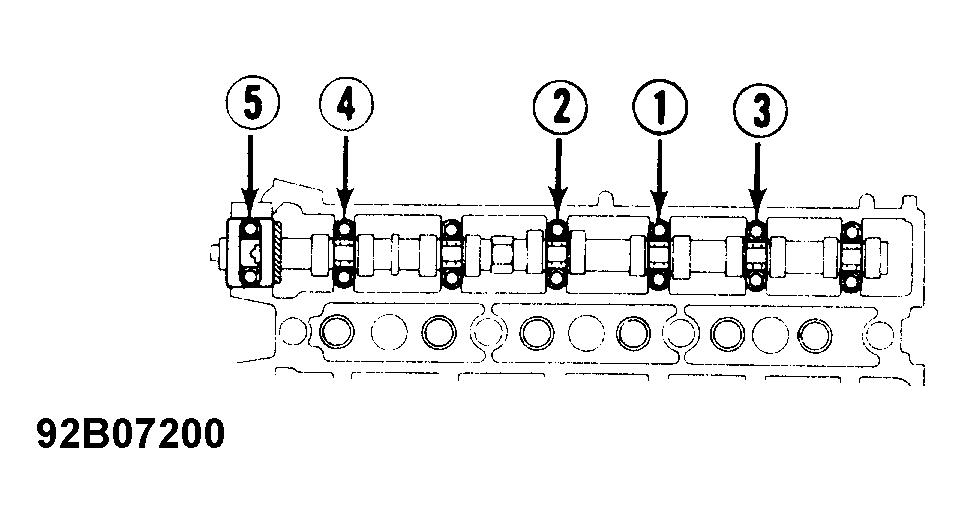
- Install camshaft in cylinder head. Using Plastigage, check camshaft oil clearance. Tighten camshaft bearing cap bolts to specification in sequence when checking oil clearance. See Fig 1-Fig 3
. See appropriate TORQUE SPECIFICATIONS table. 3) Replace camshaft and/or cylinder head if oil clearance is not within specification. See CAMSHAFT table. Check camshaft end play with camshaft bearing cap bolts tightened to specification. Replace camshaft and/or cylinder head if end play is not within specification. See CAMSHAFT table.
- Measure valve lifter diameter and bore diameter. Ensure oil clearance is within specification. Replace components if measurements are not within specification. See VALVE LIFTERS table under ENGINE SPECIFICATIONS.
 Courtesy of © TOYOTA, LICENSE AGREEMENT TMS1002
 Courtesy of © TOYOTA, LICENSE AGREEMENT TMS1002
 Courtesy of © TOYOTA, LICENSE AGREEMENT TMS1002