Removal & Installation: Camshaft: Installation
- Ensure No. 1 cylinder is at TDC on compression stroke. Coat lip of new oil seal with engine oil and install seal on camshaft. Coat all bearing journals with engine oil.
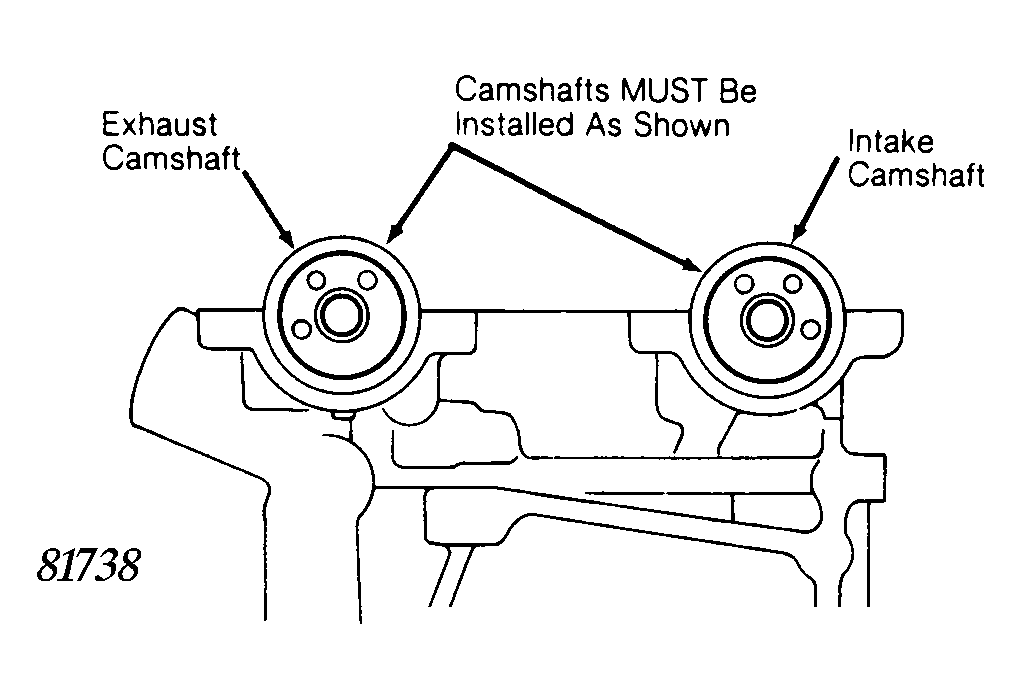
- Ensure camshafts are positioned correctly and install camshafts on cylinder head. See Fig 1. Exhaust camshaft has distributor drive gear (non-turbo) or cam position sensor (turbo) drive gear.
 Courtesy of © TOYOTA, LICENSE AGREEMENT TMS1002
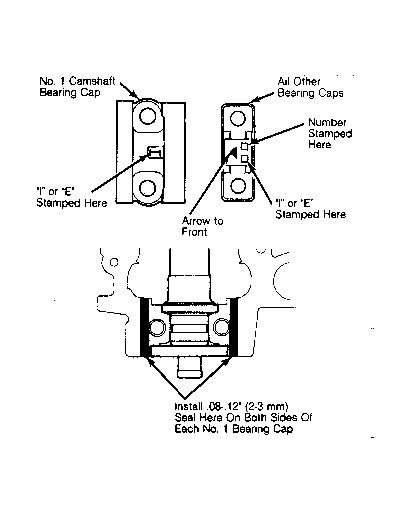
- Apply a bead of sealant .08-.12" (2.0-3.0 mm) thick on each side of camshaft at No. 1 bearing cap locations. After applying sealant, install No. 1 bearing caps. No. 1 bearing caps are identified by "I" for intake side and "E" for exhaust side. See Fig 2.
 Courtesy of © TOYOTA, LICENSE AGREEMENT TMS1002
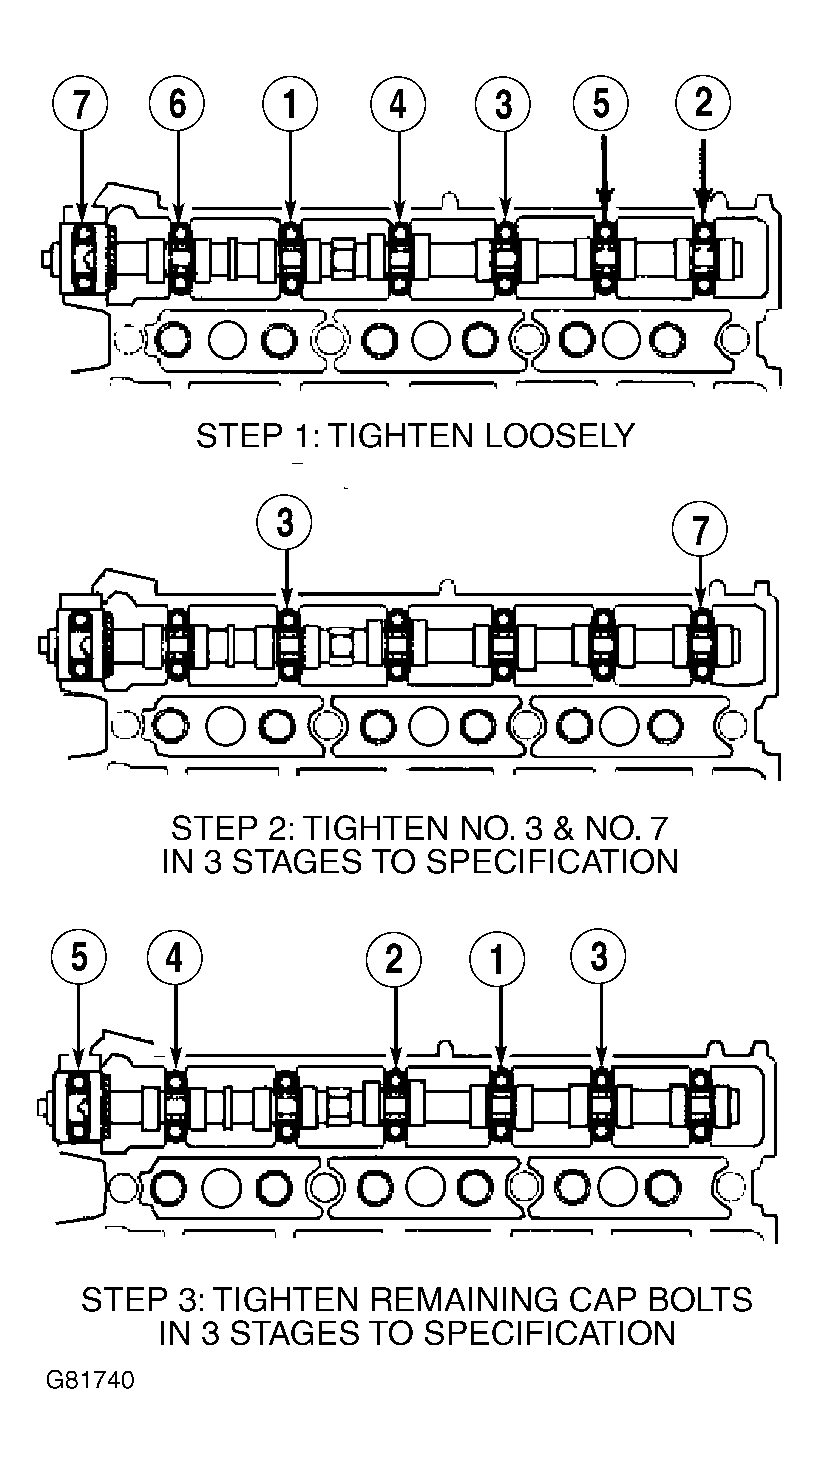
- Install remaining bearing caps in correct order with arrows pointing toward front of cylinder head. Loosely tighten all bearing caps in tightening sequence. See Step 1 in Fig 3. Using Camshaft Oil Seal Installer (09223-50010), drive in new camshaft oil seals.
 Courtesy of © TOYOTA, LICENSE AGREEMENT TMS1002
- Tighten No. 3 and No. 7 bearing caps to specification in 3 stages in sequence. See Step 2 in Fig 3. Tighten all remaining bearing caps to specification in 3 stages in sequence. See Step 3 in Fig 3. Recheck camshaft end play.
- To complete installation, reverse removal procedure. Install EGR cooler. Install heater pipe union, gaskets and pipe. Install engine bracket.