Rear Pads: Installation
- Install pad support plate, anti-rattle springs and pad guide plates on torque plate. Place new anti-squeal shims onto pads. Install pads in torque plate. Wear indicator should be on top edge of outer pad.
- Using Piston Spanner (09719-14020), push piston until it locks while turning piston clockwise. Ensure pad protrusion fits into piston stopper. Swing caliper down, ensuring boot does not wedge against pad.
- Install guide bolt. Install wheels. Ensure fluid level is correct. Set automatic parking brake adjuster by pumping brake pedal several times.
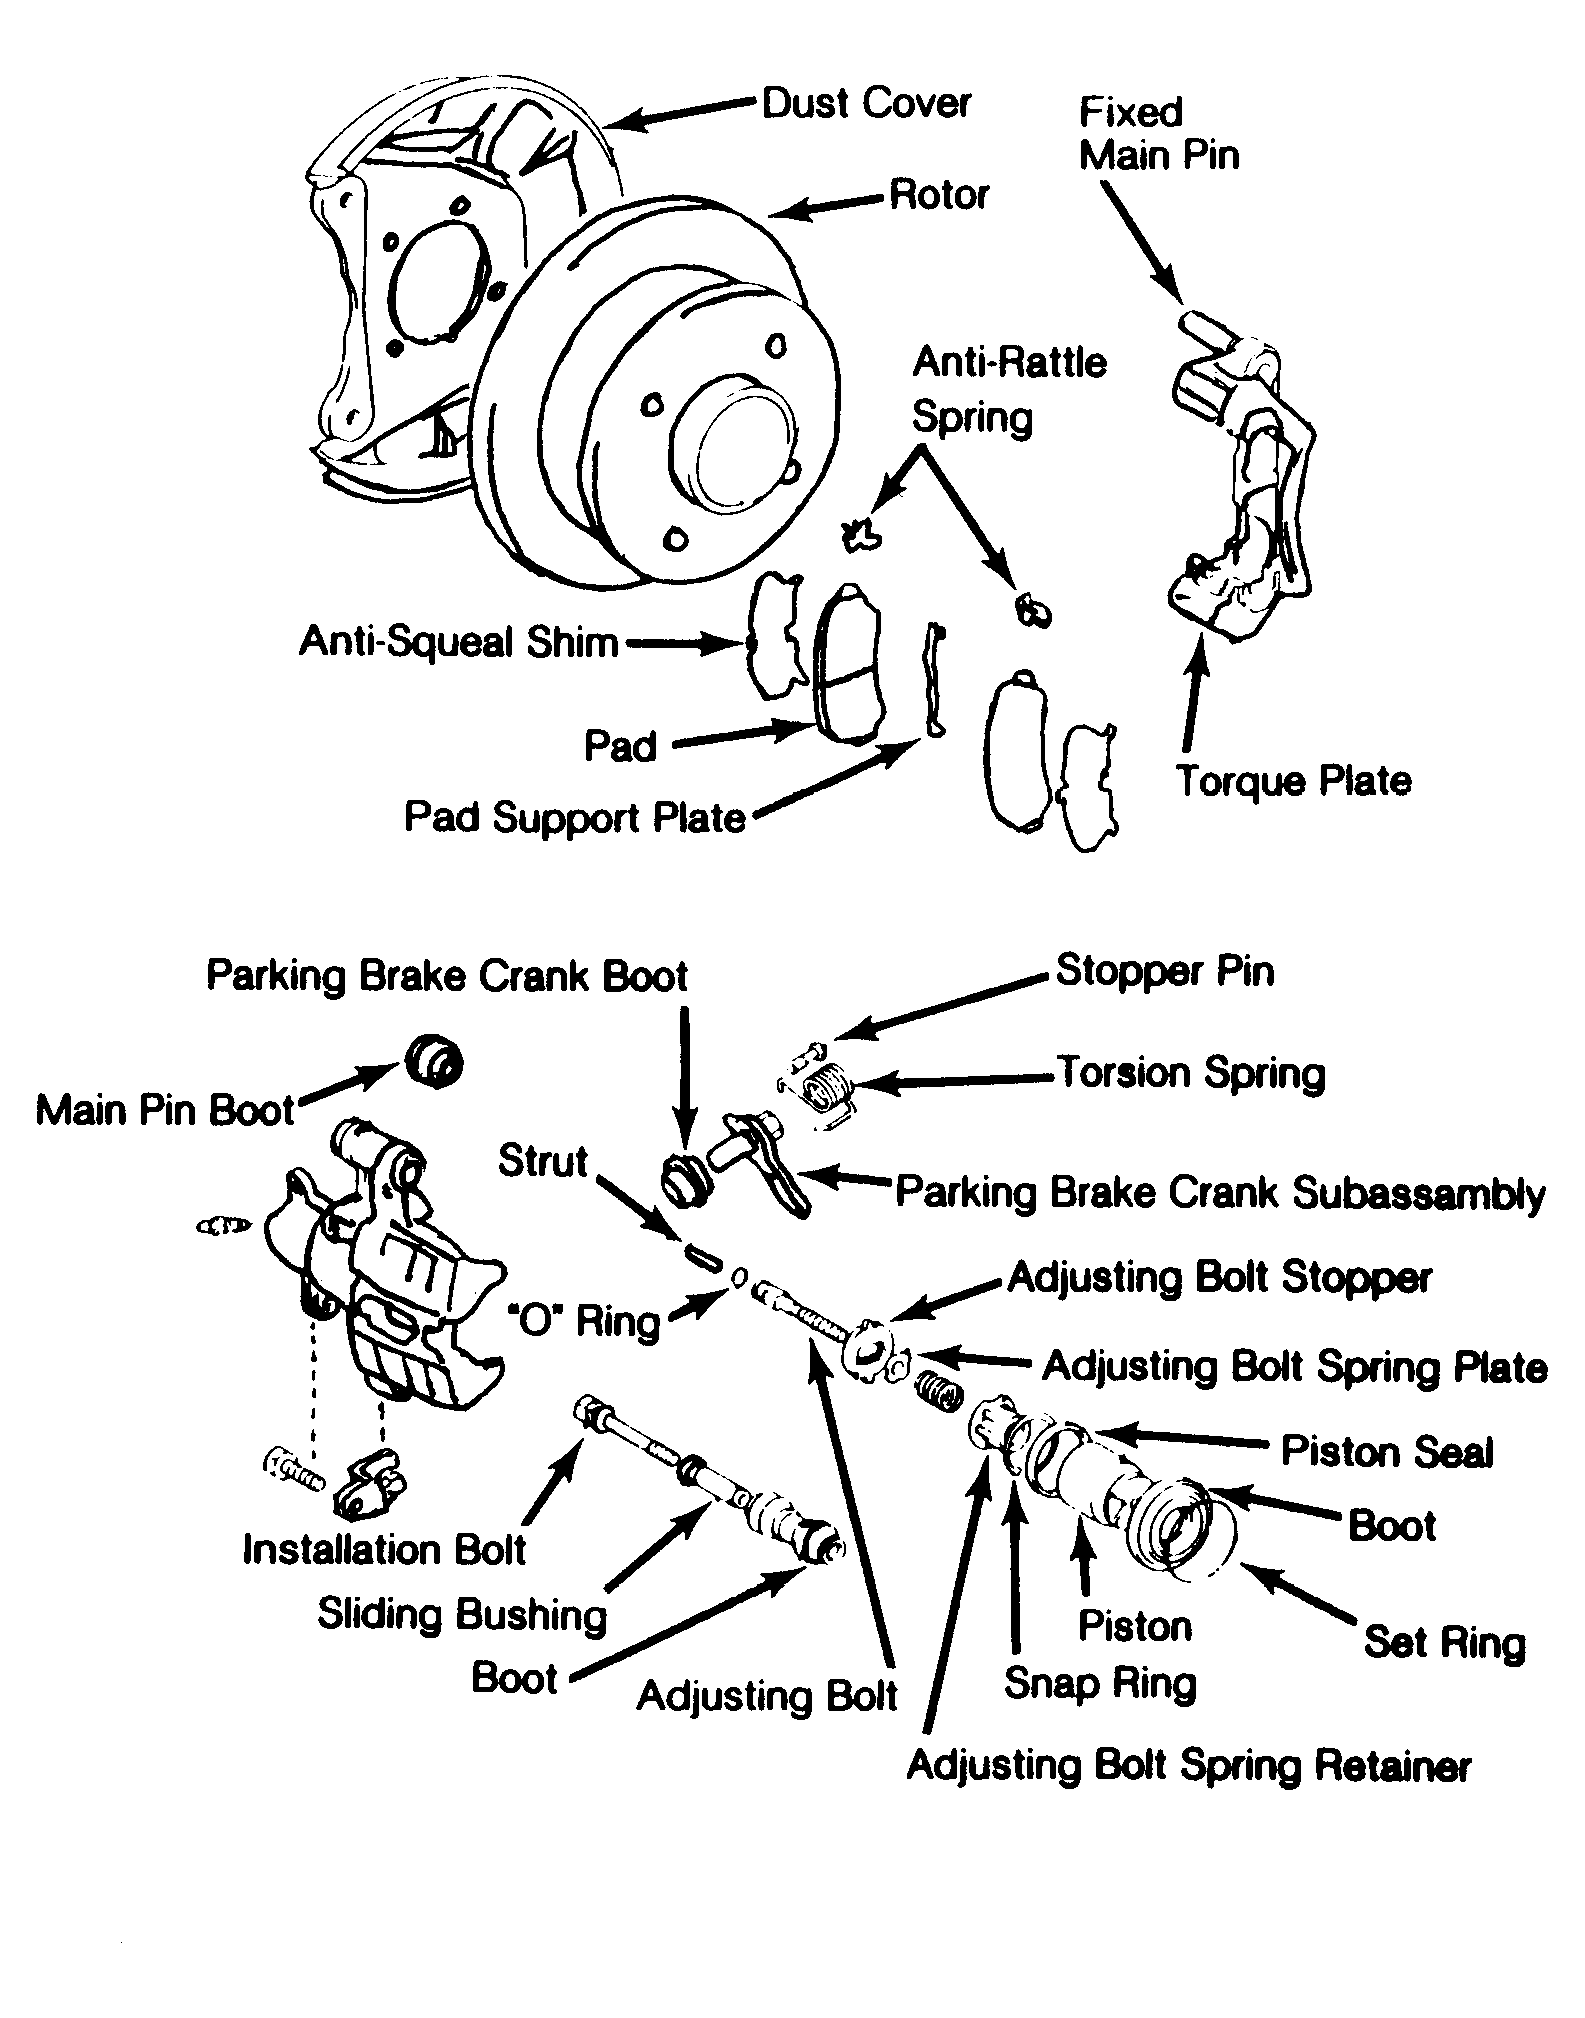 Courtesy of © TOYOTA, LICENSE AGREEMENT TMS1002
- Install new pad support plates on torque plate. Install new pad wear indicators, new anti-squeal shim and new pads. On Cressida models, wear indicators go on lower edge of pad. Anti-squeal shim goes at outside of pads.
- Push piston into bore with wooden hammer handle. Put new anti-squeal shim on piston. Slide caliper onto torque plate carefully so boot does not wedge on edge of pad.
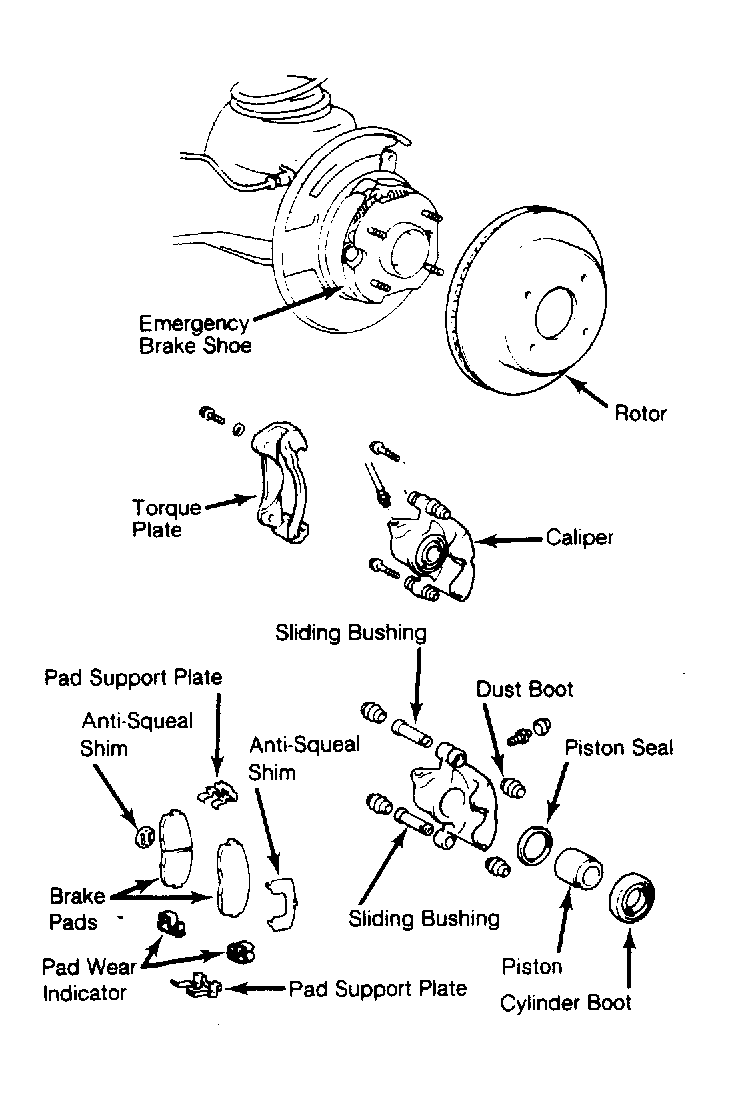 Courtesy of © TOYOTA, LICENSE AGREEMENT TMS1002