- Remove LH mid A-pillar trim
NOTE:
1x clip, 2x tabs
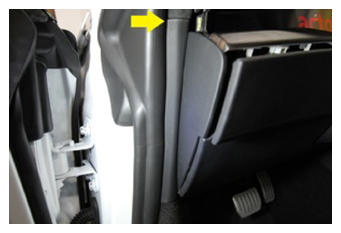 Courtesy of TESLA, INC. Courtesy of TESLA, INC.
|
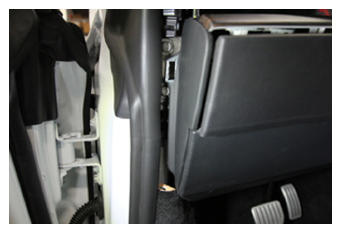 Courtesy of TESLA, INC. Courtesy of TESLA, INC.
|
- Remove LH IP end cap
NOTE:
4x clips
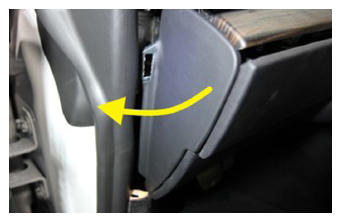 Courtesy of TESLA, INC. Courtesy of TESLA, INC.
|
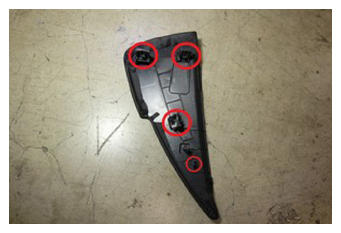 Courtesy of TESLA, INC. Courtesy of TESLA, INC.
|
- Adjust steering column fully rearward and fully down
NOTE:
Via UI > Quick Controls > Steering Wheel, Use left steering wheel scroll wheel to adjust steering column
- Remove RH mid A-pillar trim
NOTE:
1x clip, 2x tabs
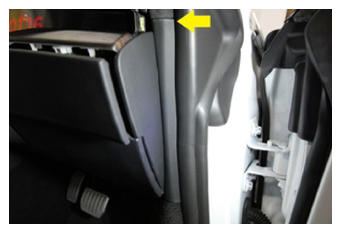 Courtesy of TESLA, INC. Courtesy of TESLA, INC.
|
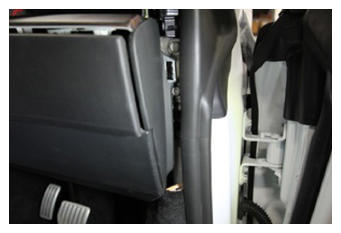 Courtesy of TESLA, INC. Courtesy of TESLA, INC.
|
- Remove RH IP end cap
NOTE:
4x clips
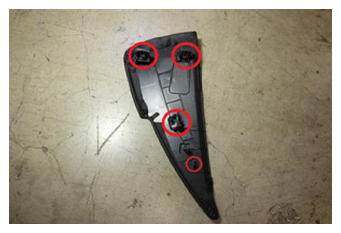 Courtesy of TESLA, INC. Courtesy of TESLA, INC.
|
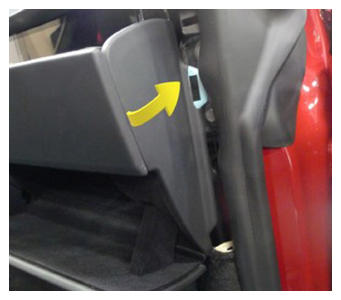 Courtesy of TESLA, INC. Courtesy of TESLA, INC.
|
- Open hood
NOTE:
Using center display touchscreen > Quick Controls > Frunk Open
- Power off vehicle from center display
NOTE:
Via Controls > Safety & Security > Power Off
- Remove rear underhood apron
NOTE:
8x clips
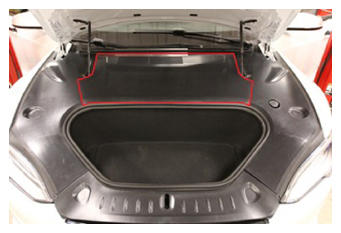 Courtesy of TESLA, INC. Courtesy of TESLA, INC.
|
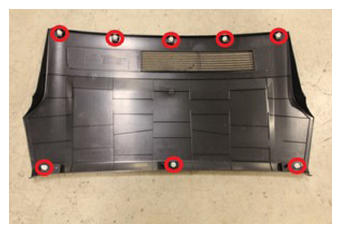 Courtesy of TESLA, INC. Courtesy of TESLA, INC.
|
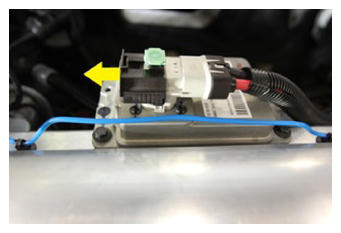
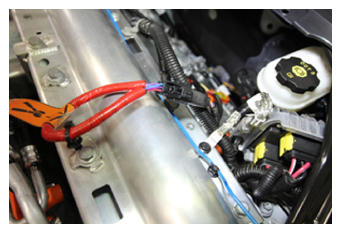
- Disconnect LV battery connector and First Responder Loop
NOTE:
2x connectors, Lift up and release green locking tab, Pull black connector lock outwards to release connection
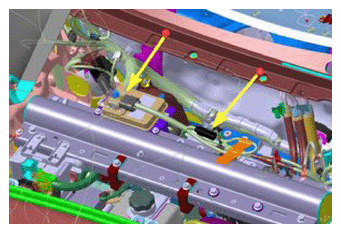 Courtesy of TESLA, INC. Courtesy of TESLA, INC.
|
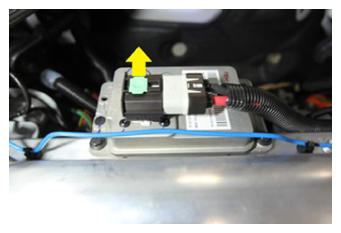 Courtesy of TESLA, INC. Courtesy of TESLA, INC.
|
 Courtesy of TESLA, INC. Courtesy of TESLA, INC.
|
 Courtesy of TESLA, INC. Courtesy of TESLA, INC.
|
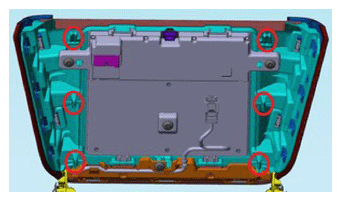
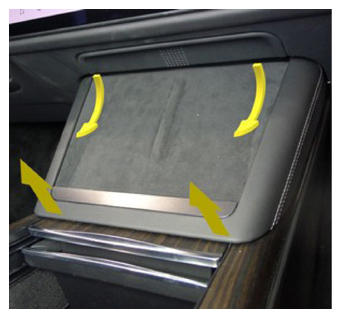
- Release phone dock
NOTE:
4x clips, 2x datums, Pull up at bottom and swing out from under instrument panel
 Courtesy of TESLA, INC. Courtesy of TESLA, INC.
|
 Courtesy of TESLA, INC. Courtesy of TESLA, INC.
|
- Remove phone dock
NOTE:
3x connectors, 1x clip, Take caution to release connector locks before pulling straight out of each socket to avoid damage
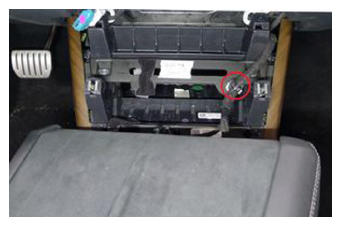 Courtesy of TESLA, INC. Courtesy of TESLA, INC.
|
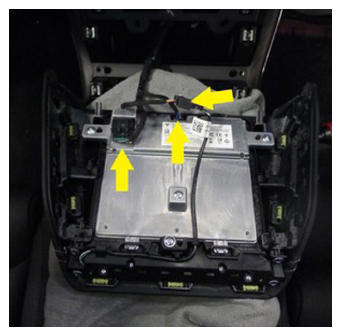 Courtesy of TESLA, INC. Courtesy of TESLA, INC.
|
- Release IP service panel
NOTE:
4x tabs, 2x datums
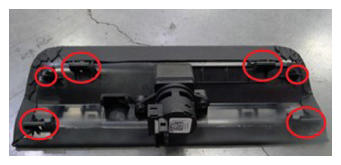 Courtesy of TESLA, INC. Courtesy of TESLA, INC.
|
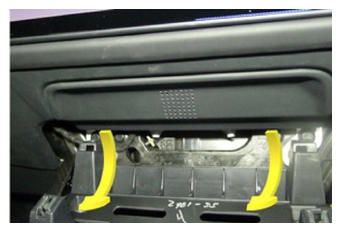 Courtesy of TESLA, INC. Courtesy of TESLA, INC.
|
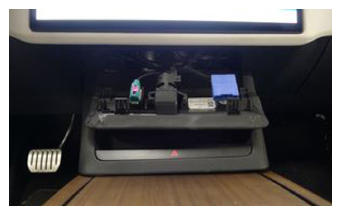 Courtesy of TESLA, INC. Courtesy of TESLA, INC.
|
- Release diagnostic and CAN harnesses from IP service panel
NOTE:
2x clips
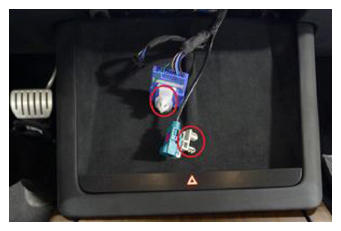 Courtesy of TESLA, INC. Courtesy of TESLA, INC.
|
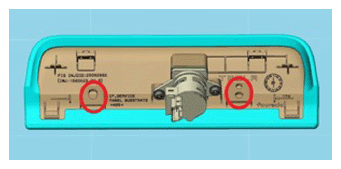 Courtesy of TESLA, INC. Courtesy of TESLA, INC.
|
- Remove IP service panel
NOTE:
1x connector
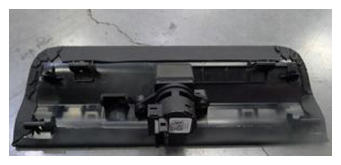 Courtesy of TESLA, INC. Courtesy of TESLA, INC.
|
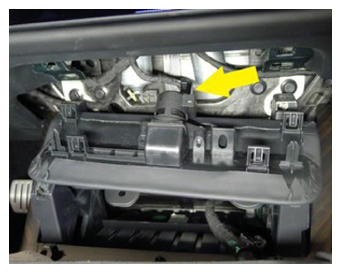 Courtesy of TESLA, INC. Courtesy of TESLA, INC.
|
- Remove center display bracket bolts
NOTE:
2x bolts, 10 mm, 7 N.m
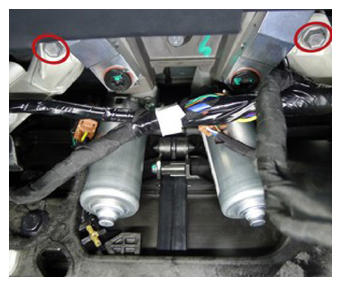 Courtesy of TESLA, INC. Courtesy of TESLA, INC.
|
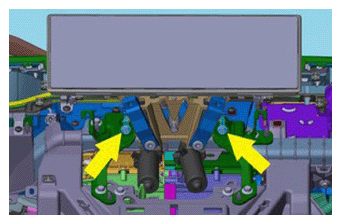 Courtesy of TESLA, INC. Courtesy of TESLA, INC.
|
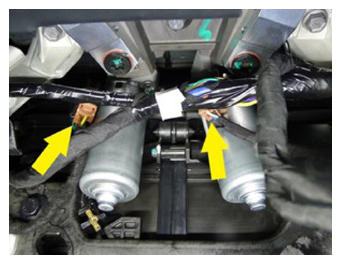
- Release center display motor connectors
NOTE:
2x connectors
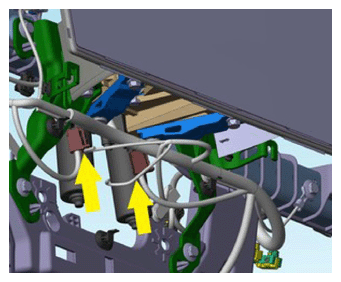 Courtesy of TESLA, INC. Courtesy of TESLA, INC.
|
 Courtesy of TESLA, INC. Courtesy of TESLA, INC.
|
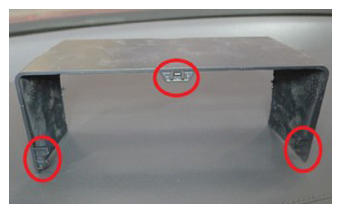
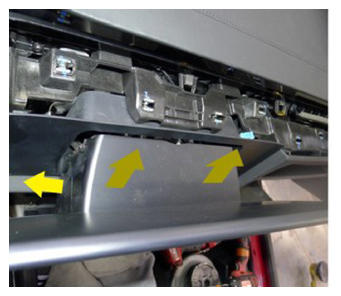
- Remove center display shroud
NOTE:
3x tabs, Slide display outwards until shroud fully clears IP and support, Release the bottom tabs and pull upward
 Courtesy of TESLA, INC. Courtesy of TESLA, INC.
|
 Courtesy of TESLA, INC. Courtesy of TESLA, INC.
|
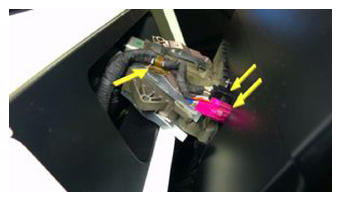
- Release center display coax and power connectors
NOTE:
2x connectors, 1x clip, Slide display rearward outwards from IP bracket and support during connector release
 Courtesy of TESLA, INC. Courtesy of TESLA, INC.
|
- Remove center display
NOTE:
Maneuver center display motors over and around IP harness during removal
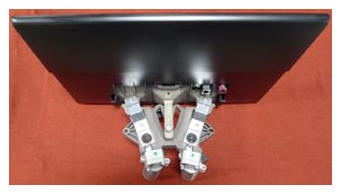 Courtesy of TESLA, INC. Courtesy of TESLA, INC.
|
- Remove IP Decor
NOTE:
15x clips, 6x datums
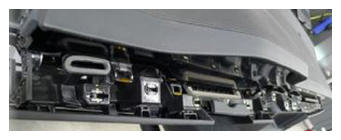 Courtesy of TESLA, INC. Courtesy of TESLA, INC.
|
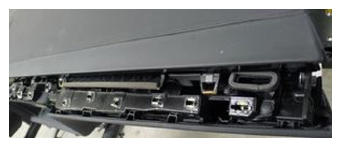 Courtesy of TESLA, INC. Courtesy of TESLA, INC.
|
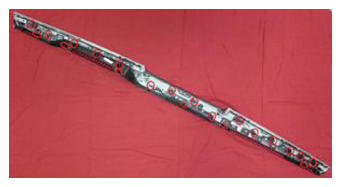 Courtesy of TESLA, INC. Courtesy of TESLA, INC.
|
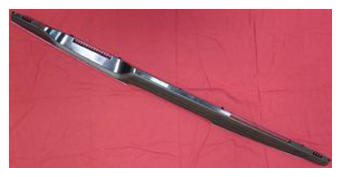 Courtesy of TESLA, INC. Courtesy of TESLA, INC.
|
- Release spring clip securing driver air bag assembly to steering wheel and pull driver air bag assembly away from steering wheel
NOTE:
2x spring clips, 2x datums, Press the spring simultaneously from two access holes to release, Access holes located at 4 and 8 o'clock position, Do not insert tool too far as air bag connector could be damaged
- Disconnect driver air bag connector and remove driver air bag assembly
NOTE:
1x connector
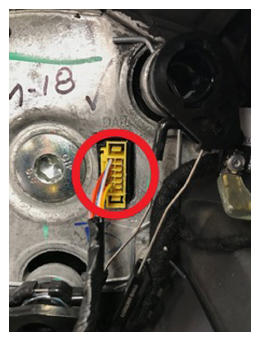 Courtesy of TESLA, INC. Courtesy of TESLA, INC.
|
- Disconnect steering wheel connector
NOTE:
1x connector
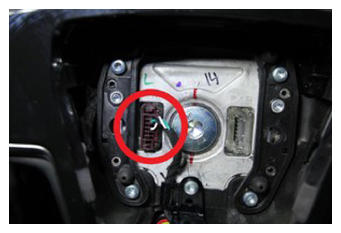 Courtesy of TESLA, INC. Courtesy of TESLA, INC.
|
- Remove bolt that secures the steering wheel to the column
NOTE:
1x patch bolt, 10 mm allen, 80 N.m, Discard after removal
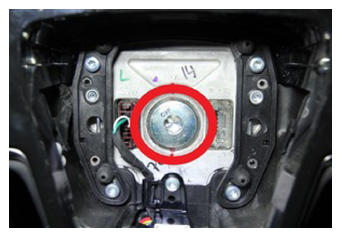 Courtesy of TESLA, INC. Courtesy of TESLA, INC.
|
- Remove steering wheel
NOTE:
Note that the steering wheel is splined to the column
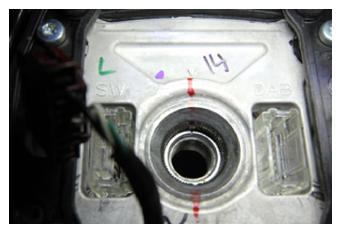 Courtesy of TESLA, INC. Courtesy of TESLA, INC.
|
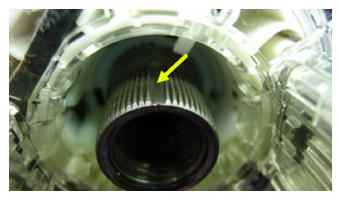 Courtesy of TESLA, INC. Courtesy of TESLA, INC.
|
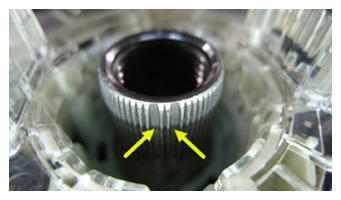 Courtesy of TESLA, INC. Courtesy of TESLA, INC.
|
- Pull upward to release steering column upper shroud from lower shroud
NOTE:
6x clips, 4x datums
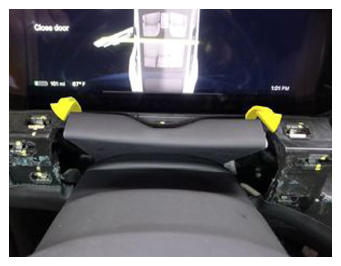 Courtesy of TESLA, INC. Courtesy of TESLA, INC.
|
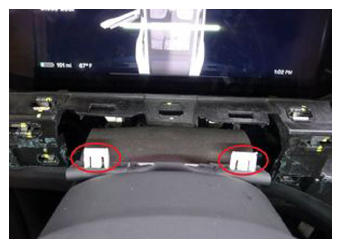 Courtesy of TESLA, INC. Courtesy of TESLA, INC.
|
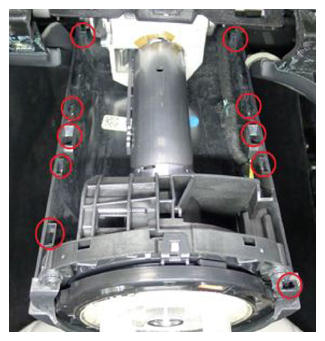 Courtesy of TESLA, INC. Courtesy of TESLA, INC.
|
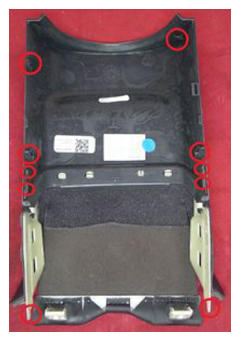 Courtesy of TESLA, INC. Courtesy of TESLA, INC.
|
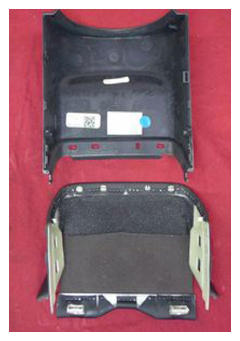
- Remove steering column upper gap hider
NOTE:
4x clips, 2x datums
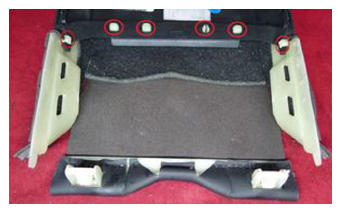 Courtesy of TESLA, INC. Courtesy of TESLA, INC.
|
 Courtesy of TESLA, INC. Courtesy of TESLA, INC.
|
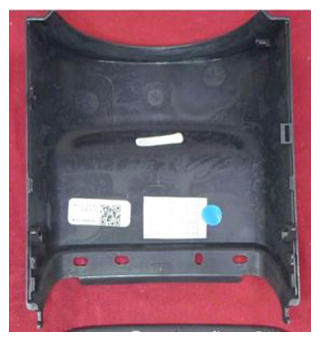
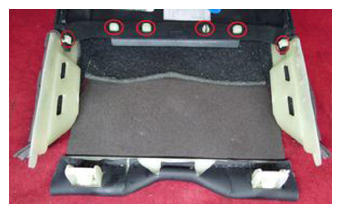
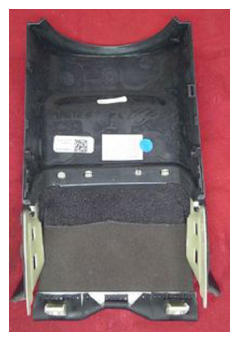
- Install steering column upper gap hider to new steering column shroud
NOTE:
4x clips, 2x datums
 Courtesy of TESLA, INC. Courtesy of TESLA, INC.
|
 Courtesy of TESLA, INC. Courtesy of TESLA, INC.
|
 Courtesy of TESLA, INC. Courtesy of TESLA, INC.
|
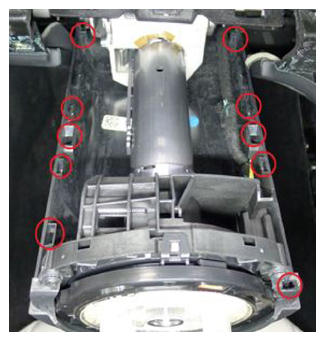
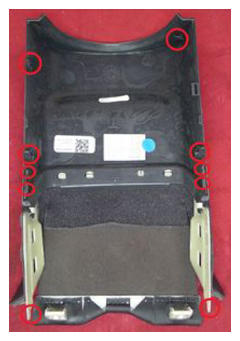
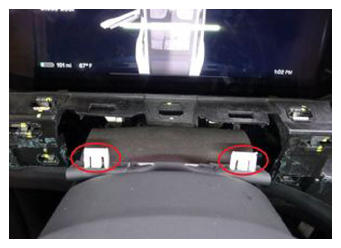
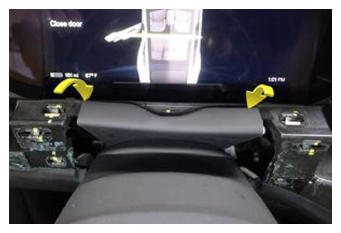
- Align the clips and datums then press downward to install upper shroud onto lower shroud
NOTE:
6x clips, 4x datums
 Courtesy of TESLA, INC. Courtesy of TESLA, INC.
|
 Courtesy of TESLA, INC. Courtesy of TESLA, INC.
|
 Courtesy of TESLA, INC. Courtesy of TESLA, INC.
|
 Courtesy of TESLA, INC. Courtesy of TESLA, INC.
|
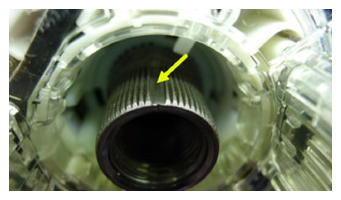
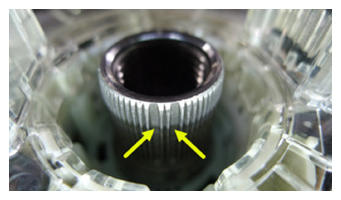
- Install steering wheel
NOTE:
Note that the steering wheel is splined to the column and can only be installed in the correct position
 Courtesy of TESLA, INC. Courtesy of TESLA, INC.
|
 Courtesy of TESLA, INC. Courtesy of TESLA, INC.
|
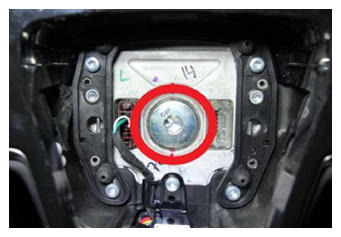
- Install bolt securing steering wheel to steering column
NOTE:
1x patch bolt, 10 mm allen, 80 N.m, Install new patch bolt
 Courtesy of TESLA, INC. Courtesy of TESLA, INC.
|
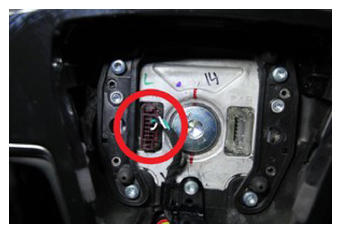
- Secure steering wheel connector
NOTE:
1x connector
 Courtesy of TESLA, INC. Courtesy of TESLA, INC.
|
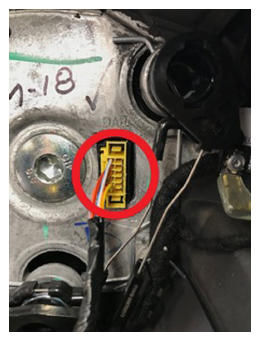
- Secure driver air bag connector
NOTE:
1x connector
 Courtesy of TESLA, INC. Courtesy of TESLA, INC.
|
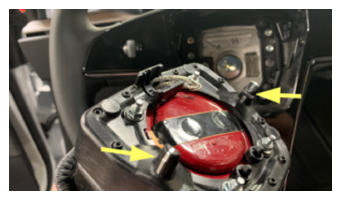
- Secure driver air bag assembly to steering wheel and verify it is fully engaged
NOTE:
2x datums, 2x spring clip
 Courtesy of TESLA, INC. Courtesy of TESLA, INC.
|
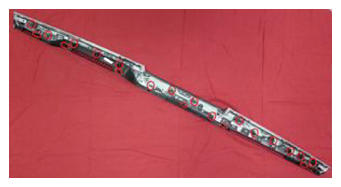
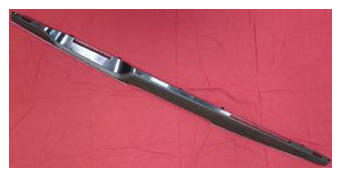
- Install IP Decor
NOTE:
15x clips, 6x datums
 Courtesy of TESLA, INC. Courtesy of TESLA, INC.
|
 Courtesy of TESLA, INC. Courtesy of TESLA, INC.
|
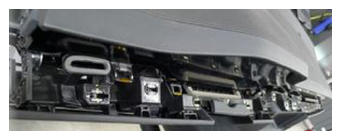 Courtesy of TESLA, INC. Courtesy of TESLA, INC.
|
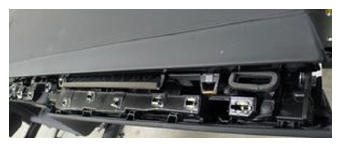 Courtesy of TESLA, INC. Courtesy of TESLA, INC.
|
- Route display harness behind LH display bracket and in front of adjustment motors
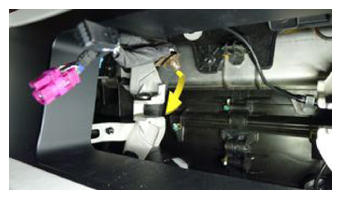 Courtesy of TESLA, INC. Courtesy of TESLA, INC.
|
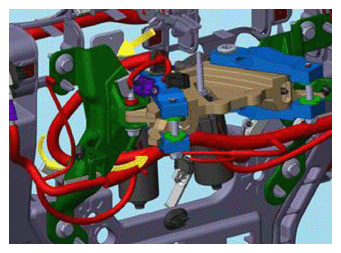 Courtesy of TESLA, INC. Courtesy of TESLA, INC.
|
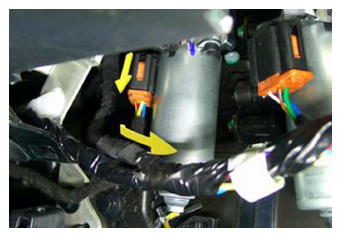 Courtesy of TESLA, INC. Courtesy of TESLA, INC.
|
- Position center display in IP
NOTE:
Maneuver center display motors over and around IP harness during positioning
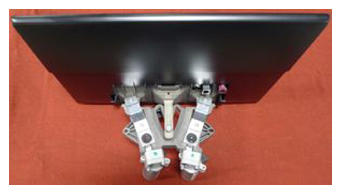 Courtesy of TESLA, INC. Courtesy of TESLA, INC.
|
- Secure center display coax and power connectors
NOTE:
2x connectors, 1x clip, Ensure strain relief clip is secure to linkage arm, Replace clip if damaged
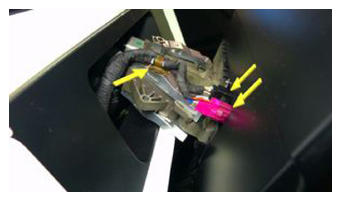 Courtesy of TESLA, INC. Courtesy of TESLA, INC.
|
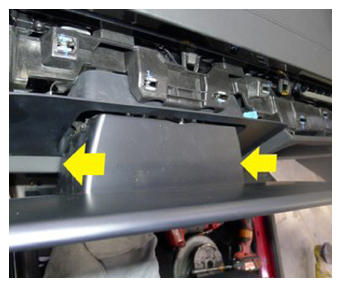
- Install center display shroud
NOTE:
3x tabs, Slide display downward until shroud tabs fully engages
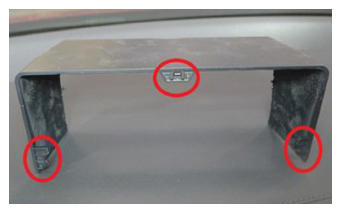 Courtesy of TESLA, INC. Courtesy of TESLA, INC.
|
 Courtesy of TESLA, INC. Courtesy of TESLA, INC.
|
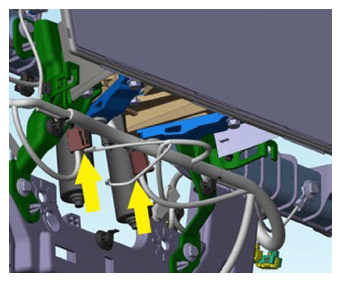
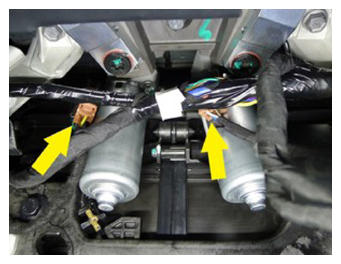
- Secure center display motor connectors
NOTE:
2x connectors, Slide center display assembly fully into IP brackets after securing connectors
 Courtesy of TESLA, INC. Courtesy of TESLA, INC.
|
 Courtesy of TESLA, INC. Courtesy of TESLA, INC.
|
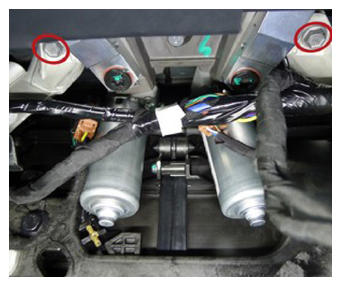
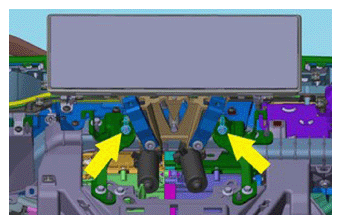
- Install center display bracket bolts
NOTE:
2x bolts, 10 mm, 7 N.m
 Courtesy of TESLA, INC. Courtesy of TESLA, INC.
|
 Courtesy of TESLA, INC. Courtesy of TESLA, INC.
|
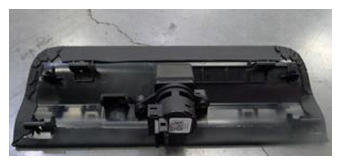
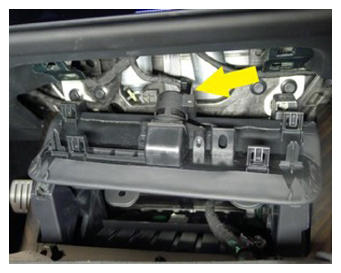
- Secure IP service panel connector
NOTE:
1x connector
 Courtesy of TESLA, INC. Courtesy of TESLA, INC.
|
 Courtesy of TESLA, INC. Courtesy of TESLA, INC.
|
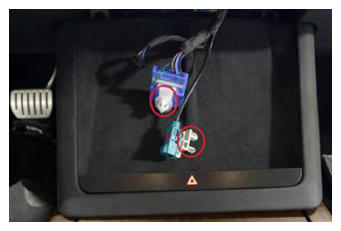
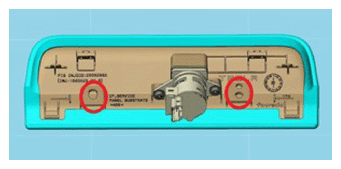
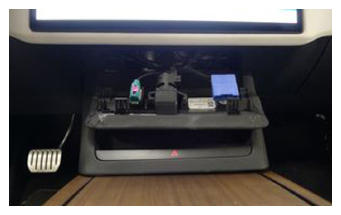
- Secure diagnostic and CAN harnesses to IP service panel
NOTE:
2x clips
 Courtesy of TESLA, INC. Courtesy of TESLA, INC.
|
 Courtesy of TESLA, INC. Courtesy of TESLA, INC.
|
 Courtesy of TESLA, INC. Courtesy of TESLA, INC.
|
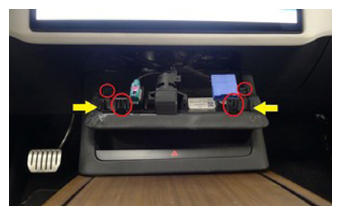
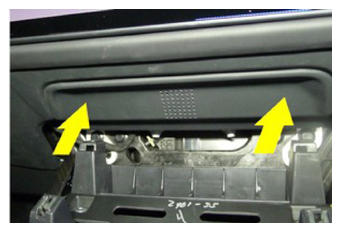
- Install IP service panel
NOTE:
4x tabs, 2 datums
 Courtesy of TESLA, INC. Courtesy of TESLA, INC.
|
 Courtesy of TESLA, INC. Courtesy of TESLA, INC.
|
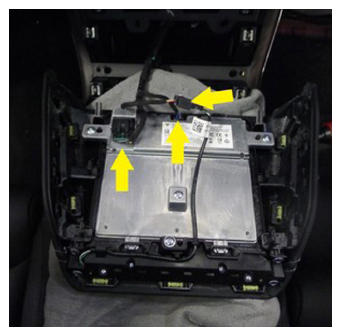
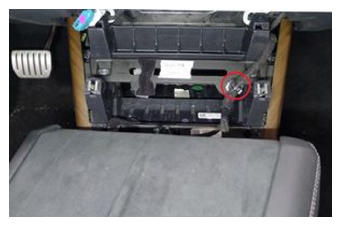
- Install phone dock connections
NOTE:
3x connectors, 1x clip
 Courtesy of TESLA, INC. Courtesy of TESLA, INC.
|
 Courtesy of TESLA, INC. Courtesy of TESLA, INC.
|
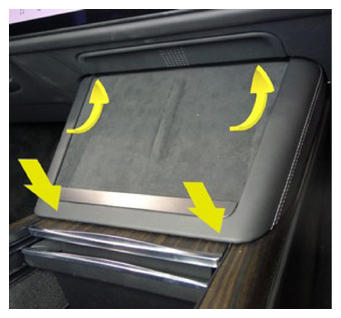
- Install phone dock
NOTE:
2x datums, 4 tabs, Slide datums forward into IP and secure tabs down into center console
 Courtesy of TESLA, INC. Courtesy of TESLA, INC.
|
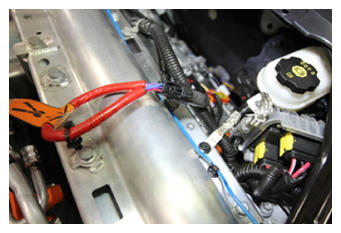
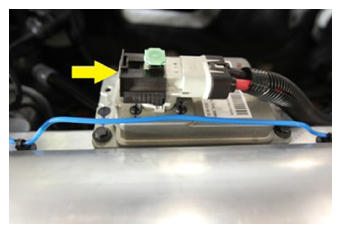
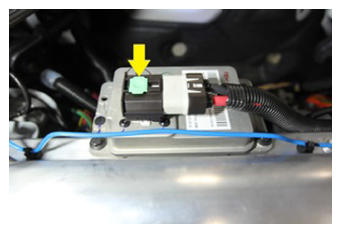
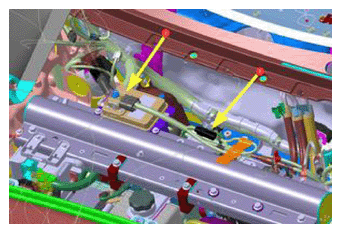
- Connect First Responder Loop and LV battery connector
NOTE:
2x connectors Secure FRL first, Seat LV battery connection and push black connector lock inwards to secure, Engage green locking tab when fully seated
 Courtesy of TESLA, INC. Courtesy of TESLA, INC.
|
 Courtesy of TESLA, INC. Courtesy of TESLA, INC.
|
 Courtesy of TESLA, INC. Courtesy of TESLA, INC.
|
 Courtesy of TESLA, INC. Courtesy of TESLA, INC.
|
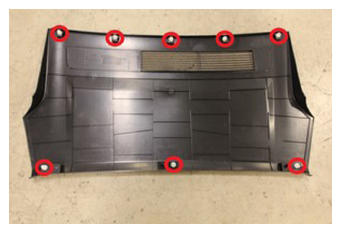
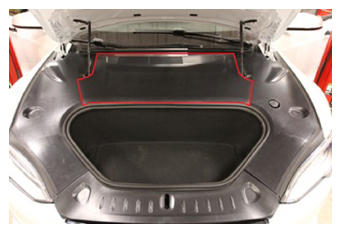
- Install rear underhood apron
NOTE:
8x clips
 Courtesy of TESLA, INC. Courtesy of TESLA, INC.
|
 Courtesy of TESLA, INC. Courtesy of TESLA, INC.
|
- Adjust steering column back to original position
NOTE:
Via UI>Quick Controls>Steering Wheel, Use left steering wheel scroll wheel to adjust steering column
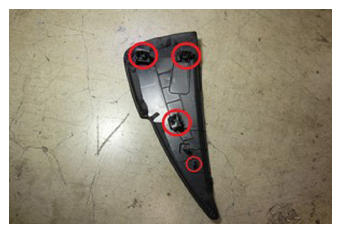
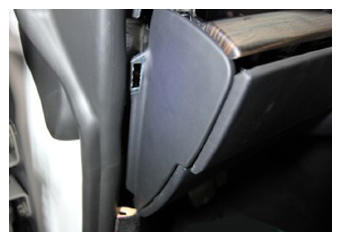
- Install LH IP end cap
NOTE:
4x clips
 Courtesy of TESLA, INC. Courtesy of TESLA, INC.
|
 Courtesy of TESLA, INC. Courtesy of TESLA, INC.
|
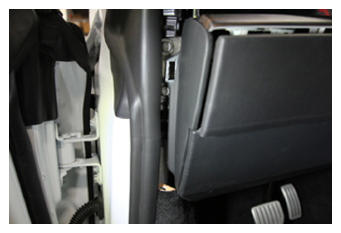
- Install LH mid A-pillar trim
NOTE:
1x clip, 2x tabs, Verify weather seal is seated properly
 Courtesy of TESLA, INC. Courtesy of TESLA, INC.
|
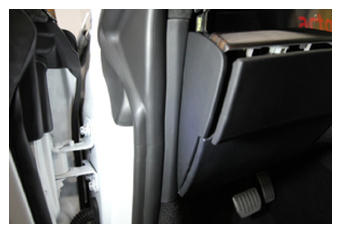 Courtesy of TESLA, INC. Courtesy of TESLA, INC.
|
- Install RH IP end cap
NOTE:
4x clips
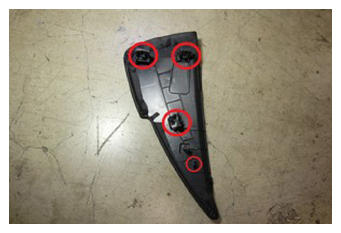 Courtesy of TESLA, INC. Courtesy of TESLA, INC.
|
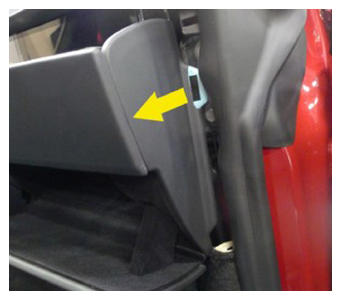 Courtesy of TESLA, INC. Courtesy of TESLA, INC.
|
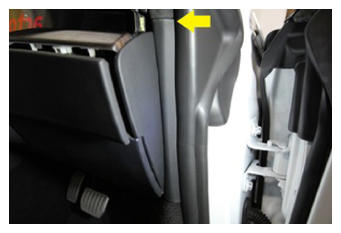
- Install RH mid A-pillar trim
NOTE:
1x clip, 2x tabs, Verify weather seal is seated properly
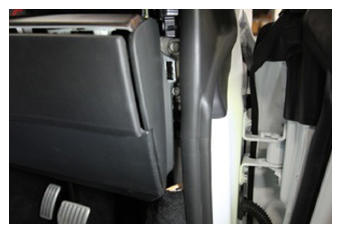 Courtesy of TESLA, INC. Courtesy of TESLA, INC.
|
 Courtesy of TESLA, INC. Courtesy of TESLA, INC.
|