- Remove rear underhood apron
NOTE:
8x clips
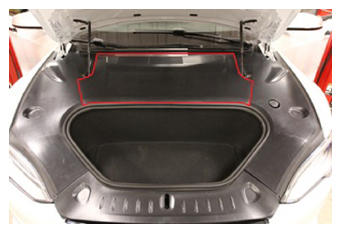 Courtesy of TESLA, INC. Courtesy of TESLA, INC.
|
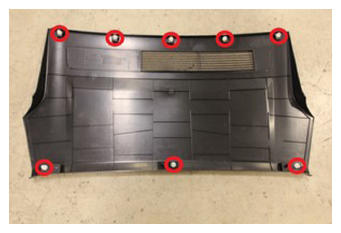 Courtesy of TESLA, INC. Courtesy of TESLA, INC.
|
- Remove LH underhood apron
NOTE:
10x clips
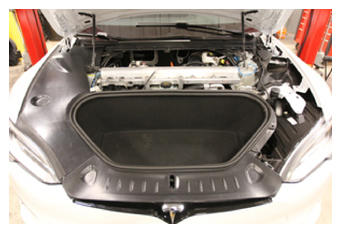 Courtesy of TESLA, INC. Courtesy of TESLA, INC.
|
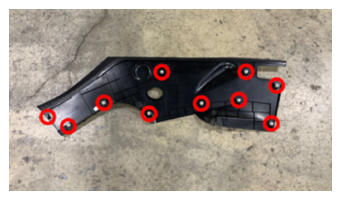 Courtesy of TESLA, INC. Courtesy of TESLA, INC.
|
- Remove RH underhood apron
NOTE:
10x clips
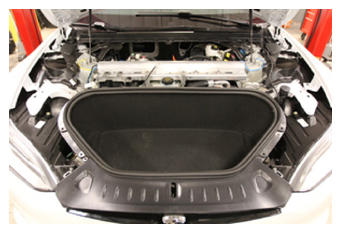 Courtesy of TESLA, INC. Courtesy of TESLA, INC.
|
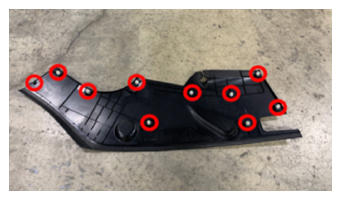 Courtesy of TESLA, INC. Courtesy of TESLA, INC.
|
- Release LH wiper arm hose nozzle
NOTE:
1x hose
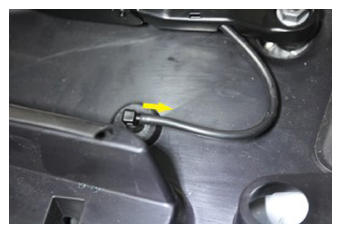 Courtesy of TESLA, INC. Courtesy of TESLA, INC.
|
- Remove LH wiper arm nut cover
NOTE:
1x cover
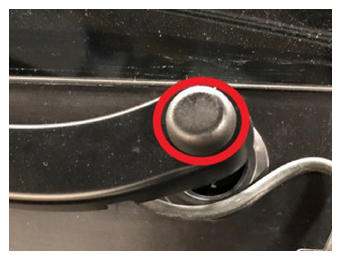 Courtesy of TESLA, INC. Courtesy of TESLA, INC.
|
- Remove LH wiper arm nut and release assembly
NOTE:
1x nut, 15 mm, 26 N.m
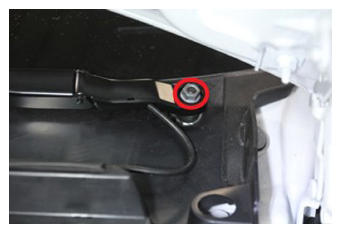 Courtesy of TESLA, INC. Courtesy of TESLA, INC.
|
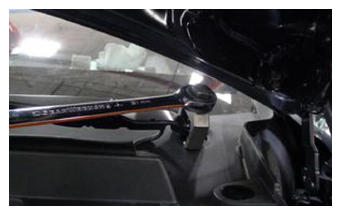 Courtesy of TESLA, INC. Courtesy of TESLA, INC.
|
- Release RH wiper arm hose nozzle
NOTE:
1x hose
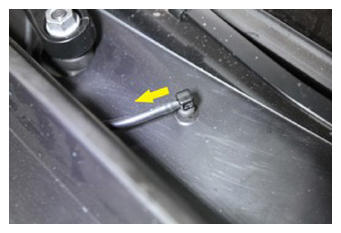 Courtesy of TESLA, INC. Courtesy of TESLA, INC.
|
- Remove RH wiper arm nut cover
NOTE:
1x cover
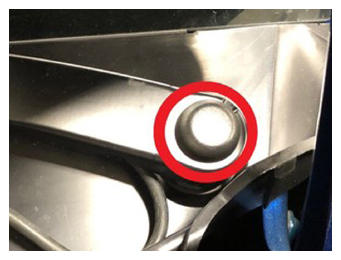 Courtesy of TESLA, INC. Courtesy of TESLA, INC.
|
- Remove RH wiper arm nut and release assembly
NOTE:
1x nut, 15 mm, 26 N.m
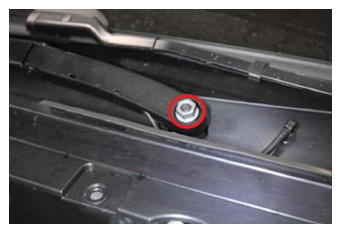 Courtesy of TESLA, INC. Courtesy of TESLA, INC.
|
- Release washer hose nozzle by LH shock tower cover
NOTE:
1x hose, 3x clips
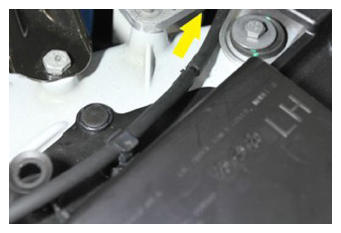 Courtesy of TESLA, INC. Courtesy of TESLA, INC.
|
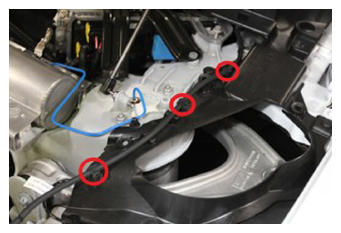 Courtesy of TESLA, INC. Courtesy of TESLA, INC.
|
- Remove LH shock tower cover
NOTE:
3x push clips, 1x fir tree clip
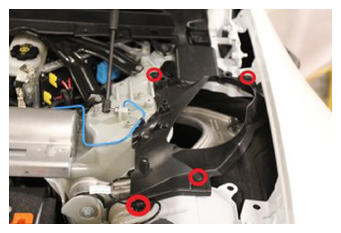 Courtesy of TESLA, INC. Courtesy of TESLA, INC.
|
- Remove RH shock tower cover
NOTE:
3x push clips, 1x fir tree clip
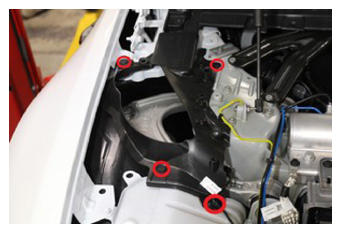 Courtesy of TESLA, INC. Courtesy of TESLA, INC.
|
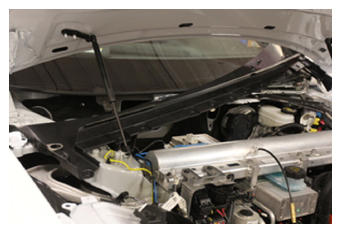
- Remove wiper cowl screen panel
NOTE:
4x push clips, 2x end tabs
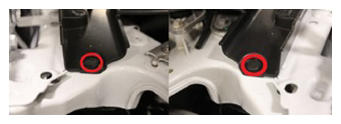 Courtesy of TESLA, INC. Courtesy of TESLA, INC.
|
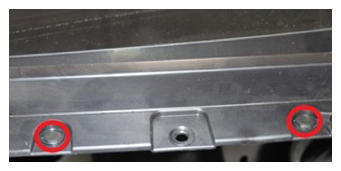 Courtesy of TESLA, INC. Courtesy of TESLA, INC.
|
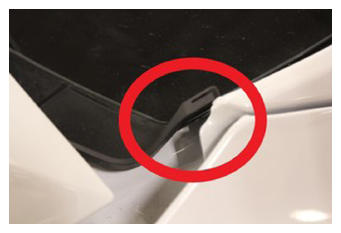 Courtesy of TESLA, INC. Courtesy of TESLA, INC.
|
 Courtesy of TESLA, INC. Courtesy of TESLA, INC.
|
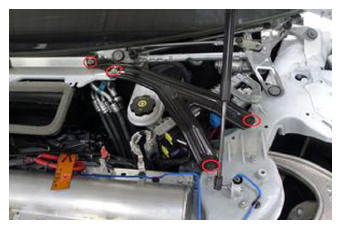
- Remove fasteners securing LH V-brace and remove assembly
NOTE:
3x bolts, 10 mm, 18 N.m, 1x nut, 10 mm, 9 N.m
 Courtesy of TESLA, INC. Courtesy of TESLA, INC.
|
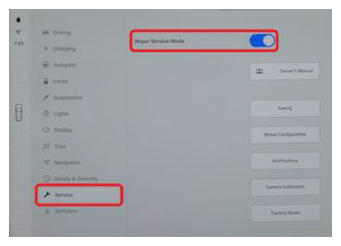
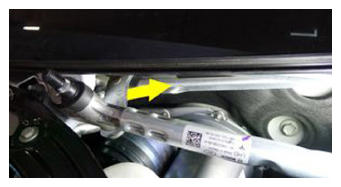
- Using center display, place wipers into "Service Mode"
NOTE:
via Controls > Service > Wiper Service Mode, If wiper module is not in service mode the RH pivot arm will not clear the V Brace crossmember during removal
 Courtesy of TESLA, INC. Courtesy of TESLA, INC.
|
 Courtesy of TESLA, INC. Courtesy of TESLA, INC.
|
- Remove wiper module
NOTE:
3x bolts, 10 mm, 8 N.m, 1x connector, Rotate module forward and up to access connector, Observe LH wiper arm pivot during removal to avoid damage to windshield
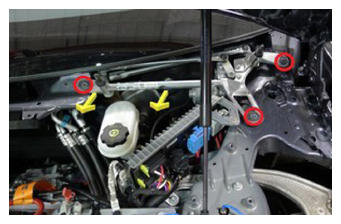 Courtesy of TESLA, INC. Courtesy of TESLA, INC.
|
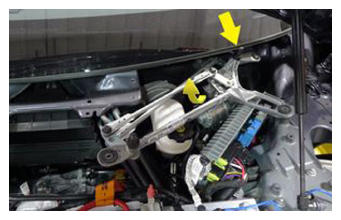 Courtesy of TESLA, INC. Courtesy of TESLA, INC.
|
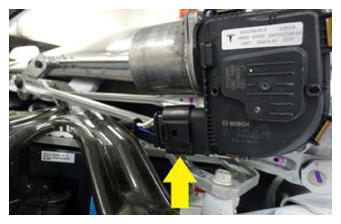 Courtesy of TESLA, INC. Courtesy of TESLA, INC.
|
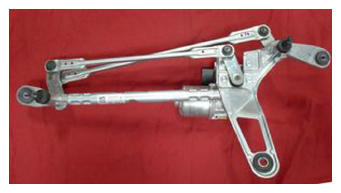 Courtesy of TESLA, INC. Courtesy of TESLA, INC.
|
- Release upper steering column bracket IP carrier bolts at bulkhead
NOTE:
2x bolts, 13 mm, 27 N.m
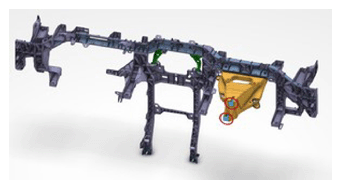 Courtesy of TESLA, INC. Courtesy of TESLA, INC.
|
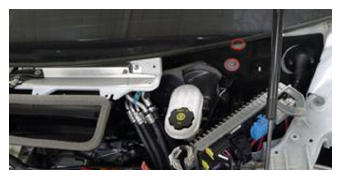 Courtesy of TESLA, INC. Courtesy of TESLA, INC.
|
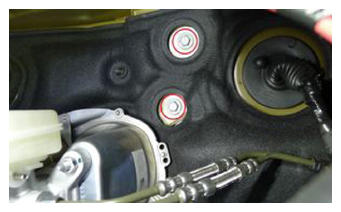 Courtesy of TESLA, INC. Courtesy of TESLA, INC.
|
- Remove the center console. See Center Console Assembly (Remove and Replace)
.
- Adjust steering column fully rearward and fully down
NOTE:
Via UI > Quick Controls > Steering Wheel, Use left steering wheel scroll wheel to adjust steering column
- Power off vehicle from center display
NOTE:
Via Controls > Safety & Security > Power Off
- Disconnect LV battery connector and First Responder Loop
NOTE:
2x connectors, Lift up and release green locking tab, Pull black connector lock outwards to release connection
- Remove the IP sub-assembly. See Sub-Assembly - Instrument Panel (Remove And Install) .
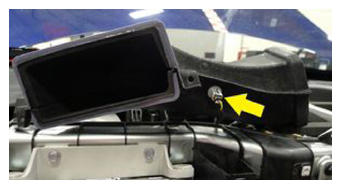
- Remove driver IP air vent duct
NOTE:
2x rivets, 1x connector, Slide outboard and up out of HVAC unit assembly
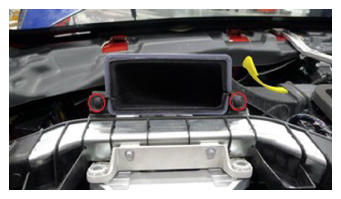 Courtesy of TESLA, INC. Courtesy of TESLA, INC.
|
 Courtesy of TESLA, INC. Courtesy of TESLA, INC.
|
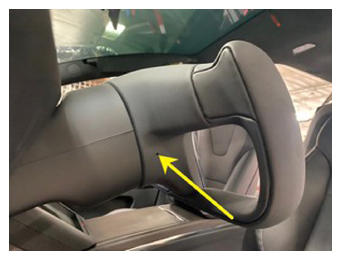
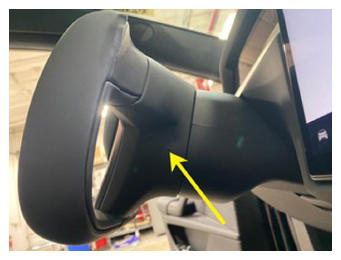
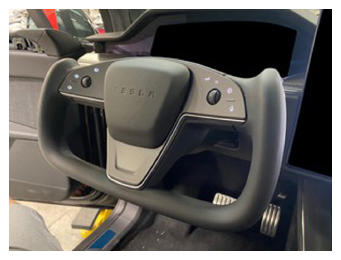
- Release spring clip securing driver air bag assembly to steering wheel and pull driver air bag assembly away from steering wheel
NOTE:
2x spring clips, 2x datums, Press the spring simultaneously from two access holes to release, Access holes located at 4 and 8 o'clock position, Do not insert tool too far as air bag connector could be damaged
 Courtesy of TESLA, INC. Courtesy of TESLA, INC.
|
 Courtesy of TESLA, INC. Courtesy of TESLA, INC.
|
 Courtesy of TESLA, INC. Courtesy of TESLA, INC.
|
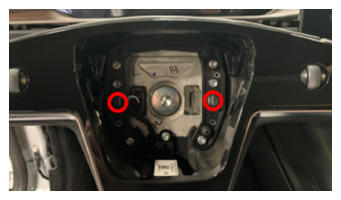 Courtesy of TESLA, INC. Courtesy of TESLA, INC.
|
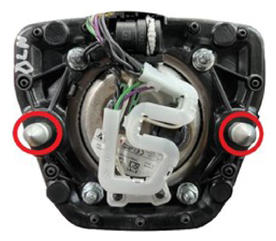 Courtesy of TESLA, INC. Courtesy of TESLA, INC.
|
- Disconnect driver air bag connector and remove driver air bag assembly
NOTE:
1x connector, 2x tabs
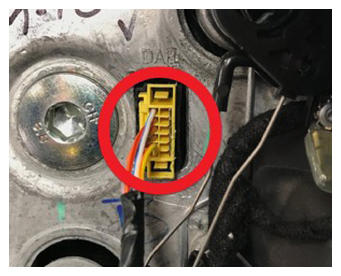 Courtesy of TESLA, INC. Courtesy of TESLA, INC.
|
- Disconnect steering wheel connector
NOTE:
1x connector
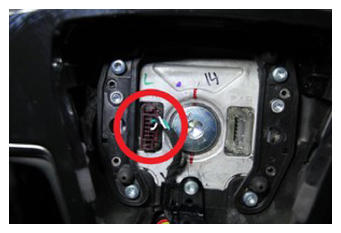 Courtesy of TESLA, INC. Courtesy of TESLA, INC.
|
- Remove bolt that secures the steering wheel to the column
NOTE:
1x patch bolt, 10 mm allen, 80 N.m, Discard after removal
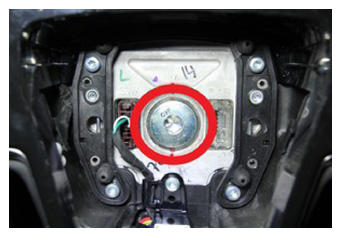 Courtesy of TESLA, INC. Courtesy of TESLA, INC.
|
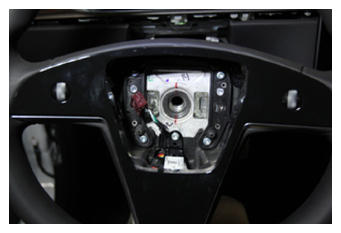 Courtesy of TESLA, INC. Courtesy of TESLA, INC.
|
- Remove steering wheel
NOTE:
Note that the steering wheel is splined to the column
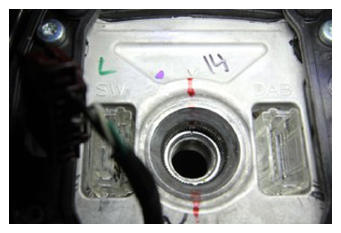 Courtesy of TESLA, INC. Courtesy of TESLA, INC.
|
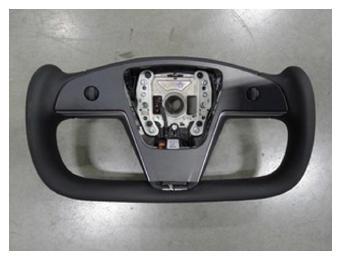 Courtesy of TESLA, INC. Courtesy of TESLA, INC.
|
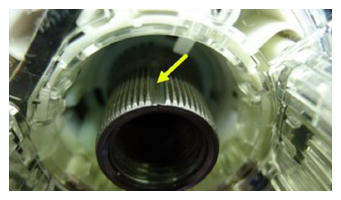 Courtesy of TESLA, INC. Courtesy of TESLA, INC.
|
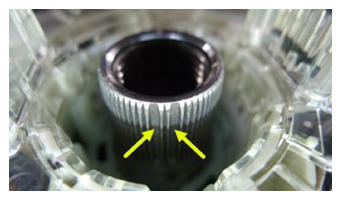 Courtesy of TESLA, INC. Courtesy of TESLA, INC.
|
- Pull upward to release steering column upper shroud from lower shroud
NOTE:
6x clips, 4x datums
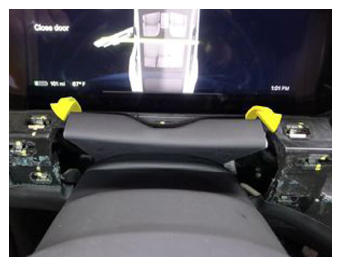 Courtesy of TESLA, INC. Courtesy of TESLA, INC.
|
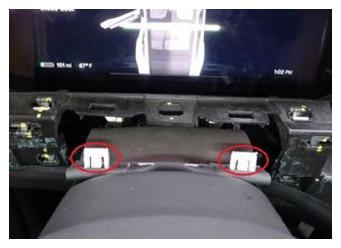 Courtesy of TESLA, INC. Courtesy of TESLA, INC.
|
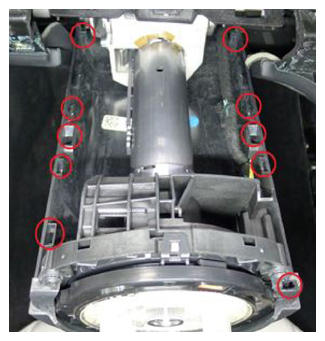 Courtesy of TESLA, INC. Courtesy of TESLA, INC.
|
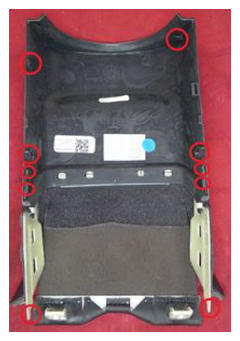 Courtesy of TESLA, INC. Courtesy of TESLA, INC.
|
- Remove lower shroud to steering column
NOTE:
2x screws, T20, 1.5 N.m, 1x clip, 1x datum, Slide lower shroud rearward to release datum
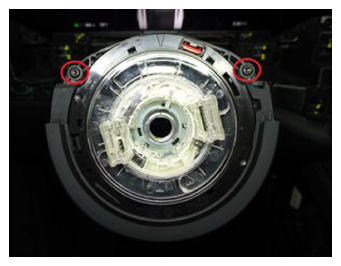 Courtesy of TESLA, INC. Courtesy of TESLA, INC.
|
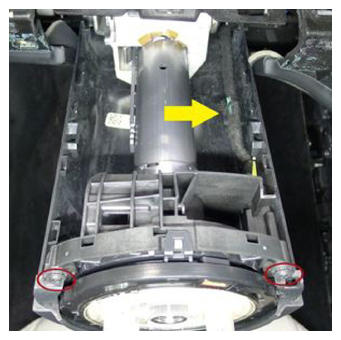 Courtesy of TESLA, INC. Courtesy of TESLA, INC.
|
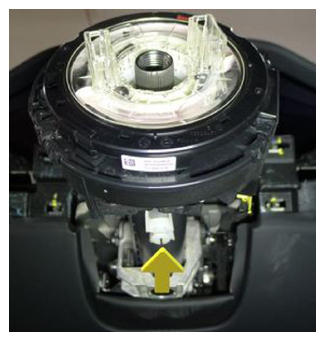 Courtesy of TESLA, INC. Courtesy of TESLA, INC.
|
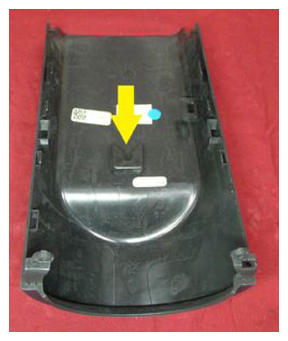 Courtesy of TESLA, INC. Courtesy of TESLA, INC.
|
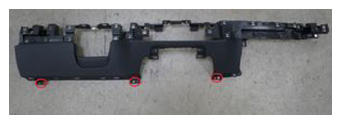
- Remove lower instrument panel assembly
NOTE:
3x screws, T20, 3 N.m, 8x tabs, Remaining screws located at bottom of assembly, Release assembly and carefully guide over upper steering column
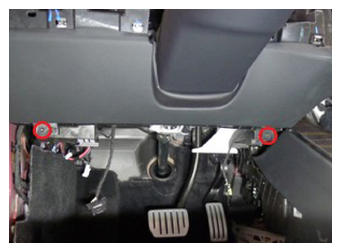 Courtesy of TESLA, INC. Courtesy of TESLA, INC.
|
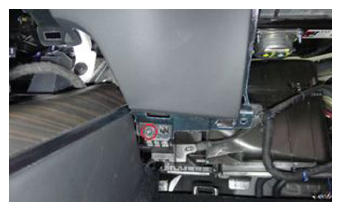 Courtesy of TESLA, INC. Courtesy of TESLA, INC.
|
 Courtesy of TESLA, INC. Courtesy of TESLA, INC.
|
 Courtesy of TESLA, INC. Courtesy of TESLA, INC.
|
 Courtesy of TESLA, INC. Courtesy of TESLA, INC.
|
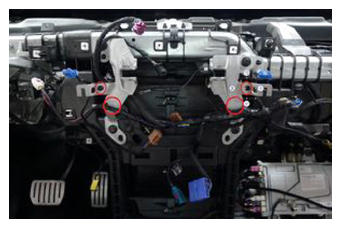
- Release IP harness at LH and RH center display brackets
NOTE:
4x clips
 Courtesy of TESLA, INC. Courtesy of TESLA, INC.
|
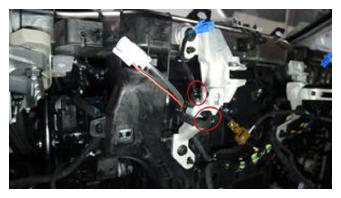 Courtesy of TESLA, INC. Courtesy of TESLA, INC.
|
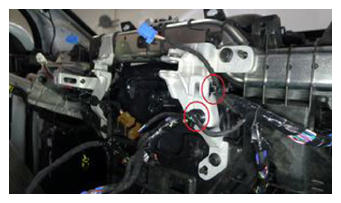 Courtesy of TESLA, INC. Courtesy of TESLA, INC.
|
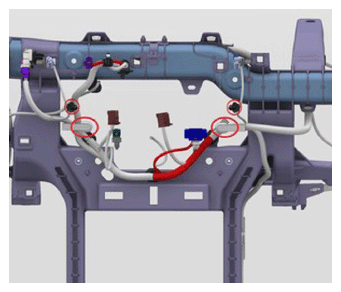 Courtesy of TESLA, INC. Courtesy of TESLA, INC.
|
- Release IP harness from center IP carrier
NOTE:
2x clips, Once released maneuver IP harness behind both center display brackets into passenger side footwell
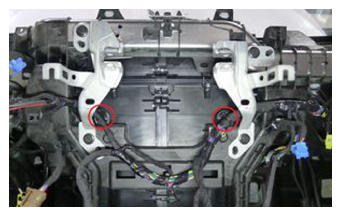 Courtesy of TESLA, INC. Courtesy of TESLA, INC.
|
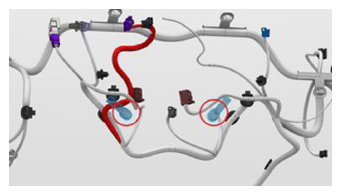 Courtesy of TESLA, INC. Courtesy of TESLA, INC.
|
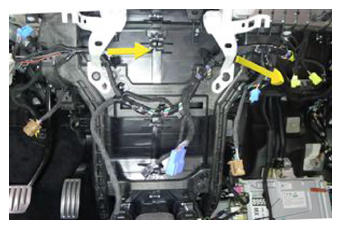 Courtesy of TESLA, INC. Courtesy of TESLA, INC.
|
- Release IP harness from RH IP carrier
NOTE:
4x clips
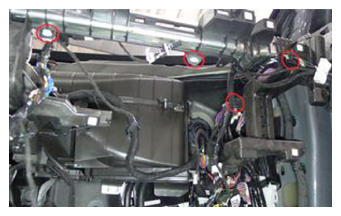 Courtesy of TESLA, INC. Courtesy of TESLA, INC.
|
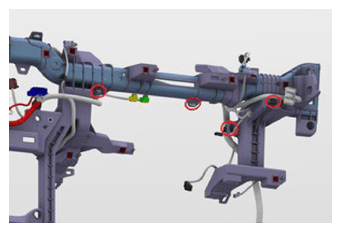 Courtesy of TESLA, INC. Courtesy of TESLA, INC.
|
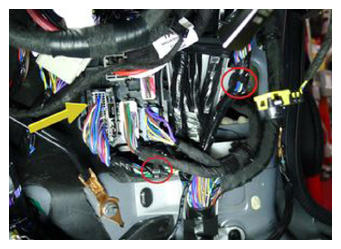
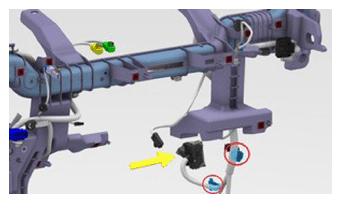
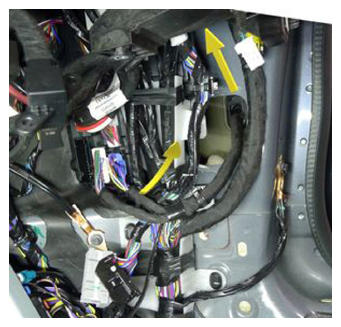
- Release IP harness from J12 x055 Dash connector at right body controller
NOTE:
2x clips, 1x connector, Release lock then remove
 Courtesy of TESLA, INC. Courtesy of TESLA, INC.
|
 Courtesy of TESLA, INC. Courtesy of TESLA, INC.
|
 Courtesy of TESLA, INC. Courtesy of TESLA, INC.
|
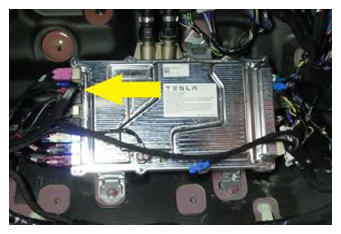
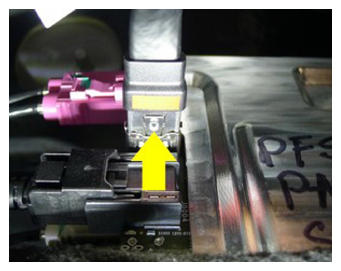
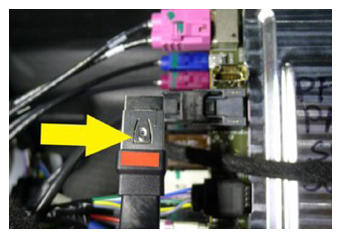
- Release connector to gaming MCU
NOTE:
1x connector, Depress lock on underside of connector before pulling out of socket, Possible damage to PCBA may occur if removed without releasing lock first
 Courtesy of TESLA, INC. Courtesy of TESLA, INC.
|
 Courtesy of TESLA, INC. Courtesy of TESLA, INC.
|
 Courtesy of TESLA, INC. Courtesy of TESLA, INC.
|
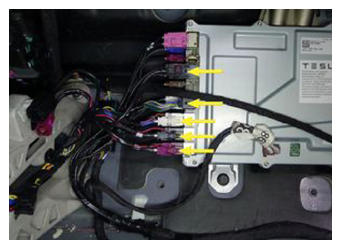
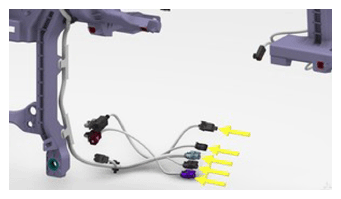
- Release IP harness connectors at LH side of car computer gaming board
NOTE:
5x connectors, Release locks on connectors before removal
 Courtesy of TESLA, INC. Courtesy of TESLA, INC.
|
 Courtesy of TESLA, INC. Courtesy of TESLA, INC.
|
- Release IP harness from lower center IP carrier
NOTE:
6x clips
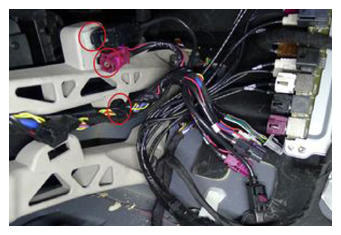 Courtesy of TESLA, INC. Courtesy of TESLA, INC.
|
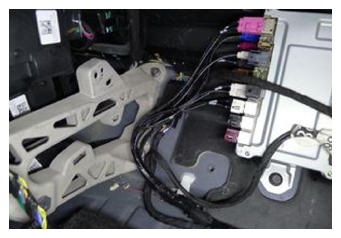 Courtesy of TESLA, INC. Courtesy of TESLA, INC.
|
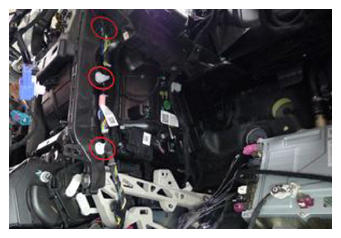 Courtesy of TESLA, INC. Courtesy of TESLA, INC.
|
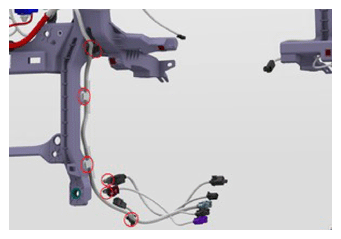 Courtesy of TESLA, INC. Courtesy of TESLA, INC.
|
- Release IP harness at upper center IP carrier
NOTE:
3x clips
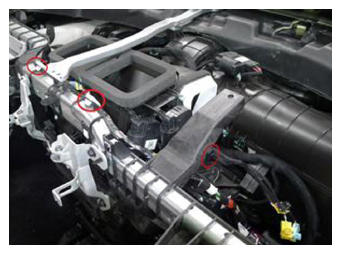 Courtesy of TESLA, INC. Courtesy of TESLA, INC.
|
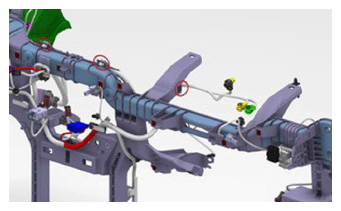 Courtesy of TESLA, INC. Courtesy of TESLA, INC.
|
- Release IP harness from LH center IP carrier
NOTE:
3x clips
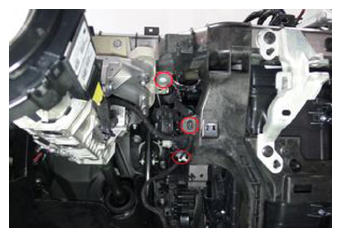 Courtesy of TESLA, INC. Courtesy of TESLA, INC.
|
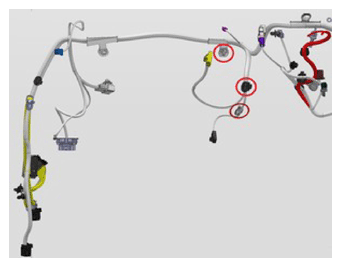 Courtesy of TESLA, INC. Courtesy of TESLA, INC.
|
- Disconnect steering column control module assembly connector
NOTE:
1x connector, Remove retaining clip on the connector, release connector, then remove the remaining broken clip from connector, Discard retaining clip after removal, Originally installed clip is black, Replacement clip is orange
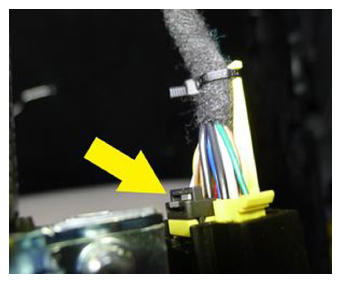 Courtesy of TESLA, INC. Courtesy of TESLA, INC.
|
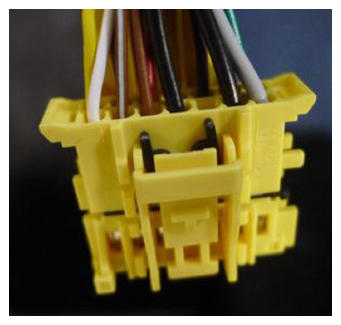 Courtesy of TESLA, INC. Courtesy of TESLA, INC.
|
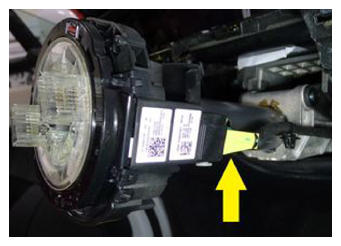 Courtesy of TESLA, INC. Courtesy of TESLA, INC.
|
- Release IP harness from J12 x035 Dash connector at left body controller and connector x947F
NOTE:
4x clips, 2x connector, Release lock then remove
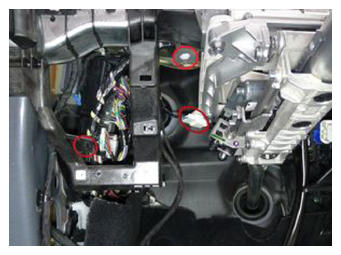 Courtesy of TESLA, INC. Courtesy of TESLA, INC.
|
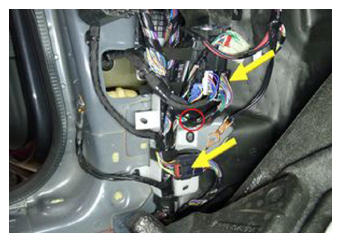 Courtesy of TESLA, INC. Courtesy of TESLA, INC.
|
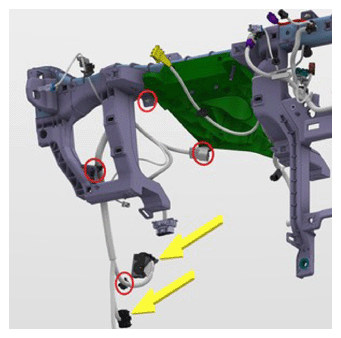 Courtesy of TESLA, INC. Courtesy of TESLA, INC.
|
- Release IP cowl link
NOTE:
2x bolts, 10 mm, 6 N.m, Only remove the bolts from the IP carrier and HVAC box
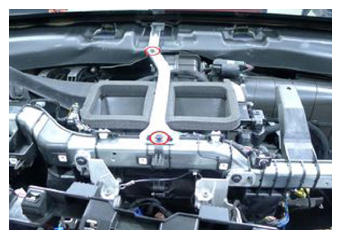 Courtesy of TESLA, INC. Courtesy of TESLA, INC.
|
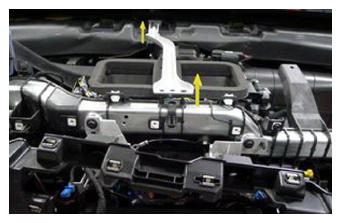 Courtesy of TESLA, INC. Courtesy of TESLA, INC.
|
- Remove IP harness from vehicle
NOTE:
Maneuver RH harness underneath IP cowl link, Maneuver LH harness up and over steering column
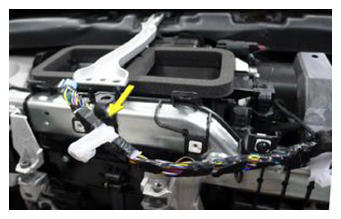 Courtesy of TESLA, INC. Courtesy of TESLA, INC.
|
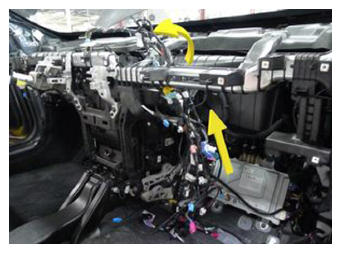 Courtesy of TESLA, INC. Courtesy of TESLA, INC.
|
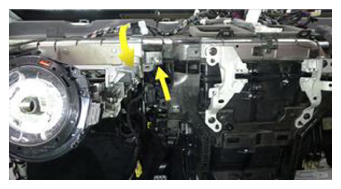 Courtesy of TESLA, INC. Courtesy of TESLA, INC.
|
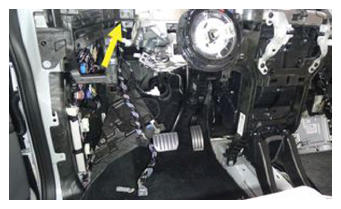 Courtesy of TESLA, INC. Courtesy of TESLA, INC.
|
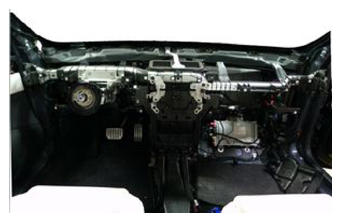 Courtesy of TESLA, INC. Courtesy of TESLA, INC.
|
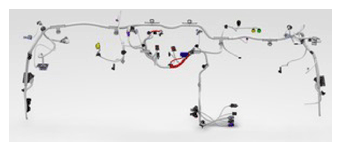 Courtesy of TESLA, INC. Courtesy of TESLA, INC.
|
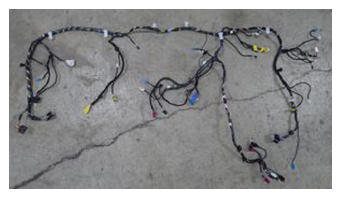 Courtesy of TESLA, INC. Courtesy of TESLA, INC.
|
- Release upper steering column from steering column bracket
NOTE:
4x nuts, 13 mm, 15 N.m, Rotate and set aside
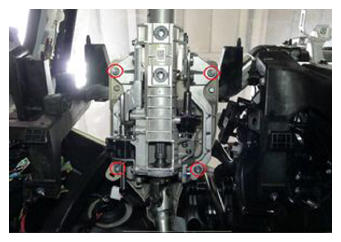 Courtesy of TESLA, INC. Courtesy of TESLA, INC.
|
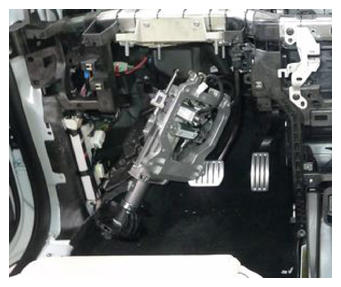 Courtesy of TESLA, INC. Courtesy of TESLA, INC.
|
- Release LH cross car beam assembly
NOTE:
2x bolts, 13 mm, 27 N.m
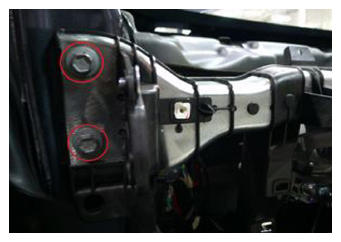 Courtesy of TESLA, INC. Courtesy of TESLA, INC.
|
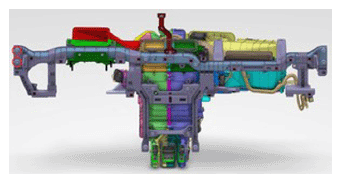 Courtesy of TESLA, INC. Courtesy of TESLA, INC.
|
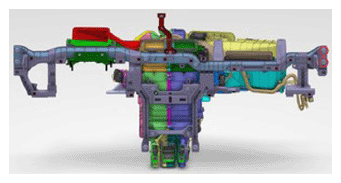
- Release RH cross car beam assembly
NOTE:
2x bolts, 13 mm, 27 N.m
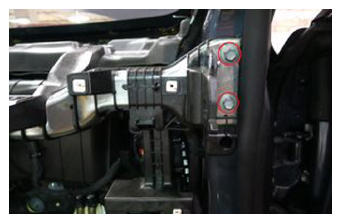 Courtesy of TESLA, INC. Courtesy of TESLA, INC.
|
 Courtesy of TESLA, INC. Courtesy of TESLA, INC.
|
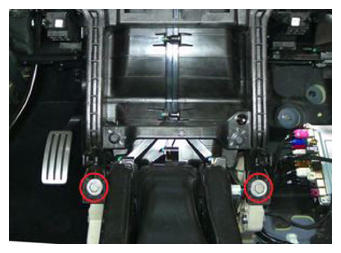
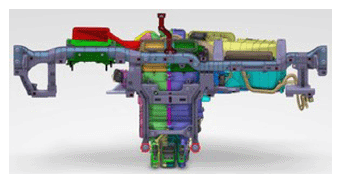
- Release cross car beam assembly from toeboard bracket
NOTE:
2x bolts, 13 mm, 27 N.m
 Courtesy of TESLA, INC. Courtesy of TESLA, INC.
|
 Courtesy of TESLA, INC. Courtesy of TESLA, INC.
|
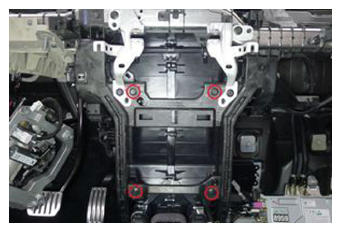
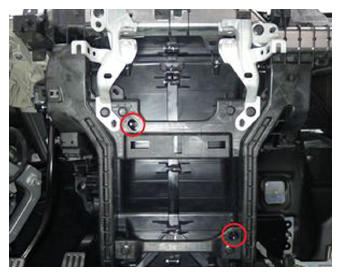
- Release cross car beam assembly from HVAC unit
NOTE:
4x bolts, 10 mm, 8 N.m
 Courtesy of TESLA, INC. Courtesy of TESLA, INC.
|
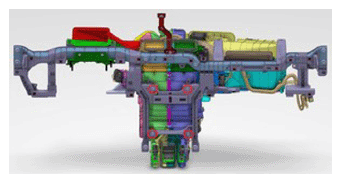 Courtesy of TESLA, INC. Courtesy of TESLA, INC.
|
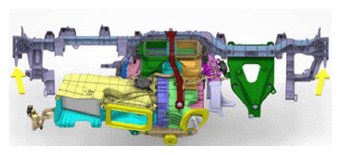
- Remove cross car beam assembly from body and HVAC unit
NOTE:
4x datums
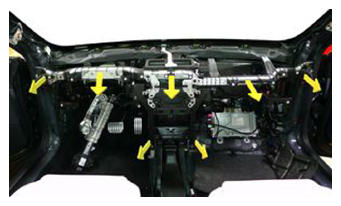 Courtesy of TESLA, INC. Courtesy of TESLA, INC.
|
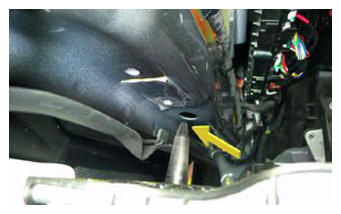 Courtesy of TESLA, INC. Courtesy of TESLA, INC.
|
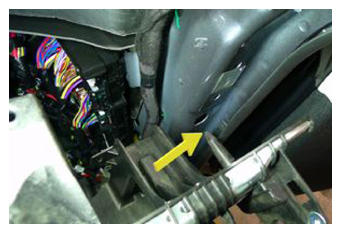 Courtesy of TESLA, INC. Courtesy of TESLA, INC.
|
 Courtesy of TESLA, INC. Courtesy of TESLA, INC.
|
 Courtesy of TESLA, INC. Courtesy of TESLA, INC.
|
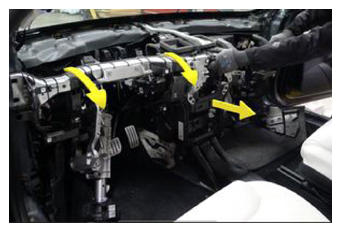
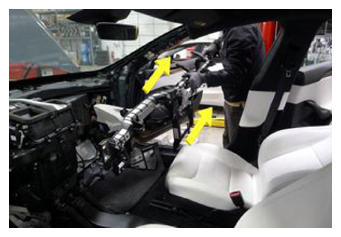
- Remove cross car beam assembly from vehicle
NOTE:
Avoid contact with seats and inner door panel, Recommend assistance as required
 Courtesy of TESLA, INC. Courtesy of TESLA, INC.
|
 Courtesy of TESLA, INC. Courtesy of TESLA, INC.
|
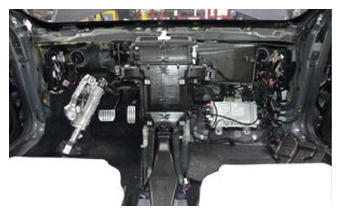 Courtesy of TESLA, INC. Courtesy of TESLA, INC.
|
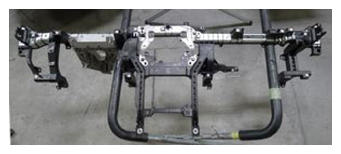 Courtesy of TESLA, INC. Courtesy of TESLA, INC.
|
- Remove center display brackets
NOTE:
4x bolts, 13 mm, 8 N.m, 4 x datums
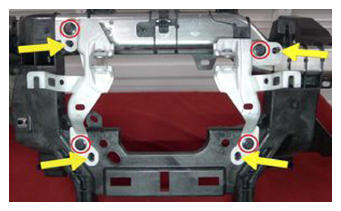 Courtesy of TESLA, INC. Courtesy of TESLA, INC.
|
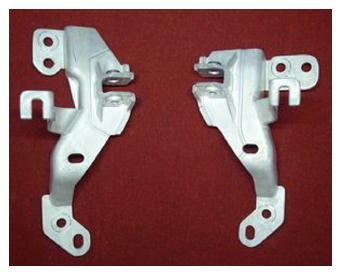 Courtesy of TESLA, INC. Courtesy of TESLA, INC.
|
- Install center display brackets to new cross car beam assembly
NOTE:
4x bolts, 13 mm, 8 N.m, 4 x datums
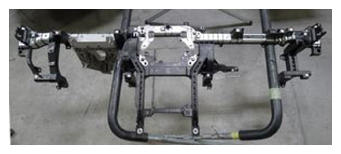 Courtesy of TESLA, INC. Courtesy of TESLA, INC.
|
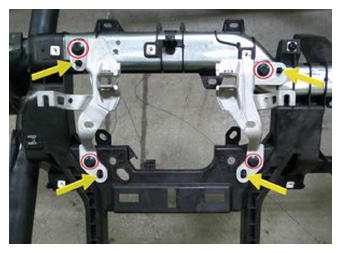 Courtesy of TESLA, INC. Courtesy of TESLA, INC.
|
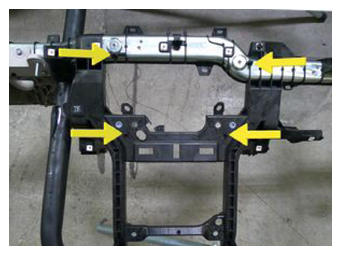 Courtesy of TESLA, INC. Courtesy of TESLA, INC.
|
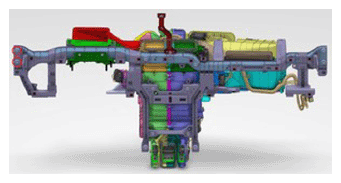
- Install cross car beam assembly into vehicle
NOTE:
4x datums, Avoid contact with seats and inner door panel, Recommend assistance as required, Align datums before fully engaging with HVAC assembly
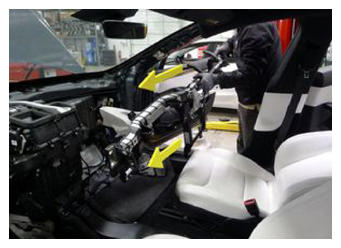 Courtesy of TESLA, INC. Courtesy of TESLA, INC.
|
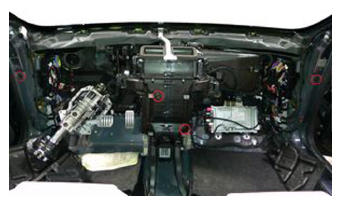 Courtesy of TESLA, INC. Courtesy of TESLA, INC.
|
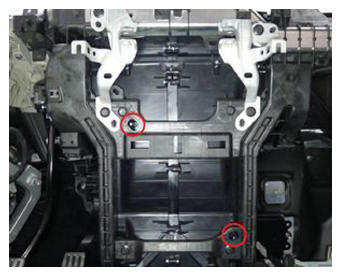
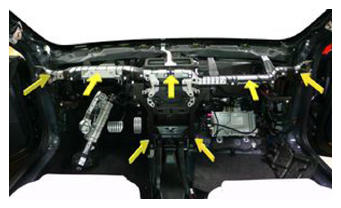
- Engage cross car beam assembly to body and HVAC unit
NOTE:
4x datums
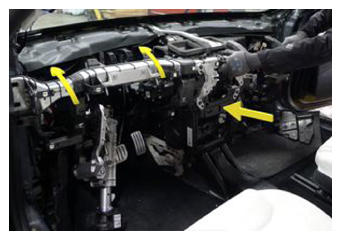 Courtesy of TESLA, INC. Courtesy of TESLA, INC.
|
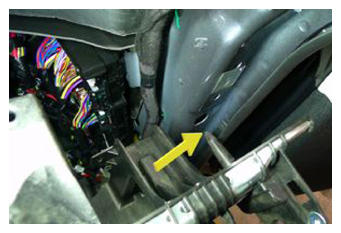 Courtesy of TESLA, INC. Courtesy of TESLA, INC.
|
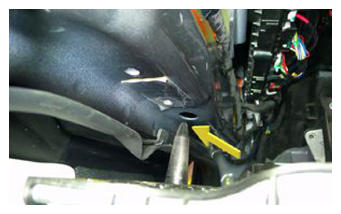 Courtesy of TESLA, INC. Courtesy of TESLA, INC.
|
 Courtesy of TESLA, INC. Courtesy of TESLA, INC.
|
 Courtesy of TESLA, INC. Courtesy of TESLA, INC.
|
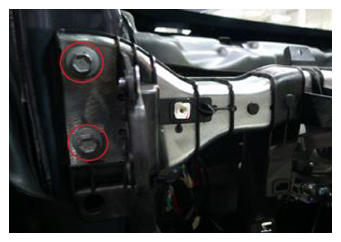
- Secure LH cross car beam assembly
NOTE:
2x bolts, 13 mm, 27 N.m
 Courtesy of TESLA, INC. Courtesy of TESLA, INC.
|
 Courtesy of TESLA, INC. Courtesy of TESLA, INC.
|
- Secure RH cross car beam assembly
NOTE:
2x bolts, 13 mm, 27 N.m
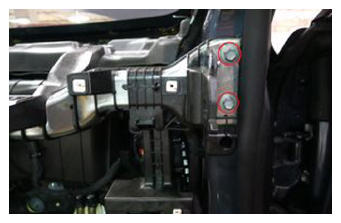 Courtesy of TESLA, INC. Courtesy of TESLA, INC.
|
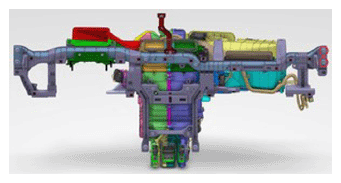 Courtesy of TESLA, INC. Courtesy of TESLA, INC.
|
- Secure cross car beam assembly to toeboard bracket
NOTE:
2x bolts, 13 mm, 27 N.m
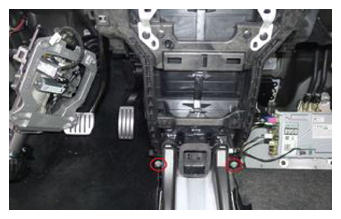 Courtesy of TESLA, INC. Courtesy of TESLA, INC.
|
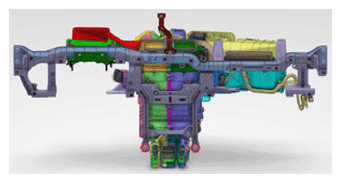 Courtesy of TESLA, INC. Courtesy of TESLA, INC.
|
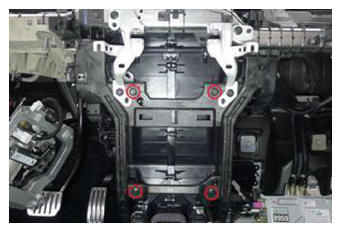
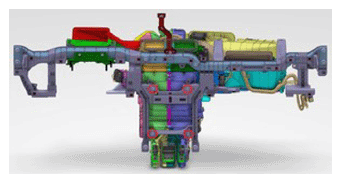
- Secure cross car beam assembly to HVAC unit
NOTE:
4x bolts, 10 mm, 8 N.m
 Courtesy of TESLA, INC. Courtesy of TESLA, INC.
|
 Courtesy of TESLA, INC. Courtesy of TESLA, INC.
|
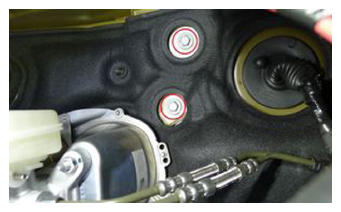
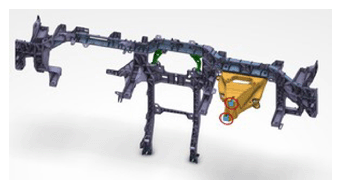
- Secure upper steering column bracket IP carrier bolts at bulkhead
NOTE:
2x bolts, 13 mm, 27 N.m
 Courtesy of TESLA, INC. Courtesy of TESLA, INC.
|
 Courtesy of TESLA, INC. Courtesy of TESLA, INC.
|
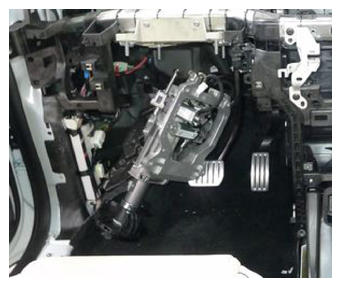
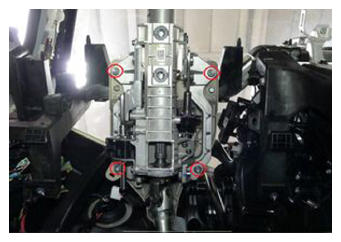
- Secure upper steering column to steering column bracket
NOTE:
4x nuts, 13 mm, 15 N.m
 Courtesy of TESLA, INC. Courtesy of TESLA, INC.
|
 Courtesy of TESLA, INC. Courtesy of TESLA, INC.
|
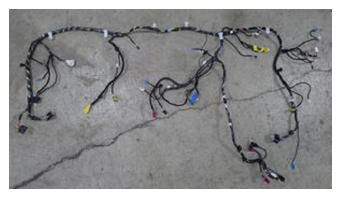
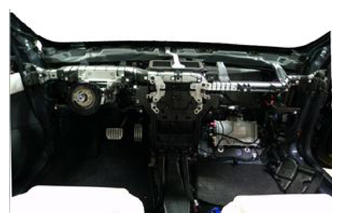
- Install IP harness into vehicle
NOTE:
Maneuver RH harness underneath IP cowl link down into passenger footwell, Maneuver LH harness up and over steering column down into driver footwell
 Courtesy of TESLA, INC. Courtesy of TESLA, INC.
|
 Courtesy of TESLA, INC. Courtesy of TESLA, INC.
|
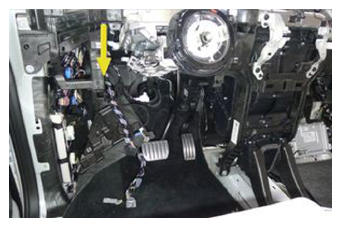 Courtesy of TESLA, INC. Courtesy of TESLA, INC.
|
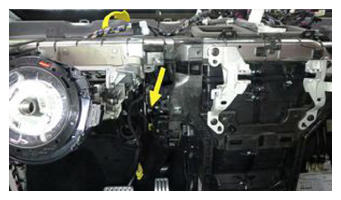 Courtesy of TESLA, INC. Courtesy of TESLA, INC.
|
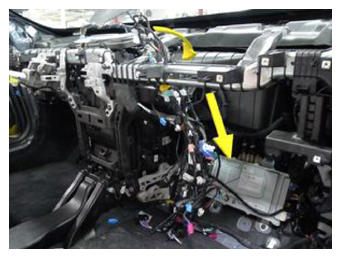 Courtesy of TESLA, INC. Courtesy of TESLA, INC.
|
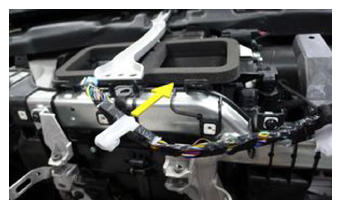 Courtesy of TESLA, INC. Courtesy of TESLA, INC.
|
- Secure IP cowl link
NOTE:
2x bolts, 10 mm, 6 N.m, 2x datums
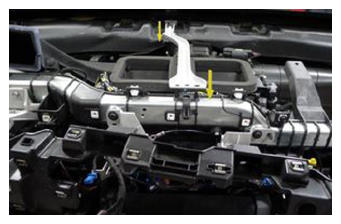 Courtesy of TESLA, INC. Courtesy of TESLA, INC.
|
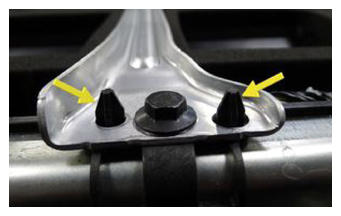 Courtesy of TESLA, INC. Courtesy of TESLA, INC.
|
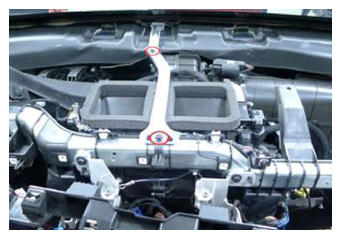 Courtesy of TESLA, INC. Courtesy of TESLA, INC.
|
- Secure IP harness to J12 x035 Dash connector at left body controller and connector x947F
NOTE:
4x clips, 2x connector
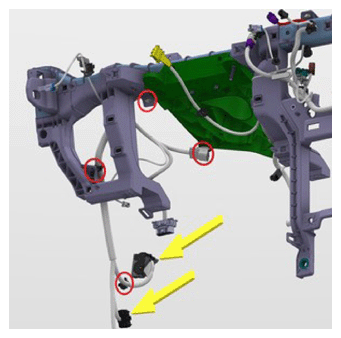 Courtesy of TESLA, INC. Courtesy of TESLA, INC.
|
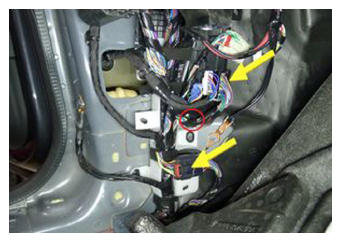 Courtesy of TESLA, INC. Courtesy of TESLA, INC.
|
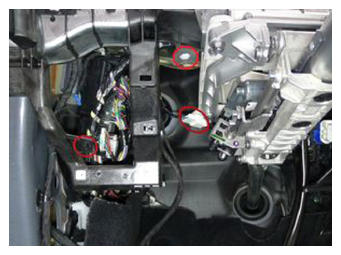 Courtesy of TESLA, INC. Courtesy of TESLA, INC.
|
- Connect steering column control module assembly connector
NOTE:
1x connector, Install new orange retaining clip to connector then install SCCM connector, Perform push-pull-push to make sure connector is seated properly
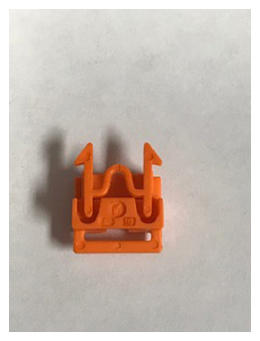 Courtesy of TESLA, INC. Courtesy of TESLA, INC.
|
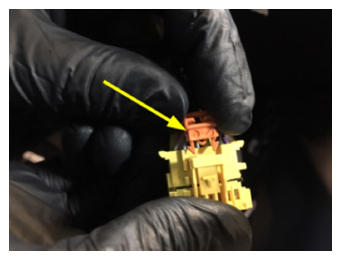 Courtesy of TESLA, INC. Courtesy of TESLA, INC.
|
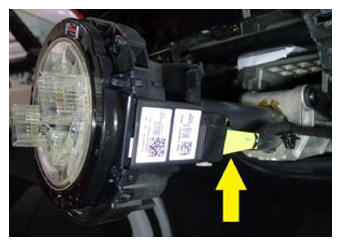 Courtesy of TESLA, INC. Courtesy of TESLA, INC.
|
- Secure IP harness to LH center IP carrier
NOTE:
3x clips
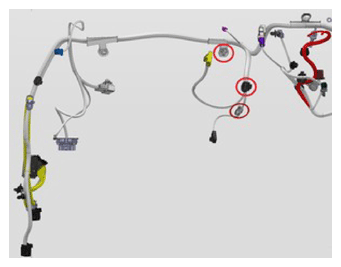 Courtesy of TESLA, INC. Courtesy of TESLA, INC.
|
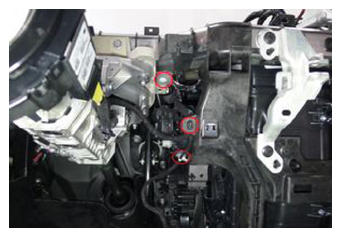 Courtesy of TESLA, INC. Courtesy of TESLA, INC.
|
- Secure IP harness at upper center IP carrier
NOTE:
3x clips
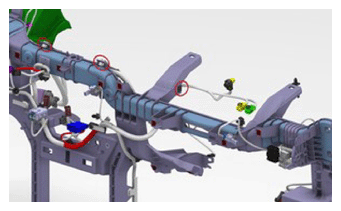 Courtesy of TESLA, INC. Courtesy of TESLA, INC.
|
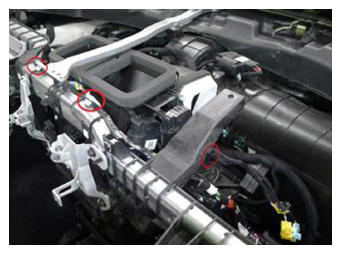 Courtesy of TESLA, INC. Courtesy of TESLA, INC.
|
- Secure IP harness to lower center IP carrier
NOTE:
6x clips
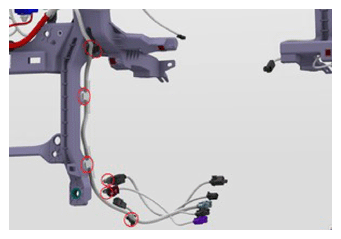 Courtesy of TESLA, INC. Courtesy of TESLA, INC.
|
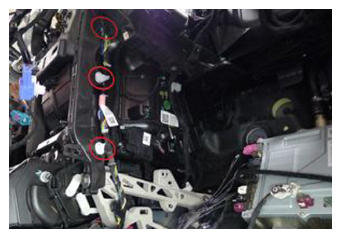 Courtesy of TESLA, INC. Courtesy of TESLA, INC.
|
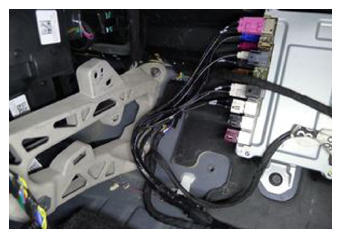 Courtesy of TESLA, INC. Courtesy of TESLA, INC.
|
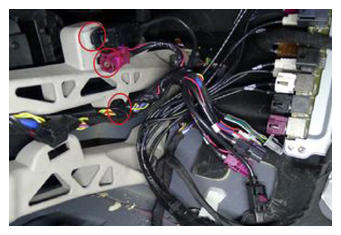 Courtesy of TESLA, INC. Courtesy of TESLA, INC.
|
- Secure IP harness connectors at LH side of car computer gaming board
NOTE:
5x connectors
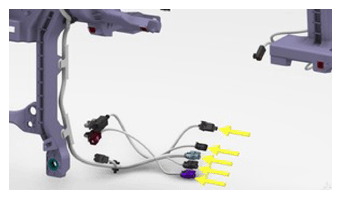 Courtesy of TESLA, INC. Courtesy of TESLA, INC.
|
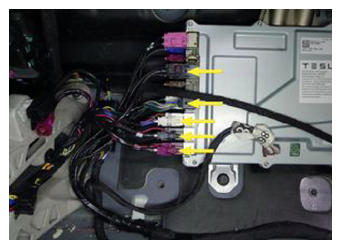 Courtesy of TESLA, INC. Courtesy of TESLA, INC.
|
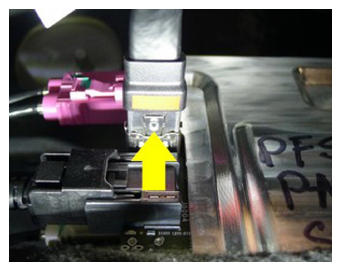
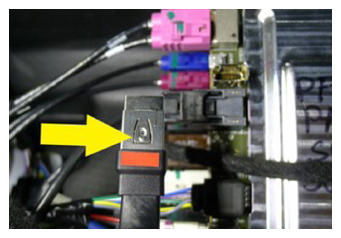
- Install connector to gaming MCU
NOTE:
1x connector, Confirm connector locked into socket
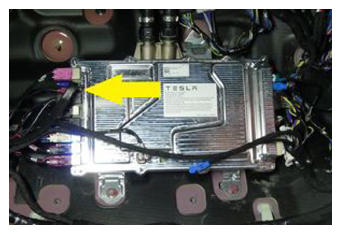 Courtesy of TESLA, INC. Courtesy of TESLA, INC.
|
 Courtesy of TESLA, INC. Courtesy of TESLA, INC.
|
 Courtesy of TESLA, INC. Courtesy of TESLA, INC.
|
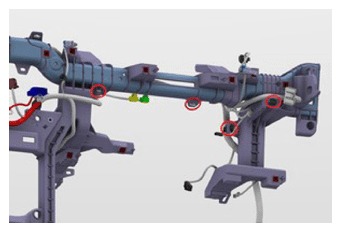
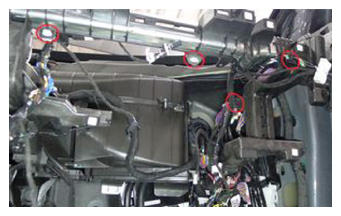
- Secure IP harness from RH IP carrier
NOTE:
4x clips
 Courtesy of TESLA, INC. Courtesy of TESLA, INC.
|
 Courtesy of TESLA, INC. Courtesy of TESLA, INC.
|
- Secure IP harness to J12 x055 Dash connector at right body controller
NOTE:
2x clips, 1x connector
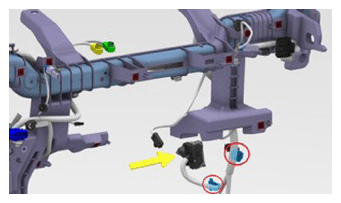 Courtesy of TESLA, INC. Courtesy of TESLA, INC.
|
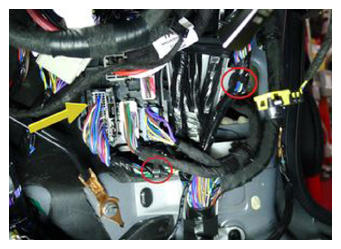 Courtesy of TESLA, INC. Courtesy of TESLA, INC.
|
- Secure IP harness to center IP carrier
NOTE:
2x clips, Maneuver IP harness behind both center display brackets into position
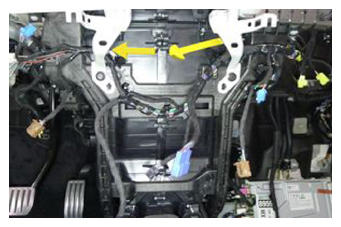 Courtesy of TESLA, INC. Courtesy of TESLA, INC.
|
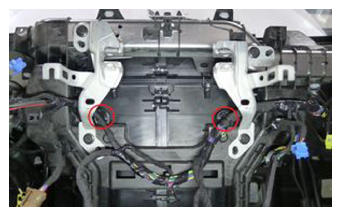 Courtesy of TESLA, INC. Courtesy of TESLA, INC.
|
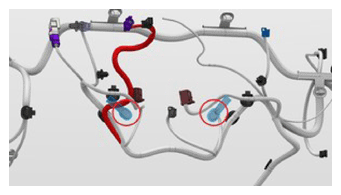 Courtesy of TESLA, INC. Courtesy of TESLA, INC.
|
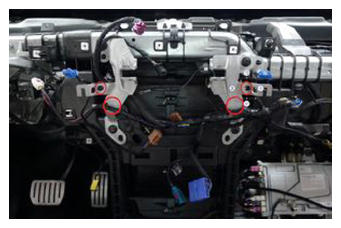
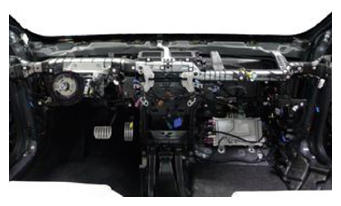
- Secure IP harness at LH and RH center display brackets
NOTE:
4x clips
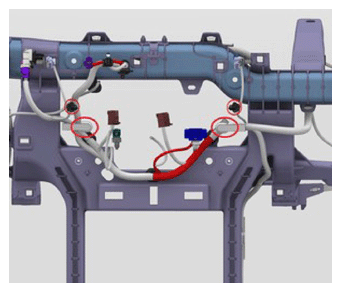 Courtesy of TESLA, INC. Courtesy of TESLA, INC.
|
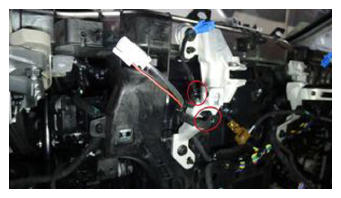 Courtesy of TESLA, INC. Courtesy of TESLA, INC.
|
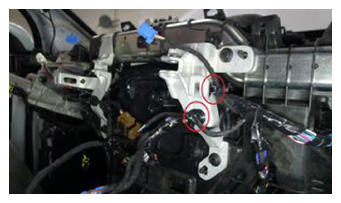 Courtesy of TESLA, INC. Courtesy of TESLA, INC.
|
 Courtesy of TESLA, INC. Courtesy of TESLA, INC.
|
 Courtesy of TESLA, INC. Courtesy of TESLA, INC.
|
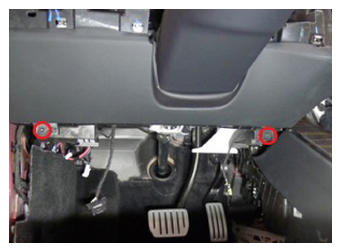
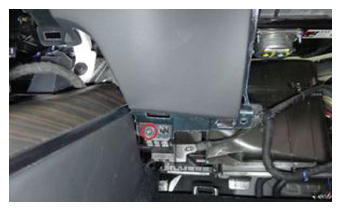
- Secure lower instrument panel assembly
NOTE:
3x screws, T20, 3 N.m, 8x tabs, Secure only the screws located at bottom of assembly, Remainder of screws are secured at a later step
 Courtesy of TESLA, INC. Courtesy of TESLA, INC.
|
 Courtesy of TESLA, INC. Courtesy of TESLA, INC.
|
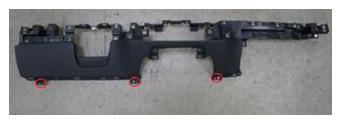 Courtesy of TESLA, INC. Courtesy of TESLA, INC.
|
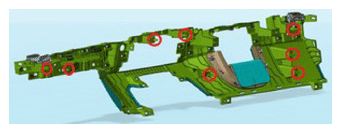 Courtesy of TESLA, INC. Courtesy of TESLA, INC.
|
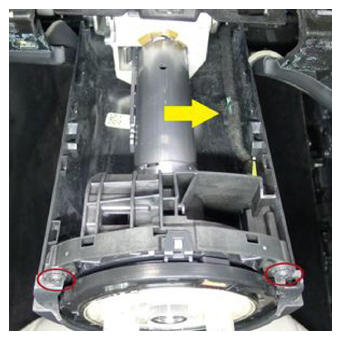
- Install lower shroud to steering column
NOTE:
2x screws, T20, 1.5 N.m, 1x clip, 1x datum, Slide lower shroud forward to engage datum
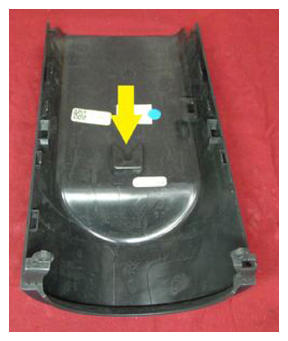 Courtesy of TESLA, INC. Courtesy of TESLA, INC.
|
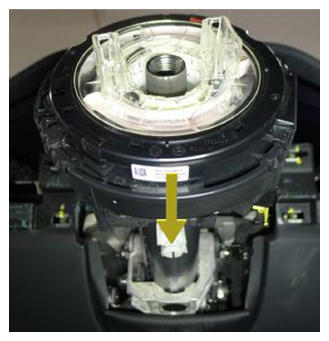 Courtesy of TESLA, INC. Courtesy of TESLA, INC.
|
 Courtesy of TESLA, INC. Courtesy of TESLA, INC.
|
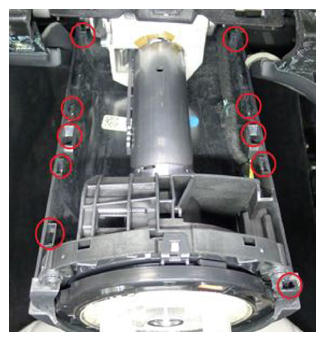
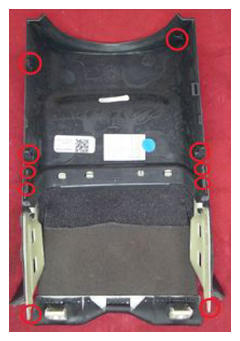
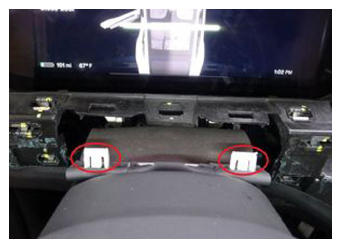
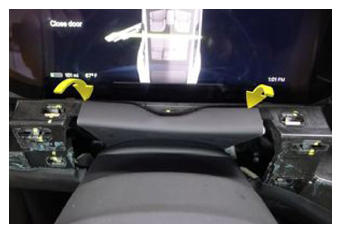
- Align the clips and datums then press downward to install upper shroud onto lower shroud
NOTE:
6x clips, 4x datums
 Courtesy of TESLA, INC. Courtesy of TESLA, INC.
|
 Courtesy of TESLA, INC. Courtesy of TESLA, INC.
|
 Courtesy of TESLA, INC. Courtesy of TESLA, INC.
|
 Courtesy of TESLA, INC. Courtesy of TESLA, INC.
|
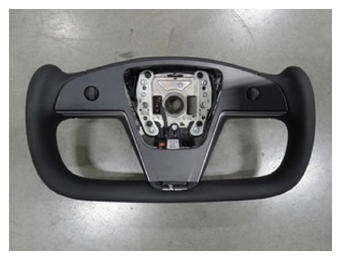
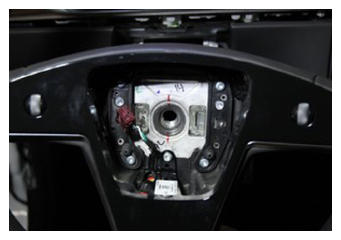
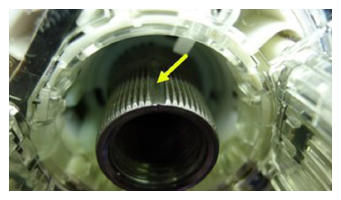
- Install steering wheel
NOTE:
Note that the steering wheel is splined to the column and can only be installed in the correct position
 Courtesy of TESLA, INC. Courtesy of TESLA, INC.
|
 Courtesy of TESLA, INC. Courtesy of TESLA, INC.
|
 Courtesy of TESLA, INC. Courtesy of TESLA, INC.
|
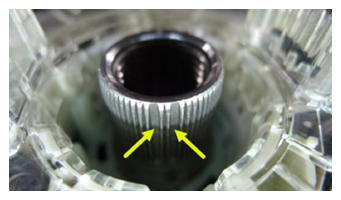 Courtesy of TESLA, INC. Courtesy of TESLA, INC.
|
- Install bolt securing steering wheel to steering column
NOTE:
1x patch bolt, 10 mm allen, 80 N.m, Install new patch bolt
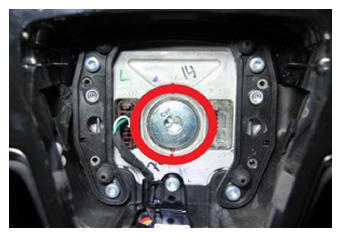 Courtesy of TESLA, INC. Courtesy of TESLA, INC.
|
- Secure steering wheel connector
NOTE:
1x connector
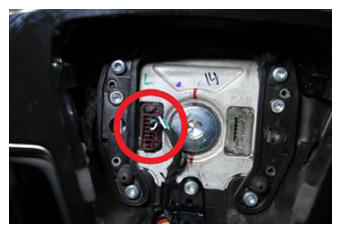 Courtesy of TESLA, INC. Courtesy of TESLA, INC.
|
- Connect driver air bag assembly connector
NOTE:
1x connector, 2x tabs
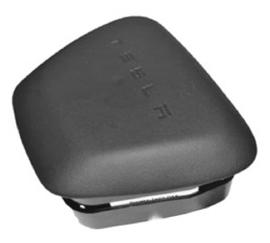 Courtesy of TESLA, INC. Courtesy of TESLA, INC.
|
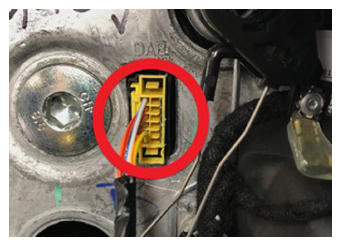 Courtesy of TESLA, INC. Courtesy of TESLA, INC.
|
- Install driver air bag assembly to yoke steering wheel
NOTE:
2x datums, 2x spring clip, Position driver air bag onto yoke steering wheel, Align datums onto the clips, Press down on one side of the air bag until clip is fully seated, then repeat on other side, You should hear an audible click, Perform pull test on each side of driver air bag assembly, Confirm the gap and space between driver air bag assembly to yoke steering wheel is symmetrical
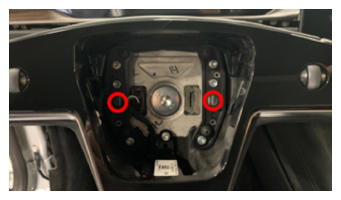 Courtesy of TESLA, INC. Courtesy of TESLA, INC.
|
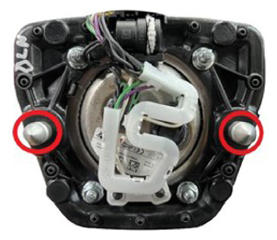 Courtesy of TESLA, INC. Courtesy of TESLA, INC.
|
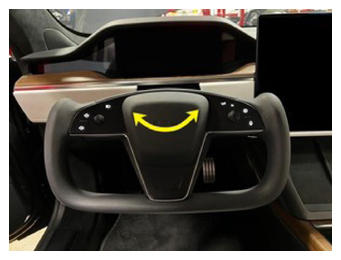 Courtesy of TESLA, INC. Courtesy of TESLA, INC.
|
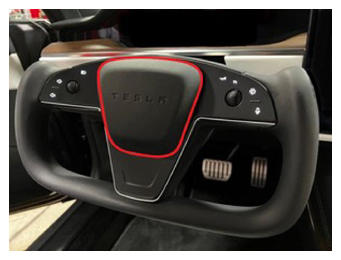 Courtesy of TESLA, INC. Courtesy of TESLA, INC.
|
- Install driver IP air vent duct
NOTE:
1x rivets, 1x connector, Slide inboard and into HVAC unit assembly
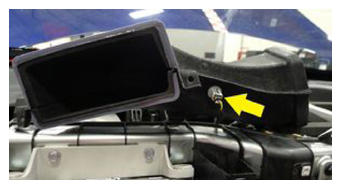 Courtesy of TESLA, INC. Courtesy of TESLA, INC.
|
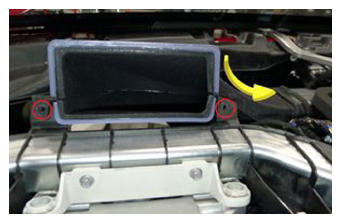 Courtesy of TESLA, INC. Courtesy of TESLA, INC.
|
- Install the instrument panel sub-assembly and all other parts that were removed for access. See Sub-Assembly - Instrument Panel (Remove And Install) .
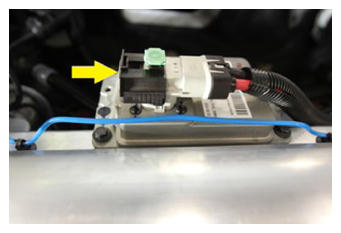
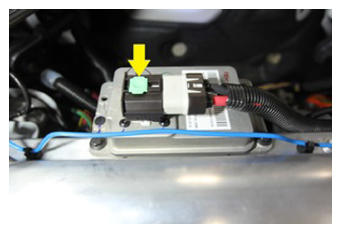
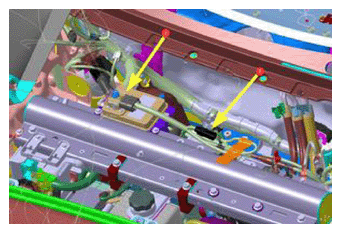
- Connect First Responder Loop and LV battery connector
NOTE:
2x connectors Secure FRL first, Seat LV battery connection and push black connector lock inwards to secure, Engage green locking tab when fully seated
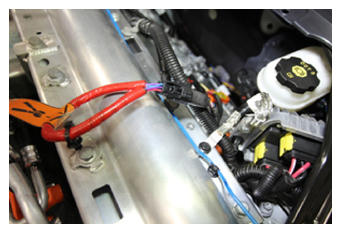 Courtesy of TESLA, INC. Courtesy of TESLA, INC.
|
 Courtesy of TESLA, INC. Courtesy of TESLA, INC.
|
 Courtesy of TESLA, INC. Courtesy of TESLA, INC.
|
 Courtesy of TESLA, INC. Courtesy of TESLA, INC.
|
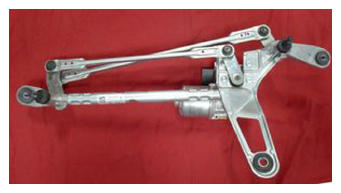
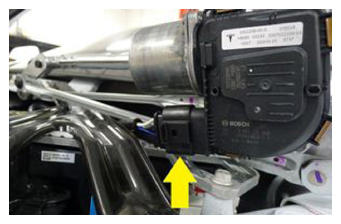
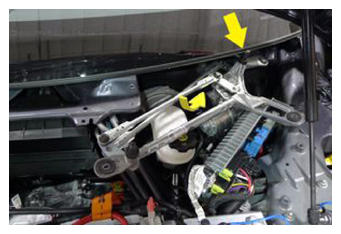
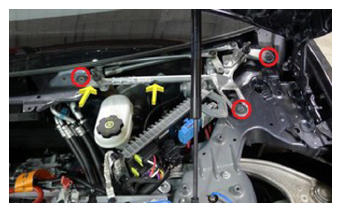
- Install wiper module
NOTE:
3x bolts, 10 mm, 8 N.m, 1x connector, Secure electrical connector first, Rotate module rearward and under windshield, Observe LH wiper arm pivot during install to avoid damage to windshield
 Courtesy of TESLA, INC. Courtesy of TESLA, INC.
|
 Courtesy of TESLA, INC. Courtesy of TESLA, INC.
|
 Courtesy of TESLA, INC. Courtesy of TESLA, INC.
|
 Courtesy of TESLA, INC. Courtesy of TESLA, INC.
|
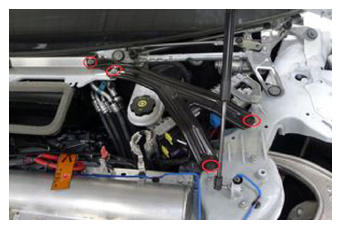
- Install fasteners securing LH V-brace and secure
NOTE:
3x bolts, 10 mm, 18 N.m, 1x nut, 10 mm, 9 N.m
 Courtesy of TESLA, INC. Courtesy of TESLA, INC.
|
- Install wiper cowl screen panel
NOTE:
4x push clips, 2x end tabs
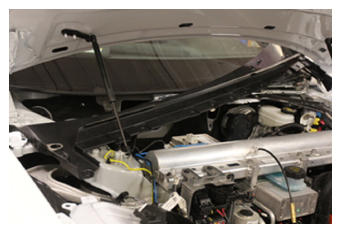 Courtesy of TESLA, INC. Courtesy of TESLA, INC.
|
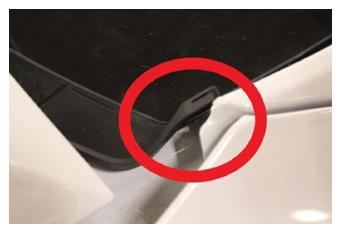 Courtesy of TESLA, INC. Courtesy of TESLA, INC.
|
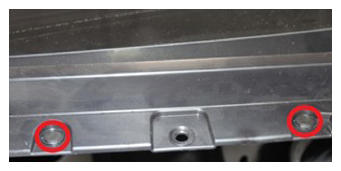 Courtesy of TESLA, INC. Courtesy of TESLA, INC.
|
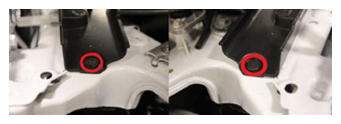 Courtesy of TESLA, INC. Courtesy of TESLA, INC.
|
- Using center display, remove wipers from "Service Mode"
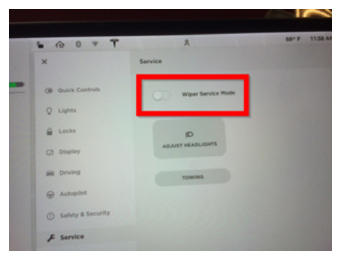 Courtesy of TESLA, INC. Courtesy of TESLA, INC.
|
- Install RH wiper arm assembly and secure nut
NOTE:
1x nut, 15 mm, 26 N.m, Line up wiper to reference mark on windshield
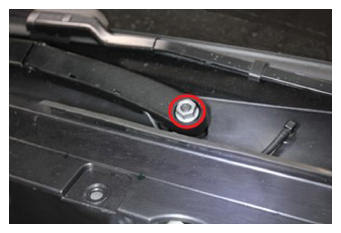 Courtesy of TESLA, INC. Courtesy of TESLA, INC.
|
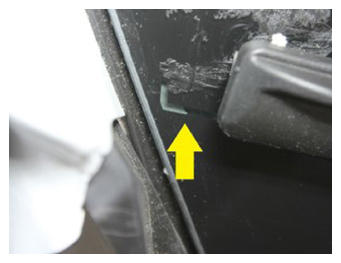 Courtesy of TESLA, INC. Courtesy of TESLA, INC.
|
- Install RH wiper arm nut cover
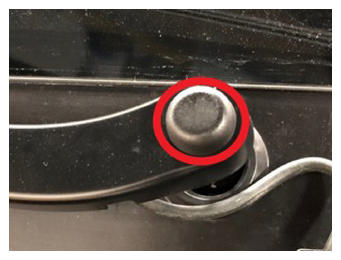 Courtesy of TESLA, INC. Courtesy of TESLA, INC.
|
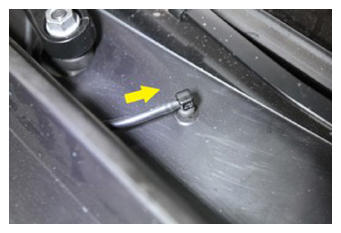
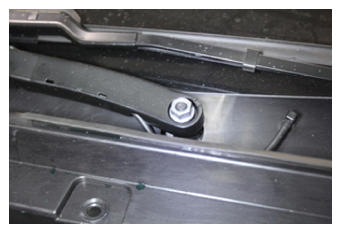
- Secure RH wiper arm washer nozzle
NOTE:
1x hose, Hose is routed below the arm
 Courtesy of TESLA, INC. Courtesy of TESLA, INC.
|
 Courtesy of TESLA, INC. Courtesy of TESLA, INC.
|
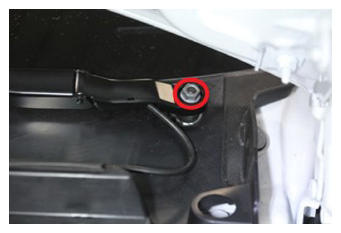
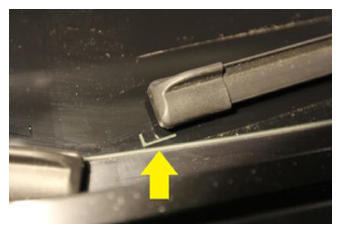
- Install LH wiper arm assembly and secure nut
NOTE:
1x nut, 15 mm, 26 N.m, Line up wiper to reference mark on windshield
 Courtesy of TESLA, INC. Courtesy of TESLA, INC.
|
 Courtesy of TESLA, INC. Courtesy of TESLA, INC.
|
- Install LH wiper arm nut cover
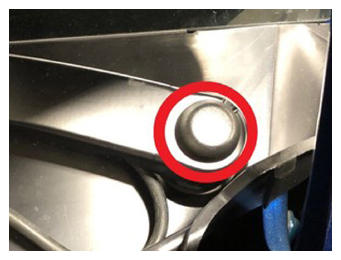 Courtesy of TESLA, INC. Courtesy of TESLA, INC.
|
- Secure LH wiper arm washer nozzle
NOTE:
1x hose, Hose is routed below the arm
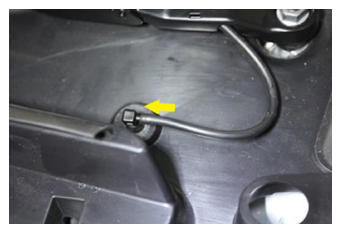 Courtesy of TESLA, INC. Courtesy of TESLA, INC.
|
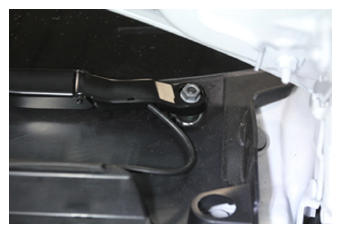 Courtesy of TESLA, INC. Courtesy of TESLA, INC.
|
- Install RH shock tower cover
NOTE:
3x push clip, 1x fir tree clip
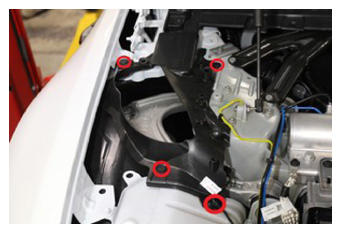 Courtesy of TESLA, INC. Courtesy of TESLA, INC.
|
- Install LH shock tower cover
NOTE:
3x push clip, 1x fir tree clip
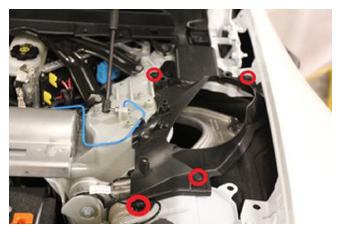 Courtesy of TESLA, INC. Courtesy of TESLA, INC.
|
- Secure washer hose nozzle by LH shock tower cover
NOTE:
1x hose, 3x clips
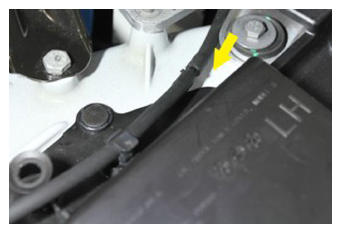 Courtesy of TESLA, INC. Courtesy of TESLA, INC.
|
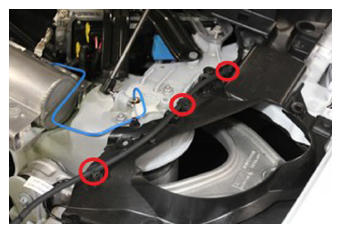 Courtesy of TESLA, INC. Courtesy of TESLA, INC.
|
- Install RH underhood apron
NOTE:
10x clips
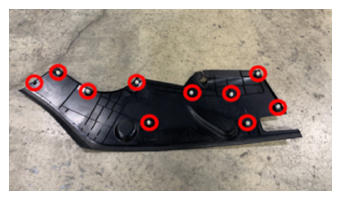 Courtesy of TESLA, INC. Courtesy of TESLA, INC.
|
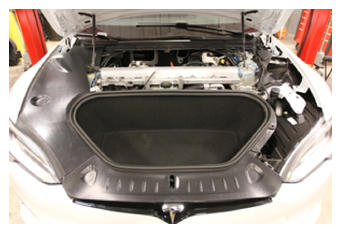 Courtesy of TESLA, INC. Courtesy of TESLA, INC.
|
- Install LH underhood apron
NOTE:
10x clips
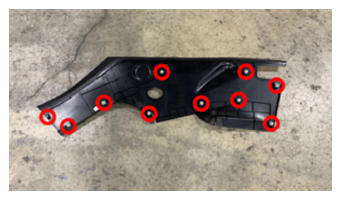 Courtesy of TESLA, INC. Courtesy of TESLA, INC.
|
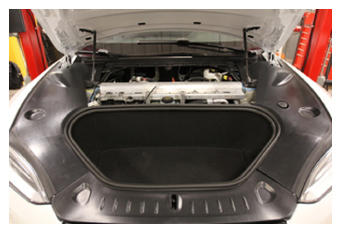 Courtesy of TESLA, INC. Courtesy of TESLA, INC.
|
- Install rear underhood apron
NOTE:
8x clips
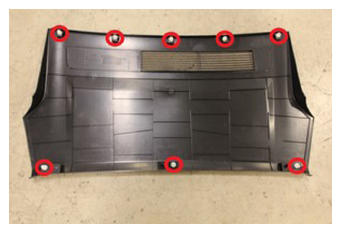 Courtesy of TESLA, INC. Courtesy of TESLA, INC.
|
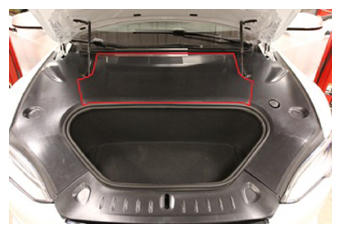 Courtesy of TESLA, INC. Courtesy of TESLA, INC.
|
- Install the center console. See Center Console Assembly (Remove and Replace)
.
- Adjust steering column back to original position
NOTE:
Via UI>Controls>Steering, Use left steering wheel scroll wheel to adjust steering column