- Cut slits into front outer noise absorber near RH side of vehicle
NOTE:
Cut only within highlighted areas, This will allow the absorber to slip over the harness and coolant hoses during removal
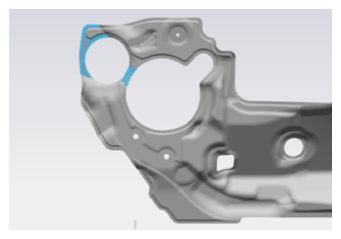 Courtesy of TESLA, INC. Courtesy of TESLA, INC.
|
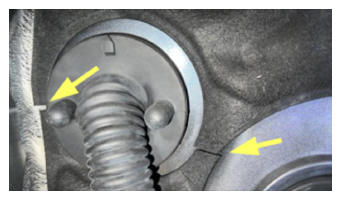 Courtesy of TESLA, INC. Courtesy of TESLA, INC.
|
- Remove fasteners securing front outer noise absorber to bulkhead on RH side of vehicle
NOTE:
1x push nut, 2x barrel clips
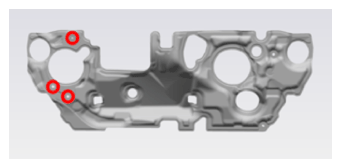 Courtesy of TESLA, INC. Courtesy of TESLA, INC.
|
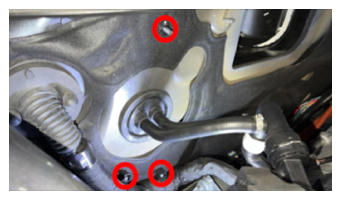 Courtesy of TESLA, INC. Courtesy of TESLA, INC.
|
- Cut slits into front outer noise absorber near LH side of vehicle
NOTE:
Cut only within highlighted areas, This will allow the absorber to slip over the harness and AC lines during removal
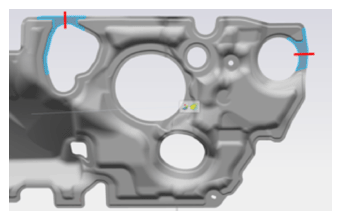 Courtesy of TESLA, INC. Courtesy of TESLA, INC.
|
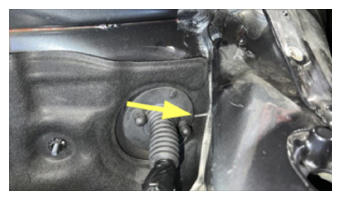 Courtesy of TESLA, INC. Courtesy of TESLA, INC.
|
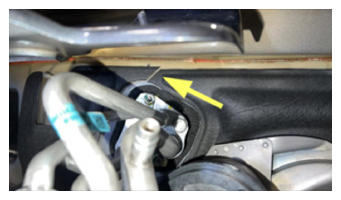 Courtesy of TESLA, INC. Courtesy of TESLA, INC.
|
- Remove fastener securing lower portion of front outer noise absorber to bulkhead
NOTE:
1x push nut
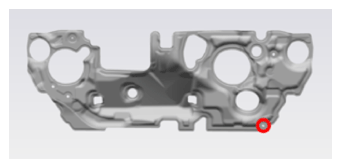 Courtesy of TESLA, INC. Courtesy of TESLA, INC.
|
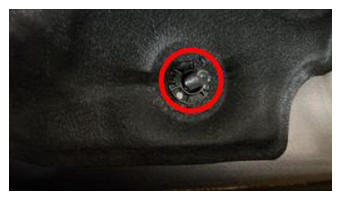 Courtesy of TESLA, INC. Courtesy of TESLA, INC.
|
- Remove fastener securing front outer noise absorber to bulkhead on LH side of vehicle
NOTE:
1x push nut
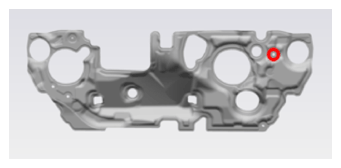 Courtesy of TESLA, INC. Courtesy of TESLA, INC.
|
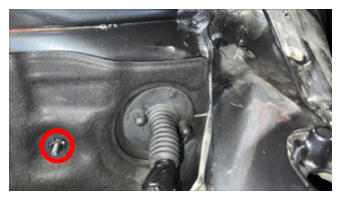 Courtesy of TESLA, INC. Courtesy of TESLA, INC.
|
- Remove front outer noise absorber from vehicle
NOTE:
4x studs
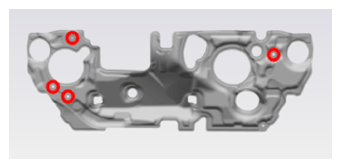 Courtesy of TESLA, INC. Courtesy of TESLA, INC.
|
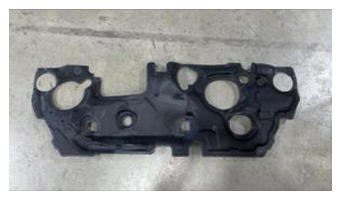 Courtesy of TESLA, INC. Courtesy of TESLA, INC.
|
- Cut slit into new front outer noise absorber
NOTE:
Cut only within highlighted areas, This will allow the absorber to slip over both ends of the harness, AC line, and coolant hoses during installation
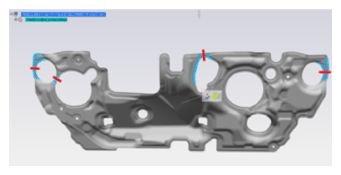 Courtesy of TESLA, INC. Courtesy of TESLA, INC.
|
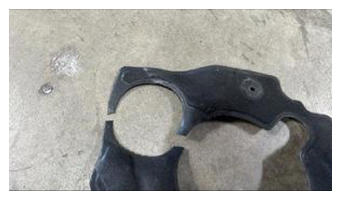 Courtesy of TESLA, INC. Courtesy of TESLA, INC.
|
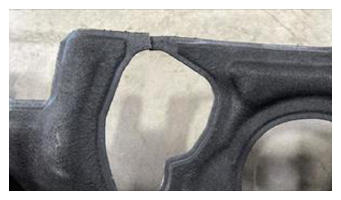 Courtesy of TESLA, INC. Courtesy of TESLA, INC.
|
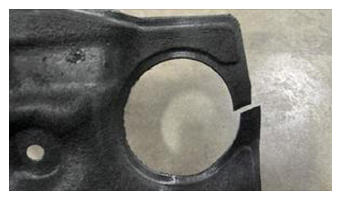 Courtesy of TESLA, INC. Courtesy of TESLA, INC.
|
- Position front outer noise absorber into vehicle
NOTE:
4x studs, Tuck absorber behind harness guide
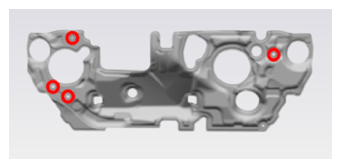 Courtesy of TESLA, INC. Courtesy of TESLA, INC.
|
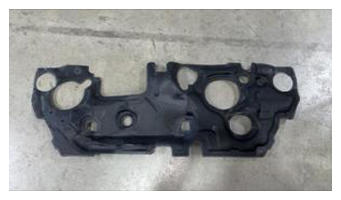 Courtesy of TESLA, INC. Courtesy of TESLA, INC.
|
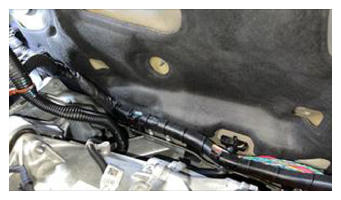 Courtesy of TESLA, INC. Courtesy of TESLA, INC.
|
- Install fastener securing front outer noise absorber to bulkhead on LH side of vehicle
NOTE:
1x push nut
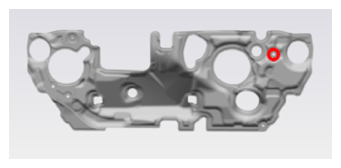 Courtesy of TESLA, INC. Courtesy of TESLA, INC.
|
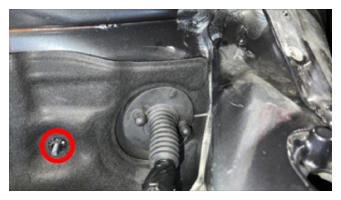 Courtesy of TESLA, INC. Courtesy of TESLA, INC.
|
- Install fastener securing lower portion of front outer noise absorber to bulkhead
NOTE:
1x push nut
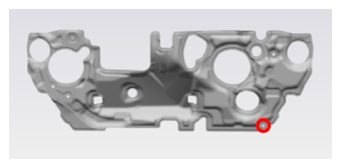 Courtesy of TESLA, INC. Courtesy of TESLA, INC.
|
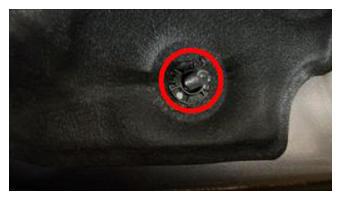 Courtesy of TESLA, INC. Courtesy of TESLA, INC.
|
- Install fasteners securing front outer noise absorber to bulkhead on RH side of vehicle
NOTE:
1x push nut, 2x barrel clips
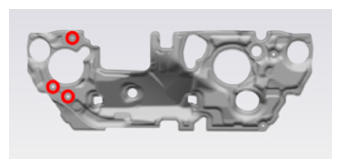 Courtesy of TESLA, INC. Courtesy of TESLA, INC.
|
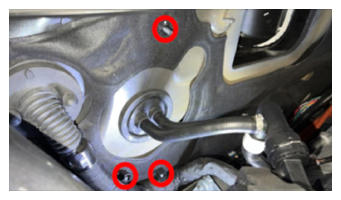 Courtesy of TESLA, INC. Courtesy of TESLA, INC.
|
- Install upper steering column bracket to IP carrier
NOTE:
4x nuts, 13 mm, 15 N.m, Guide lower steering shaft down through bulkhead
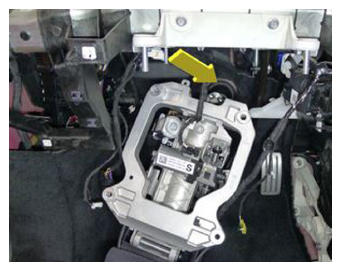 Courtesy of TESLA, INC. Courtesy of TESLA, INC.
|
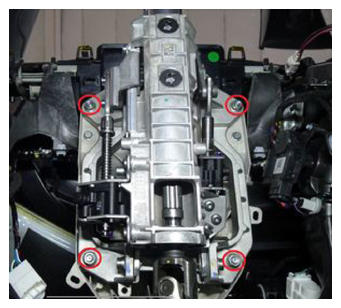 Courtesy of TESLA, INC. Courtesy of TESLA, INC.
|
- Secure steering column harness
NOTE:
1x connector, 1x clip
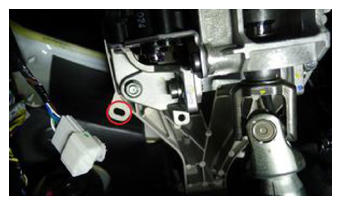 Courtesy of TESLA, INC. Courtesy of TESLA, INC.
|
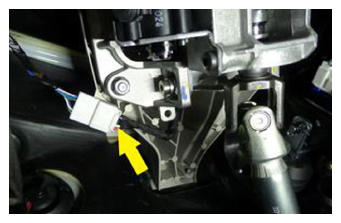 Courtesy of TESLA, INC. Courtesy of TESLA, INC.
|
- Raise vehicle fully and lower lift onto locks
NOTE:
Set vehicle to comfortable working height, Make sure there's an audible click of the locks on both sides before lowering, otherwise vehicle may tilt to the side
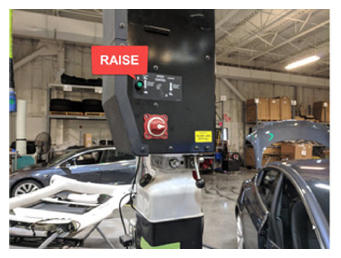 Courtesy of TESLA, INC. Courtesy of TESLA, INC.
|
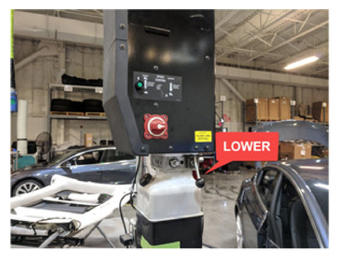 Courtesy of TESLA, INC. Courtesy of TESLA, INC.
|
- Slide lower electric steering column onto steering gear and install bolt
NOTE:
1x bolt, 13 mm, 30 N.m
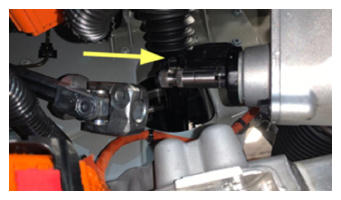 Courtesy of TESLA, INC. Courtesy of TESLA, INC.
|
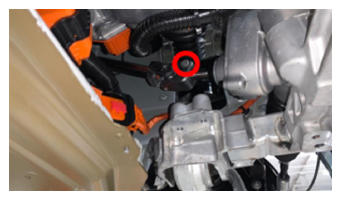 Courtesy of TESLA, INC. Courtesy of TESLA, INC.
|
- Position front skid plate for installation and thread in all bolts
NOTE:
4x bolts, 15 mm, 70 N.m, 2x bolts, 15 mm, 60 N.m, 2x bolts, 15 mm, 30 N.m, 2x bolts, 10 mm, 10 N.m, Torque at later step
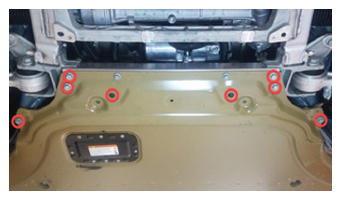 Courtesy of TESLA, INC. Courtesy of TESLA, INC.
|
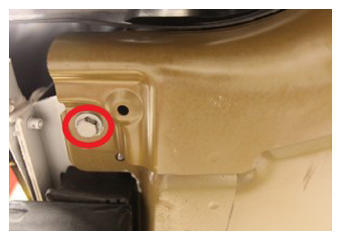 Courtesy of TESLA, INC. Courtesy of TESLA, INC.
|
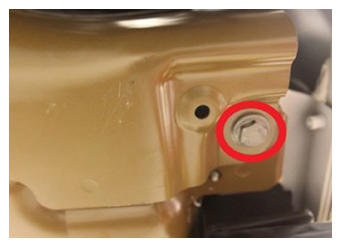 Courtesy of TESLA, INC. Courtesy of TESLA, INC.
|
- Torque bolts securing front skid plate to body casting
NOTE:
2x bolts, 15 mm, 60 N.m
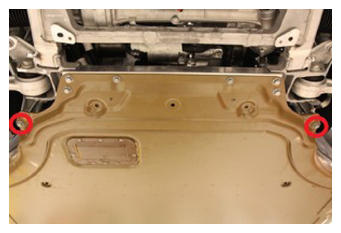 Courtesy of TESLA, INC. Courtesy of TESLA, INC.
|
- Torque bolts securing front skid plate to body sill
NOTE:
2x bolts, 15 mm, 30 N.m
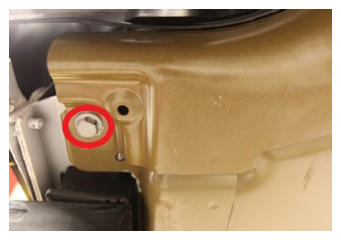 Courtesy of TESLA, INC. Courtesy of TESLA, INC.
|
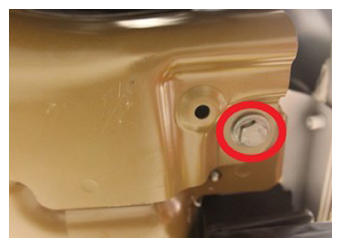 Courtesy of TESLA, INC. Courtesy of TESLA, INC.
|
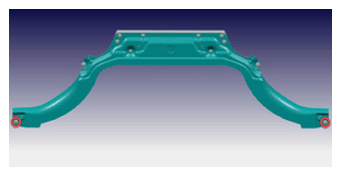 Courtesy of TESLA, INC. Courtesy of TESLA, INC.
|
- Torque bolts securing front skid plate to front subframe
NOTE:
4x bolts, 15 mm, 70 N.m, 2x bolts, 10 mm, 10 N.m
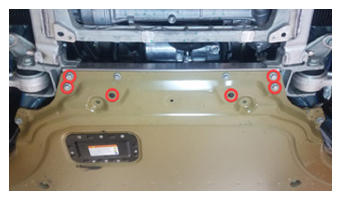 Courtesy of TESLA, INC. Courtesy of TESLA, INC.
|
- Secure clips securing wheel house liner to front skid plate
NOTE:
4x clips
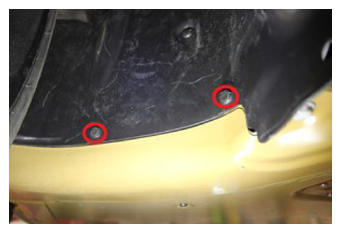 Courtesy of TESLA, INC. Courtesy of TESLA, INC.
|
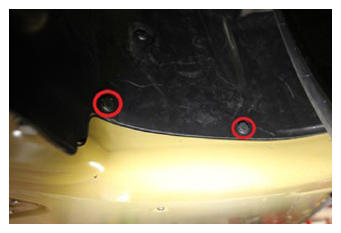 Courtesy of TESLA, INC. Courtesy of TESLA, INC.
|
- Apply Loctite 222 onto front aero shield bolts and install fasteners securing front aero shield to vehicle
NOTE:
9x bolts, 10 mm, 6 N.m
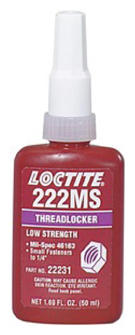 Courtesy of TESLA, INC. Courtesy of TESLA, INC.
|
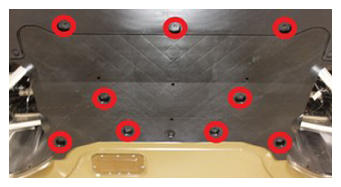 Courtesy of TESLA, INC. Courtesy of TESLA, INC.
|
- Install clips securing front aero shield
NOTE:
5x push clips
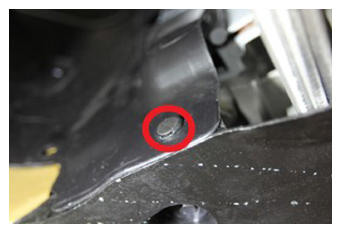 Courtesy of TESLA, INC. Courtesy of TESLA, INC.
|
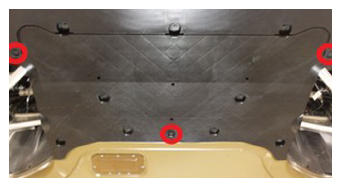 Courtesy of TESLA, INC. Courtesy of TESLA, INC.
|
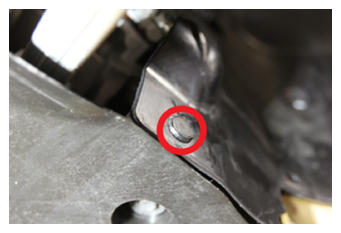 Courtesy of TESLA, INC. Courtesy of TESLA, INC.
|
- Lower vehicle partially and set lift onto locks
NOTE:
Raise lift off locks, then hold lock release lever to keep locks free while vehicle is lowered, Set vehicle to comfortable working height
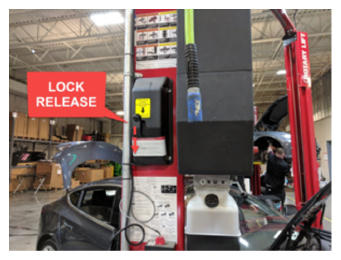 Courtesy of TESLA, INC. Courtesy of TESLA, INC.
|
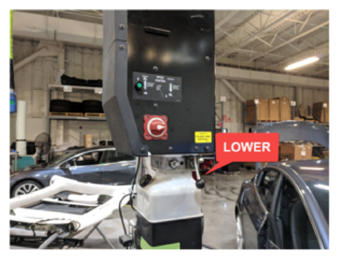 Courtesy of TESLA, INC. Courtesy of TESLA, INC.
|
- Install brake booster assembly to vehicle
NOTE:
Maneuver flexible brake lines out of the way for clearance
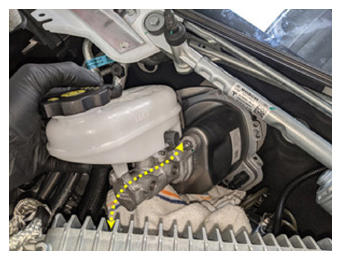 Courtesy of TESLA, INC. Courtesy of TESLA, INC.
|
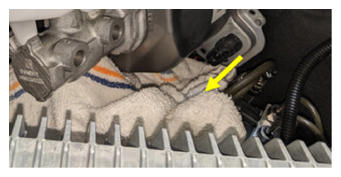 Courtesy of TESLA, INC. Courtesy of TESLA, INC.
|
- Install fasteners securing brake booster assembly to bulkhead
NOTE:
2x nuts, 13 mm, 16.5 N.m, Install new nyloc nuts
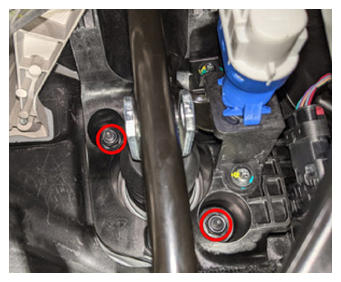 Courtesy of TESLA, INC. Courtesy of TESLA, INC.
|
- Install flexible brake lines to master cylinder
NOTE:
2x nuts, 12 mm, 16 N.m, Clean lines with brake cleaner before mating as needed
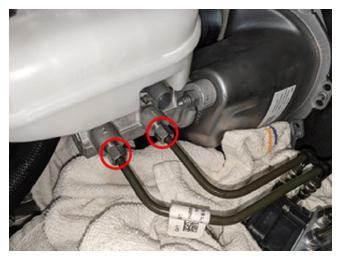 Courtesy of TESLA, INC. Courtesy of TESLA, INC.
|
- Connect brake fluid level sensor
NOTE:
1x connector
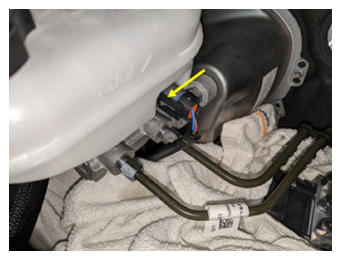 Courtesy of TESLA, INC. Courtesy of TESLA, INC.
|
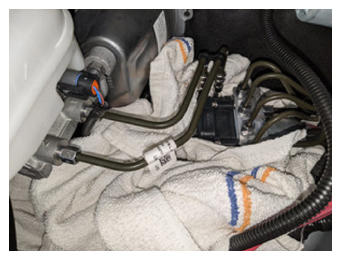
- Remove shop rags from underneath brake lines
NOTE:
Clean up any residual fluid lost
 Courtesy of TESLA, INC. Courtesy of TESLA, INC.
|
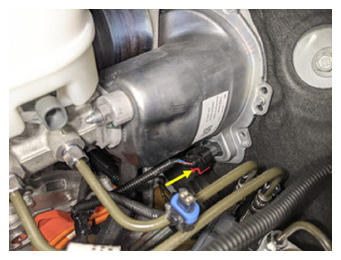
- Connect DTS position sensor to brake booster
NOTE:
1x connector, Secure red locking tab
 Courtesy of TESLA, INC. Courtesy of TESLA, INC.
|
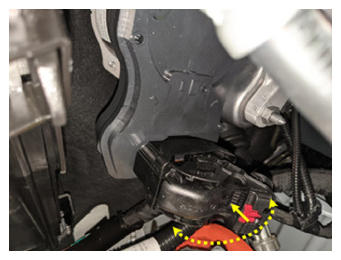
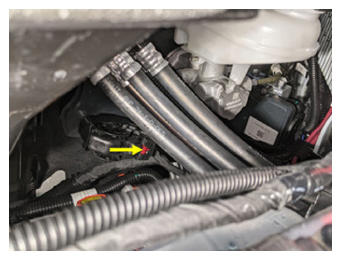
- Connect brake booster ECU connector
NOTE:
1x connector, Align connector and rotate lever to fully seat, Secure red locking tab
 Courtesy of TESLA, INC. Courtesy of TESLA, INC.
|
 Courtesy of TESLA, INC. Courtesy of TESLA, INC.
|
- Position battery controller into vehicle
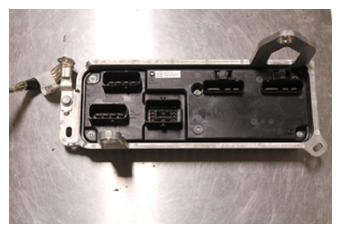 Courtesy of TESLA, INC. Courtesy of TESLA, INC.
|
- Secure harness clip onto battery controller
NOTE:
1x clip
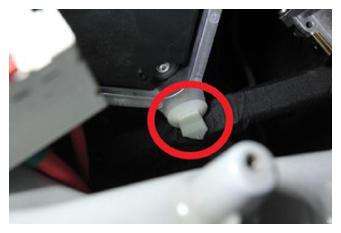 Courtesy of TESLA, INC. Courtesy of TESLA, INC.
|
- Secure side J1 connection onto battery controller
NOTE:
1x locking connector, Engage red locking tab
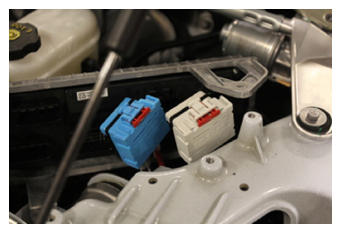 Courtesy of TESLA, INC. Courtesy of TESLA, INC.
|
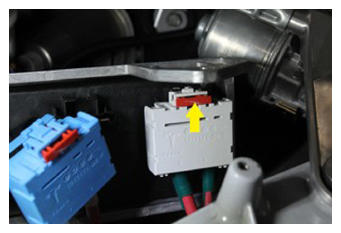 Courtesy of TESLA, INC. Courtesy of TESLA, INC.
|
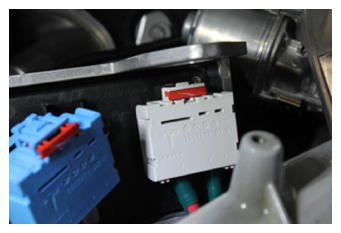 Courtesy of TESLA, INC. Courtesy of TESLA, INC.
|
- Secure middle J2 connection onto battery controller
NOTE:
1x locking connector, Engage red locking tab
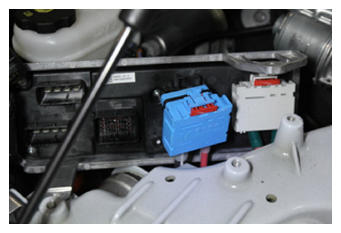 Courtesy of TESLA, INC. Courtesy of TESLA, INC.
|
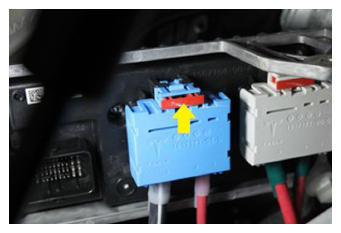 Courtesy of TESLA, INC. Courtesy of TESLA, INC.
|
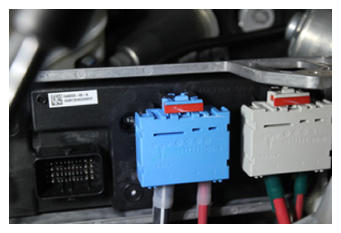 Courtesy of TESLA, INC. Courtesy of TESLA, INC.
|
- Secure side J3 connection onto battery controller
NOTE:
1x locking connector, Verify yellow locking tab is fully opened, Seat connector and mechanism will begin to engage
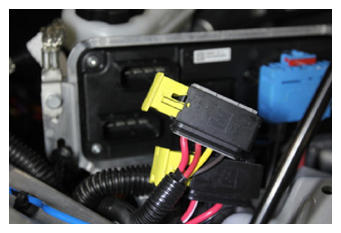 Courtesy of TESLA, INC. Courtesy of TESLA, INC.
|
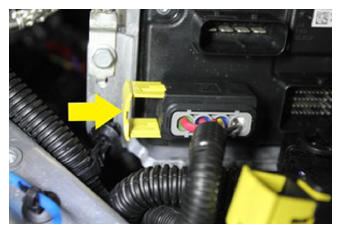 Courtesy of TESLA, INC. Courtesy of TESLA, INC.
|
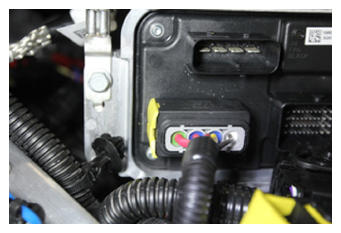 Courtesy of TESLA, INC. Courtesy of TESLA, INC.
|
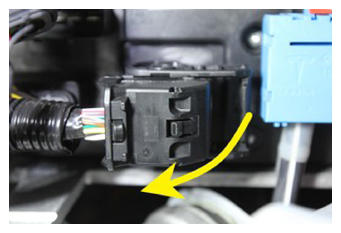
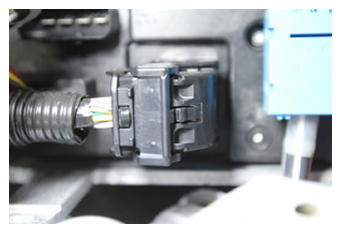
- Secure middle J5 connection onto battery controller
NOTE:
1x locking connector, Verify lever is fully opened, Seat connector and lever will being to engage
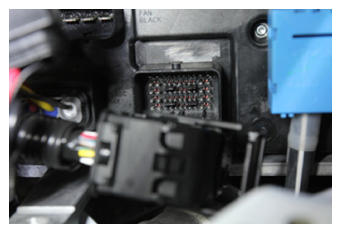 Courtesy of TESLA, INC. Courtesy of TESLA, INC.
|
 Courtesy of TESLA, INC. Courtesy of TESLA, INC.
|
 Courtesy of TESLA, INC. Courtesy of TESLA, INC.
|
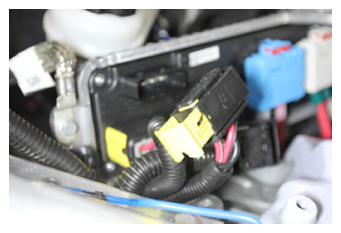
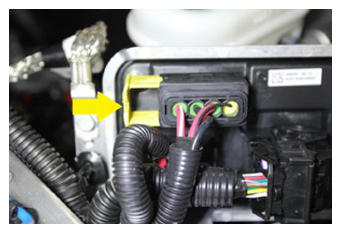
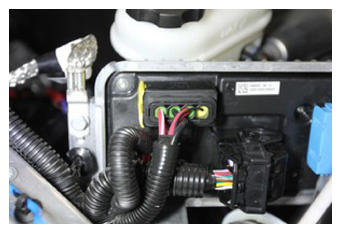
- Secure top J4 connection onto battery controller
NOTE:
1x locking connector, Verify yellow locking tab is fully opened, Seat connector and mechanism will begin to engage
 Courtesy of TESLA, INC. Courtesy of TESLA, INC.
|
 Courtesy of TESLA, INC. Courtesy of TESLA, INC.
|
 Courtesy of TESLA, INC. Courtesy of TESLA, INC.
|
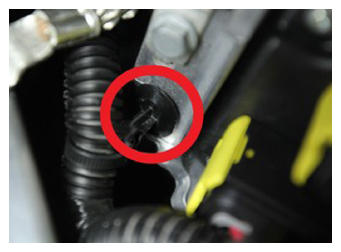
- Secure harness clip onto battery controller
NOTE:
1x clip
 Courtesy of TESLA, INC. Courtesy of TESLA, INC.
|
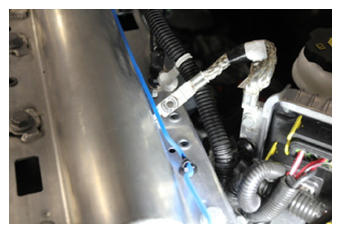
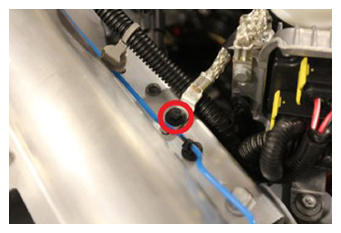
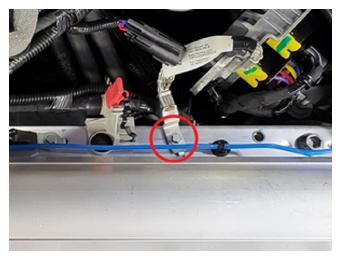
- Secure battery controller ground cable
NOTE:
1x bolt, 10 mm or E10 5-lobe, 9 N.m
 Courtesy of TESLA, INC. Courtesy of TESLA, INC.
|
 Courtesy of TESLA, INC. Courtesy of TESLA, INC.
|
 Courtesy of TESLA, INC. Courtesy of TESLA, INC.
|
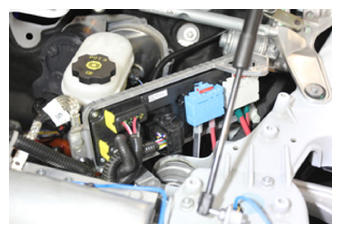
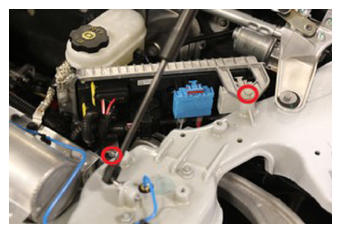
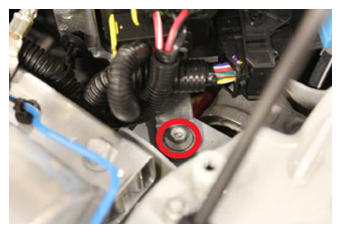
- Position battery controller forward and install fasteners
NOTE:
1x bolt, 10 mm, 10 N.m, 1x nut 10 mm, 10 N.m
 Courtesy of TESLA, INC. Courtesy of TESLA, INC.
|
 Courtesy of TESLA, INC. Courtesy of TESLA, INC.
|
 Courtesy of TESLA, INC. Courtesy of TESLA, INC.
|
- Install HEPA housing assembly
NOTE:
2x nuts, 10 mm, 7 N.m, Maneuver assembly down and under cross member, Rotate V-brace crossmember bracket back to install position
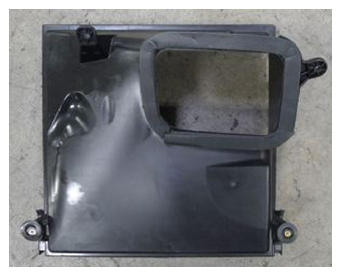 Courtesy of TESLA, INC. Courtesy of TESLA, INC.
|
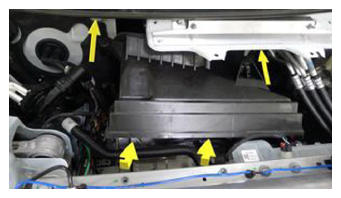 Courtesy of TESLA, INC. Courtesy of TESLA, INC.
|
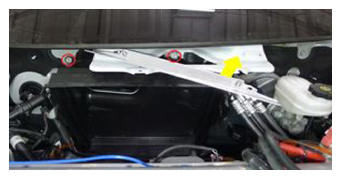 Courtesy of TESLA, INC. Courtesy of TESLA, INC.
|
- Secure V-brace crossmember
NOTE:
2x nuts, 10 mm, 18 N.m
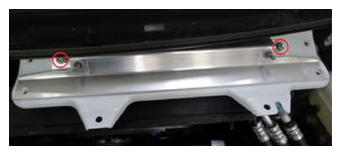 Courtesy of TESLA, INC. Courtesy of TESLA, INC.
|
- Secure battery coolant pump to bracket
NOTE:
1x clip, Slide pump on to bracket and secure lower coolant hose to bracket
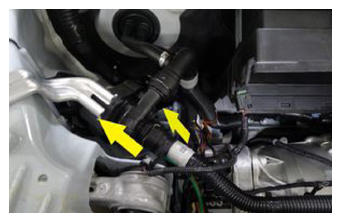 Courtesy of TESLA, INC. Courtesy of TESLA, INC.
|
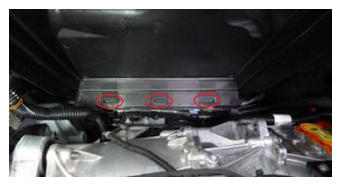
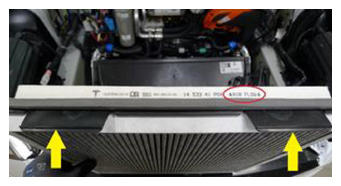
- Install HEPA filter
NOTE:
3x datums, 2x clips, Align 3 datums into bottom of housing, Confirm air flow direction, Ensure clips lock and secure filter into housing
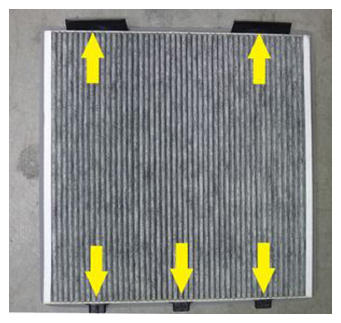 Courtesy of TESLA, INC. Courtesy of TESLA, INC.
|
 Courtesy of TESLA, INC. Courtesy of TESLA, INC.
|
 Courtesy of TESLA, INC. Courtesy of TESLA, INC.
|
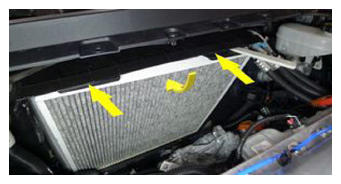 Courtesy of TESLA, INC. Courtesy of TESLA, INC.
|
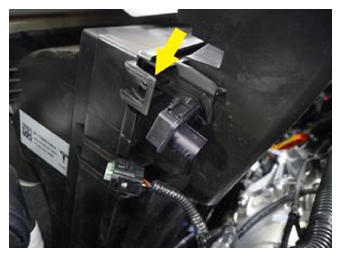
- Install HEPA filter assembly cover
NOTE:
2x tabs, 2x datums, 2x slots, Maneuver cover down and under V-brace cross member, Fully engage seal and locking tabs
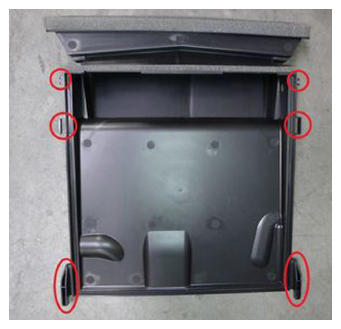 Courtesy of TESLA, INC. Courtesy of TESLA, INC.
|
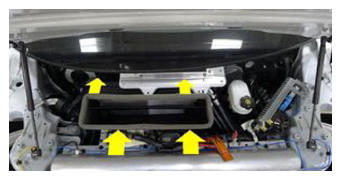 Courtesy of TESLA, INC. Courtesy of TESLA, INC.
|
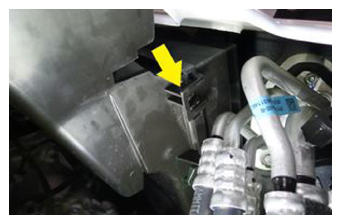 Courtesy of TESLA, INC. Courtesy of TESLA, INC.
|
 Courtesy of TESLA, INC. Courtesy of TESLA, INC.
|
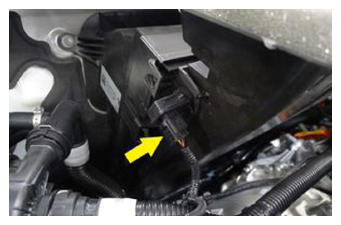
- Connect air quality sensor harness
NOTE:
1x connector
 Courtesy of TESLA, INC. Courtesy of TESLA, INC.
|
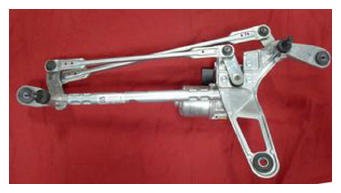
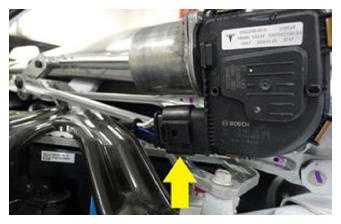
- Install wiper module
NOTE:
3x bolts, 10 mm, 8 N.m, 1x connector, Secure electrical connector first, Rotate module rearward and under windshield, Observe LH wiper arm pivot during install to avoid damage to windshield
 Courtesy of TESLA, INC. Courtesy of TESLA, INC.
|
 Courtesy of TESLA, INC. Courtesy of TESLA, INC.
|
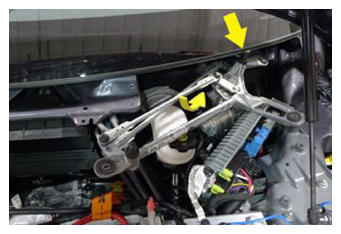 Courtesy of TESLA, INC. Courtesy of TESLA, INC.
|
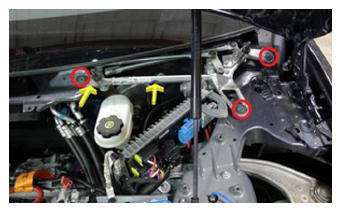 Courtesy of TESLA, INC. Courtesy of TESLA, INC.
|
- Install fasteners securing LH V-brace and secure
NOTE:
3x bolts, 10 mm, 18 N.m, 1x nut, 10 mm, 9 N.m
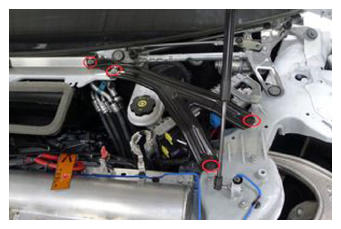 Courtesy of TESLA, INC. Courtesy of TESLA, INC.
|
- Install fasteners securing RH V-brace and secure
NOTE:
3x bolts, 10 mm, 18 N.m, 1x nut, 10 mm, 9 N.m
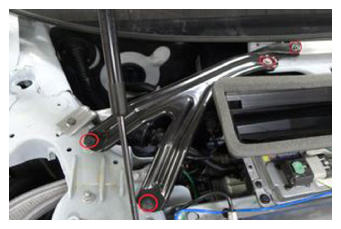 Courtesy of TESLA, INC. Courtesy of TESLA, INC.
|
- Install wiper cowl screen panel
NOTE:
4x push clips, 2x end tabs
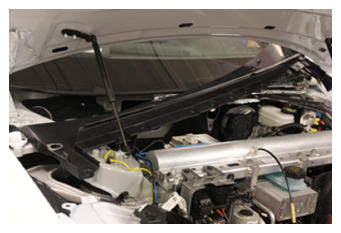 Courtesy of TESLA, INC. Courtesy of TESLA, INC.
|
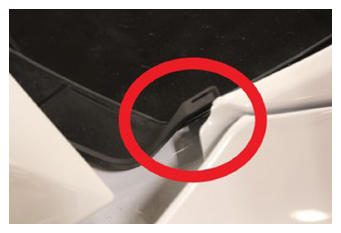 Courtesy of TESLA, INC. Courtesy of TESLA, INC.
|
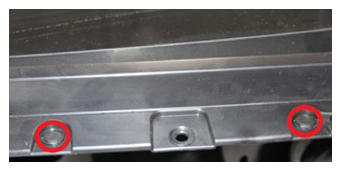 Courtesy of TESLA, INC. Courtesy of TESLA, INC.
|
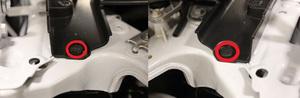 Courtesy of TESLA, INC. Courtesy of TESLA, INC.
|
- Install fasteners securing LV battery to multi-system beam
NOTE:
3x bolts, 10 mm, 9 N.m, 2x datums, Shift into position and install fasteners
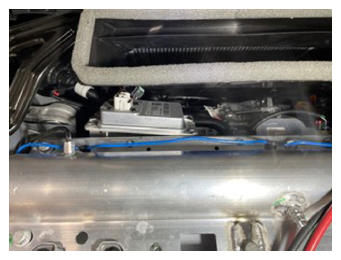 Courtesy of TESLA, INC. Courtesy of TESLA, INC.
|
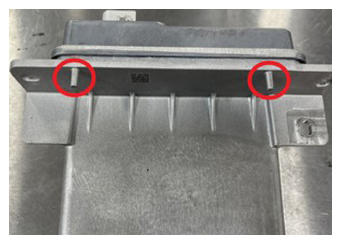 Courtesy of TESLA, INC. Courtesy of TESLA, INC.
|
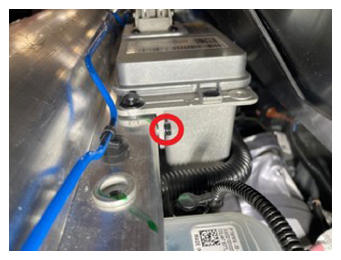 Courtesy of TESLA, INC. Courtesy of TESLA, INC.
|
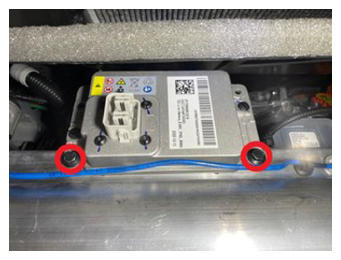 Courtesy of TESLA, INC. Courtesy of TESLA, INC.
|
- Install lower instrument panel assembly
NOTE:
8x screws, T20, 3 N.m, 8x tabs, Guide over upper steering column, Engage all tabs before starting screws
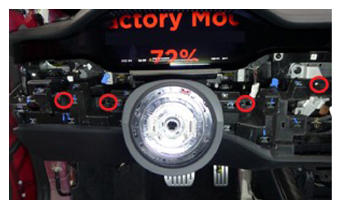 Courtesy of TESLA, INC. Courtesy of TESLA, INC.
|
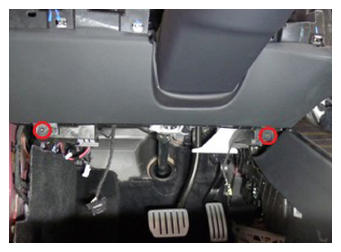 Courtesy of TESLA, INC. Courtesy of TESLA, INC.
|
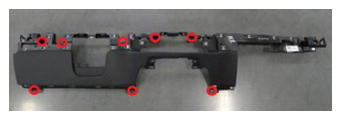 Courtesy of TESLA, INC. Courtesy of TESLA, INC.
|
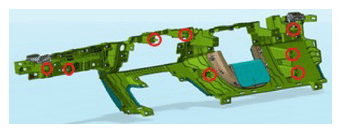 Courtesy of TESLA, INC. Courtesy of TESLA, INC.
|
- Install SCCM to steering column
NOTE:
1x bolt, 5 mm Allen, 9 N.m, Carefully slide module on to steering column without rotating
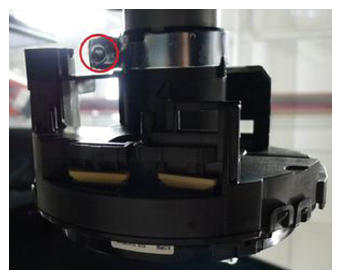 Courtesy of TESLA, INC. Courtesy of TESLA, INC.
|
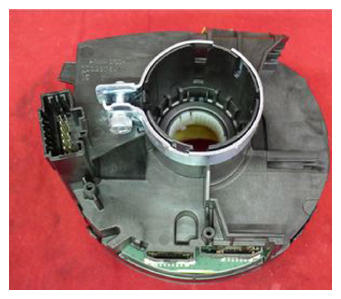 Courtesy of TESLA, INC. Courtesy of TESLA, INC.
|
- Connect steering column control module assembly connector
NOTE:
1x connector, Install new orange retaining clip to connector then install SCCM connector, Perform push-pull-push to make sure connector is seated properly
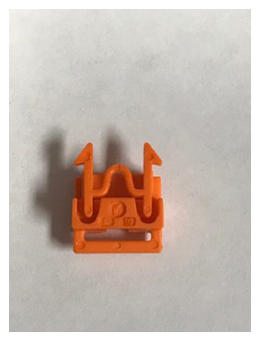 Courtesy of TESLA, INC. Courtesy of TESLA, INC.
|
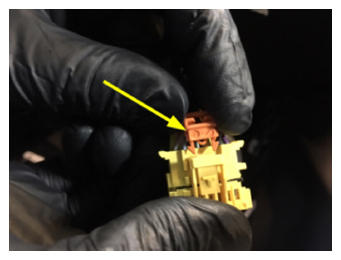 Courtesy of TESLA, INC. Courtesy of TESLA, INC.
|
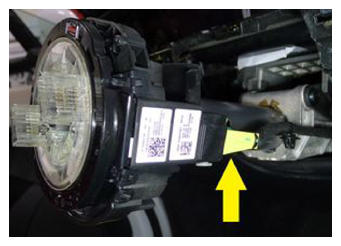 Courtesy of TESLA, INC. Courtesy of TESLA, INC.
|
- Install lower shroud to steering column
NOTE:
2x screws, T20, 1.5 N.m, 1x clip, 1x datum, Slide lower shroud forward to engage datum
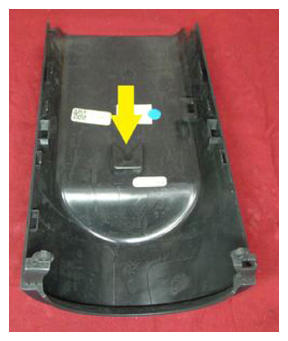 Courtesy of TESLA, INC. Courtesy of TESLA, INC.
|
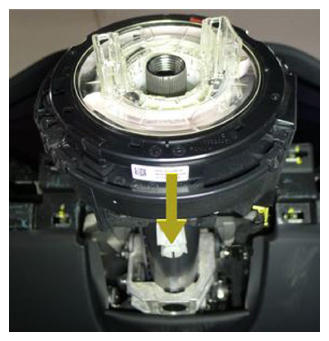 Courtesy of TESLA, INC. Courtesy of TESLA, INC.
|
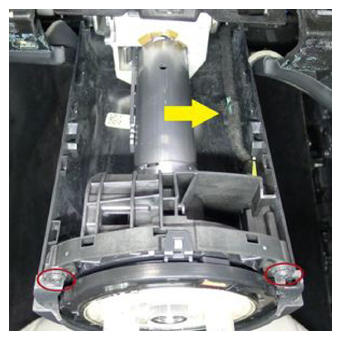 Courtesy of TESLA, INC. Courtesy of TESLA, INC.
|
- Align the clips and datums then press downward to install upper shroud onto lower shroud
NOTE:
6x clips, 4x datums
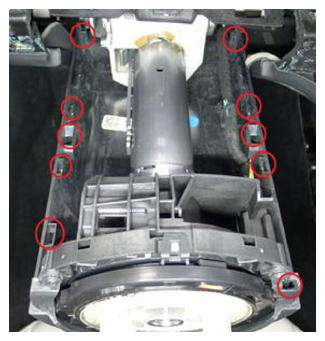 Courtesy of TESLA, INC. Courtesy of TESLA, INC.
|
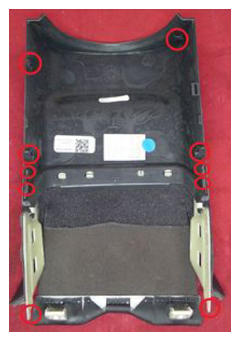 Courtesy of TESLA, INC. Courtesy of TESLA, INC.
|
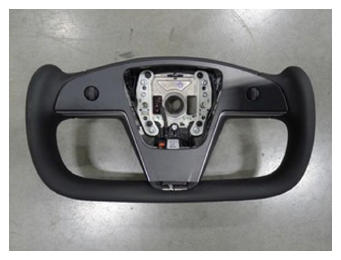
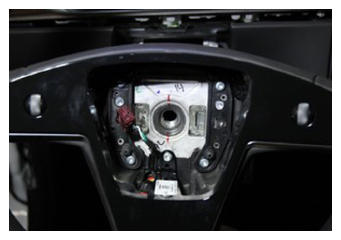
- Install steering wheel
NOTE:
Note that the steering wheel is splined to the column and can only be installed in the correct position
 Courtesy of TESLA, INC. Courtesy of TESLA, INC.
|
 Courtesy of TESLA, INC. Courtesy of TESLA, INC.
|
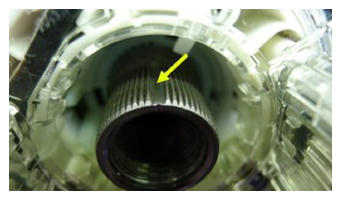 Courtesy of TESLA, INC. Courtesy of TESLA, INC.
|
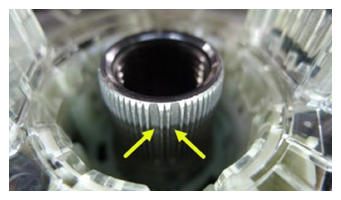 Courtesy of TESLA, INC. Courtesy of TESLA, INC.
|
- Install bolt securing steering wheel to steering column
NOTE:
1x patch bolt, 10 mm allen, 80 N.m, Install new patch bolt
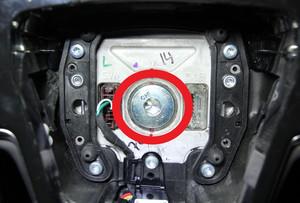 Courtesy of TESLA, INC. Courtesy of TESLA, INC.
|
- Secure steering wheel connector
NOTE:
1x connector
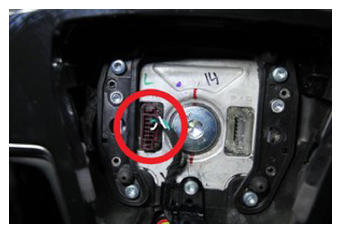 Courtesy of TESLA, INC. Courtesy of TESLA, INC.
|
- Connect driver air bag assembly connector
NOTE:
1x connector, 2x tabs
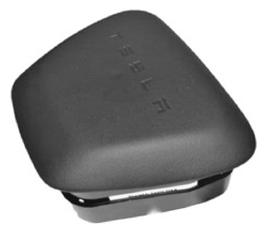 Courtesy of TESLA, INC. Courtesy of TESLA, INC.
|
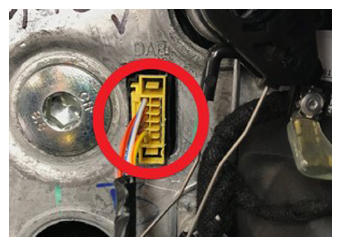 Courtesy of TESLA, INC. Courtesy of TESLA, INC.
|
- Install driver air bag assembly to yoke steering wheel
NOTE:
2x datums, 2x spring clip, Position driver air bag onto yoke steering wheel, Align datums onto the clips, Press down on one side of the air bag until clip is fully seated, then repeat on other side, You should hear an audible click, Perform pull test on each side of driver air bag assembly, Confirm the gap and space between driver air bag assembly to yoke steering wheel is symmetrical
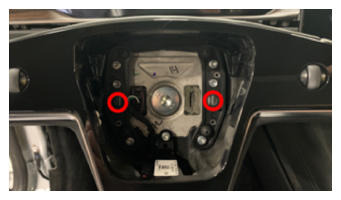 Courtesy of TESLA, INC. Courtesy of TESLA, INC.
|
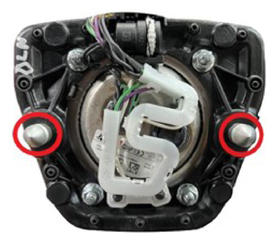 Courtesy of TESLA, INC. Courtesy of TESLA, INC.
|
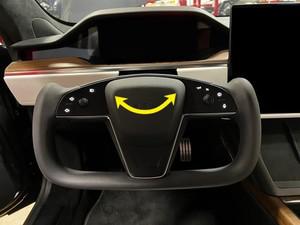 Courtesy of TESLA, INC. Courtesy of TESLA, INC.
|
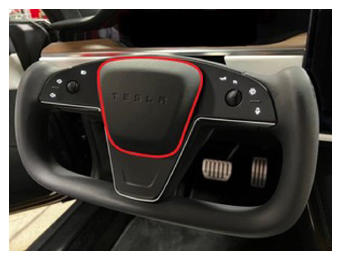 Courtesy of TESLA, INC. Courtesy of TESLA, INC.
|
- Secure USB outlet
NOTE:
2x screws, T20, 3 N.m, 1x clip, Ensure USB socket flush in glove box
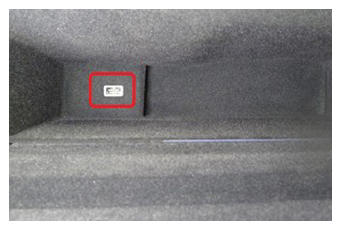 Courtesy of TESLA, INC. Courtesy of TESLA, INC.
|
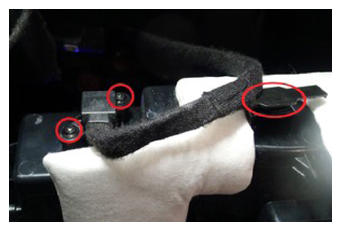 Courtesy of TESLA, INC. Courtesy of TESLA, INC.
|
- Secure glove box connectors
NOTE:
3x connectors
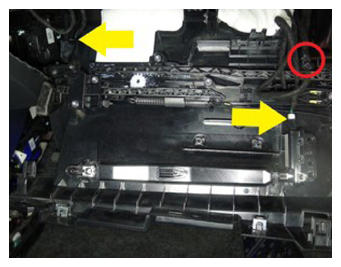 Courtesy of TESLA, INC. Courtesy of TESLA, INC.
|
- Install glove box
NOTE:
5x screws, T20, 3 N.m, Install screws at top of box, close lid then install bottom screws. Use manual release to open box if needed
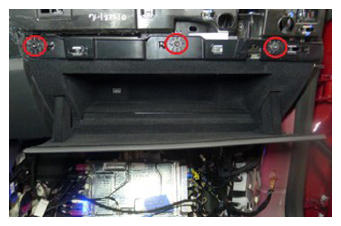 Courtesy of TESLA, INC. Courtesy of TESLA, INC.
|
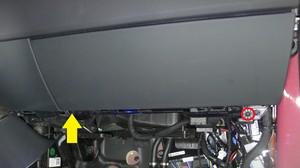 Courtesy of TESLA, INC. Courtesy of TESLA, INC.
|
- Install RH knee air bag assembly into vehicle
NOTE:
2x connectors, 6x tabs, 1x clip, Hook tabs before fully seating, Use caution not to damage the connector/harness, Support the knee air bag while connecting the connector
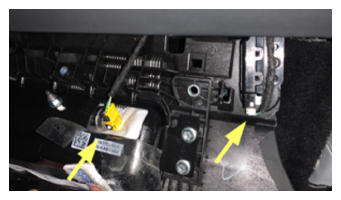 Courtesy of TESLA, INC. Courtesy of TESLA, INC.
|
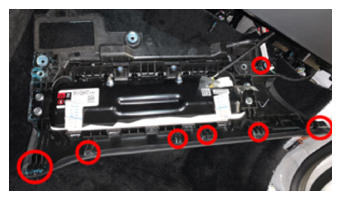 Courtesy of TESLA, INC. Courtesy of TESLA, INC.
|
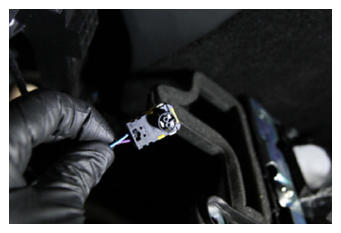 Courtesy of TESLA, INC. Courtesy of TESLA, INC.
|
- Install fasteners securing RH knee air bag assembly to vehicle
NOTE:
2x patch bolts, E10, 8 N.m, Install new fasteners
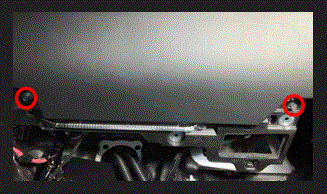 Courtesy of TESLA, INC. Courtesy of TESLA, INC.
|
- Install RH footwell cover
NOTE:
3x magnets, 1x connectors
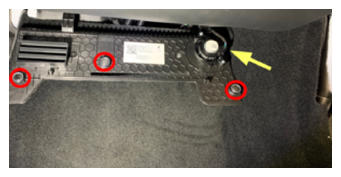 Courtesy of TESLA, INC. Courtesy of TESLA, INC.
|
- Install IP RH mid Panel
NOTE:
14x tabs, 2 datums
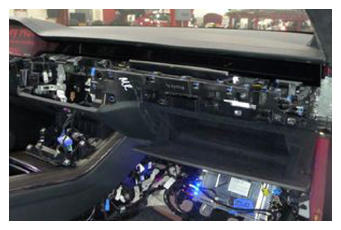 Courtesy of TESLA, INC. Courtesy of TESLA, INC.
|
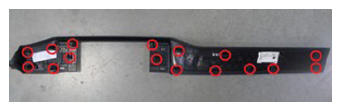 Courtesy of TESLA, INC. Courtesy of TESLA, INC.
|
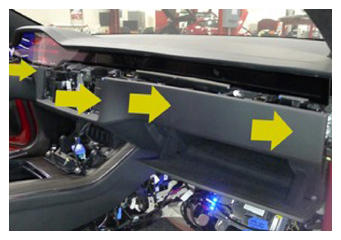 Courtesy of TESLA, INC. Courtesy of TESLA, INC.
|
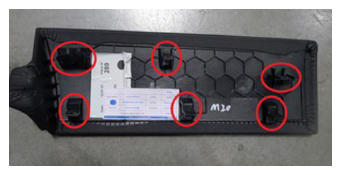
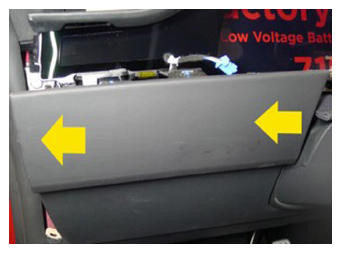
- Install IP LH mid panel
NOTE:
6x tabs
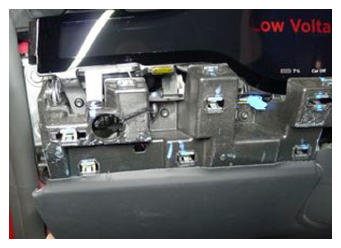 Courtesy of TESLA, INC. Courtesy of TESLA, INC.
|
 Courtesy of TESLA, INC. Courtesy of TESLA, INC.
|
 Courtesy of TESLA, INC. Courtesy of TESLA, INC.
|
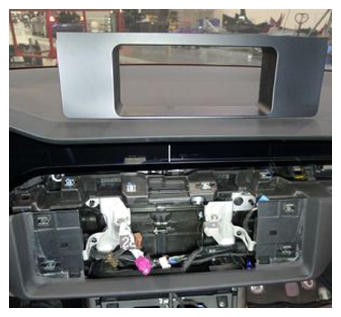
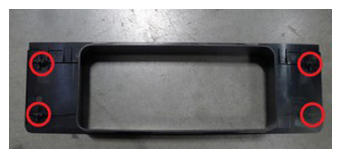
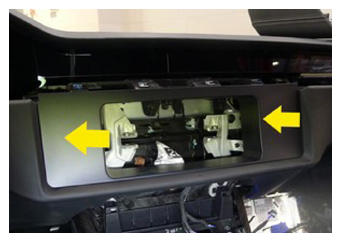
- Install IP closeout panel
NOTE:
4x tabs
 Courtesy of TESLA, INC. Courtesy of TESLA, INC.
|
 Courtesy of TESLA, INC. Courtesy of TESLA, INC.
|
 Courtesy of TESLA, INC. Courtesy of TESLA, INC.
|
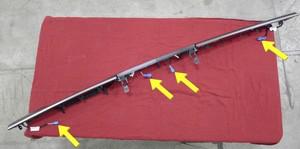
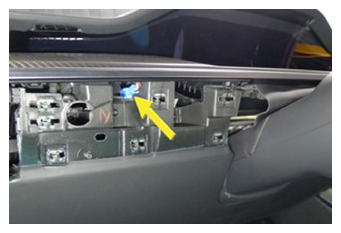
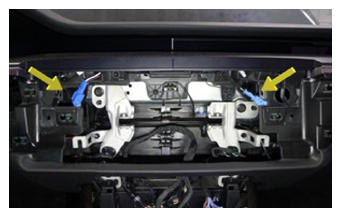
- Install IP Decor
NOTE:
21x clips, 6x datums, 4x connectors, Connect ambient bright harness, Secure each IP decor connector clip to IP carrier, Secure IP decor to lower instrument panel
 Courtesy of TESLA, INC. Courtesy of TESLA, INC.
|
 Courtesy of TESLA, INC. Courtesy of TESLA, INC.
|
 Courtesy of TESLA, INC. Courtesy of TESLA, INC.
|
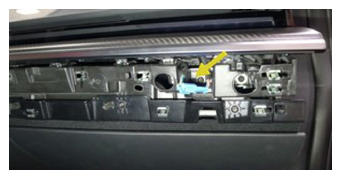 Courtesy of TESLA, INC. Courtesy of TESLA, INC.
|
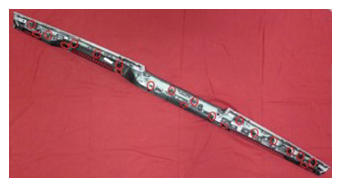 Courtesy of TESLA, INC. Courtesy of TESLA, INC.
|
- Install the touchscreen. See Touchscreen (Remove and Replace)
.
- Secure RH HEPA assembly lower dash bolt
NOTE:
1x bolt, 10 mm, 7 N.m
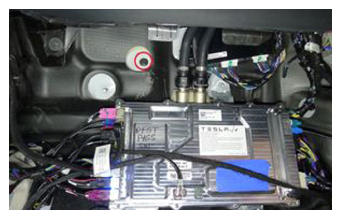 Courtesy of TESLA, INC. Courtesy of TESLA, INC.
|
- Install RH footrest panel
NOTE:
2x bolts, 10 mm, 5 N.m, 1x nut, 10 mm, 5 N.m
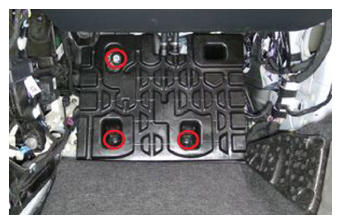 Courtesy of TESLA, INC. Courtesy of TESLA, INC.
|
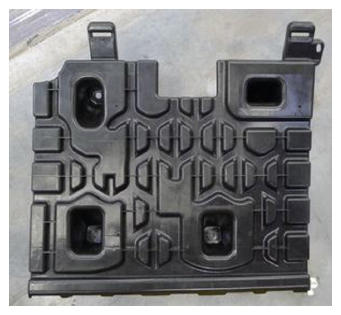 Courtesy of TESLA, INC. Courtesy of TESLA, INC.
|
- Secure harness to RH footrest panel
NOTE:
1x clip
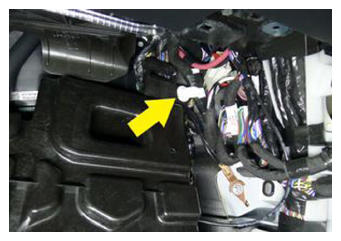 Courtesy of TESLA, INC. Courtesy of TESLA, INC.
|
- Fold RH main carpet back into place
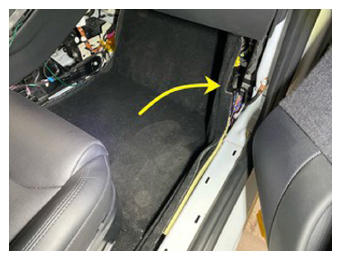 Courtesy of TESLA, INC. Courtesy of TESLA, INC.
|
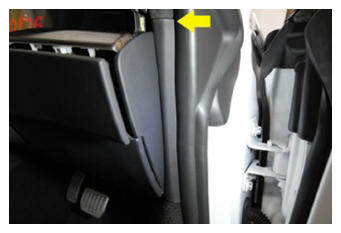
- Install RH mid A-pillar trim
NOTE:
1x clip, 2x tabs, Verify weather seal is seated properly
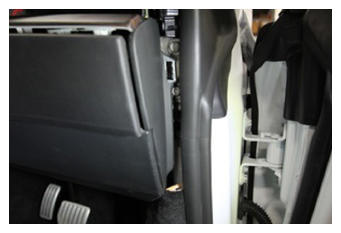 Courtesy of TESLA, INC. Courtesy of TESLA, INC.
|
 Courtesy of TESLA, INC. Courtesy of TESLA, INC.
|
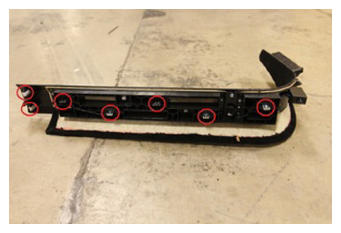
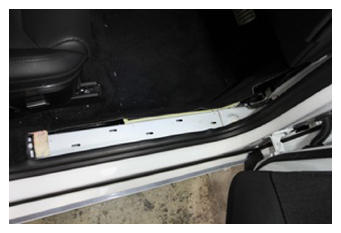
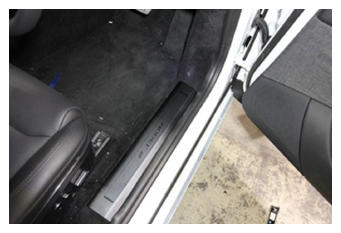
- Install RH lower A-pillar trim
NOTE:
7x clips, Verify weather seal is seated properly
 Courtesy of TESLA, INC. Courtesy of TESLA, INC.
|
 Courtesy of TESLA, INC. Courtesy of TESLA, INC.
|
 Courtesy of TESLA, INC. Courtesy of TESLA, INC.
|
- Install RH IP end cap
NOTE:
4x clips
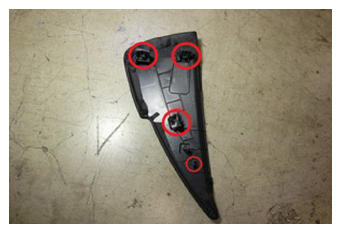 Courtesy of TESLA, INC. Courtesy of TESLA, INC.
|
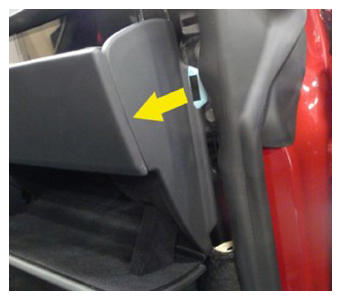 Courtesy of TESLA, INC. Courtesy of TESLA, INC.
|
- Install RH console side carpet
NOTE:
11x clips
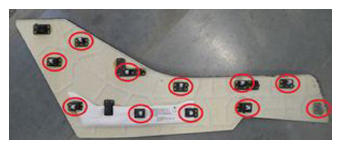 Courtesy of TESLA, INC. Courtesy of TESLA, INC.
|
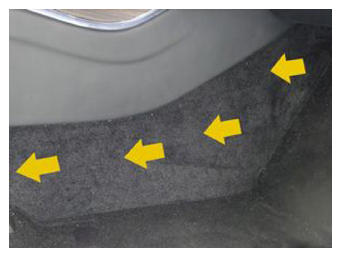 Courtesy of TESLA, INC. Courtesy of TESLA, INC.
|
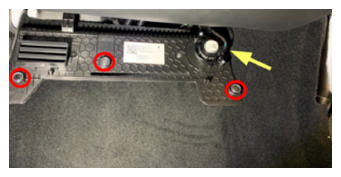
- Install RH footwell cover
NOTE:
3x magnets, 1x connectors
 Courtesy of TESLA, INC. Courtesy of TESLA, INC.
|
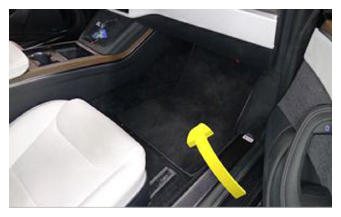
- Install RH front floor mat
 Courtesy of TESLA, INC. Courtesy of TESLA, INC.
|
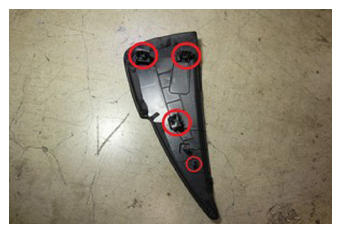
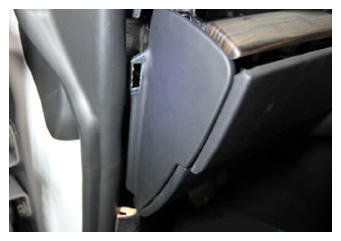
- Install LH IP end cap
NOTE:
4x clips
 Courtesy of TESLA, INC. Courtesy of TESLA, INC.
|
 Courtesy of TESLA, INC. Courtesy of TESLA, INC.
|
- Install LH mid A-pillar trim
NOTE:
1x clip, 2x tabs, Verify weather seal is seated properly
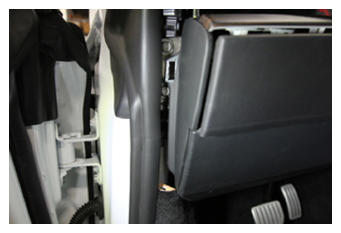 Courtesy of TESLA, INC. Courtesy of TESLA, INC.
|
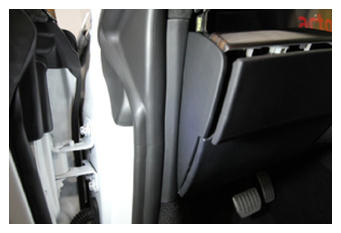 Courtesy of TESLA, INC. Courtesy of TESLA, INC.
|
- Secure LH HEPA assembly lower dash bolt
NOTE:
1x bolt, 10 mm, 7 N.m
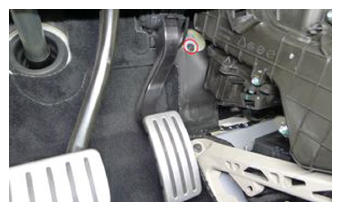 Courtesy of TESLA, INC. Courtesy of TESLA, INC.
|
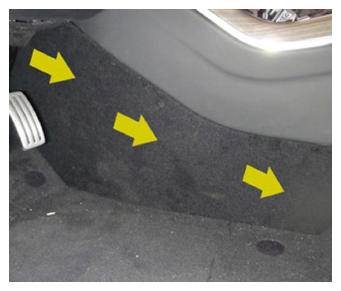
- Install LH console side carpet
NOTE:
11x clips
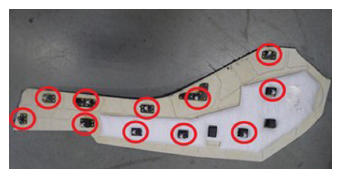 Courtesy of TESLA, INC. Courtesy of TESLA, INC.
|
 Courtesy of TESLA, INC. Courtesy of TESLA, INC.
|
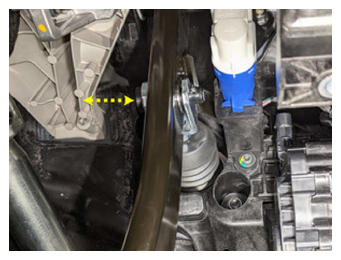
- Align brake pedal to iBooster rod and install clevis pin to brake pedal assembly
NOTE:
1x pin
 Courtesy of TESLA, INC. Courtesy of TESLA, INC.
|
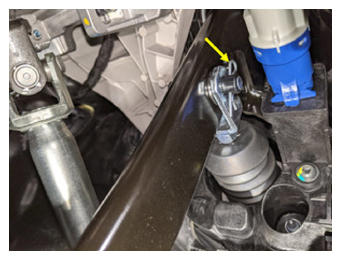
- Install cotter pin into clevis pin clip on brake pedal assembly
NOTE:
1x clip, Install to original position, replace clip if damaged
 Courtesy of TESLA, INC. Courtesy of TESLA, INC.
|
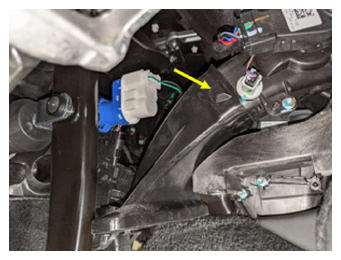
- Install driver floor jumper air duct
NOTE:
1x tab
 Courtesy of TESLA, INC. Courtesy of TESLA, INC.
|
- Install the LH knee air bag assembly into vehicle
NOTE:
1x clip, 3x connectors, 6x tabs, Hook tabs before fully seating, Use caution not to damage the connector/harness, Support the knee air bag while connecting the connectors
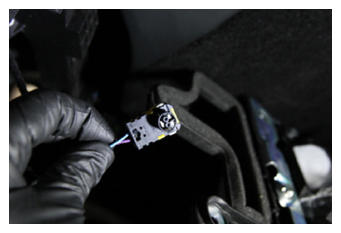 Courtesy of TESLA, INC. Courtesy of TESLA, INC.
|
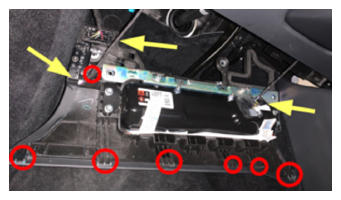 Courtesy of TESLA, INC. Courtesy of TESLA, INC.
|
- Install fasteners securing LH knee air bag assembly to vehicle
NOTE:
2x patch bolts, E10, 8 N.m, Install new fasteners
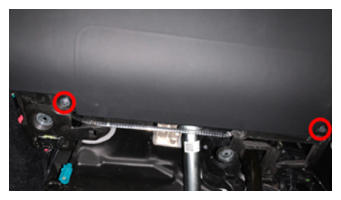 Courtesy of TESLA, INC. Courtesy of TESLA, INC.
|
- Install LH footwell cover
NOTE:
1x connector, 2x magnets
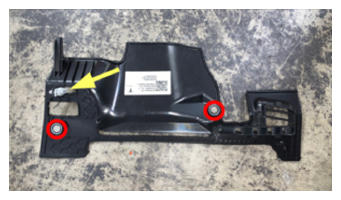 Courtesy of TESLA, INC. Courtesy of TESLA, INC.
|
- Install LH front floor mat
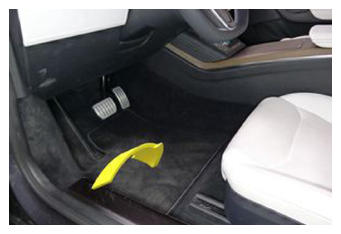 Courtesy of TESLA, INC. Courtesy of TESLA, INC.
|
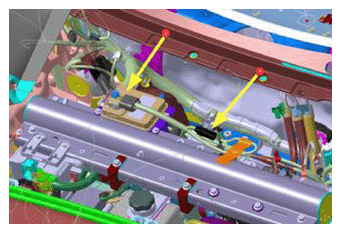
- Connect First Responder Loop and LV battery connector
NOTE:
2x connectors Secure FRL first, Seat LV battery connection and push black connector lock inwards to secure, Engage green locking tab when fully seated
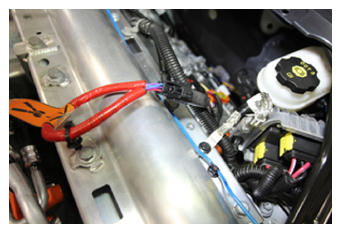 Courtesy of TESLA, INC. Courtesy of TESLA, INC.
|
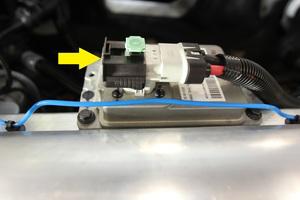 Courtesy of TESLA, INC. Courtesy of TESLA, INC.
|
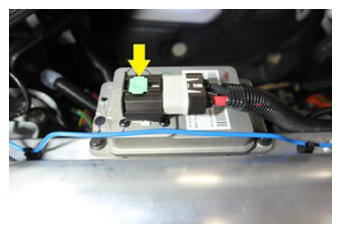 Courtesy of TESLA, INC. Courtesy of TESLA, INC.
|
 Courtesy of TESLA, INC. Courtesy of TESLA, INC.
|
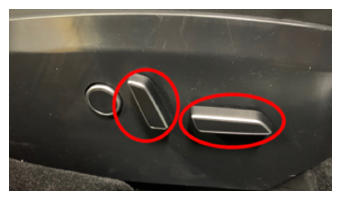
- Move RH front seat to original position
 Courtesy of TESLA, INC. Courtesy of TESLA, INC.
|
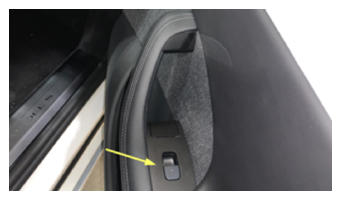
- Raise RH front window
 Courtesy of TESLA, INC. Courtesy of TESLA, INC.
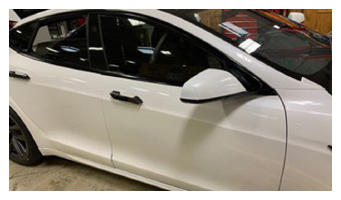
|
- Close RH front door
 Courtesy of TESLA, INC. Courtesy of TESLA, INC.
|
- Move LH front seat to original position
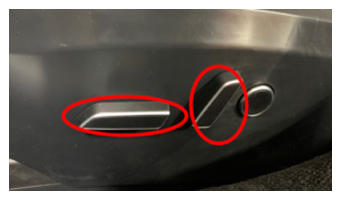 Courtesy of TESLA, INC. Courtesy of TESLA, INC.
|
- Using center display, remove wipers from "Service Mode"
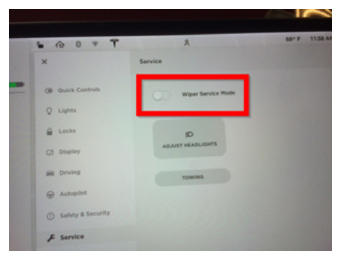 Courtesy of TESLA, INC. Courtesy of TESLA, INC.
|
- Install RH wiper arm assembly and secure nut
NOTE:
1x nut, 15 mm, 26 N.m, Line up wiper to reference mark on windshield
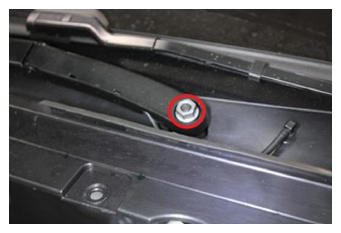 Courtesy of TESLA, INC. Courtesy of TESLA, INC.
|
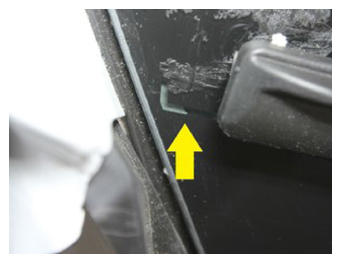 Courtesy of TESLA, INC. Courtesy of TESLA, INC.
|
- Install RH wiper arm nut cover
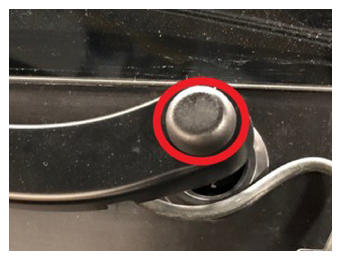 Courtesy of TESLA, INC. Courtesy of TESLA, INC.
|
- Secure RH wiper arm washer nozzle
NOTE:
1x hose, Hose is routed below the arm
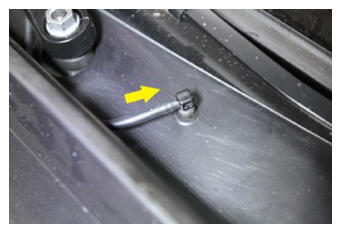 Courtesy of TESLA, INC. Courtesy of TESLA, INC.
|
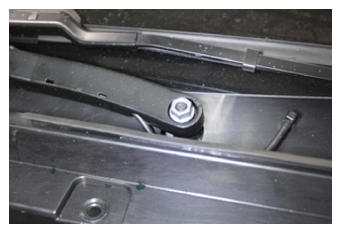 Courtesy of TESLA, INC. Courtesy of TESLA, INC.
|
- Install LH wiper arm assembly and secure nut
NOTE:
1x nut, 15 mm, 26 N.m, Line up wiper to reference mark on windshield
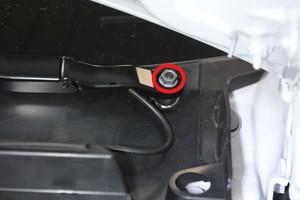 Courtesy of TESLA, INC. Courtesy of TESLA, INC.
|
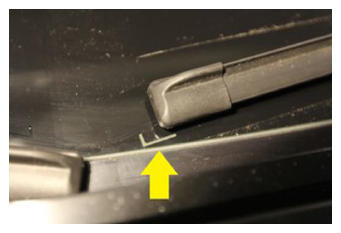 Courtesy of TESLA, INC. Courtesy of TESLA, INC.
|
- Install LH wiper arm nut cover
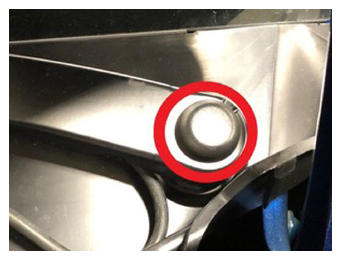 Courtesy of TESLA, INC. Courtesy of TESLA, INC.
|
- Secure LH wiper arm washer nozzle
NOTE:
1x hose, Hose is routed below the arm
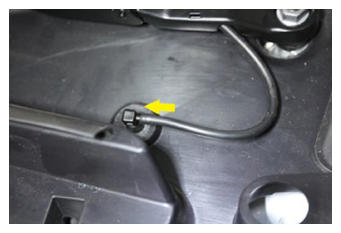 Courtesy of TESLA, INC. Courtesy of TESLA, INC.
|
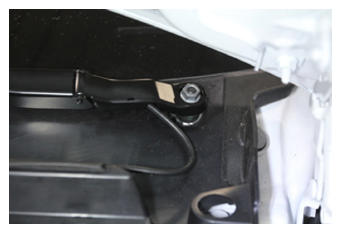 Courtesy of TESLA, INC. Courtesy of TESLA, INC.
|
- Install RH shock tower cover
NOTE:
3x push clip, 1x fir tree clip
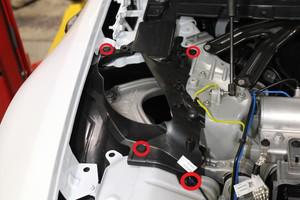 Courtesy of TESLA, INC. Courtesy of TESLA, INC.
|
- Install LH shock tower cover
NOTE:
3x push clip, 1x fir tree clip
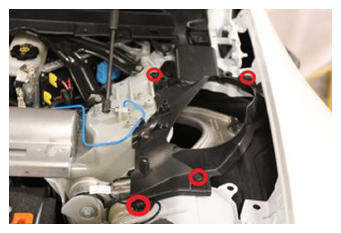 Courtesy of TESLA, INC. Courtesy of TESLA, INC.
|
- Secure washer hose nozzle by LH shock tower cover
NOTE:
1x hose, 3x clips
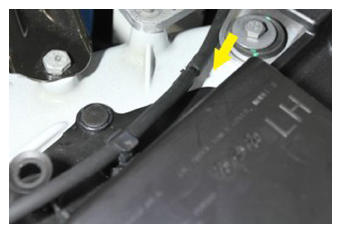 Courtesy of TESLA, INC. Courtesy of TESLA, INC.
|
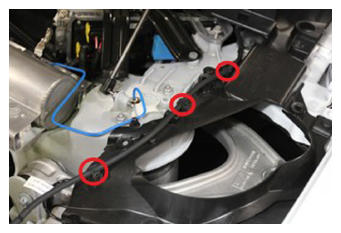 Courtesy of TESLA, INC. Courtesy of TESLA, INC.
|
- Clean area around brake fluid reservoir and remove brake reservoir cap
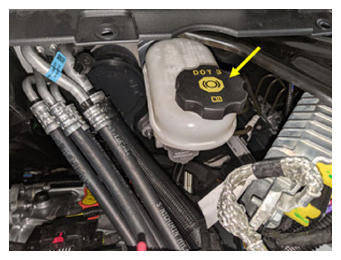 Courtesy of TESLA, INC. Courtesy of TESLA, INC.
|
- Check brake fluid level and top off reservoir if necessary
NOTE:
If level is above Max line, remove extra fluid
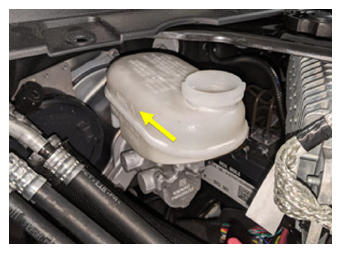 Courtesy of TESLA, INC. Courtesy of TESLA, INC.
|
- Fill brake bleeder reservoir to full level
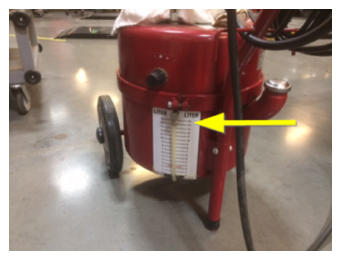 Courtesy of TESLA, INC. Courtesy of TESLA, INC.
|
- Install pressure bleeder adapter onto reservoir
NOTE:
Attach the brake reservoir hose to the brake adapter at this time
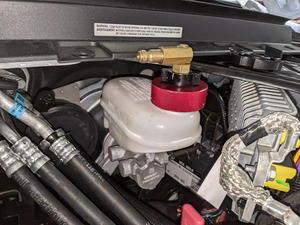 Courtesy of TESLA, INC. Courtesy of TESLA, INC.
|
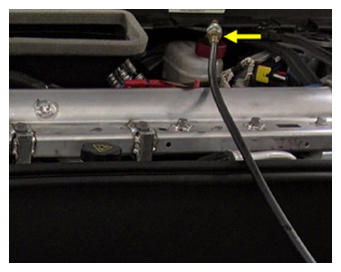 Courtesy of TESLA, INC. Courtesy of TESLA, INC.
|
- Set pressure to 30 psi
NOTE:
Connect power supply to bleeder and turn on the power to set pressure to 30 psi
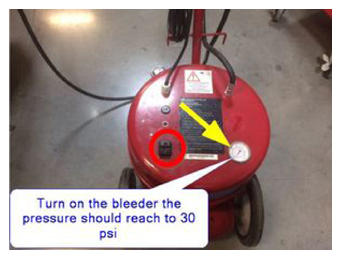 Courtesy of TESLA, INC. Courtesy of TESLA, INC.
|
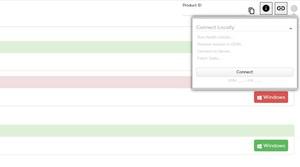
- Re-establish vehicle connection to Toolbox 3
NOTE:
Open Toolbox 3 website and establish connection to the vehicle. https://toolbox.teslamotors.com, Select connection status icon at top right corner, and select connect locally (icon will turn green when vehicle is connected)
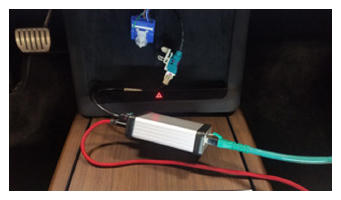 Courtesy of TESLA, INC. Courtesy of TESLA, INC.
|
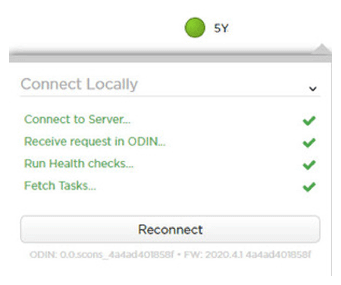 Courtesy of TESLA, INC. Courtesy of TESLA, INC.
|
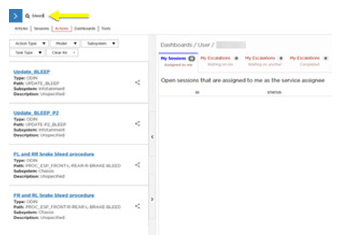
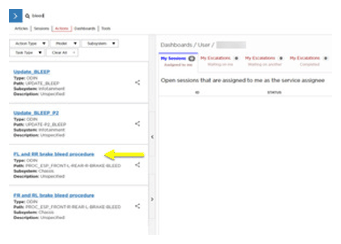
- Select "Actions" tab and search for '"bleed"
 Courtesy of TESLA, INC. Courtesy of TESLA, INC.
|
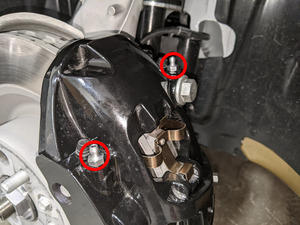
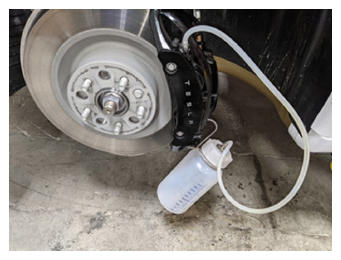
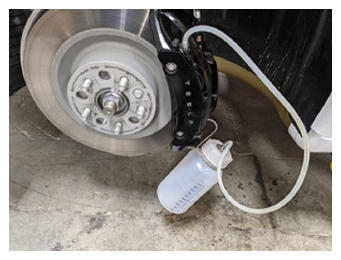
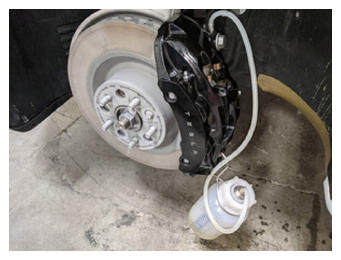
- Remove bleeding valve covers and install the fluid catching bottle to LH front outer brake caliper bleeding valve before starting the ESP
NOTE:
2x covers
 Courtesy of TESLA, INC. Courtesy of TESLA, INC.
|
 Courtesy of TESLA, INC. Courtesy of TESLA, INC.
|
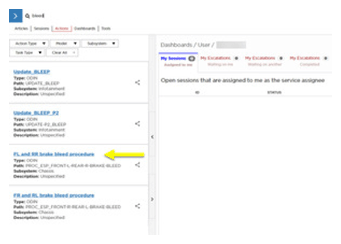
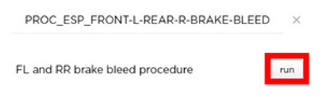
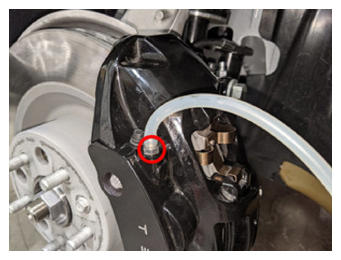
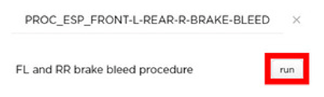
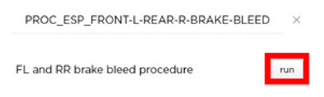
- Open the LH front outer brake caliper bleeding valve then Click the play button next to "PROC_ESP_FRONT-L-REAR-R-BRAKE-BLEED" and select "Run" to start the ESP and then close the bleeding valve once the pump stops running
NOTE:
1x bleeding valve, 11 mm, 18.5 N.m
 Courtesy of TESLA, INC. Courtesy of TESLA, INC.
|
 Courtesy of TESLA, INC. Courtesy of TESLA, INC.
|
 Courtesy of TESLA, INC. Courtesy of TESLA, INC.
|
 Courtesy of TESLA, INC. Courtesy of TESLA, INC.
|
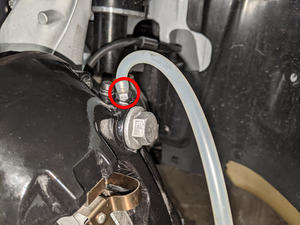
- Open the LH front inner brake caliper bleeding valve then Click the play button next to "PROC_ESP_FRONT-L-REAR-R-BRAKE-BLEED" and select "Run" to start the ESP and then close the bleeding valve once the pump stops running
NOTE:
1x bleeding valves, 11 mm, 18.5 N.m
 Courtesy of TESLA, INC. Courtesy of TESLA, INC.
|
 Courtesy of TESLA, INC. Courtesy of TESLA, INC.
|
 Courtesy of TESLA, INC. Courtesy of TESLA, INC.
|
 Courtesy of TESLA, INC. Courtesy of TESLA, INC.
|
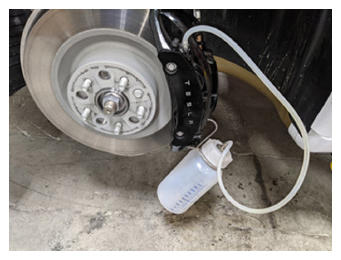
- Repeat the above steps until clear fluid and no air bubbles come out of the LH front brake caliper bleeding valve
NOTE:
1x bleeding valve, 11 mm, 18.5 N.m, Finish bleeding on the outer valve
 Courtesy of TESLA, INC. Courtesy of TESLA, INC.
|
 Courtesy of TESLA, INC. Courtesy of TESLA, INC.
|
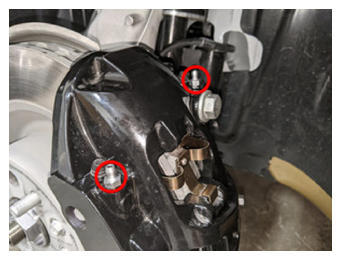
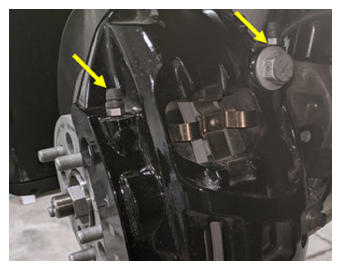
- Remove the fluid catching bottle, Torque LH front brake caliper bleeding valves and install covers
NOTE:
2x bleeding valves, 11 mm, 18.5 N.m, 2x covers
 Courtesy of TESLA, INC. Courtesy of TESLA, INC.
|
 Courtesy of TESLA, INC. Courtesy of TESLA, INC.
|
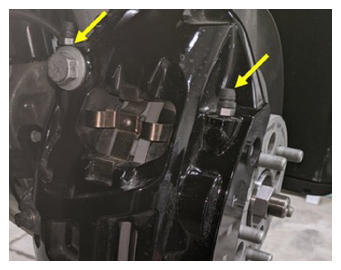
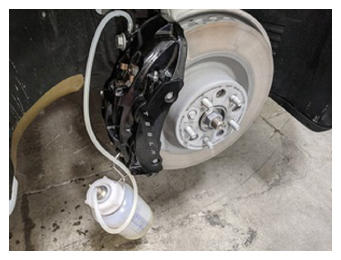
- Remove bleeding valve covers and install the fluid catching bottle to RH front outer brake caliper bleeding valve before starting the ESP
NOTE:
2x covers
 Courtesy of TESLA, INC. Courtesy of TESLA, INC.
|
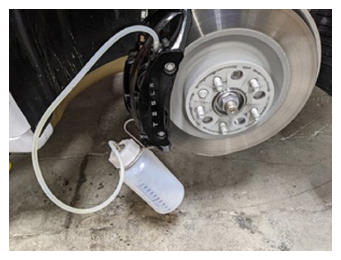 Courtesy of TESLA, INC. Courtesy of TESLA, INC.
|
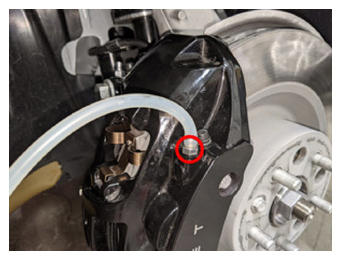
- Open the RH front outer brake caliper bleeding valve then Click the play button next to "PROC_ESP_FRONT-R-REAR-L-BRAKE-BLEED" and select "Run" to start the ESP and then close the bleeding valve once the pump stops running
NOTE:
1x bleeding valve, 11 mm, 18.5 N.m
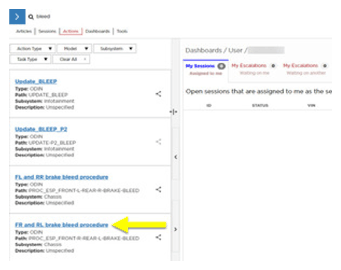 Courtesy of TESLA, INC. Courtesy of TESLA, INC.
|
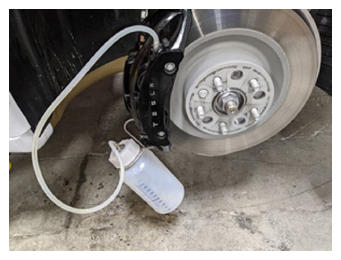 Courtesy of TESLA, INC. Courtesy of TESLA, INC.
|
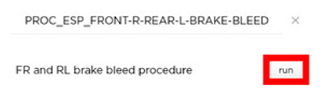 Courtesy of TESLA, INC. Courtesy of TESLA, INC.
|
 Courtesy of TESLA, INC. Courtesy of TESLA, INC.
|
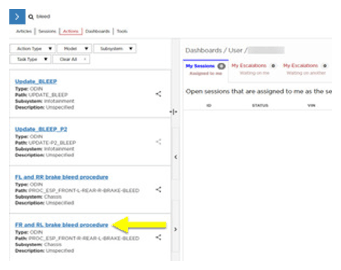
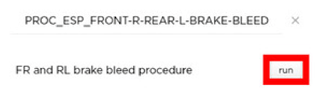
- Open the RH front inner brake caliper bleeding valve then Click the play button next to "PROC_ESP_FRONT-R-REAR-L-BRAKE-BLEED" and select "Run" to start the ESP and then close the bleeding valve once the pump stops running
NOTE:
1x bleeding valves, 11 mm, 18.5 N.m
 Courtesy of TESLA, INC. Courtesy of TESLA, INC.
|
 Courtesy of TESLA, INC. Courtesy of TESLA, INC.
|
 Courtesy of TESLA, INC. Courtesy of TESLA, INC.
|
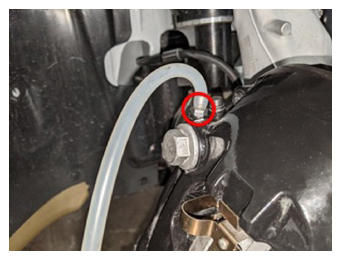 Courtesy of TESLA, INC. Courtesy of TESLA, INC.
|
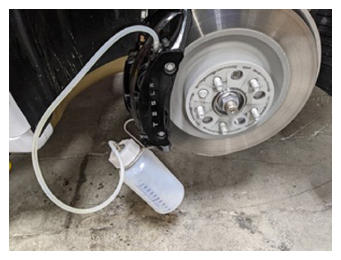
- Repeat the above steps until clear fluid and no air bubbles come out of the RH front brake caliper bleeding valve
NOTE:
1x bleeding valve, 11 mm, 18.5 N.m, Finish bleeding on the outer valve
 Courtesy of TESLA, INC. Courtesy of TESLA, INC.
|
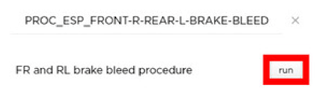 Courtesy of TESLA, INC. Courtesy of TESLA, INC.
|
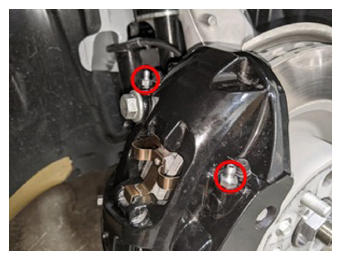
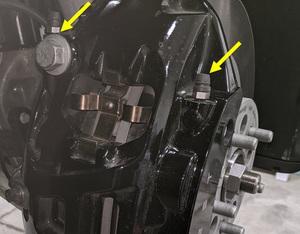
- Remove the fluid catching bottle, Torque RH front brake caliper bleeding valves and install covers
NOTE:
2x bleeding valves, 11 mm, 18.5 N.m, 2x covers
 Courtesy of TESLA, INC. Courtesy of TESLA, INC.
|
 Courtesy of TESLA, INC. Courtesy of TESLA, INC.
|
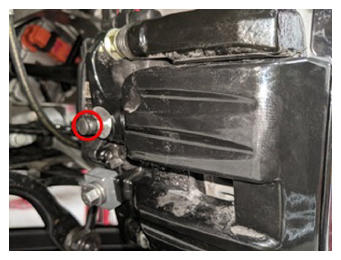
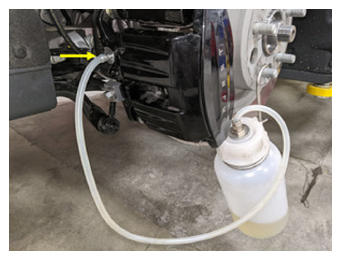
- Remove bleeding valve cover and install the fluid catching bottle to RH rear brake caliper bleeding valve before starting the ESP
NOTE:
1x cover
 Courtesy of TESLA, INC. Courtesy of TESLA, INC.
|
 Courtesy of TESLA, INC. Courtesy of TESLA, INC.
|
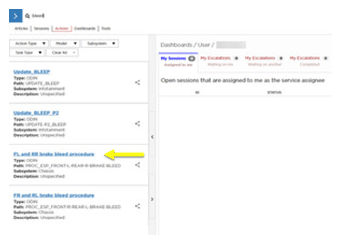
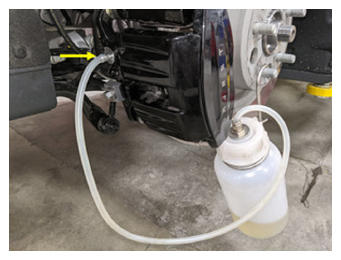
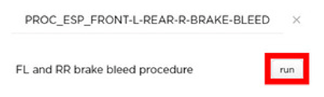
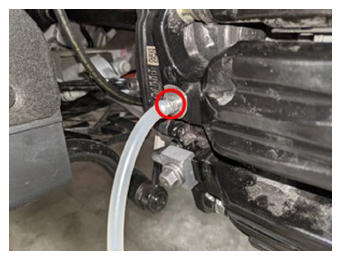
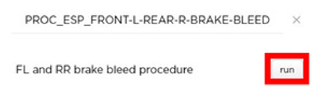
- Open the RH rear brake caliper bleeding valve then Click the play button next to "PROC_ESP_FRONT-L-REAR-R-BRAKE-BLEED" and select "Run" to start the ESP and then close the bleeding valve once the pump stops running
NOTE:
1x bleeding valve, 10 mm, 10 N.m
 Courtesy of TESLA, INC. Courtesy of TESLA, INC.
|
 Courtesy of TESLA, INC. Courtesy of TESLA, INC.
|
 Courtesy of TESLA, INC. Courtesy of TESLA, INC.
|
 Courtesy of TESLA, INC. Courtesy of TESLA, INC.
|
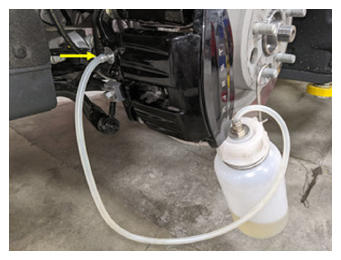
- Repeat the above step until clear fluid and no air bubbles come out of the RH rear brake caliper bleeding valve
NOTE:
1x bleeding valve, 10 mm, 10 N.m
 Courtesy of TESLA, INC. Courtesy of TESLA, INC.
|
 Courtesy of TESLA, INC. Courtesy of TESLA, INC.
|
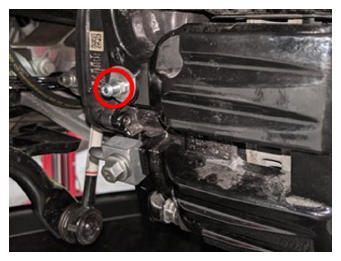
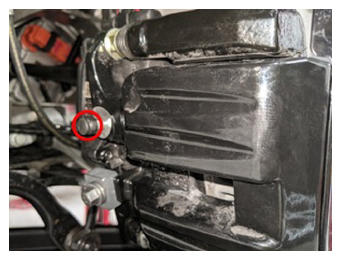
- Remove the fluid catching bottle, Torque RH rear brake caliper bleeding valve and install cover
NOTE:
1x bleeding valve, 10 mm, 10 N.m, 1x cover
 Courtesy of TESLA, INC. Courtesy of TESLA, INC.
|
 Courtesy of TESLA, INC. Courtesy of TESLA, INC.
|
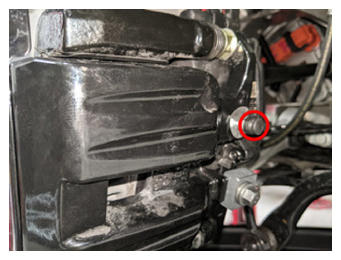
- Remove bleeding valve cover and install the fluid catching bottle to LH rear brake caliper bleeding valve before starting the ESP
NOTE:
1x cover
 Courtesy of TESLA, INC. Courtesy of TESLA, INC.
|
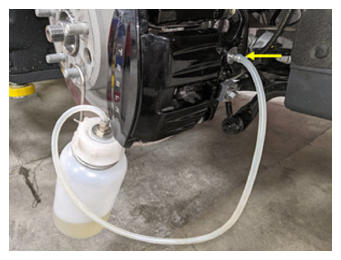 Courtesy of TESLA, INC. Courtesy of TESLA, INC.
|
- Open the LH rear brake caliper bleeding valve then Click the play button next to "PROC_ESP_FRONT-R-REAR-L-BRAKE-BLEED" and select "Run" to start the ESP and then close the bleeding valve once the pump stops running
NOTE:
1x bleeding valve, 10 mm, 10 N.m
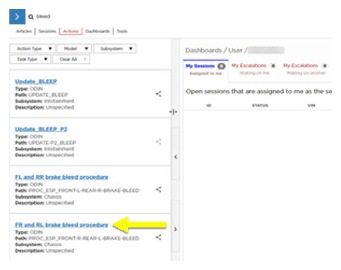 Courtesy of TESLA, INC. Courtesy of TESLA, INC.
|
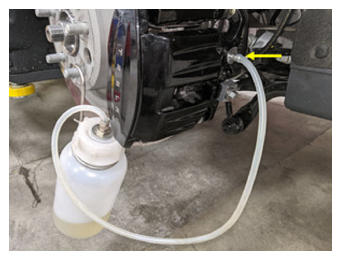 Courtesy of TESLA, INC. Courtesy of TESLA, INC.
|
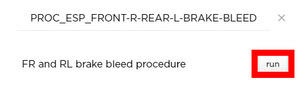 Courtesy of TESLA, INC. Courtesy of TESLA, INC.
|
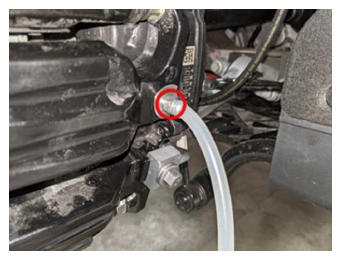 Courtesy of TESLA, INC. Courtesy of TESLA, INC.
|
- Repeat the above step until clear fluid and no air bubbles come out of the LH rear brake caliper bleeding valve
NOTE:
1x bleeding valve, 10 mm, 10 N.m
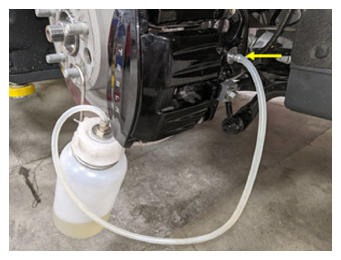 Courtesy of TESLA, INC. Courtesy of TESLA, INC.
|
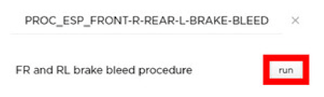 Courtesy of TESLA, INC. Courtesy of TESLA, INC.
|
- Remove the fluid catching bottle, Torque LH rear brake caliper bleeding valve and install cover
NOTE:
1x bleeding valve, 10 mm, 10 N.m, 1x cover
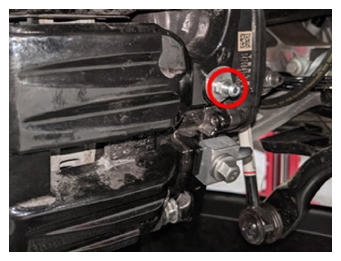 Courtesy of TESLA, INC. Courtesy of TESLA, INC.
|
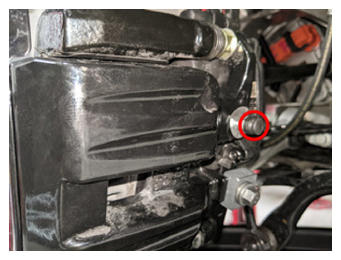 Courtesy of TESLA, INC. Courtesy of TESLA, INC.
|
- Turn off and remove pressure brake bleeder kit from vehicle
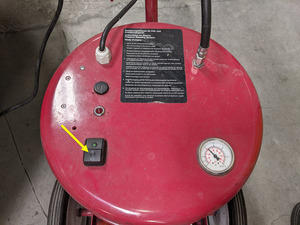 Courtesy of TESLA, INC. Courtesy of TESLA, INC.
|
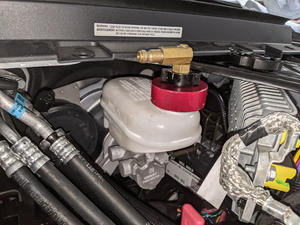 Courtesy of TESLA, INC. Courtesy of TESLA, INC.
|
- Install brake reservoir cap
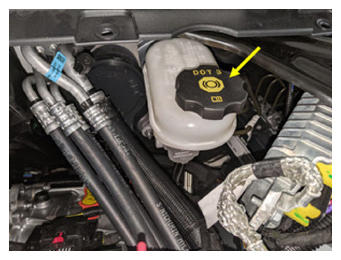 Courtesy of TESLA, INC. Courtesy of TESLA, INC.
|
- Pump brake pedal a few times to ensure pedal feels normal
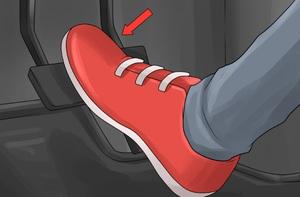 Courtesy of TESLA, INC. Courtesy of TESLA, INC.
|
- Using Toolbox 3:
- Select the Actions tab and search for "Stiffness".
- Select the ODIN routine TEST_BRAKE_X_STIFFNESS-TEST-SERVICE, and then click the link of the routine.
- If brake pads or rotors have been replaced, select UNBURNISHED under "Action_Type". In all other cases, select BURNISHED.
- Click RUN, and allow the routine to complete.
NOTE:
Do not press the brake pedal during the test.
- Disconnect Toolbox 3 from vehicle and remove laptop and ethernet diag kit
NOTE:
If RJ45 ethernet diagnostic connector present media converter box not required. Disconnect directly from laptop using an RJ45 Ethernet cable
 Courtesy of TESLA, INC. Courtesy of TESLA, INC.
|
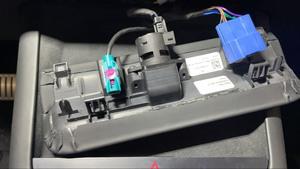 Courtesy of TESLA, INC. Courtesy of TESLA, INC.
|
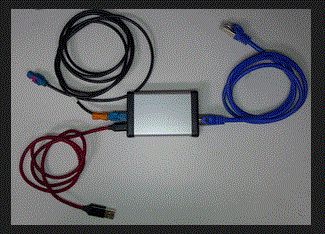 Courtesy of TESLA, INC. Courtesy of TESLA, INC.
|
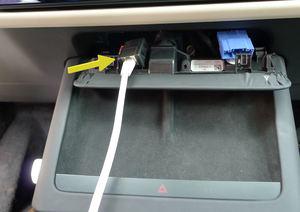 Courtesy of TESLA, INC. Courtesy of TESLA, INC.
|
- Install RH underhood apron
NOTE:
10x clips
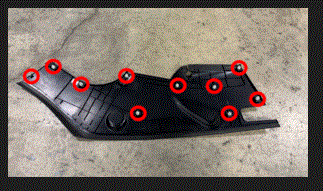 Courtesy of TESLA, INC. Courtesy of TESLA, INC.
|
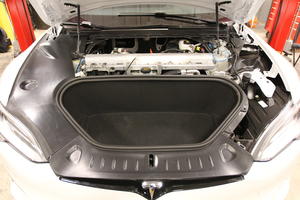 Courtesy of TESLA, INC. Courtesy of TESLA, INC.
|
- Install LH underhood apron
NOTE:
10x clips
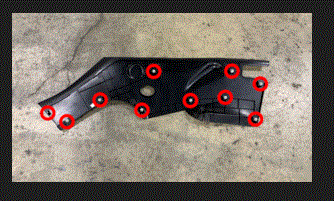 Courtesy of TESLA, INC. Courtesy of TESLA, INC.
|
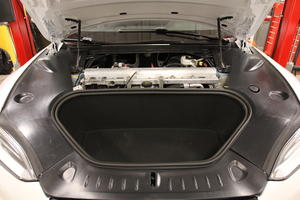 Courtesy of TESLA, INC. Courtesy of TESLA, INC.
|
- Install rear underhood apron
NOTE:
8x clips
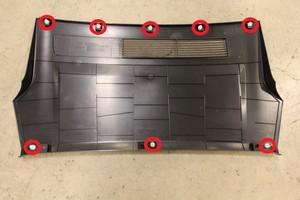 Courtesy of TESLA, INC. Courtesy of TESLA, INC.
|
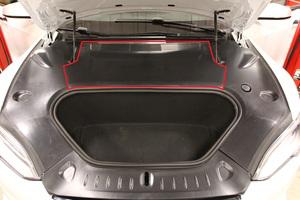 Courtesy of TESLA, INC. Courtesy of TESLA, INC.
|
- Close hood
NOTE:
Press firmly in green highlighted areas (see image), Damage may result from pressure elsewhere on hood
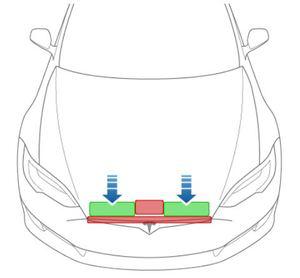 Courtesy of TESLA, INC. Courtesy of TESLA, INC.
|
- Raise vehicle partially and lower onto locks
NOTE:
Set vehicle to comfortable working height, Make sure there's an audible click of the locks on both sides before lowering, otherwise vehicle may tilt to the side
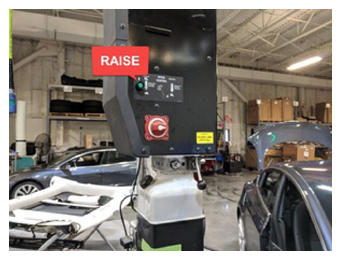 Courtesy of TESLA, INC. Courtesy of TESLA, INC.
|
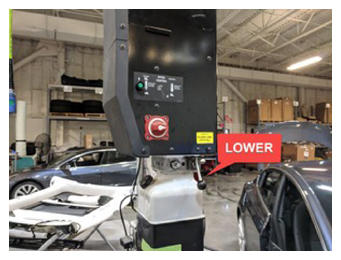 Courtesy of TESLA, INC. Courtesy of TESLA, INC.
|
- Install LH front wheel
NOTE:
5x nuts, 21 mm, 175 N.m, Start lug nuts by hand before using power tool
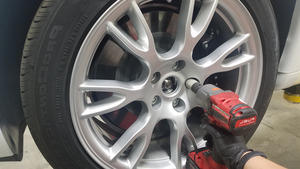 Courtesy of TESLA, INC. Courtesy of TESLA, INC.
|
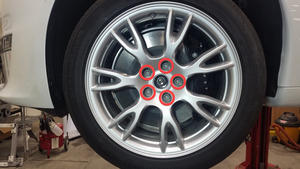 Courtesy of TESLA, INC. Courtesy of TESLA, INC.
|
- Install RH front wheel
NOTE:
5x nuts, 21 mm, 175 N.m, Start lug nuts by hand before using power tool
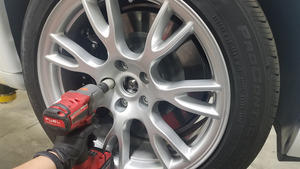 Courtesy of TESLA, INC. Courtesy of TESLA, INC.
|
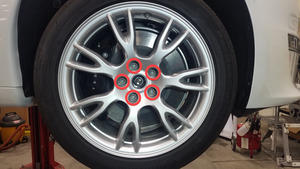 Courtesy of TESLA, INC. Courtesy of TESLA, INC.
|
- Install RH rear wheel
NOTE:
5x nuts, 21 mm, 175 N.m, Start lug nuts by hand before using power tool
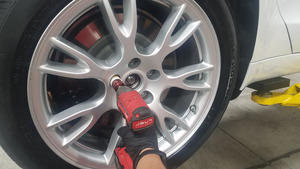 Courtesy of TESLA, INC. Courtesy of TESLA, INC.
|
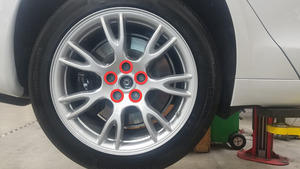 Courtesy of TESLA, INC. Courtesy of TESLA, INC.
|
- Install LH rear wheel
NOTE:
5x nuts, 21 mm, 175 N.m, Start lug nuts by hand before using power tool
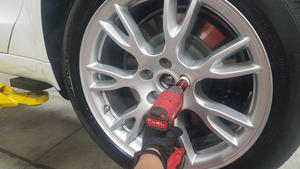 Courtesy of TESLA, INC. Courtesy of TESLA, INC.
|
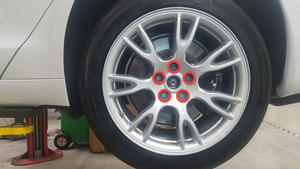 Courtesy of TESLA, INC. Courtesy of TESLA, INC.
|
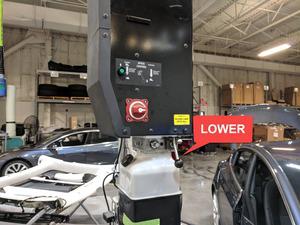
- Lower vehicle until tires are touching the ground
NOTE:
Raise lift off locks, then hold lock release lever to keep locks free while vehicle is lowered
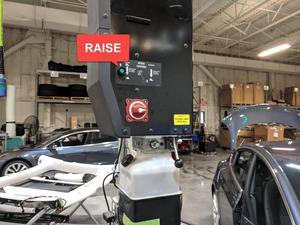 Courtesy of TESLA, INC. Courtesy of TESLA, INC.
|
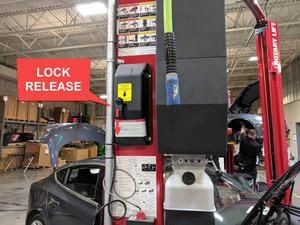 Courtesy of TESLA, INC. Courtesy of TESLA, INC.
|
 Courtesy of TESLA, INC. Courtesy of TESLA, INC.
|
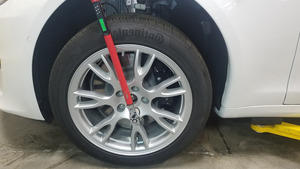
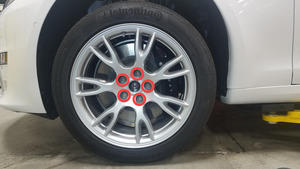
- Torque LH front wheel
NOTE:
5x nuts, 21 mm, 175 N.m
 Courtesy of TESLA, INC. Courtesy of TESLA, INC.
|
 Courtesy of TESLA, INC. Courtesy of TESLA, INC.
|
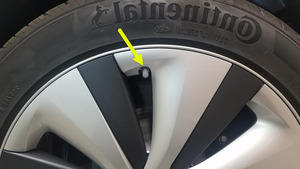
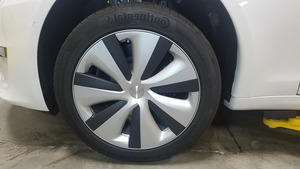
- Install LH front wheel cap
NOTE:
Align valve stem with cap
 Courtesy of TESLA, INC. Courtesy of TESLA, INC.
|
 Courtesy of TESLA, INC. Courtesy of TESLA, INC.
|
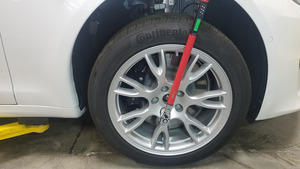
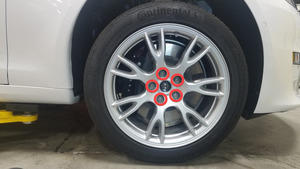
- Torque RH front wheel
NOTE:
5x nuts, 21 mm, 175 N.m
 Courtesy of TESLA, INC. Courtesy of TESLA, INC.
|
 Courtesy of TESLA, INC. Courtesy of TESLA, INC.
|
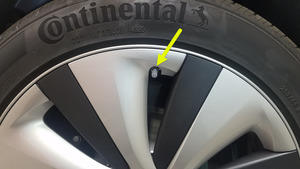
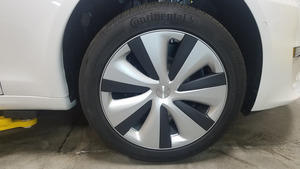
- Install RH front wheel cap
NOTE:
Align valve stem with cap
 Courtesy of TESLA, INC. Courtesy of TESLA, INC.
|
 Courtesy of TESLA, INC. Courtesy of TESLA, INC.
|
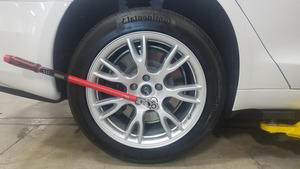
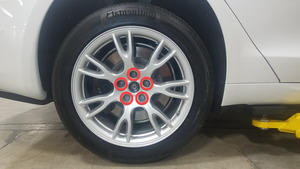
- Torque RH rear wheel
NOTE:
5x nuts, 21 mm, 175 N.m
 Courtesy of TESLA, INC. Courtesy of TESLA, INC.
|
 Courtesy of TESLA, INC. Courtesy of TESLA, INC.
|
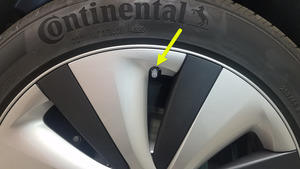
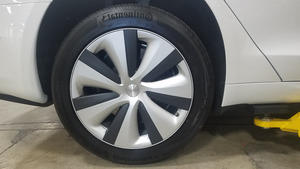
- Install RH rear wheel cap
NOTE:
Align valve stem with cap
 Courtesy of TESLA, INC. Courtesy of TESLA, INC.
|
 Courtesy of TESLA, INC. Courtesy of TESLA, INC.
|
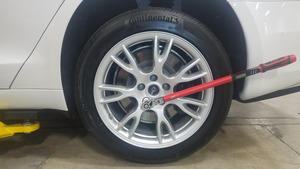
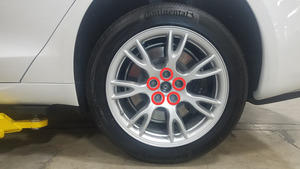
- Torque LH rear wheel
NOTE:
5x nuts, 21 mm, 175 N.m
 Courtesy of TESLA, INC. Courtesy of TESLA, INC.
|
 Courtesy of TESLA, INC. Courtesy of TESLA, INC.
|
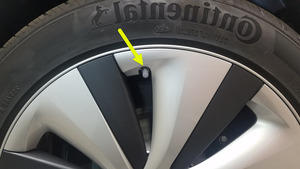
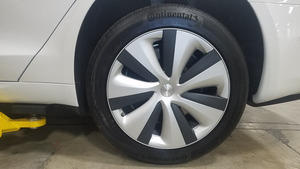
- Install LH rear wheel cap
NOTE:
Align valve stem with cap
 Courtesy of TESLA, INC. Courtesy of TESLA, INC.
|
 Courtesy of TESLA, INC. Courtesy of TESLA, INC.
|
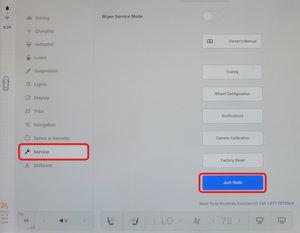
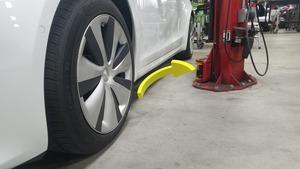
- Remove vehicle from lift
NOTE:
Lower rack arms fully and remove them from under vehicle, Remove air suspension from "Jack Mode"
 Courtesy of TESLA, INC. Courtesy of TESLA, INC.
|
 Courtesy of TESLA, INC. Courtesy of TESLA, INC.
|
- Raise LH front window
- Close LH front door
- Perform a road test and ensure proper brake pedal feel and performance
NOTE:
Add correction code (00040100) to account for time