- Remove the steering column. See RHD STEERING - STEERING RACK AND LOWER COLUMN - STEERING GEAR AND LOWER COLUMN - STEERING GEAR ASSEMBLY (RR) - REMOVE AND REPLACE
.
- Remove the wiper module. See RHD ELECTRICAL - WIPERS AND WASHER - WINDSHIELD WIPERS AND MOTOR - WIPER MODULE - REMOVE AND REPLACE
.
- Remove the fresh air intake assembly. See CABIN HVAC - HVAC, FRESH AIR INTAKE - REMOVE AND REPLACE
.
- Remove the LV battery. See LV BATTERY - LI-ION BATTERY PACK - REMOVE AND REPLACE
.
- Remove the shock tower brace. See BODY - BODY PANELS - FRONT INNER PANELS - SHOCK TOWER BRACE ASSEMBLY - REMOVE AND REPLACE
.
- Remove the front controller. See BODY CONTROLLERS - ASSEMBLY, FRONT CONTROLLER GEN 3 - REMOVE AND REPLACE
.
- Disconnect the steering gear assembly connectors (x4).
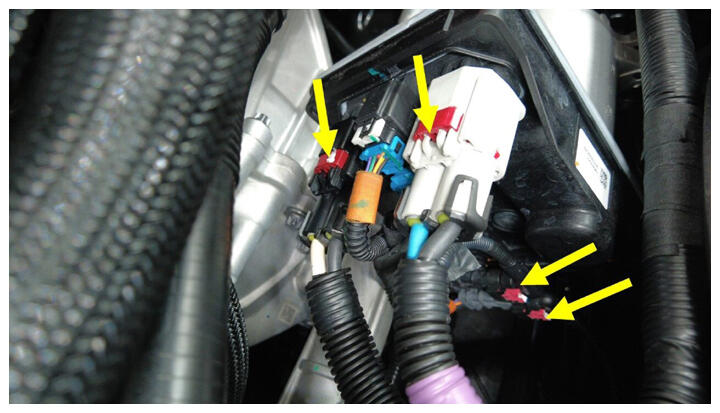 Courtesy of TESLA, INC. Courtesy of TESLA, INC.
|
- Disconnect FDU front subframe harness connector.
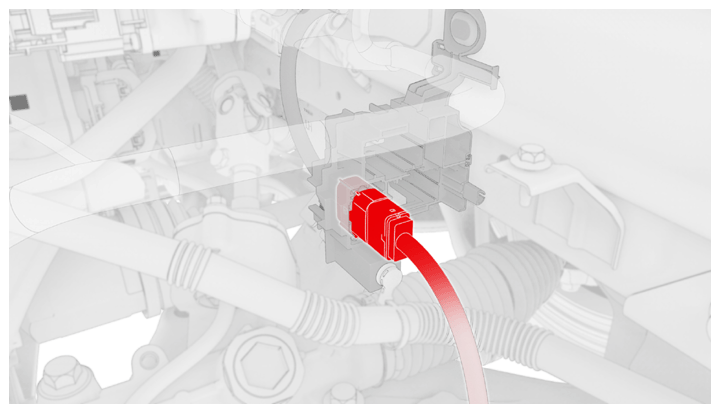 Courtesy of TESLA, INC. Courtesy of TESLA, INC.
|
- Remove washer hose from LH front frame rail area
NOTE:
1x clip
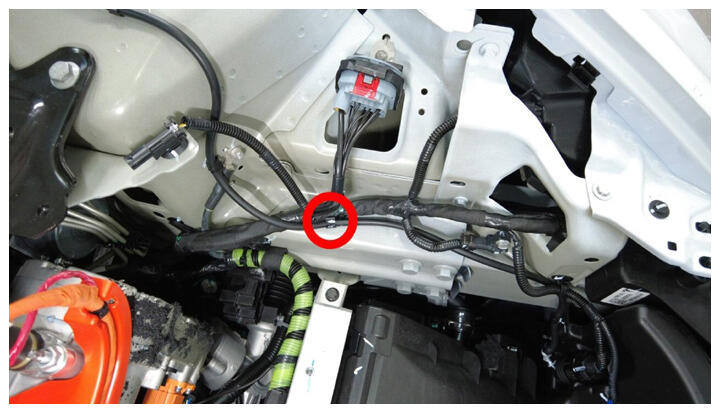 Courtesy of TESLA, INC. Courtesy of TESLA, INC.
|
- Release front harness clips around LH front frame rail area
NOTE:
6x clips
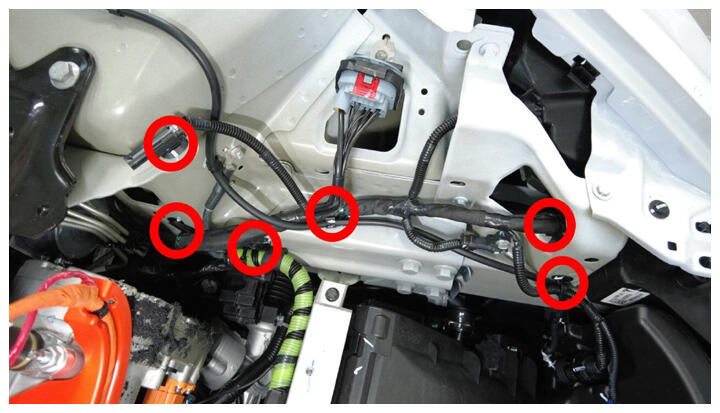 Courtesy of TESLA, INC. Courtesy of TESLA, INC.
|
- Remove front harness ground terminal at LH front shock tower
NOTE:
1x bolts, 10 mm, 8 N.m, Inspect bolts: if they are self tapping tri-lobular bolts (1128269-00-A) then discard, If they are normal bolts (1447438-00-A) they can be reused
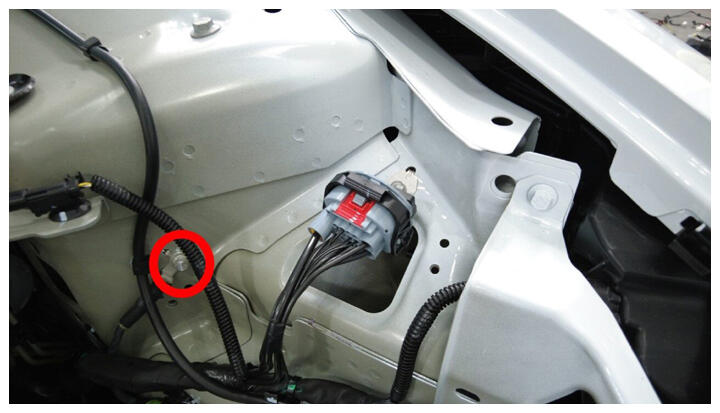 Courtesy of TESLA, INC. Courtesy of TESLA, INC.
|
- Remove LH harness bracket clip and remove from vehicle
NOTE:
2x clips
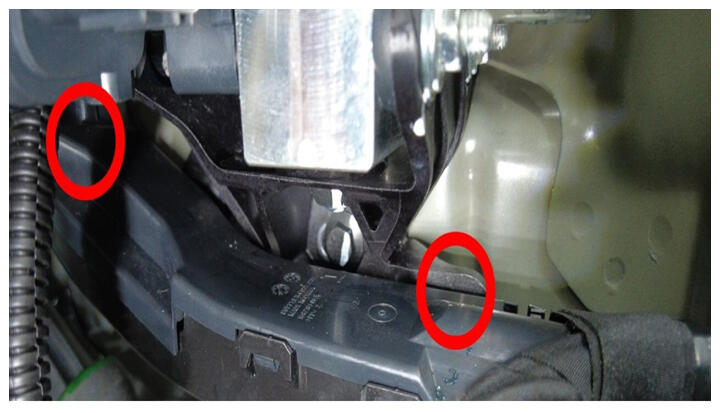 Courtesy of TESLA, INC. Courtesy of TESLA, INC.
|
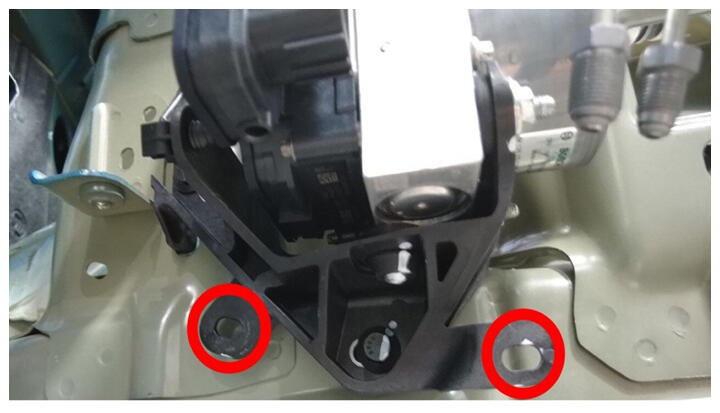 Courtesy of TESLA, INC. Courtesy of TESLA, INC.
|
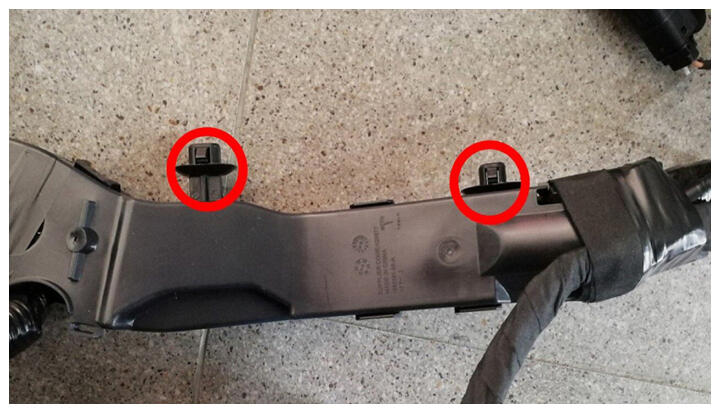 Courtesy of TESLA, INC. Courtesy of TESLA, INC.
|
- Remove bolts securing front harness bracket from vehicle
NOTE:
2x bolts, 10 mm, 9 N.m
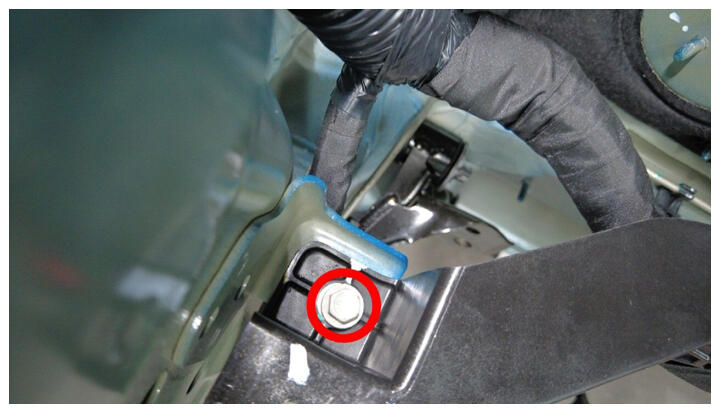 Courtesy of TESLA, INC. Courtesy of TESLA, INC.
|
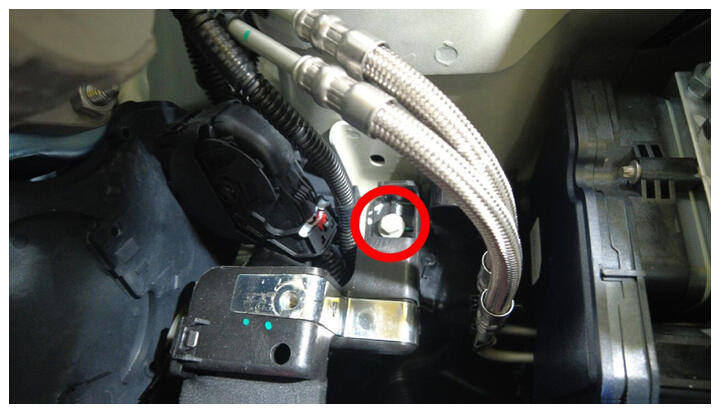 Courtesy of TESLA, INC. Courtesy of TESLA, INC.
|
- Release clips securing harness behind LH shock tower
NOTE:
4x clips
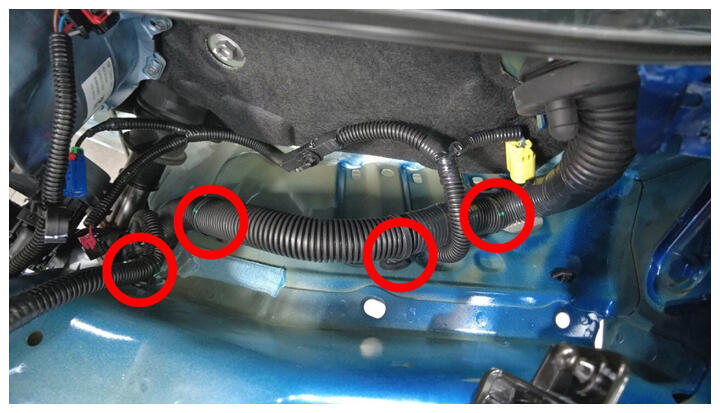 Courtesy of TESLA, INC. Courtesy of TESLA, INC.
|
- Position fluid catcher under underneath vehicle
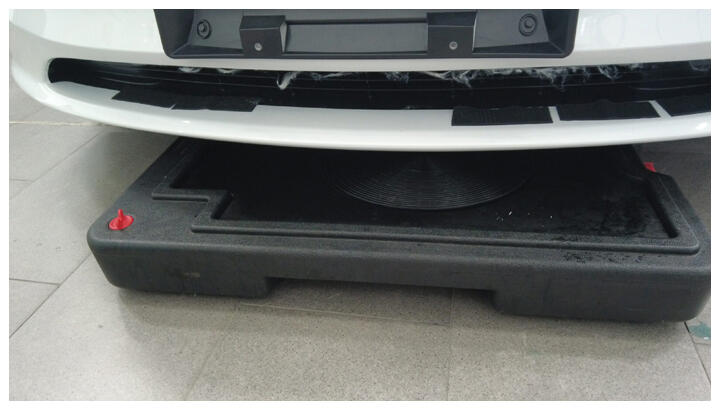 Courtesy of TESLA, INC. Courtesy of TESLA, INC.
|
- Place absorbent material underneath brake booster and reservoir area
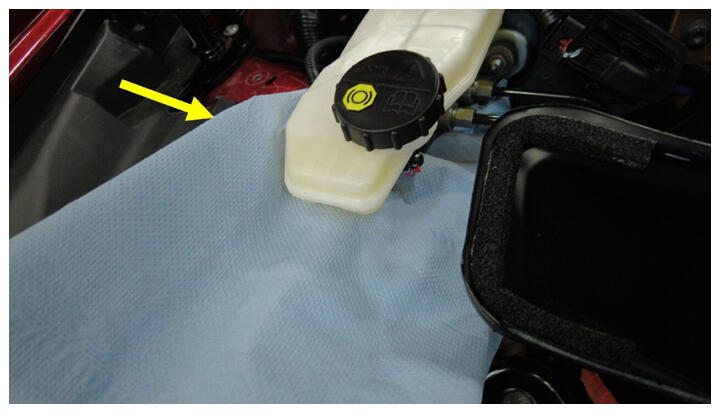 Courtesy of TESLA, INC. Courtesy of TESLA, INC.
|
- Remove fluid from brake fluid reservoir
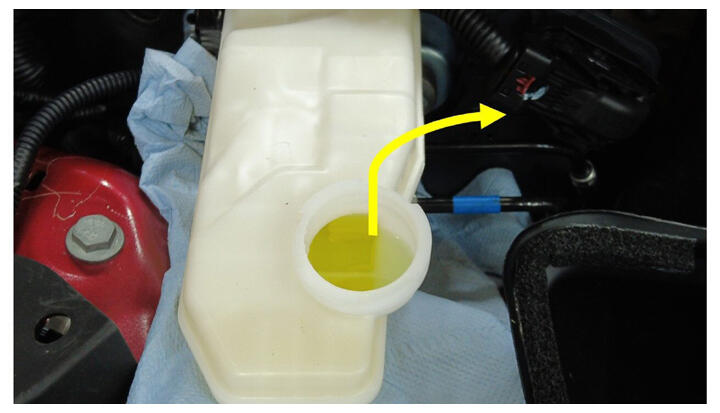 Courtesy of TESLA, INC. Courtesy of TESLA, INC.
|
- Disconnect forward brake line from brake booster
NOTE:
1x nut, 12 mm, 16 N.m
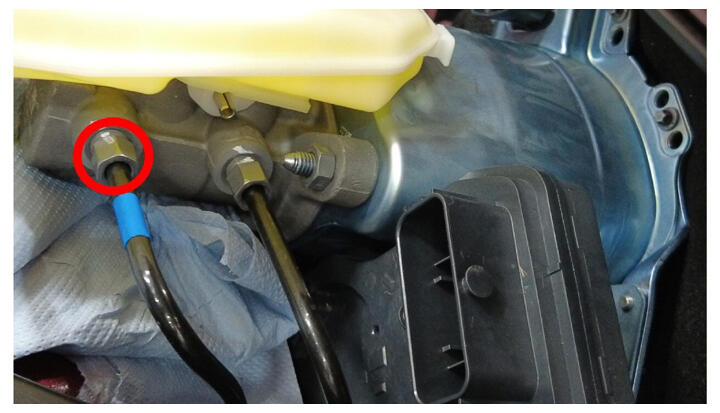 Courtesy of TESLA, INC. Courtesy of TESLA, INC.
|
- Disconnect rear brake line from brake booster
NOTE:
1x nut, 12 mm, 16 N.m
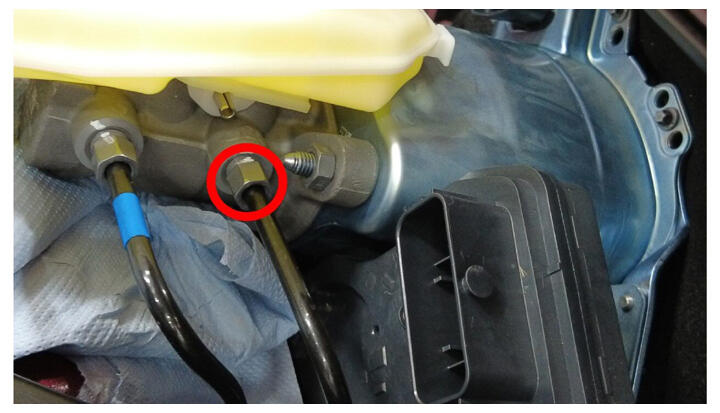 Courtesy of TESLA, INC. Courtesy of TESLA, INC.
|
- Disconnect the hydraulic control unit connector
NOTE:
1x connector, Disengage locking tab and pull up on connector to release
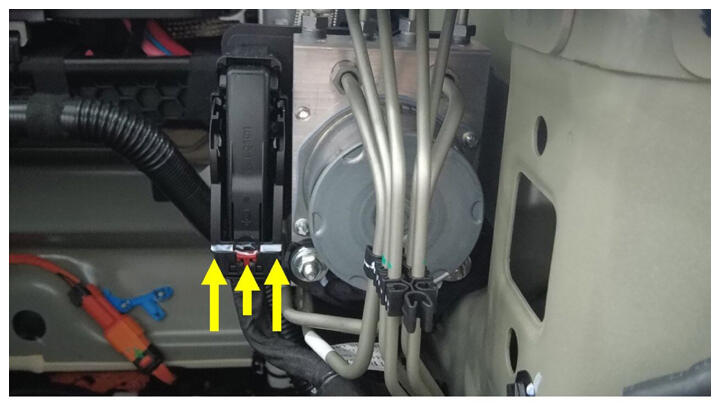 Courtesy of TESLA, INC. Courtesy of TESLA, INC.
|
- Remove RH front brake line tube nut from hydraulic control unit
NOTE:
1x nut, 12 mm, 16 N.m
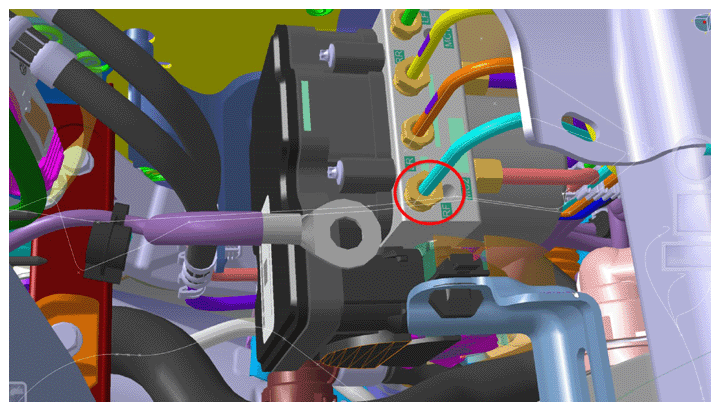 Courtesy of TESLA, INC. Courtesy of TESLA, INC.
|
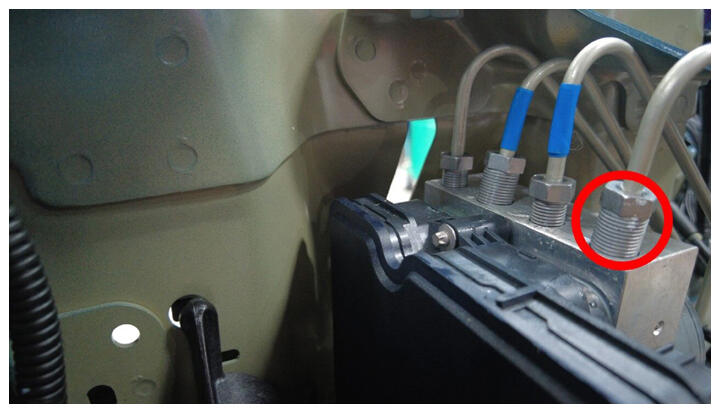 Courtesy of TESLA, INC. Courtesy of TESLA, INC.
|
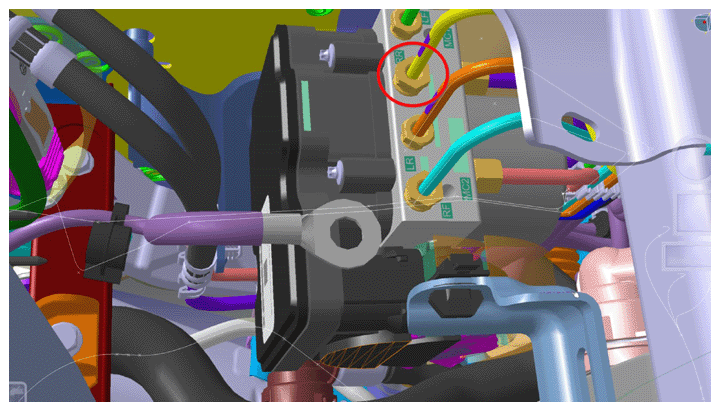
- Remove the LH rear brake line tube nut from hydraulic control unit
NOTE:
1x nut, 12 mm, 16 N.m
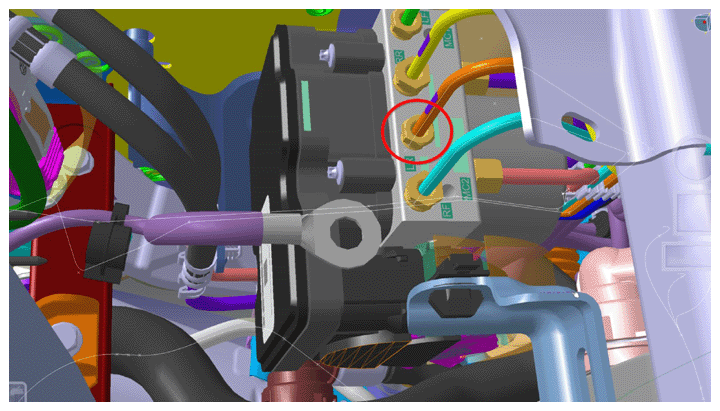 Courtesy of TESLA, INC. Courtesy of TESLA, INC.
|
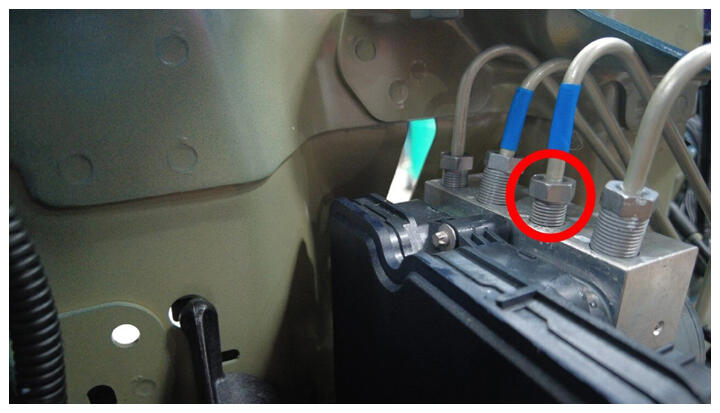 Courtesy of TESLA, INC. Courtesy of TESLA, INC.
|
- Remove RH rear brake line tube nut from hydraulic control unit
NOTE:
1x nut, 12 mm, 16 N.m
 Courtesy of TESLA, INC. Courtesy of TESLA, INC.
|
 Courtesy of TESLA, INC. Courtesy of TESLA, INC.
|
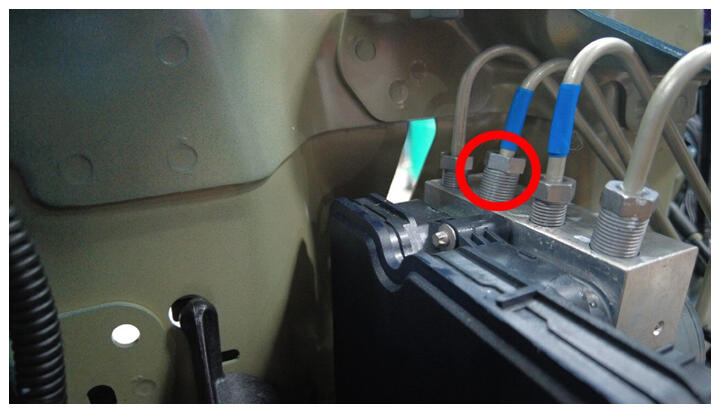
- Remove LH front brake line tube nut from hydraulic control unit
NOTE:
1x nut, 12 mm, 16 N.m
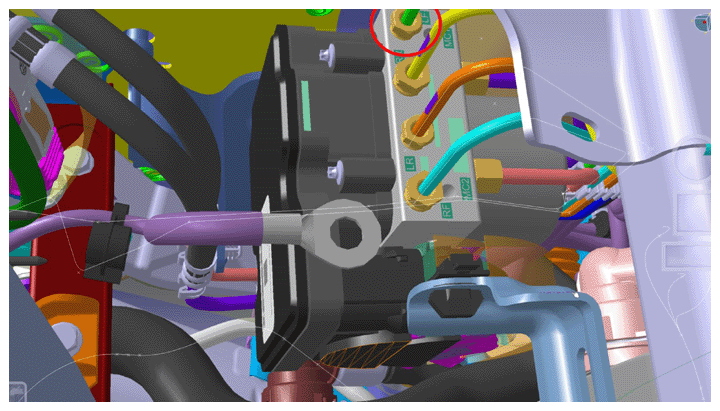 Courtesy of TESLA, INC. Courtesy of TESLA, INC.
|
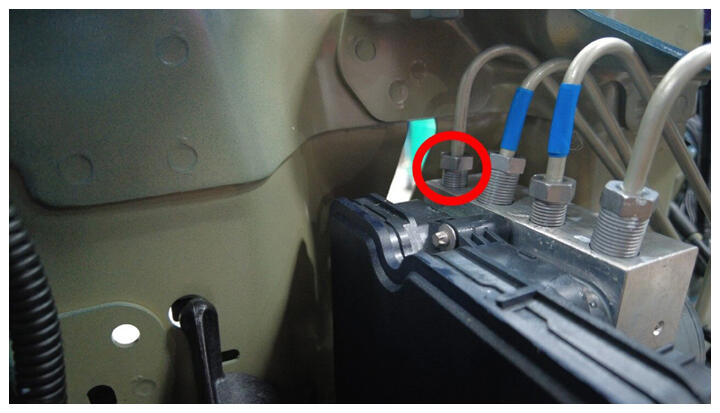 Courtesy of TESLA, INC. Courtesy of TESLA, INC.
|
- Remove the master cylinder secondary pipe nut from hydraulic control unit
NOTE:
1x nut, 12 mm, 16 N.m
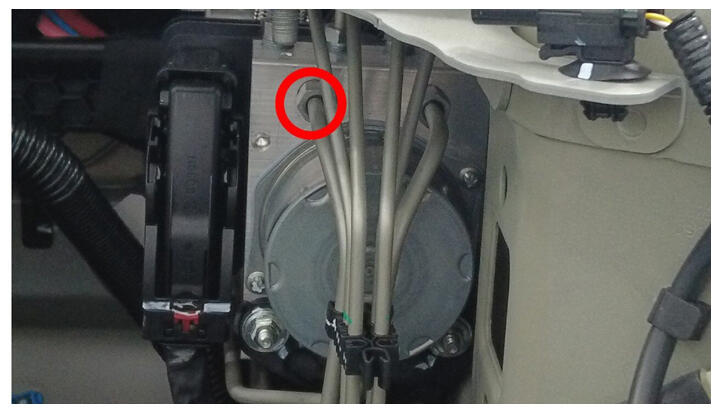 Courtesy of TESLA, INC. Courtesy of TESLA, INC.
|
- Remove the master cylinder primary pipe nut from hydraulic control unit
NOTE:
1x nut, 12 mm, 16 N.m
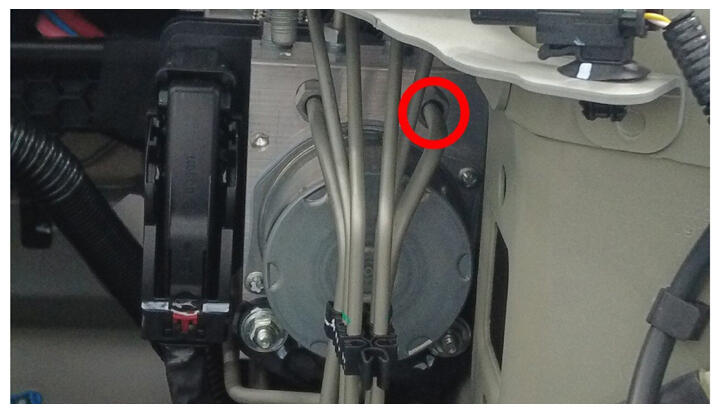 Courtesy of TESLA, INC. Courtesy of TESLA, INC.
|
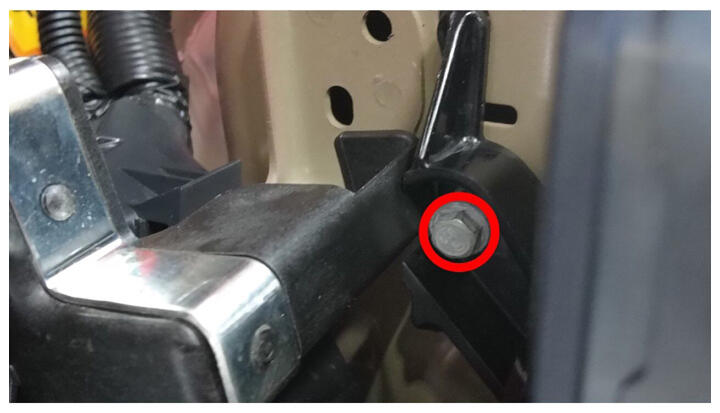
- Remove bolts securing hydraulic control unit bracket to frame rail
NOTE:
2x bolts, 10 mm, 10 N.m
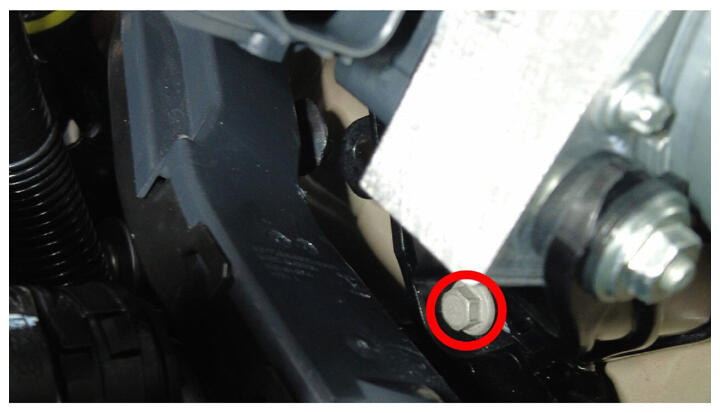 Courtesy of TESLA, INC. Courtesy of TESLA, INC.
|
 Courtesy of TESLA, INC. Courtesy of TESLA, INC.
|
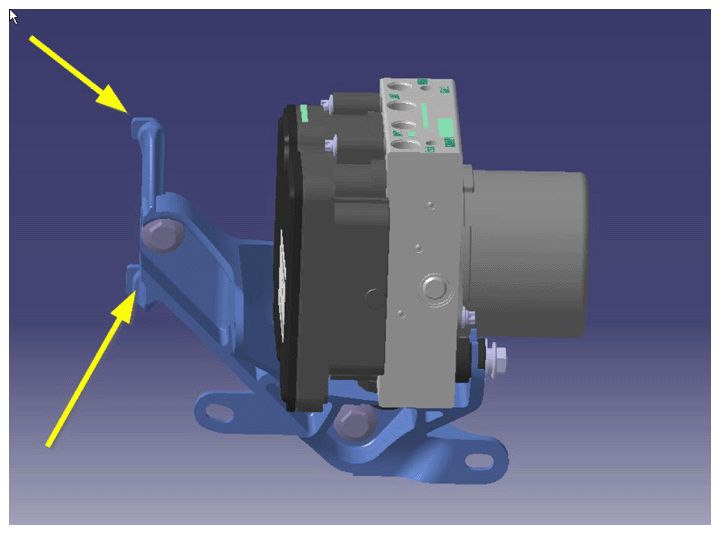
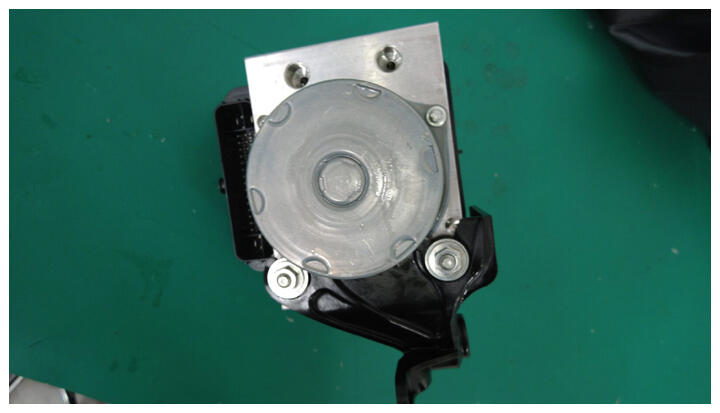
- Remove hydraulic control unit and bracket from vehicle
NOTE:
2x tabs
 Courtesy of TESLA, INC. Courtesy of TESLA, INC.
|
 Courtesy of TESLA, INC. Courtesy of TESLA, INC.
|
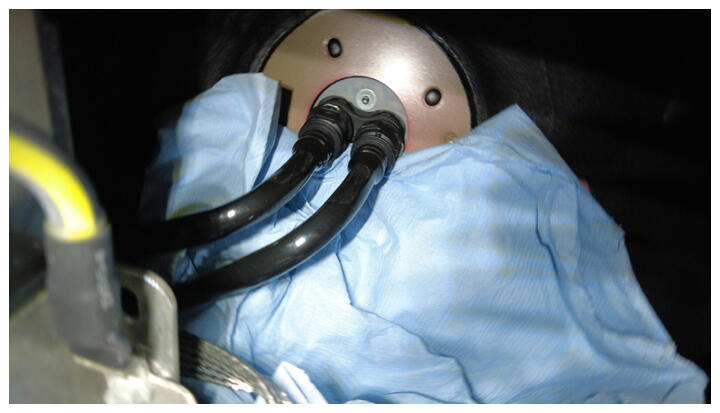
- Place absorbent material below car computer coolant hose connection points to collect any spilled coolant
 Courtesy of TESLA, INC. Courtesy of TESLA, INC.
|
- Disconnect outer coolant hose from car computer mount
NOTE:
1x spring clip, Plug hose
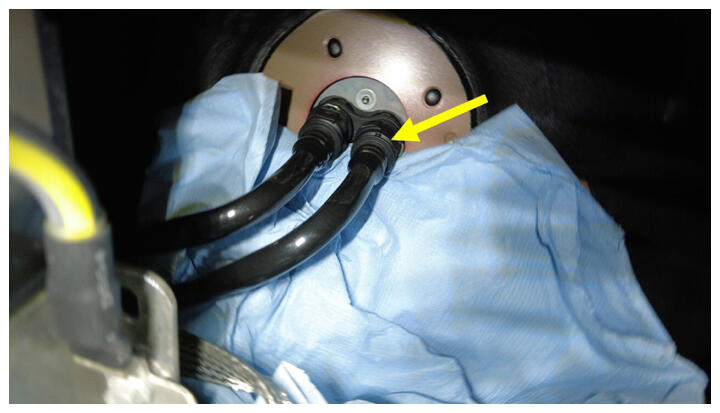 Courtesy of TESLA, INC. Courtesy of TESLA, INC.
|
- Disconnect inner coolant hose to car computer mount and remove coolant hoses from car computer
NOTE:
1x spring clip, Plug hose
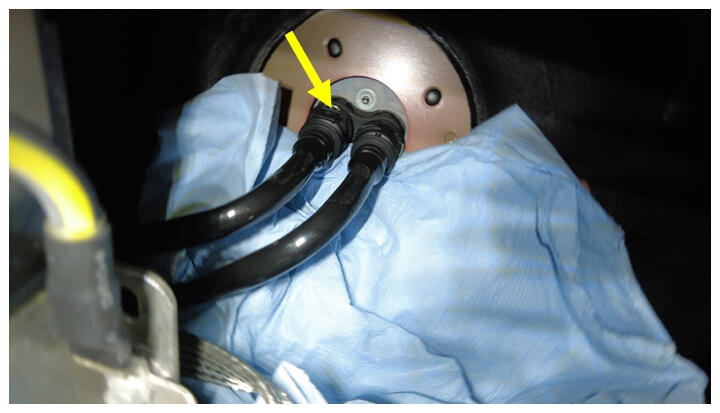 Courtesy of TESLA, INC. Courtesy of TESLA, INC.
|
- Install car computer coolant plug
NOTE:
1x coolant plug
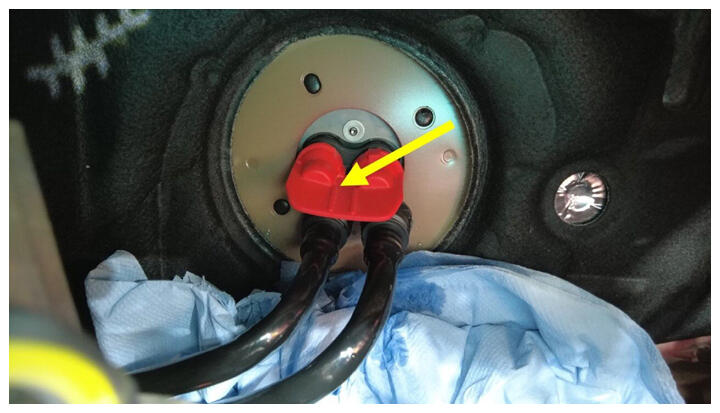 Courtesy of TESLA, INC. Courtesy of TESLA, INC.
|
- Install plugs to car computer coolant hoses
NOTE:
2x plugs, Do not need to engage spring clips
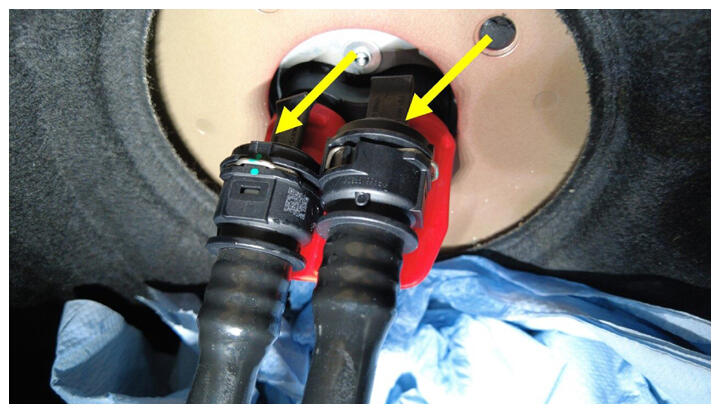 Courtesy of TESLA, INC. Courtesy of TESLA, INC.
|
- Release primary and secondary pipe from bundle clip
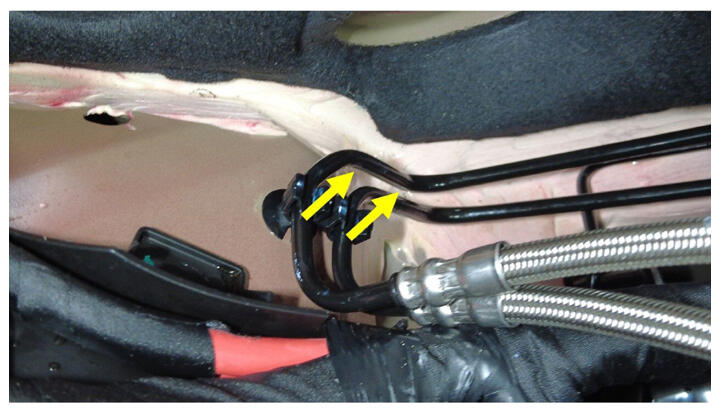 Courtesy of TESLA, INC. Courtesy of TESLA, INC.
|
- Release LH bundle clip from body
NOTE:
Be careful with water pipe during disassembly
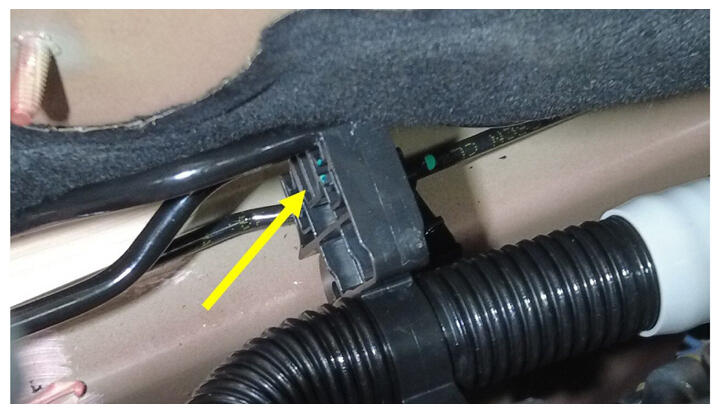 Courtesy of TESLA, INC. Courtesy of TESLA, INC.
|
- Release primary and secondary pipe from LH bundle clip
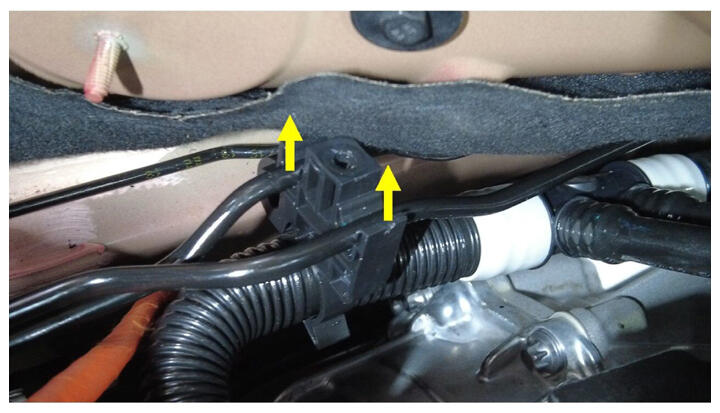 Courtesy of TESLA, INC. Courtesy of TESLA, INC.
|
- Release RH bundle clip from body
NOTE:
Be careful with water pipe during disassembly
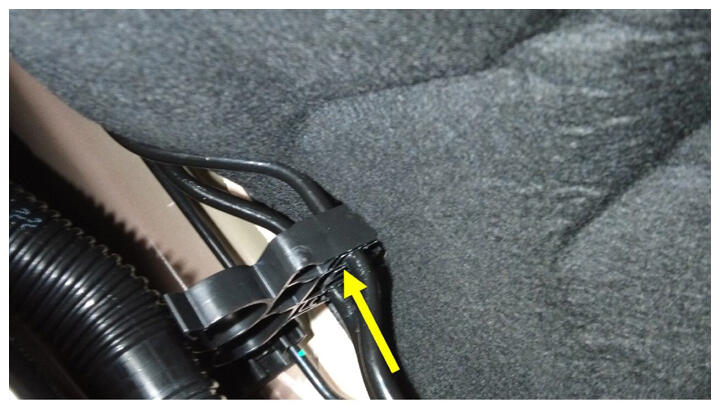 Courtesy of TESLA, INC. Courtesy of TESLA, INC.
|
- Release primary and secondary pipe from RH bundle clip
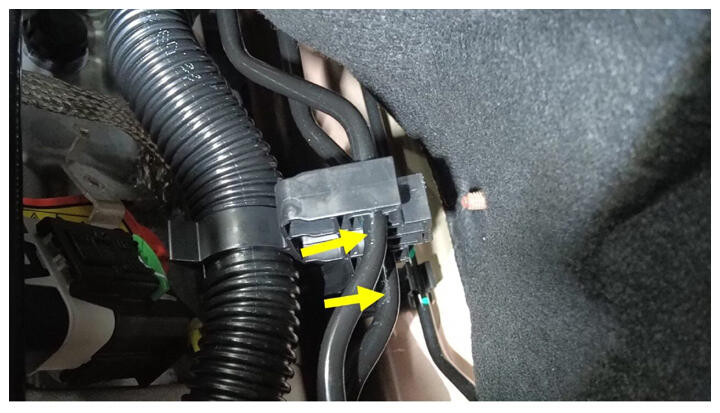 Courtesy of TESLA, INC. Courtesy of TESLA, INC.
|
- Release primary and secondary pipe from bundle clips
NOTE:
2x clips
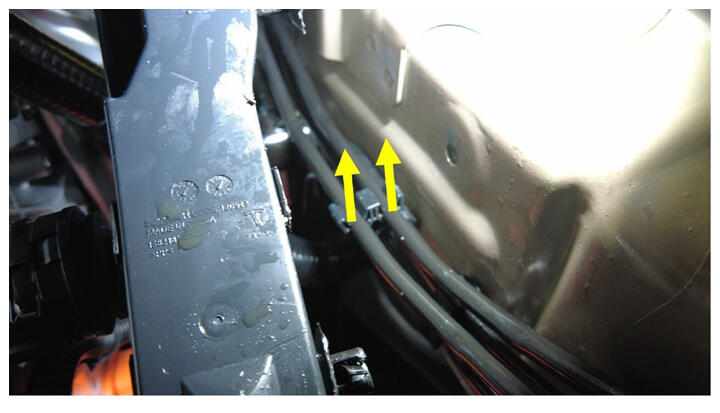 Courtesy of TESLA, INC. Courtesy of TESLA, INC.
|
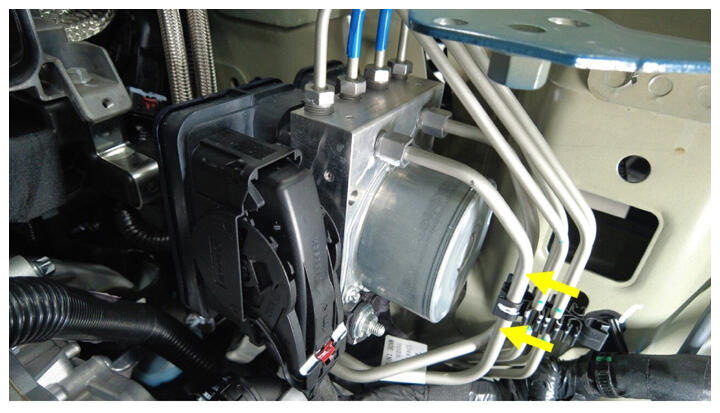 Courtesy of TESLA, INC. Courtesy of TESLA, INC.
|
- Remove brake line bundle from vehicle
NOTE:
Move right side of pipeline upwards, pass through wiring harness, and take it out from right side
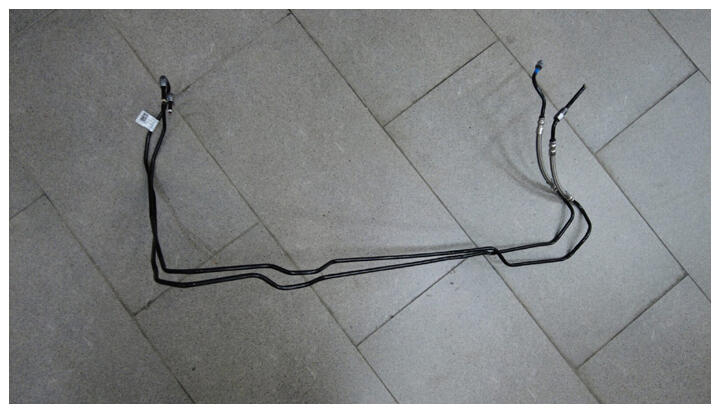 Courtesy of TESLA, INC. Courtesy of TESLA, INC.
|