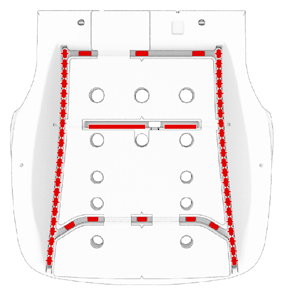
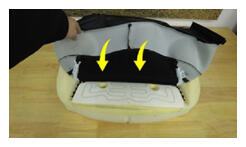
- Install the Velcro strips (x4) and hog rings (x8) that attach the seat cushion cover onto the seat cushion foam pad.
NOTE:
Massage the Velcro to make sure the cover and the foam pad are perfectly fit.
 Courtesy of TESLA, INC. Courtesy of TESLA, INC.
|
 Courtesy of TESLA, INC. Courtesy of TESLA, INC.
|
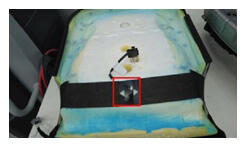
- Attach the strap that attaches the seat cushion cover to the foam pad.
 Courtesy of TESLA, INC. Courtesy of TESLA, INC.
|
- Install the seat cushion foam pad assembly onto the seat frame assembly.
- Maneuver the seat to gain access to the underside.
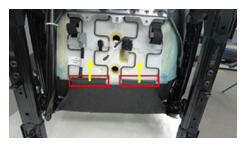
- Fasten the clips (x2) that attach the seat cushion to the seat suspension.
 Courtesy of TESLA, INC. Courtesy of TESLA, INC.
|
- Install the seat cushion cover to the seat cushion frame, and then fasten the clip strips (x3) that attach the seat cushion to the frame at the outboard and inboard sides, and at the front.
NOTE:
Make sure that the seat heater connector and seat occupied sensor assembly pass through the seat suspension or frame.
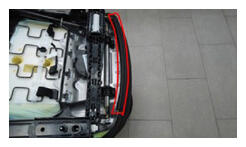 Courtesy of TESLA, INC. Courtesy of TESLA, INC.
|
- Install the seat occupied sensor to the seat underside, and then fasten the clip that attaches the sensor to the seat underside.
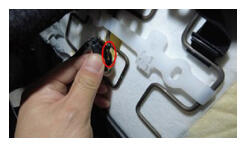 Courtesy of TESLA, INC. Courtesy of TESLA, INC.
|
- Connect the electrical wiring harness to the seat occupied sensor connector.
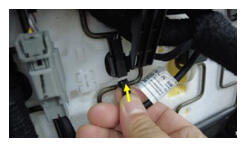 Courtesy of TESLA, INC. Courtesy of TESLA, INC.
|
- Fasten the clip that attaches the seat pad heater connector to the seat underside, and then connect the electrical wiring harness to the seat pad heater connector.
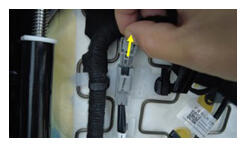 Courtesy of TESLA, INC. Courtesy of TESLA, INC.
|
- Fasten the clip that attaches the seat back heater connector to the seat underside, and then connect the electrical wiring harness to the seat back heater connector.
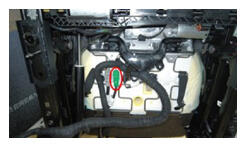 Courtesy of TESLA, INC. Courtesy of TESLA, INC.
|
- Attach the clips (x2) that attach the lower section of the seat back cover to the seat suspension.
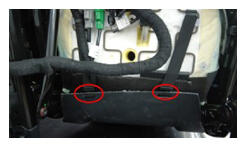 Courtesy of TESLA, INC. Courtesy of TESLA, INC.
|
- Position the driver seat assembly in the upright position.
- Install the driver seat outboard side shield carrier. See FRONT SEAT COVERS AND PADS - 1ST ROW SIDESHIELD CARRIER, LH - REMOVE AND REPLACE .
- Install the driver seat outboard side shield. See FRONT SEAT COVERS AND PADS - 1ST ROW OUTBOARD SIDESHIELD, LH - REMOVE AND REPLACE .
NOTE:
It is not necessary to install the seat cushion button switch, the recliner button switch and the 8 way switch.
- Install the driver seat inboard side shield carrier. See FRONT SEAT COVERS AND PADS - 1ST ROW SIDESHIELD CARRIER, LH - REMOVE AND REPLACE .
- Install the driver seat inboard side shield. See FRONT SEAT COVERS AND PADS - 1ST ROW INBOARD SIDESHIELD, LH - REMOVE AND REPLACE .
- Install the driver seat assembly. See FRONT SEAT ASSEMBLIES - 1ST ROW SEAT ASSEMBLY, LH - REMOVE AND REPLACE .
- Install the LH lower A-pillar trim. See A - B - C POST INTERIOR TRIM - A - PILLAR LOWER ASSEMBLY, LH - REMOVE AND REPLACE
.
- Install the LH instrument panel end cap. See DASH PANEL - END CAP, LH - REMOVE AND REPLACE
.
- Install the rear underhood apron. See UNDERHOOD TRIM - REAR APRON ASSEMBLY - REMOVE AND REPLACE
.