- With assistance, position the RH 1st row seat in the vehicle.
CAUTION:
Take care not to damage the upholstery or trim while positioning the seat.
- Route the RH 1st row seat harness under the RH front carpet, position the harness in the harness guide, and then install the clips that attach the harness to the harness guide.
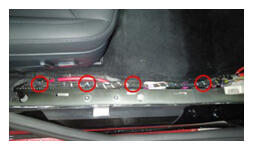 Courtesy of TESLA, INC. Courtesy of TESLA, INC.
|
- Install the clip that attaches the RH front seat harness to the RH footwell support bracket near the RH side of the RH footwell.
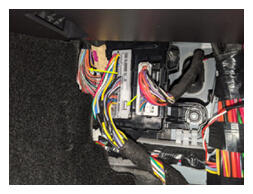 Courtesy of TESLA, INC. Courtesy of TESLA, INC.
|
- Install the RH front seat harness connector on the RH body controller, and then engage the connector lock.
NOTE:
Perform a push-pull test to ensure that the connector is fully seated and locked.
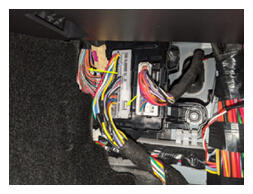 Courtesy of TESLA, INC. Courtesy of TESLA, INC.
|
- Connect LV power. See LV BATTERY - LI-ION - DISCONNECT AND CONNECT
.
- Move the RH front seat fully rearward.
- Install the new bolts (x2) that attach the front of the RH 1st row seat to the body.
 33.5 N.m (24.7 lbs-ft)
CAUTION:
Use only the Torx Plus T45 bit to install the seat bolts.
NOTE:
Use of the following tool(s) is recommended:
- Torx Plus T45 socket
- Cordless Ratchet/Impact Driver
- Flex head ratchet/flex head torque wrench
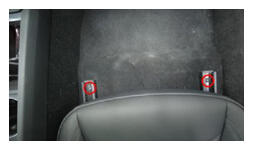 Courtesy of TESLA, INC. Courtesy of TESLA, INC.
|
- Move the RH front seat fully forward.
- Install the new bolts (x2) that attach the rear of the RH 1st row seat to the body.
33.5 N.m (24.7 lbs-ft)
CAUTION:
Use only the Torx Plus T45 bit to install the seat bolts.
NOTE:
Use of the following tool(s) is recommended:
- Torx Plus T45 socket
- Cordless Ratchet/Impact Driver
- Flex head ratchet/flex head torque wrench
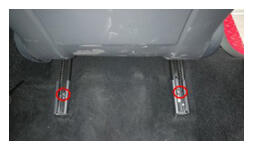 Courtesy of TESLA, INC. Courtesy of TESLA, INC.
|
- Install the RH 1st row seat belt retractor onto the pretensioner.
NOTE:
After reinstalling the seat belt pretensioner into the seat belt pretensioner coupling, perform a pull test to make sure that the seat belt and pretensioner are securely engaged.
- Reinstall the vehicle firmware. See SOFTWARE REINSTALL - TOUCHSCREEN
.
- Install the RH lower A-Pillar trim. See A - B - C POST INTERIOR TRIM - A - PILLAR LOWER ASSEMBLY, LH - REMOVE AND REPLACE
.
- Install the RH IP end cap. See DASH PANEL - END CAP, LH - REMOVE AND REPLACE
.
- Install the rear underhood apron. See UNDERHOOD TRIM - REAR APRON ASSEMBLY - REMOVE AND REPLACE
.
- Use the vehicle touchscreen to perform seat calibration.
NOTE:
Controls > Service > Seat Calibration > Start
- Move the RH front seat to its original position.