- Loosely install the LH primary front side body seal to the body.
- Align the joint line of the LH primary front side body seal to the marking on the B-pillar.
NOTE:
Make sure the seal strings are positioned towards the interior of the vehicle when aligning the primary seal.
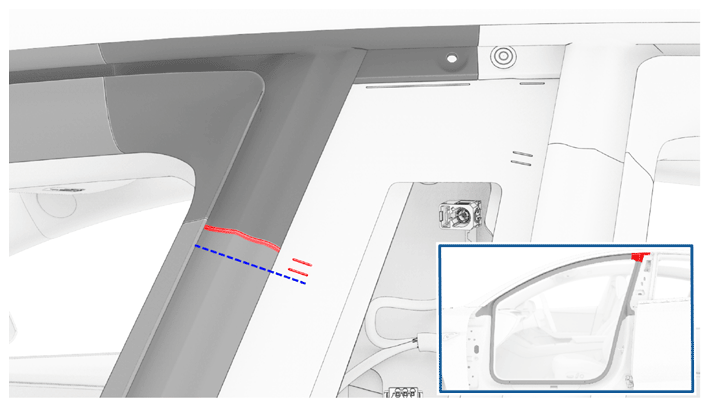 Courtesy of TESLA, INC. Courtesy of TESLA, INC.
|
- Install the clip that attaches the LH primary front side body seal to the upper B-pillar.
NOTE:
Make sure the edge of the seal are parallel with and above the marking on the upper B-pillar.
 Courtesy of TESLA, INC. Courtesy of TESLA, INC.
|
 Courtesy of TESLA, INC. Courtesy of TESLA, INC.
|
- Align the outer edge of the LH primary front side body seal to the bottom of the LH upper brightwork.
 Courtesy of TESLA, INC. Courtesy of TESLA, INC.
|
- Install the clips (x2) that attach the LH primary front side body seal to the mid B-pillar and the A-pillar.
 Courtesy of TESLA, INC. Courtesy of TESLA, INC.
|
 Courtesy of TESLA, INC. Courtesy of TESLA, INC.
|
- Pull the seal strings from the new seal.
- Tuck the seal into the bright molding, and make sure that it fits properly to the trim panels and the headliner.
- Press the seal into the lower corners, and then install the rest of the seal to the body.
NOTE:
Stretch and tuck the seal so that it is evenly distributed around the perimeter.
- Install the LH B-pillar applique. See EXTERIOR TRIM FITTINGS - LHD - ASSEMBLY B-PILLAR APPLIQUE LH - REMOVE AND REPLACE
.