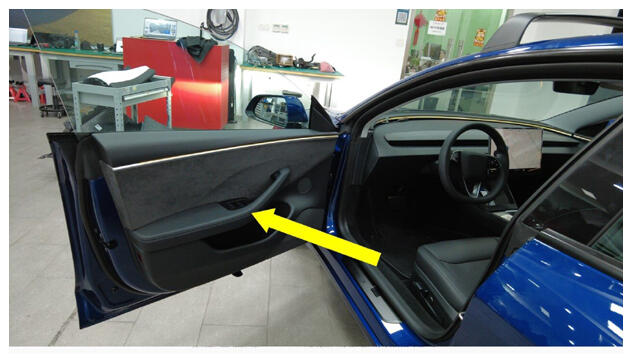
- Open LH front door
 Courtesy of TESLA, INC. Courtesy of TESLA, INC.
|
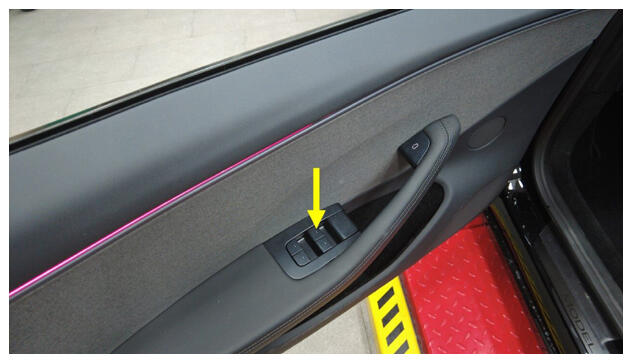
- Lower LH front window
 Courtesy of TESLA, INC. Courtesy of TESLA, INC.
|
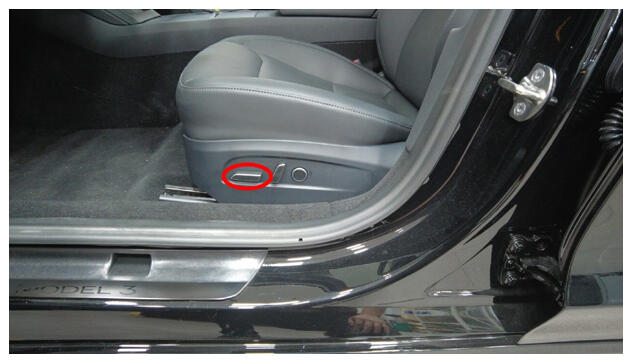
- Move LH front seat backward
 Courtesy of TESLA, INC. Courtesy of TESLA, INC.
|
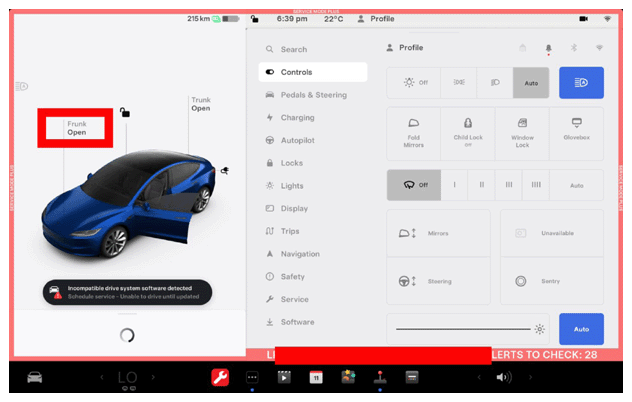
- Open hood
 Courtesy of TESLA, INC. Courtesy of TESLA, INC.
|
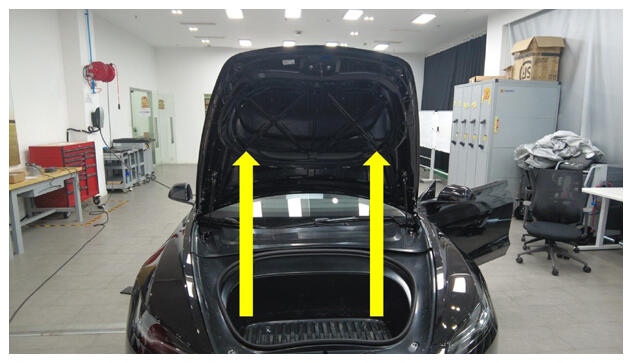 Courtesy of TESLA, INC. Courtesy of TESLA, INC.
|
- Remove rear underhood apron
NOTE:
14x clips
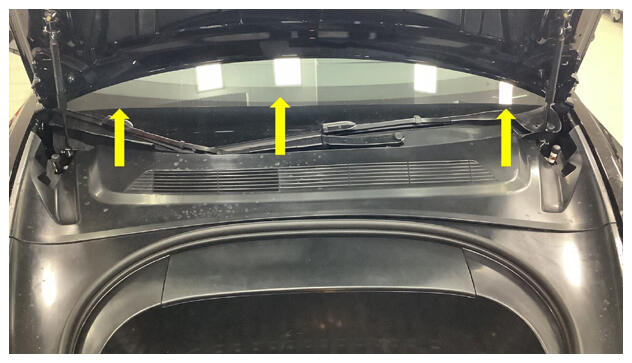 Courtesy of TESLA, INC. Courtesy of TESLA, INC.
|
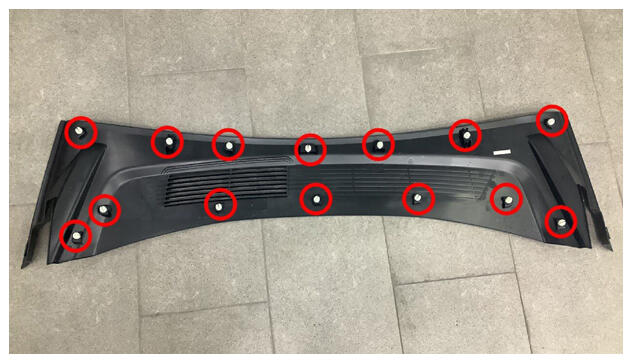 Courtesy of TESLA, INC. Courtesy of TESLA, INC.
|
- Power off vehicle from center display
NOTE:
Via Controls > Safety > Power Off, Select Power Off button at warning dialogue box
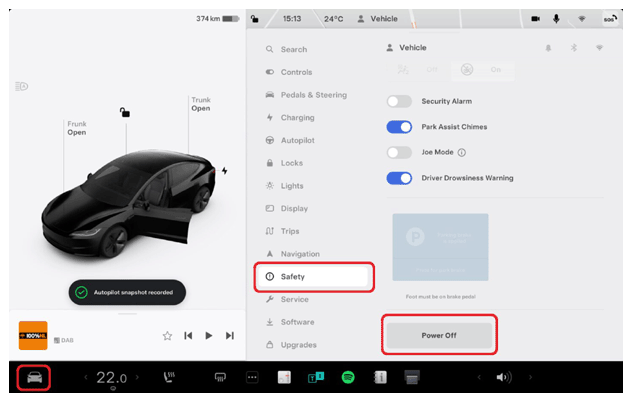 Courtesy of TESLA, INC. Courtesy of TESLA, INC.
|
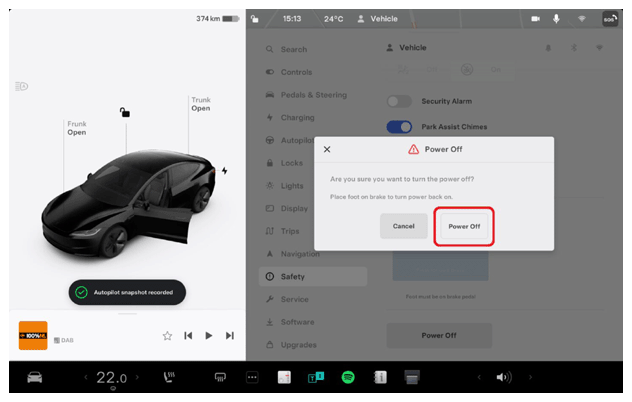 Courtesy of TESLA, INC. Courtesy of TESLA, INC.
|
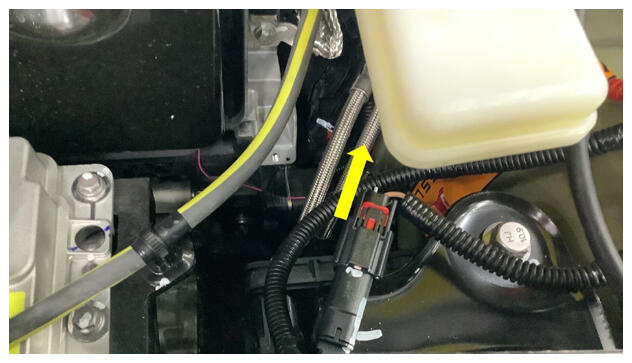
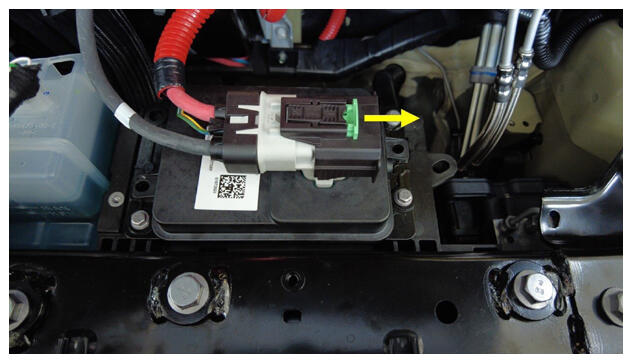
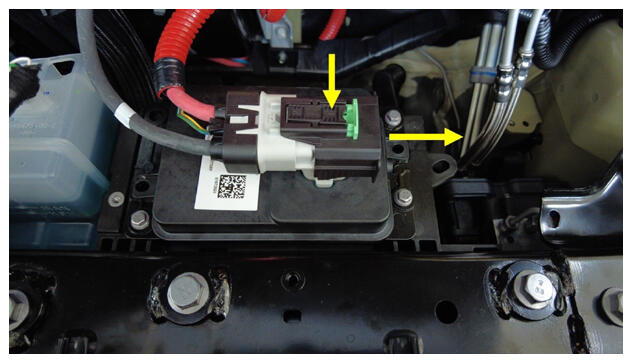
- Disconnect LV battery and First Responder Loop
NOTE:
2x connectors, Release green locking tab, Press black tab then pull black connector lock outwards to release connection, Release red lock tab on FRL, Allow 2 minutes for all electrical circuits to fully discharge
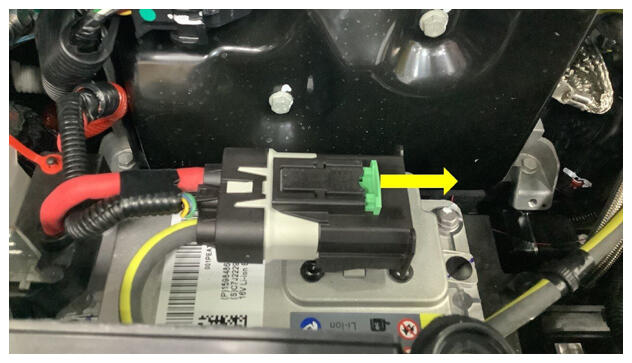 Courtesy of TESLA, INC. Courtesy of TESLA, INC.
|
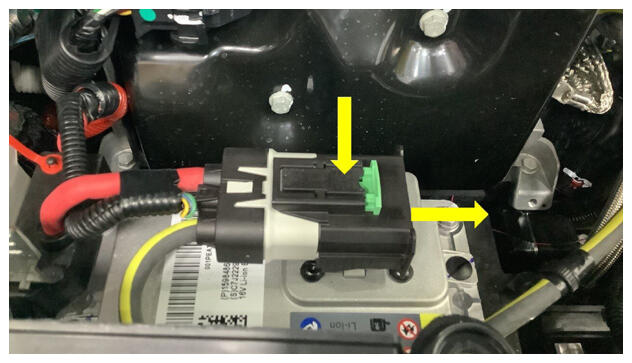 Courtesy of TESLA, INC. Courtesy of TESLA, INC.
|
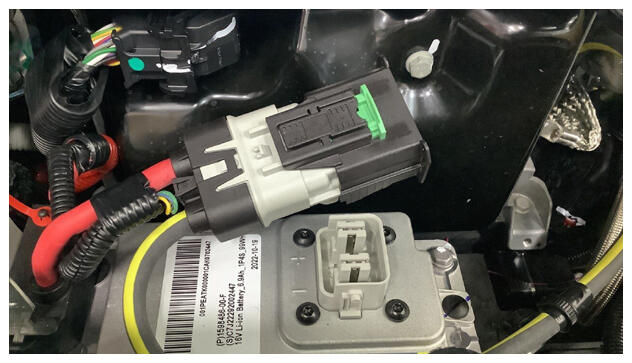 Courtesy of TESLA, INC. Courtesy of TESLA, INC.
|
 Courtesy of TESLA, INC. Courtesy of TESLA, INC.
|
 Courtesy of TESLA, INC. Courtesy of TESLA, INC.
|
 Courtesy of TESLA, INC. Courtesy of TESLA, INC.
|
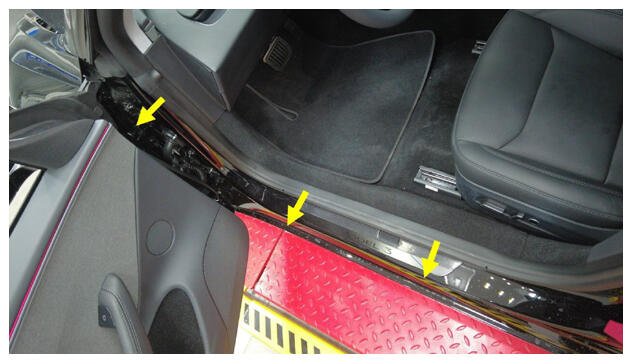
- Partially release LH front primary door seal
NOTE:
Release lower section of LH front primary door seal
 Courtesy of TESLA, INC. Courtesy of TESLA, INC.
|
- Remove LH IP end cap
NOTE:
5x clips, 2x guide tabs
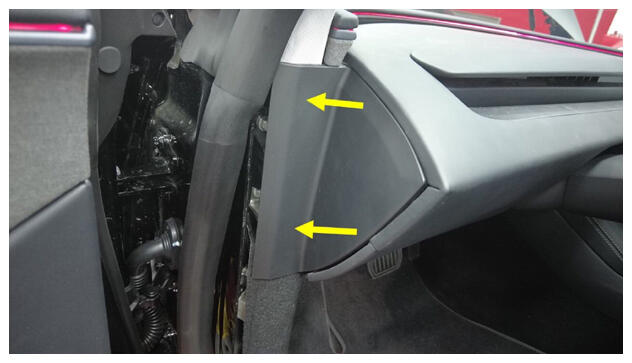 Courtesy of TESLA, INC. Courtesy of TESLA, INC.
|
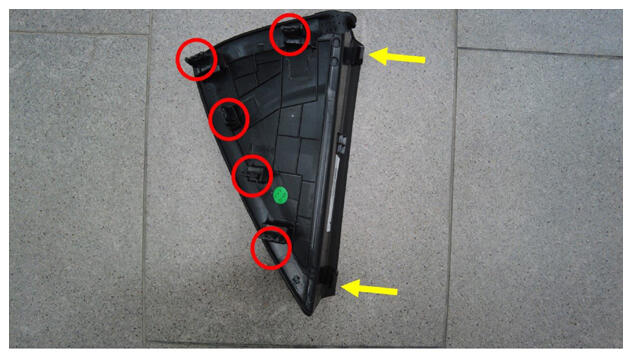 Courtesy of TESLA, INC. Courtesy of TESLA, INC.
|
- Release LH footwell cover
NOTE:
2x magnets, 1x guide tab
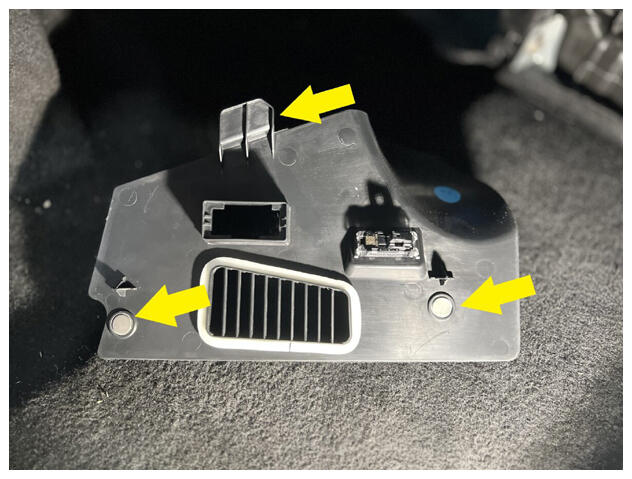 Courtesy of TESLA, INC. Courtesy of TESLA, INC.
|
- Remove connectors from LH footwell cover
NOTE:
1x connector, 1x OBDII connector, Release OBDII connector by depressing tabs from front side
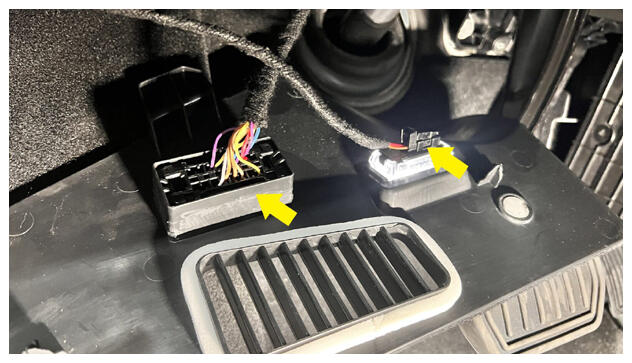 Courtesy of TESLA, INC. Courtesy of TESLA, INC.
|
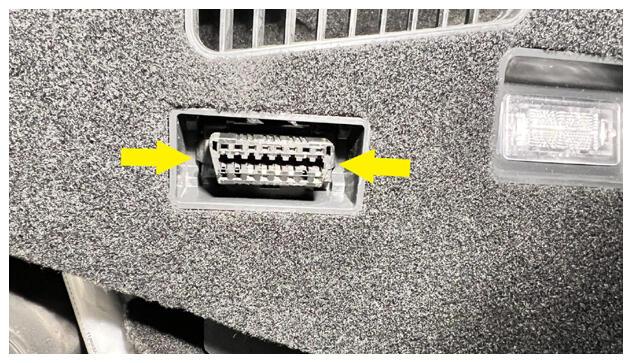 Courtesy of TESLA, INC. Courtesy of TESLA, INC.
|
- Remove LH knee airbag bolt covers
NOTE:
2x covers
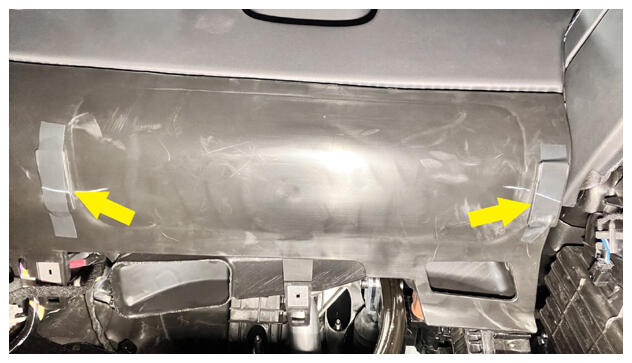 Courtesy of TESLA, INC. Courtesy of TESLA, INC.
|
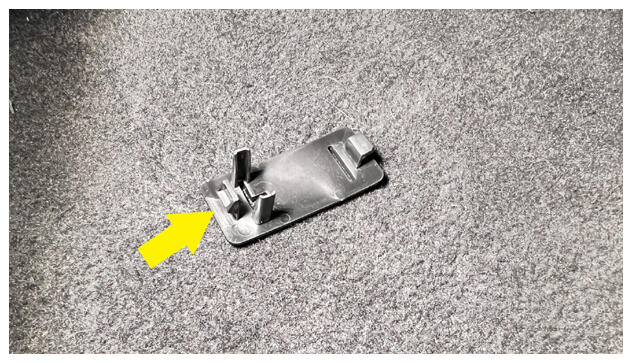 Courtesy of TESLA, INC. Courtesy of TESLA, INC.
|
- Remove LH knee air bag bolts
NOTE:
4x bolts, EP10, 8.5 N.m, Discard bolts after removal
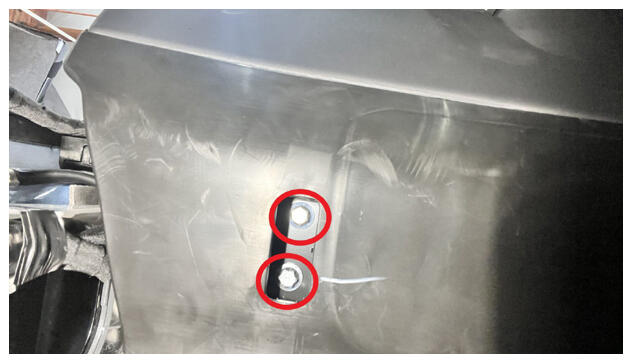 Courtesy of TESLA, INC. Courtesy of TESLA, INC.
|
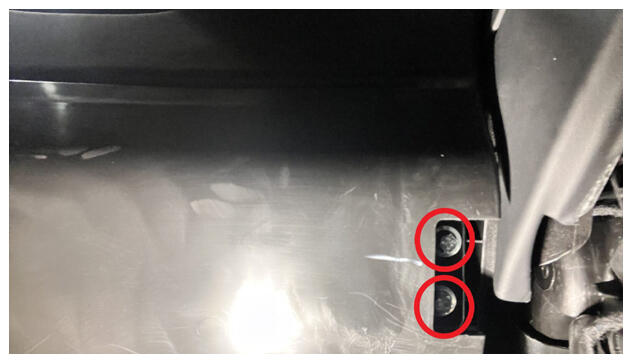 Courtesy of TESLA, INC. Courtesy of TESLA, INC.
|
- Remove LH knee airbag assembly
NOTE:
1x connector, Peel back plastic film, Release by pulling back both white tabs simultaneously, Avoid straining harness, Only one tab visible in image matching tab is on opposite side
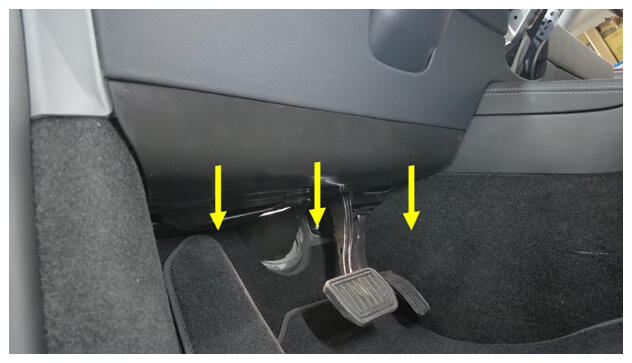 Courtesy of TESLA, INC. Courtesy of TESLA, INC.
|
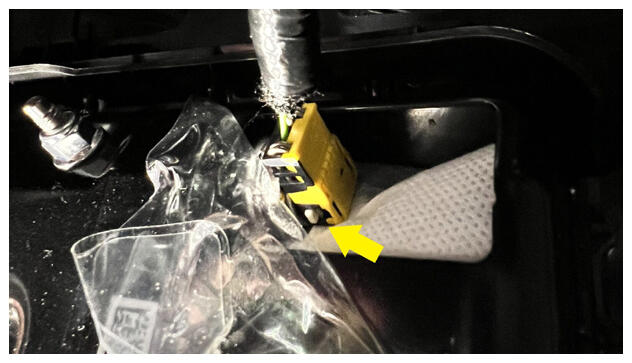 Courtesy of TESLA, INC. Courtesy of TESLA, INC.
|
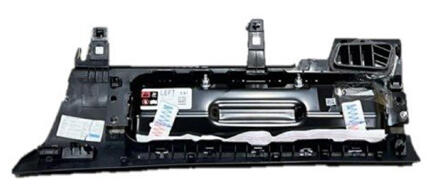 Courtesy of TESLA, INC. Courtesy of TESLA, INC.
|
- Remove screws securing IP lower assembly to IP carrier
NOTE:
1x screw, T20, 2.3 N.m
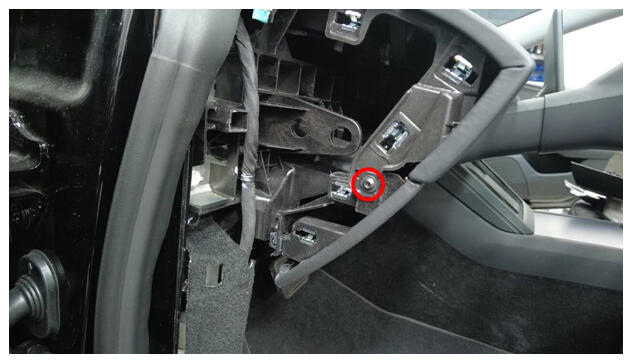 Courtesy of TESLA, INC. Courtesy of TESLA, INC.
|
- Remove IP lower assembly from IP carrier
NOTE:
13x tabs
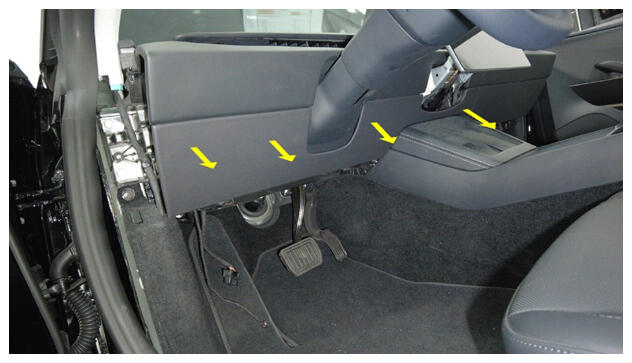 Courtesy of TESLA, INC. Courtesy of TESLA, INC.
|
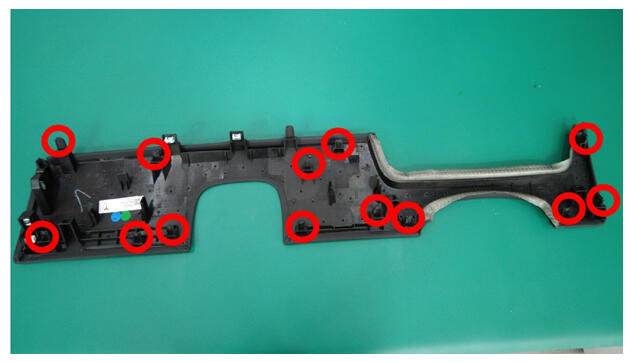 Courtesy of TESLA, INC. Courtesy of TESLA, INC.
|
- Remove screws securing IP carrier to cross car beam on lower LH side
NOTE:
3x screws, T20, 2.3 N.m, 2x datums
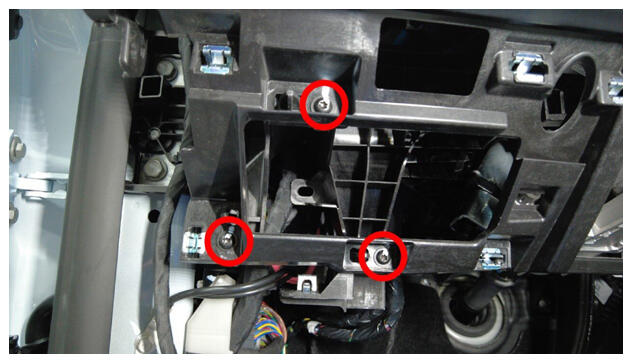 Courtesy of TESLA, INC. Courtesy of TESLA, INC.
|
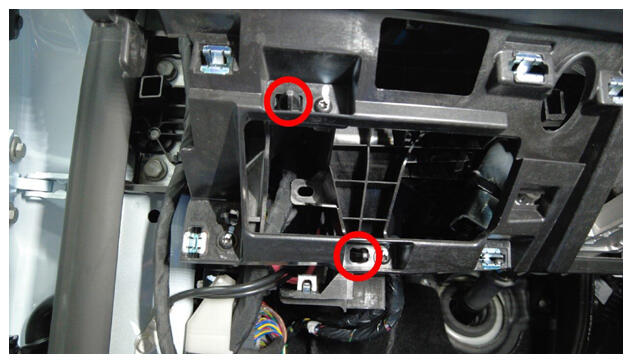 Courtesy of TESLA, INC. Courtesy of TESLA, INC.
|
- Remove screws securing IP carrier to cross car beam at lower center
NOTE:
3x screws, T20, 2.3 N.m, 3x datums
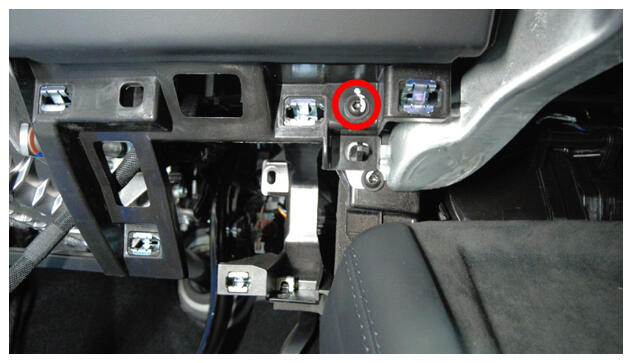 Courtesy of TESLA, INC. Courtesy of TESLA, INC.
|
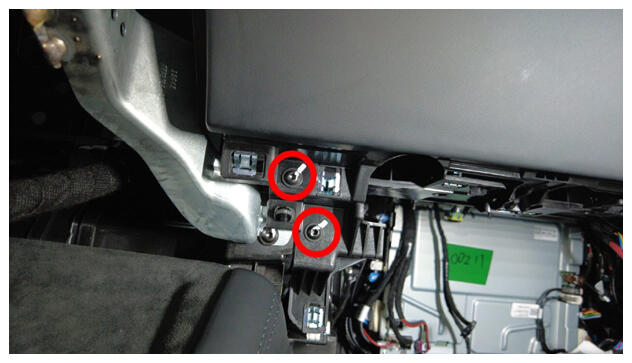 Courtesy of TESLA, INC. Courtesy of TESLA, INC.
|
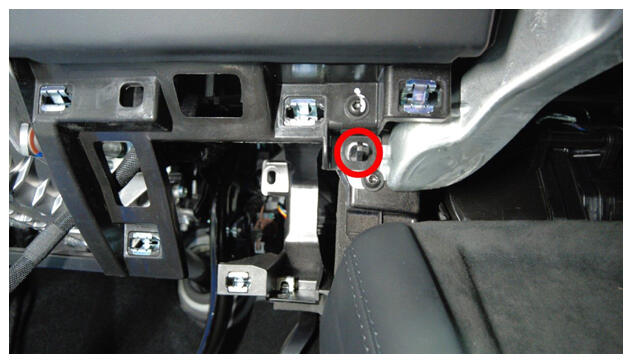 Courtesy of TESLA, INC. Courtesy of TESLA, INC.
|
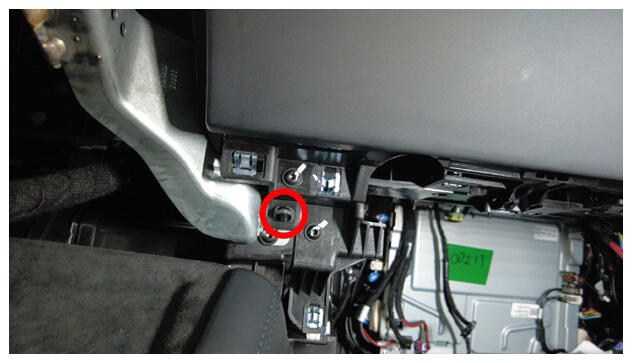 Courtesy of TESLA, INC. Courtesy of TESLA, INC.
|
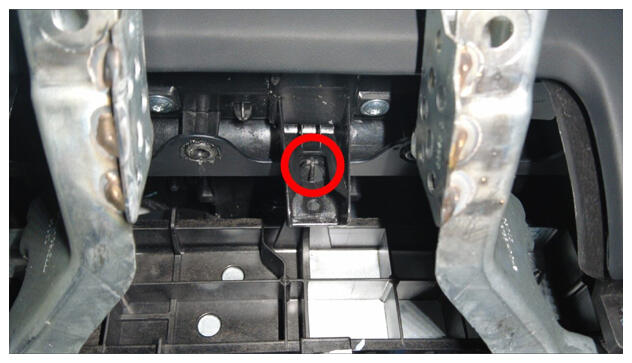 Courtesy of TESLA, INC. Courtesy of TESLA, INC.
|
- Remove LH Knee Impact Foam
NOTE:
Carefully pull the IP carrier outwards to remove LH Knee Impact Foam
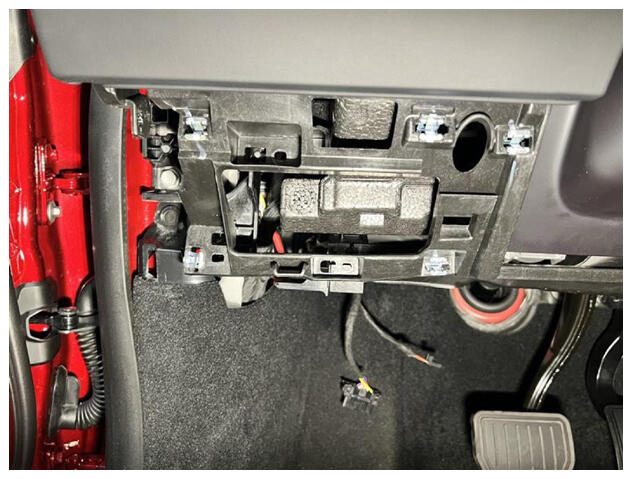 Courtesy of TESLA, INC. Courtesy of TESLA, INC.
|
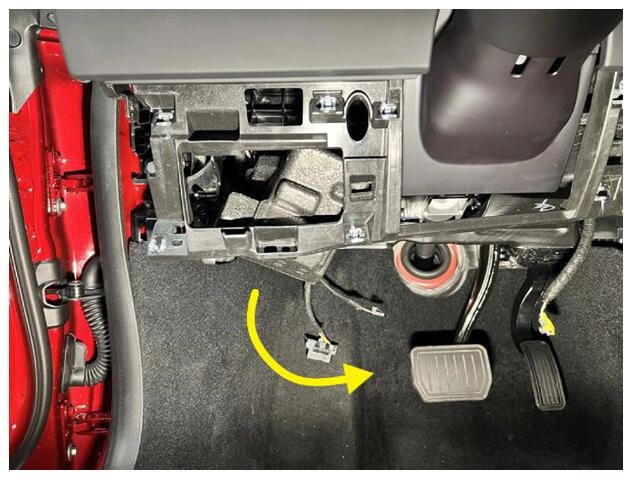 Courtesy of TESLA, INC. Courtesy of TESLA, INC.
|
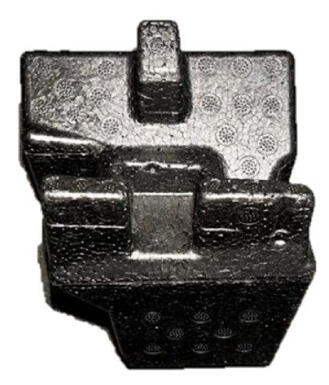 Courtesy of TESLA, INC. Courtesy of TESLA, INC.
|
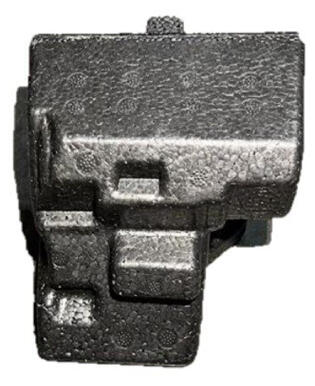 Courtesy of TESLA, INC. Courtesy of TESLA, INC.
|
- Install LH Knee Impact Foam
NOTE:
Carefully pull the IP carrier outwards to install LH Knee Impact Foam
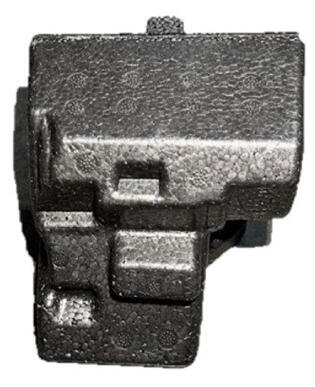 Courtesy of TESLA, INC. Courtesy of TESLA, INC.
|
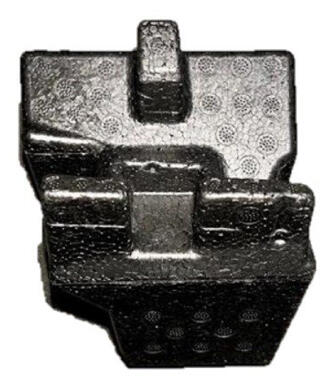 Courtesy of TESLA, INC. Courtesy of TESLA, INC.
|
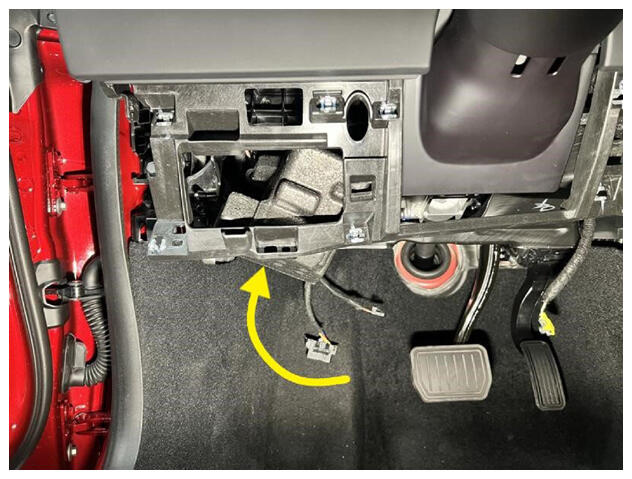 Courtesy of TESLA, INC. Courtesy of TESLA, INC.
|
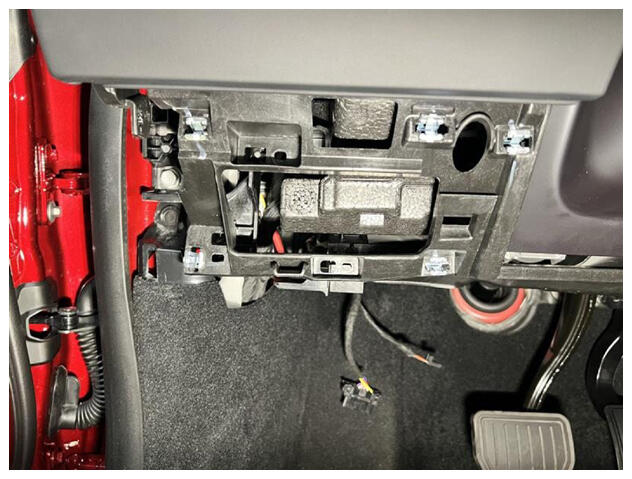 Courtesy of TESLA, INC. Courtesy of TESLA, INC.
|
- Install screws securing IP carrier to cross car beam at lower center
NOTE:
3x screws, T20, 2.3 N.m, 3x datums
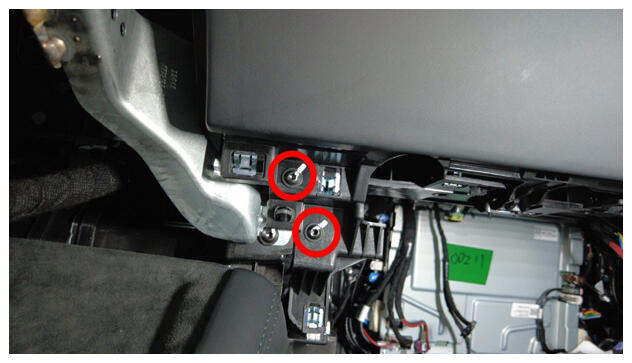 Courtesy of TESLA, INC. Courtesy of TESLA, INC.
|
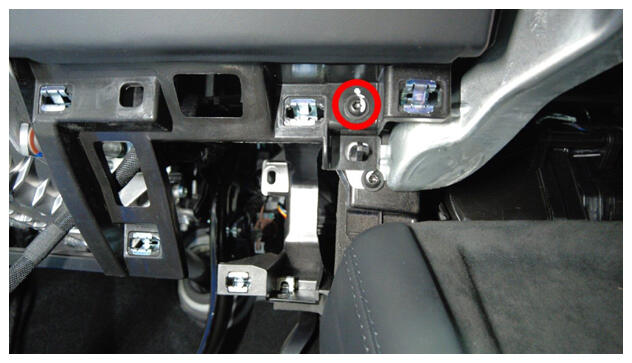 Courtesy of TESLA, INC. Courtesy of TESLA, INC.
|
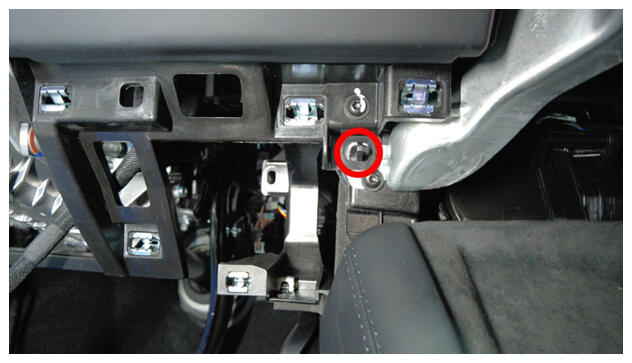 Courtesy of TESLA, INC. Courtesy of TESLA, INC.
|
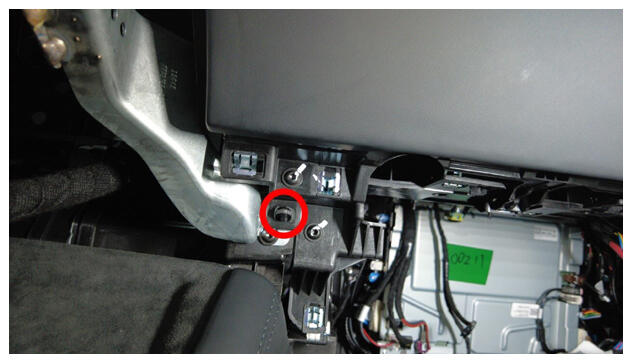 Courtesy of TESLA, INC. Courtesy of TESLA, INC.
|
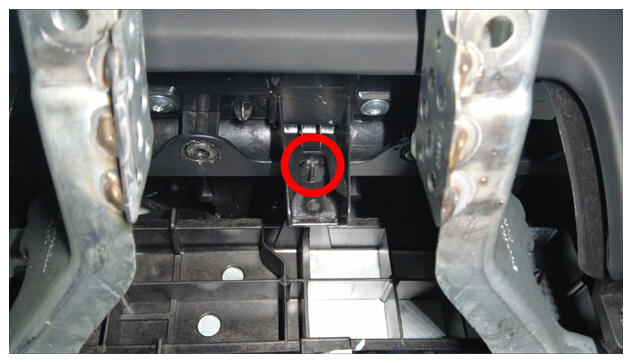 Courtesy of TESLA, INC. Courtesy of TESLA, INC.
|
- Install screws securing IP carrier to cross car beam on lower LH side
NOTE:
3x screws, T20, 2.3 N.m, 2x datums
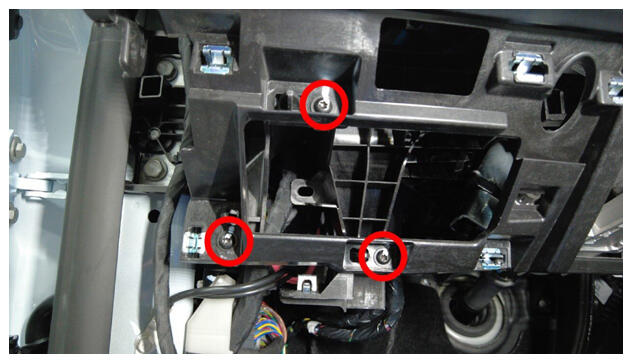 Courtesy of TESLA, INC. Courtesy of TESLA, INC.
|
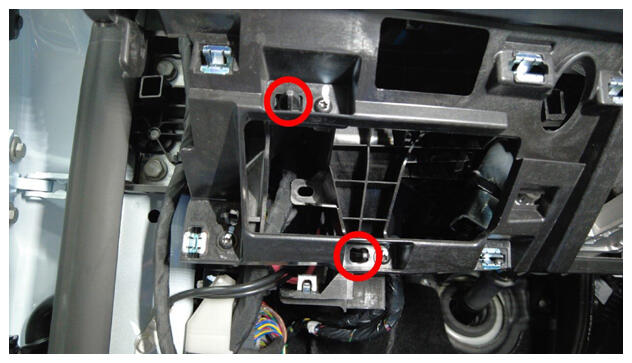 Courtesy of TESLA, INC. Courtesy of TESLA, INC.
|
- Install IP lower assembly to IP carrier
NOTE:
13x tabs
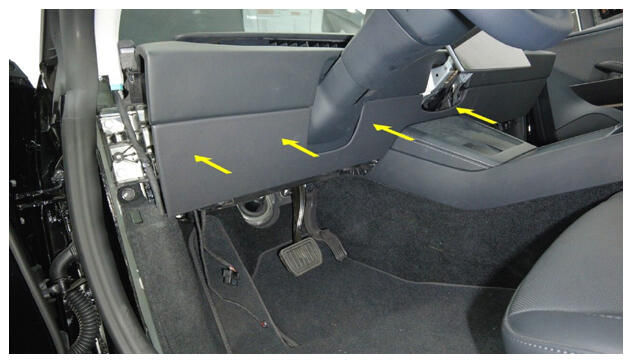 Courtesy of TESLA, INC. Courtesy of TESLA, INC.
|
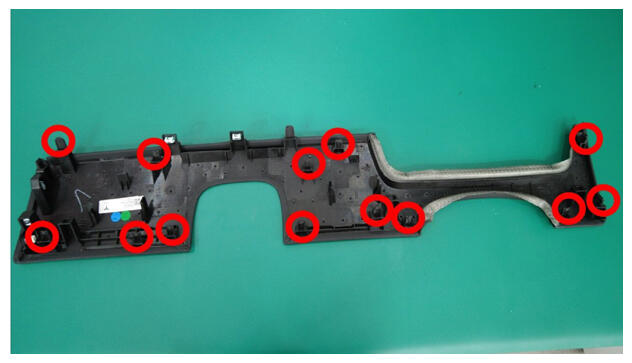 Courtesy of TESLA, INC. Courtesy of TESLA, INC.
|
- Install screws securing IP lower assembly to IP carrier
NOTE:
1x screw, T20, 2.3 N.m
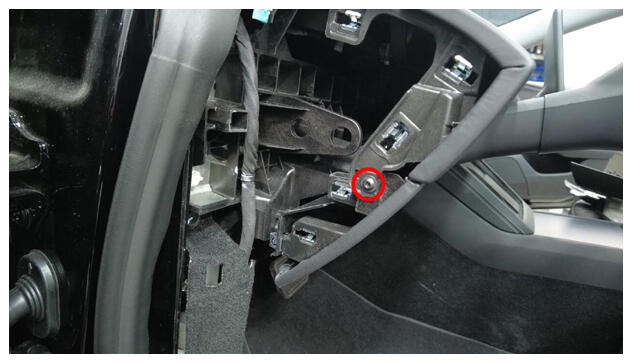 Courtesy of TESLA, INC. Courtesy of TESLA, INC.
|
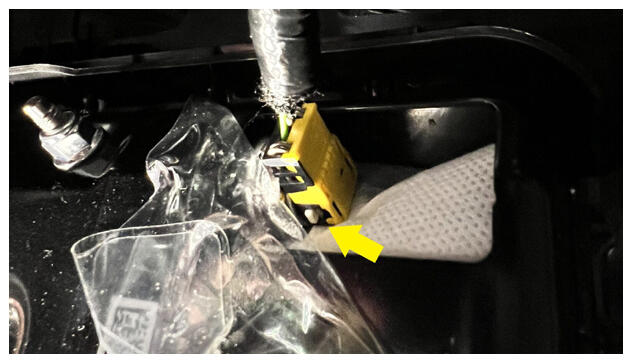
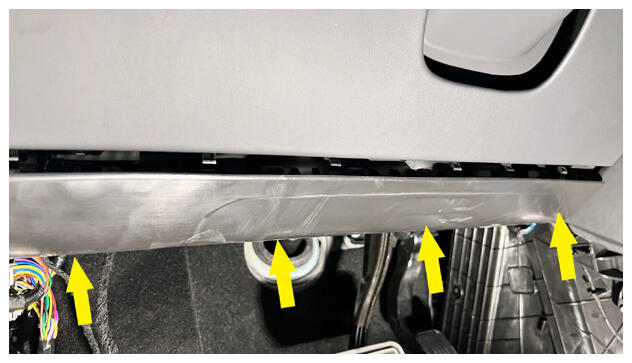
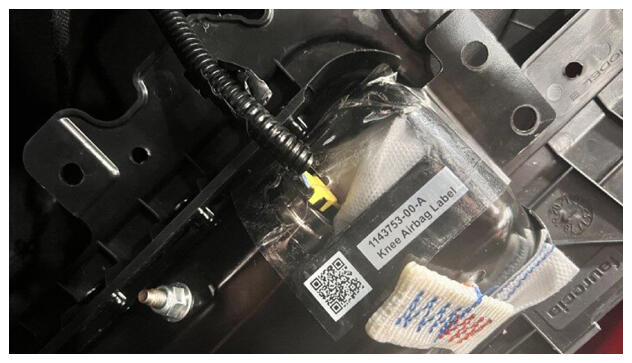
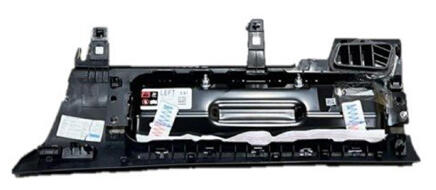
- Install LH knee airbag assembly
NOTE:
1x connector, Ensure airbag connector is fully engaged, Apply knee airbag label over squib assembly
 Courtesy of TESLA, INC. Courtesy of TESLA, INC.
|
 Courtesy of TESLA, INC. Courtesy of TESLA, INC.
|
 Courtesy of TESLA, INC. Courtesy of TESLA, INC.
|
 Courtesy of TESLA, INC. Courtesy of TESLA, INC.
|
- Install LH knee air bag bolts
NOTE:
4x bolts, EP10, 8.5 N.m, Install new bolts
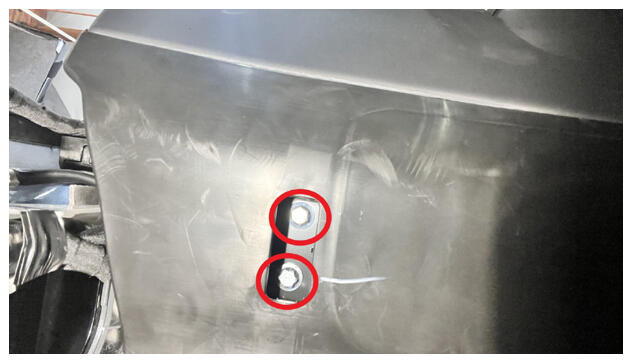 Courtesy of TESLA, INC. Courtesy of TESLA, INC.
|
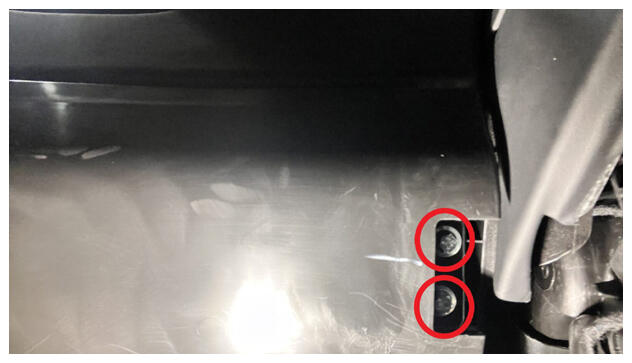 Courtesy of TESLA, INC. Courtesy of TESLA, INC.
|
- Install LH knee airbag bolt covers
NOTE:
2x covers
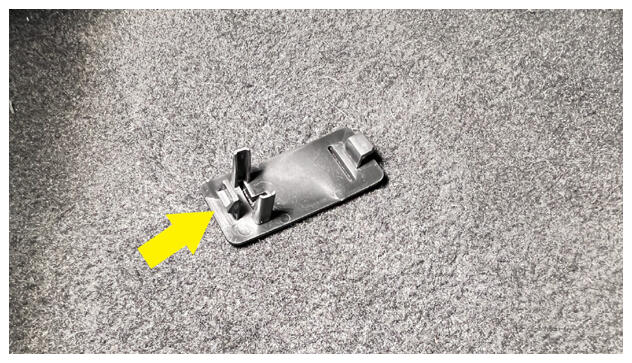 Courtesy of TESLA, INC. Courtesy of TESLA, INC.
|
- Install connectors to LH footwell cover
NOTE:
1x connector, 1x OBDII connector, Ensure tabs engage on OBDII connector
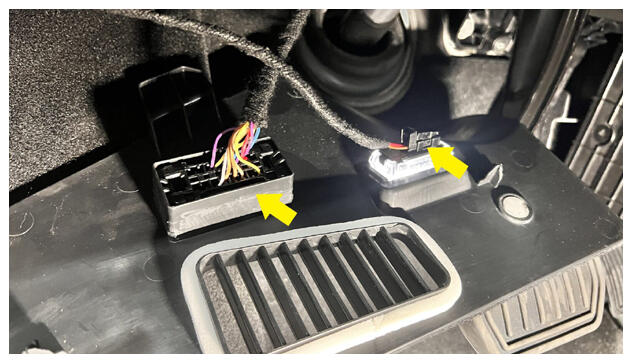 Courtesy of TESLA, INC. Courtesy of TESLA, INC.
|
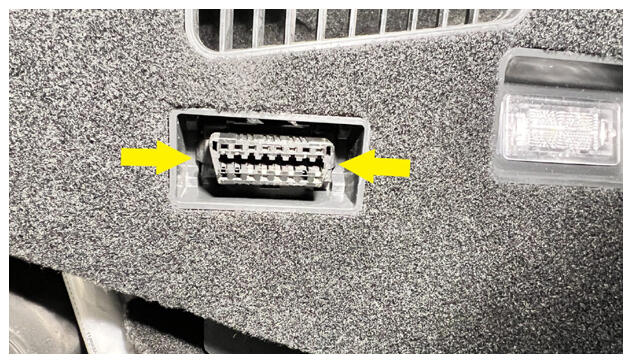 Courtesy of TESLA, INC. Courtesy of TESLA, INC.
|
- Install LH footwell cover
NOTE:
2x magnets, 1x guide tab
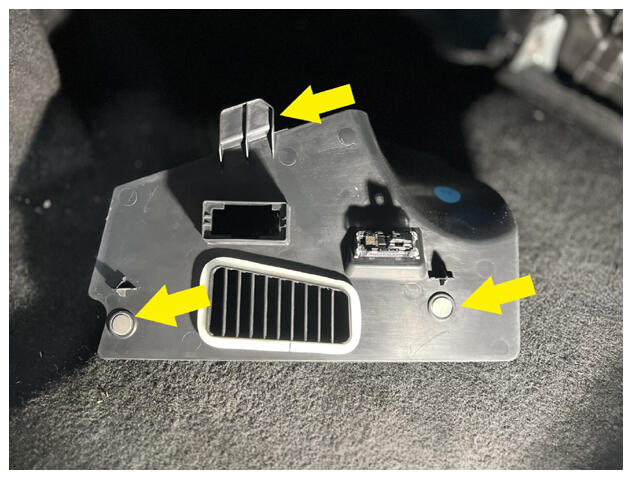 Courtesy of TESLA, INC. Courtesy of TESLA, INC.
|
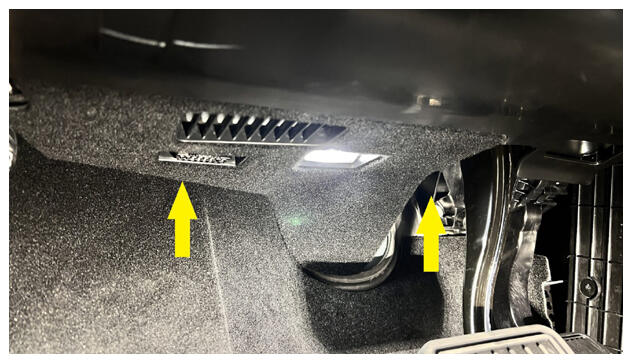 Courtesy of TESLA, INC. Courtesy of TESLA, INC.
|
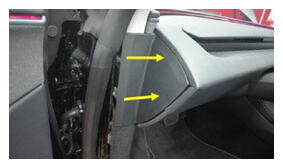
- Install LH IP end cap
NOTE:
5x clips, 2x guide tabs
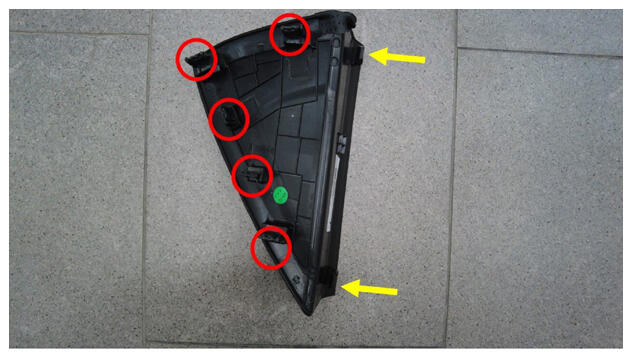 Courtesy of TESLA, INC. Courtesy of TESLA, INC.
|
 Courtesy of TESLA, INC. Courtesy of TESLA, INC.
|
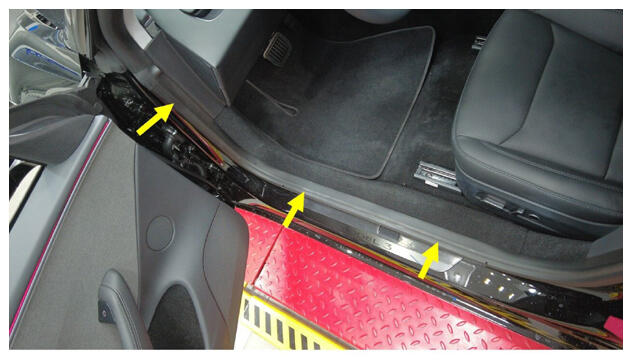
- Install LH front primary seal
NOTE:
Verify seal is seated properly on all trim panels
 Courtesy of TESLA, INC. Courtesy of TESLA, INC.
|
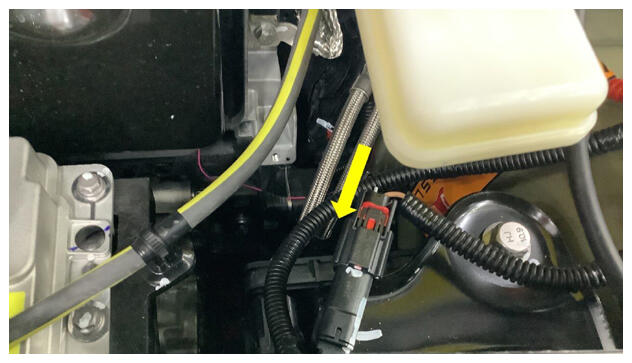
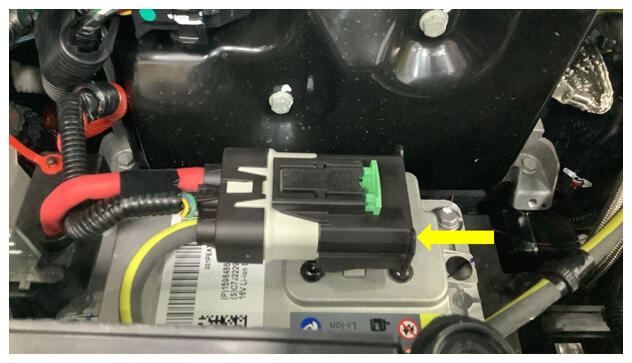
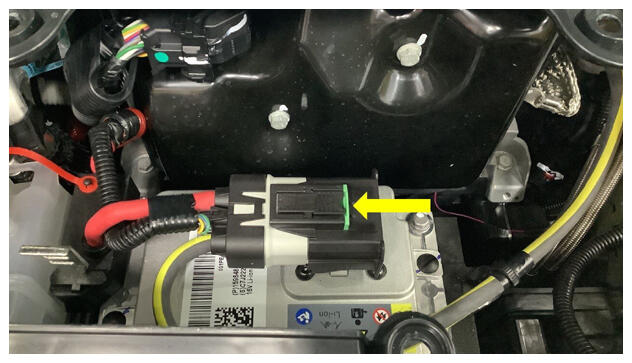
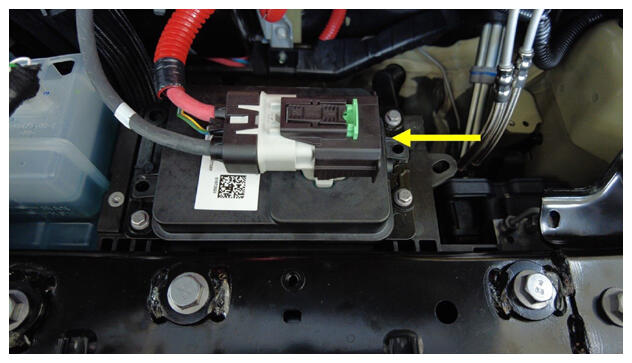
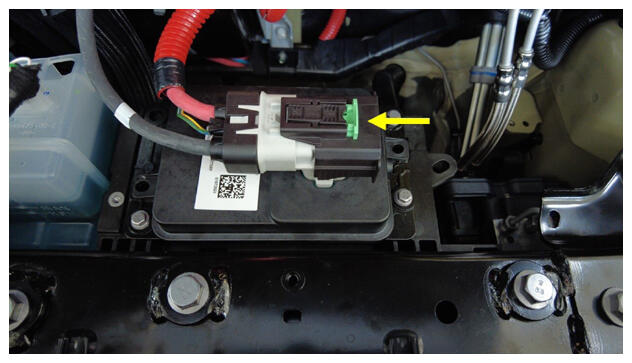
- Connect First Responder Loop and LV battery
NOTE:
2x connectors, Secure FRL first, Seat LV battery connection and push black connector lock inwards to secure, Engage green locking tab when fully seated
 Courtesy of TESLA, INC. Courtesy of TESLA, INC.
|
 Courtesy of TESLA, INC. Courtesy of TESLA, INC.
|
 Courtesy of TESLA, INC. Courtesy of TESLA, INC.
|
 Courtesy of TESLA, INC. Courtesy of TESLA, INC.
|
 Courtesy of TESLA, INC. Courtesy of TESLA, INC.
|
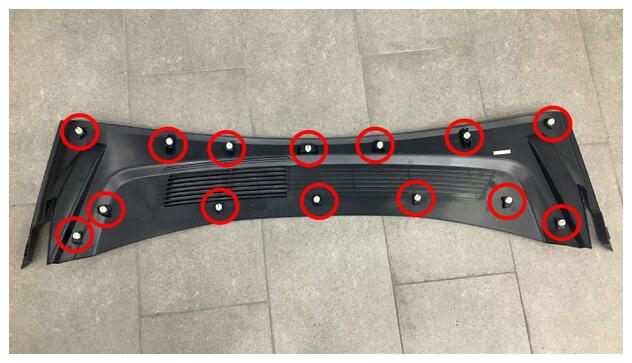
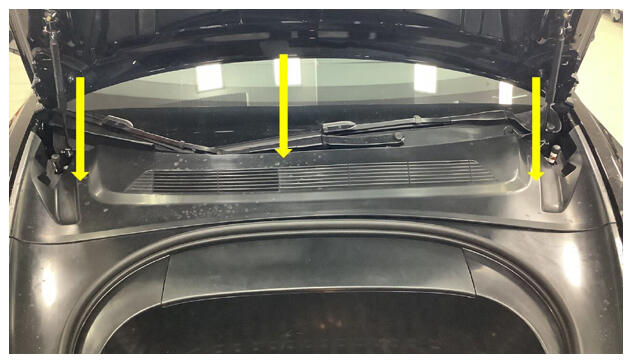
- Install rear underhood apron
NOTE:
14x clips, Hold rear wall of frunk to keep from flexing while engaging front clips
 Courtesy of TESLA, INC. Courtesy of TESLA, INC.
|
 Courtesy of TESLA, INC. Courtesy of TESLA, INC.
|
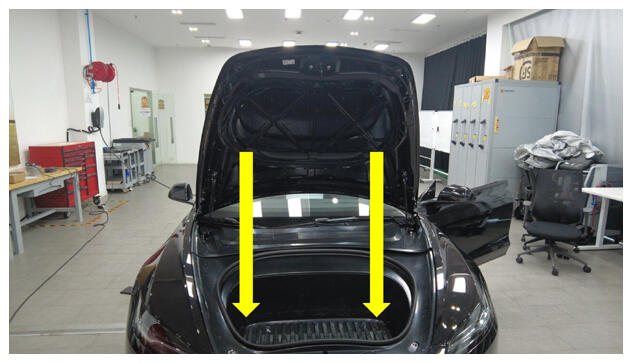
- Close hood
 Courtesy of TESLA, INC. Courtesy of TESLA, INC.
|
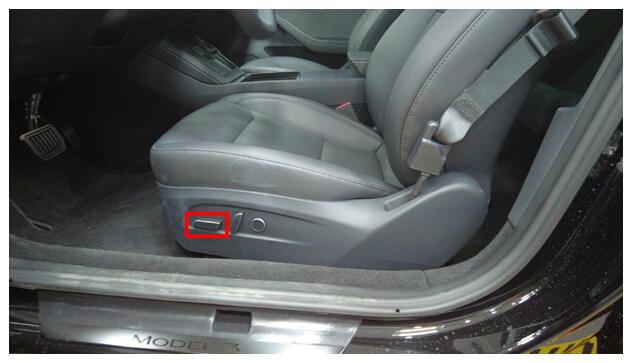
- Move LH front seat to original position
 Courtesy of TESLA, INC. Courtesy of TESLA, INC.
|
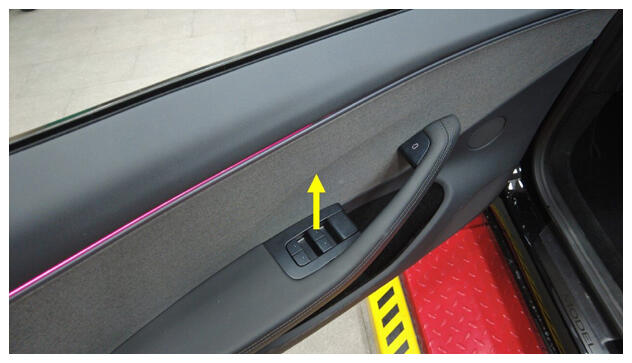
- Raise LH front window
 Courtesy of TESLA, INC. Courtesy of TESLA, INC.
|
- Close LH front door
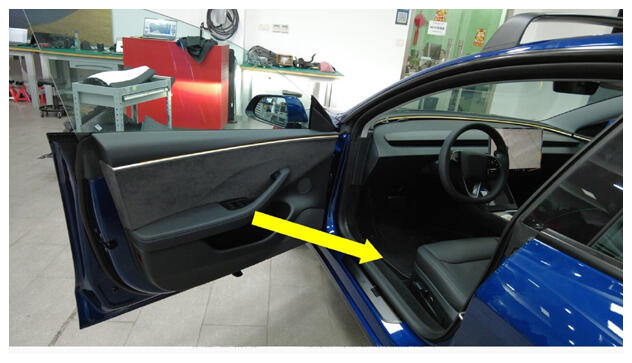 Courtesy of TESLA, INC. Courtesy of TESLA, INC.
|