- Open all doors, and latch the rear doors to prevent accidental closing.
- Lower all windows.
- Set the steering wheel straight ahead.
- Remove the second row seat cushion. See SEAT CUSHION - LOWER - 2ND ROW (REMOVE AND REPLACE)
.
- Remove the rear underhood apron. See UNDERHOOD APRON - REAR (REMOVE AND REPLACE)
.
- Remove the LH and RH instrument panel end caps. See END CAP - INSTRUMENT PANEL - LH (REMOVE AND REPLACE) .
- Remove the LH and RH middle A-pillar trim. See TRIM - A-PILLAR - MIDDLE - LH (REMOVE AND REPLACE)
.
- Remove the LH and RH lower A-pillar trim. See TRIM - A-PILLAR - LOWER - LH (REMOVE AND REPLACE)
.
- Remove the LH and RH upper A-pillar trim. See TRIM - A-PILLAR - UPPER - LH (REMOVE AND REPLACE)
- Remove the LH footwell cover. See COVER - FOOTWELL - PASSENGER (RHD) (REMOVE AND REPLACE) .
- Remove the RH footwell vent duct. See DUCT - FOOTWELL - RH (RHD) (REMOVE AND REPLACE)
.
- Open the glove box.
- Remove the LH and RH front seats. See SEAT - DRIVER (REMOVE AND REPLACE)
.
CAUTION:
Make sure to disconnect 12V power before disconnecting the seat electrical harnesses.
- Remove the center console. See CENTER CONSOLE (REMOVE AND REPLACE)
.
- Remove the main instrument panel decor trim. See DECOR TRIM - INSTRUMENT PANEL - MAIN (REMOVE AND REPLACE) .
- Remove the glove box. See GLOVE BOX - WITHOUT KNEE AIRBAGS (REMOVE AND REPLACE) .
- Remove the LH footwell duct. See DUCT - FOOTWELL - LH (RHD) (REMOVE AND REPLACE)
.
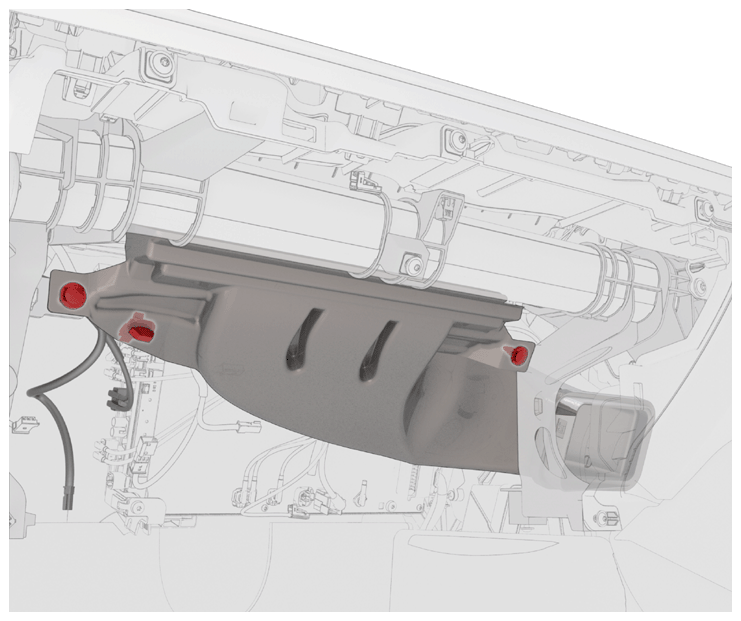
- Remove the clips (x3) that attach the LH air wave duct, and then remove the duct.
 Courtesy of TESLA, INC. Courtesy of TESLA, INC.
|
- Remove the steering wheel. See STEERING WHEEL (REMOVE AND INSTALL)
.
- Remove the steering column control module. See MODULE - STEERING COLUMN CONTROL (REMOVE AND REPLACE)
.
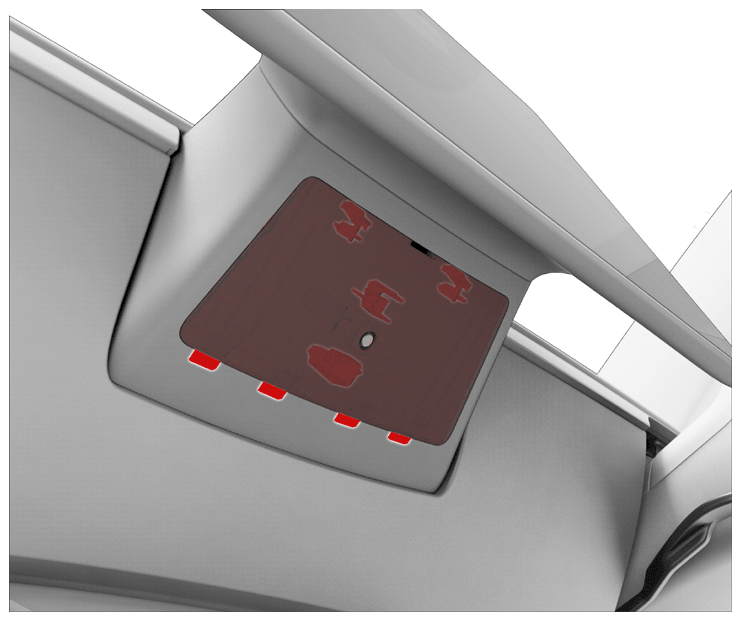
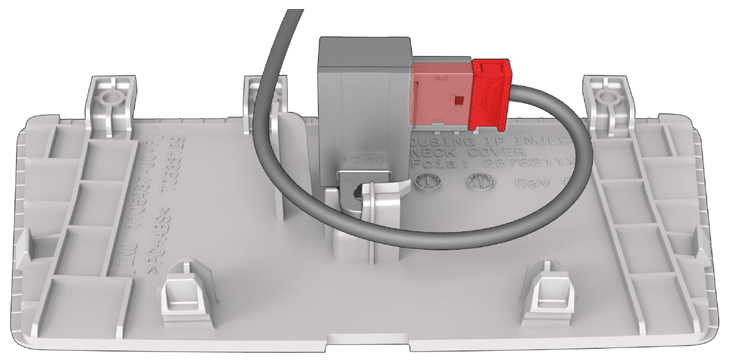
- Release the clips (x4) that attach the instrument panel service panel to the instrument panel, and then disconnect the temperature sensor connector.
 Courtesy of TESLA, INC. Courtesy of TESLA, INC.
|
 Courtesy of TESLA, INC. Courtesy of TESLA, INC.
|
- Remove the touchscreen and the center display housing. See TOUCHSCREEN (REMOVE AND REPLACE)
.
- Remove the vent finisher. See FINISHER - VENT (REMOVE AND REPLACE) .
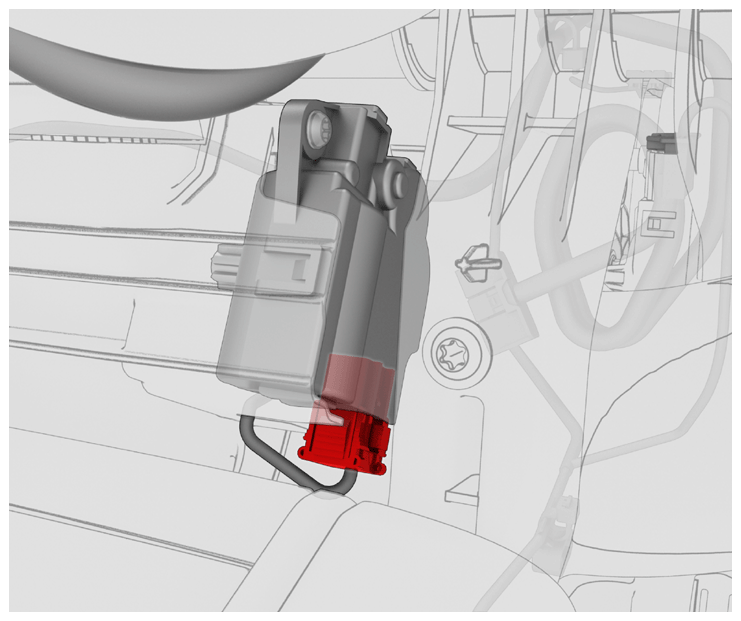
- Remove the screw (torque 2.3 N.m) that attaches the RH air duct to the instrument panel, and then release the air duct from the instrument panel.
- Disconnect the harness connector from the RH air duct and remove the duct.
 Courtesy of TESLA, INC. Courtesy of TESLA, INC.
|
- Remove the screw (torque 2.3 N.m) that attaches the LH air duct to the instrument panel, and then release the air duct from the instrument panel.
- Disconnect the harness connector from the LH air duct and remove the duct.
 Courtesy of TESLA, INC. Courtesy of TESLA, INC.
|
- Remove the speaker grille. See GRILLE - SPEAKER - INSTRUMENT PANEL (REMOVE AND REPLACE) .
- Remove the LH and RH dash speakers. See SPEAKER - DASH - LH (REMOVE AND REPLACE)
.
- Remove the center dash speaker. See SPEAKER - DASH - CENTER (REMOVE AND REPLACE)
.
- Remove the dash tweeter. See TWEETER - DASH (REMOVE AND REPLACE)
.
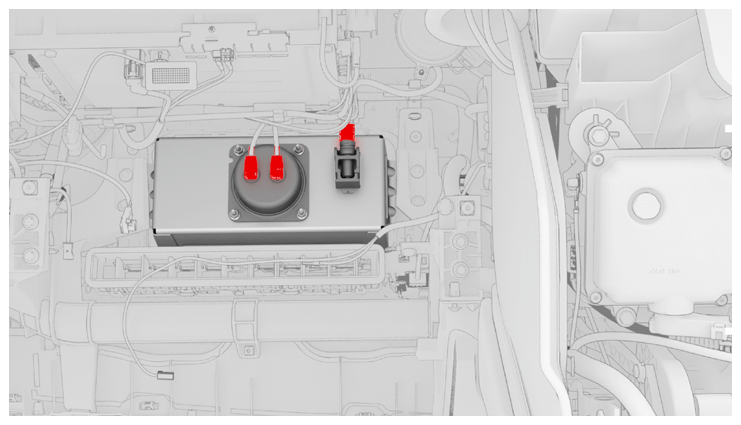
- Disconnect the electrical wiring harness from the front passenger airbag connectors (x3).
 Courtesy of TESLA, INC. Courtesy of TESLA, INC.
|
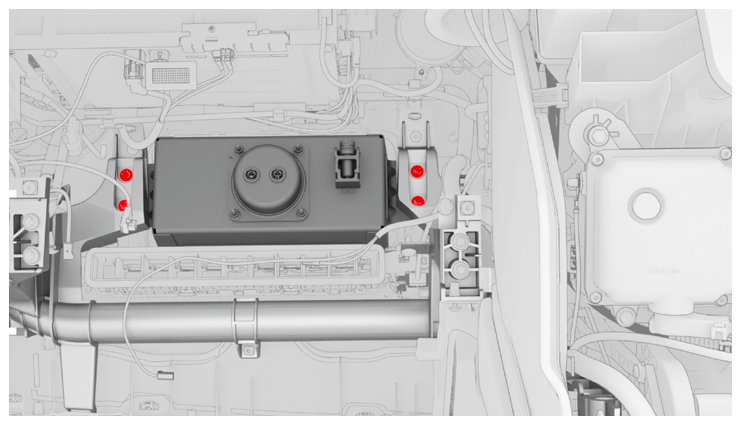
- Remove and discard the bolts (x4) that attach the front passenger airbag to the cross car beam.
 8 N.m (5.9 ft-lbs)
 Courtesy of TESLA, INC. Courtesy of TESLA, INC.
|
- Remove the screws (x2) that attach the IP carrier to the cross car beam near the front passenger airbag (torque 2.3 N.m).
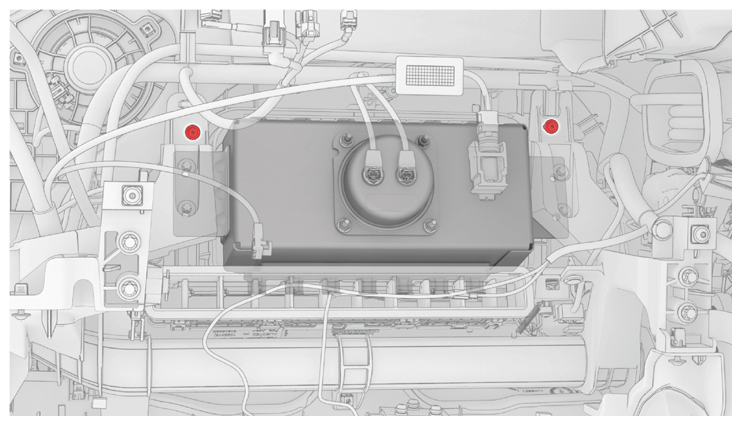 Courtesy of TESLA, INC. Courtesy of TESLA, INC.
|
- Remove the screws (x11) that attach the IP carrier to the cross car beam.
 2.3 N.m (1.7 ft-lbs)
NOTE:
LHD Shown, RHD Similar.
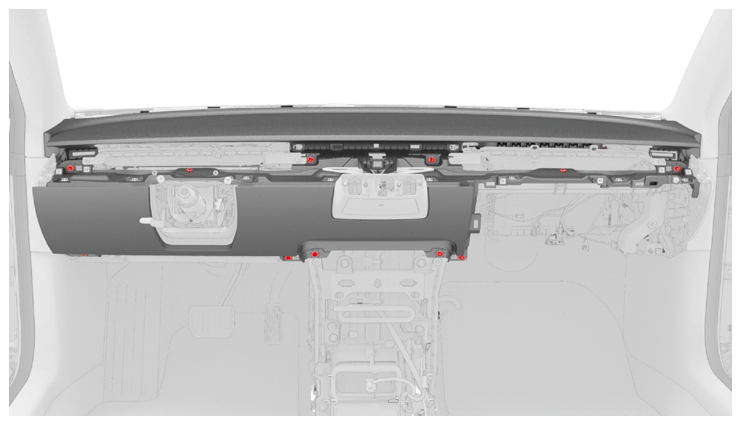 Courtesy of TESLA, INC. Courtesy of TESLA, INC.
|
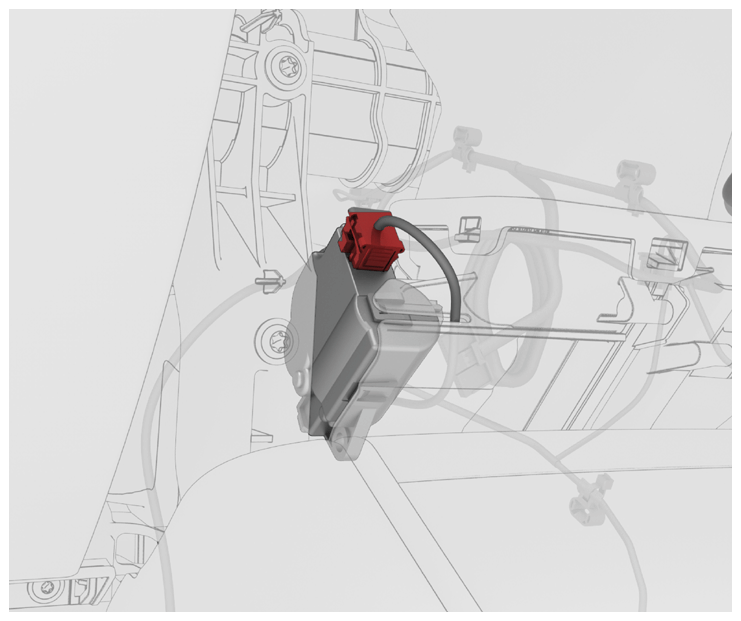
- Slightly release the instrument panel carrier from the cross car beam to gain access to the E-call antenna. See IP CARRIER (REMOVE AND INSTALL) .
- Disconnect the harness connector from the E-call antenna.
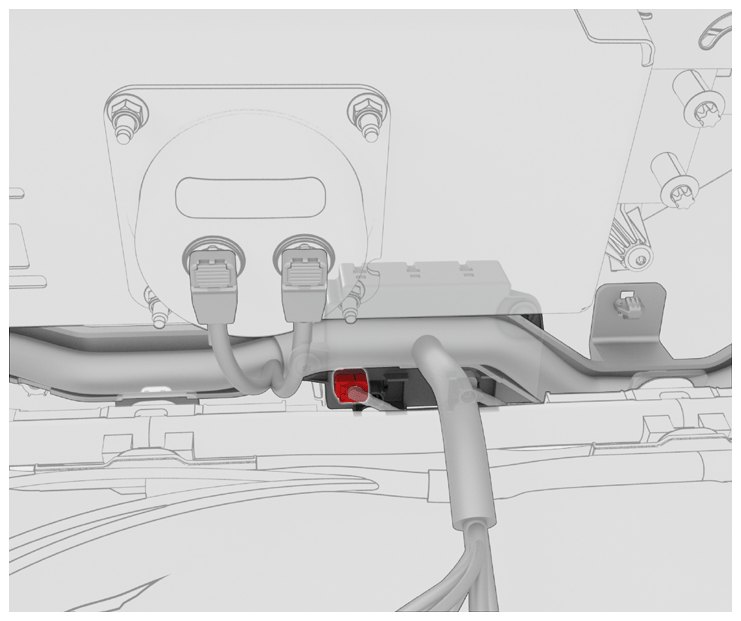 Courtesy of TESLA, INC. Courtesy of TESLA, INC.
|
- Remove the instrument panel carrier from the cross car beam.
CAUTION:
Make sure to clear the harness attached to the top of the HVAC assembly.