- Open all doors and lower the windows.
NOTE:
Latch the rear doors to prevent accidental closure.
- Move the front seats fully forward.
- Release the clips that attach the LH upper B-pillar trim to the B-pillar, and then move the trim aside.
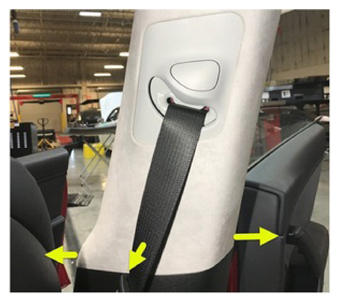 Courtesy of TESLA, INC. Courtesy of TESLA, INC.
|
- Remove the LH side rail trim. See TRIM - SIDE RAIL - LH (REMOVE AND REPLACE)
.
- Release the clip that attach the screw covers to the LH rear coat hook.
- Remove the screw that attach the LH rear coat hook to the body.
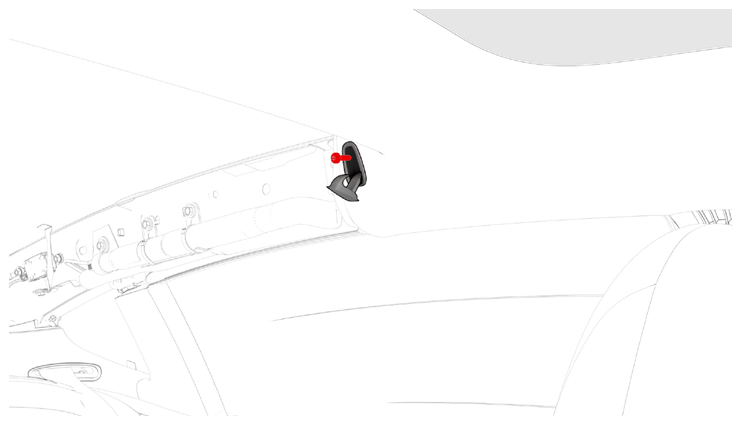 Courtesy of TESLA, INC. Courtesy of TESLA, INC.
|
- Repeat step 3 through step 6 for the RH side of the vehicle.
- Release clips (x4) that attach the rear end of the headliner to the body.
NOTE:
If necessary, use an air bladder between the headliner and body for additional clearance.
CAUTION:
Be cautious not to damage the headliner.
- Remove the LH 2nd row seat side bolster. See BOLSTER - SIDE - SEAT - 2ND ROW - LH (REMOVE AND REPLACE)
.
- Remove the LH upper C-pillar trim. See TRIM - C-PILLAR - UPPER - LH (REMOVE AND REPLACE)
.
- Release the clip and tabs that attach the LH rear C-pillar trim to the body, and then set the trim aside.
NOTE:
Pull the rear of the trim forward, and then upward to remove it.
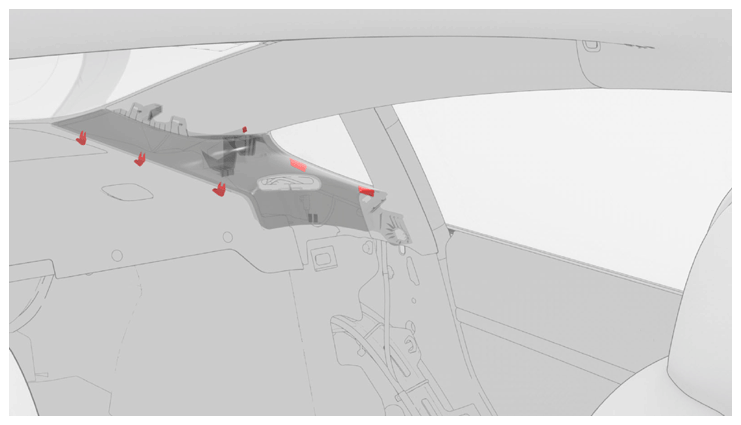 Courtesy of TESLA, INC. Courtesy of TESLA, INC.
|
- Disconnect the electrical connector from the FM antenna amplifier.
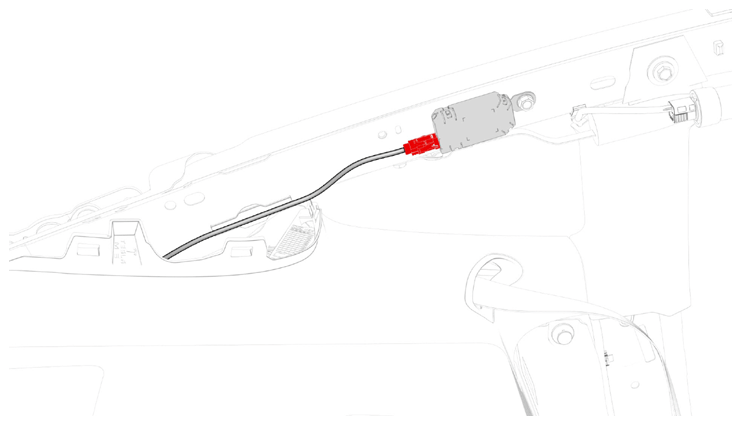 Courtesy of TESLA, INC. Courtesy of TESLA, INC.
|
- Disconnect the backlight electrical harness connector from the antenna amplifier on the LH side C-pillar.
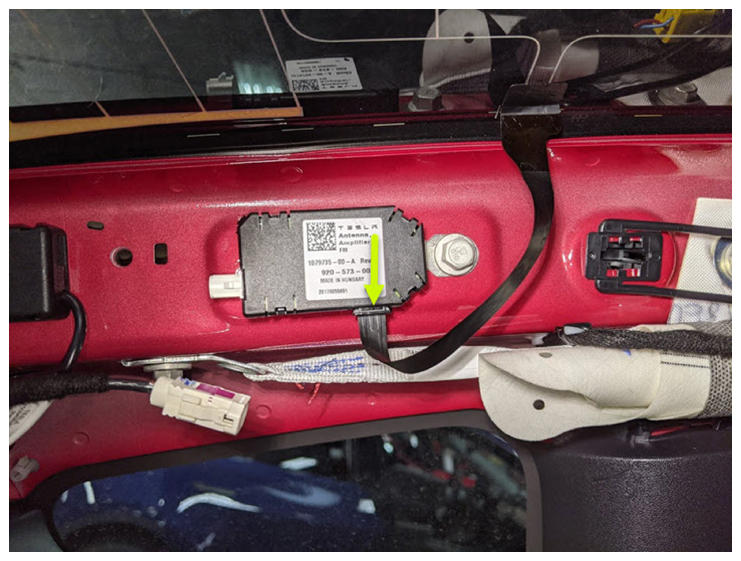 Courtesy of TESLA, INC. Courtesy of TESLA, INC.
|
- Disconnect the ground noise filter antenna connector on the LH side of the vehicle.
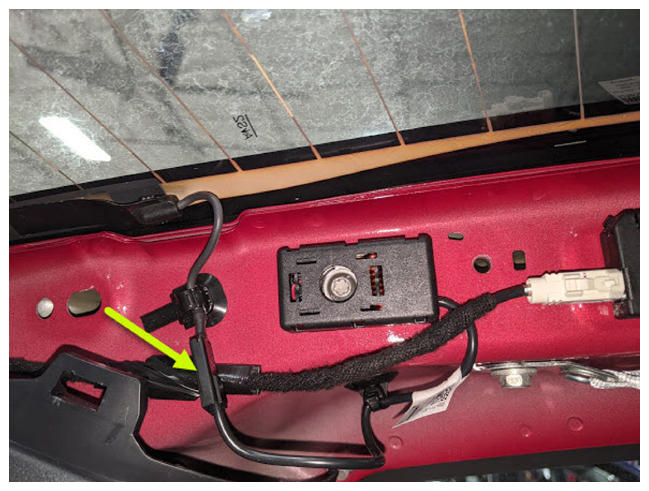 Courtesy of TESLA, INC. Courtesy of TESLA, INC.
|
- Release the LH side backlight busbar harness from the body.
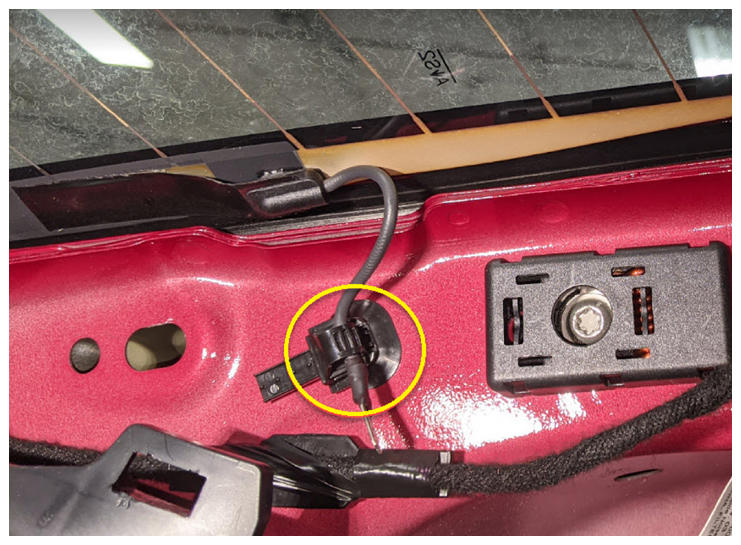 Courtesy of TESLA, INC. Courtesy of TESLA, INC.
|
- Remove the RH 2nd row seat side bolster. See BOLSTER - SIDE - SEAT - 2ND ROW - LH (REMOVE AND REPLACE)
.
- Remove the RH upper C-pillar trim. See TRIM - C-PILLAR - UPPER - LH (REMOVE AND REPLACE)
.
- Release the clip and tabs that attach the RH rear C-pillar trim to the body, and then set the trim aside.
NOTE:
Pull the rear of the trim forward, and then upward to remove it.
NOTE:
LH shown; RH similar.
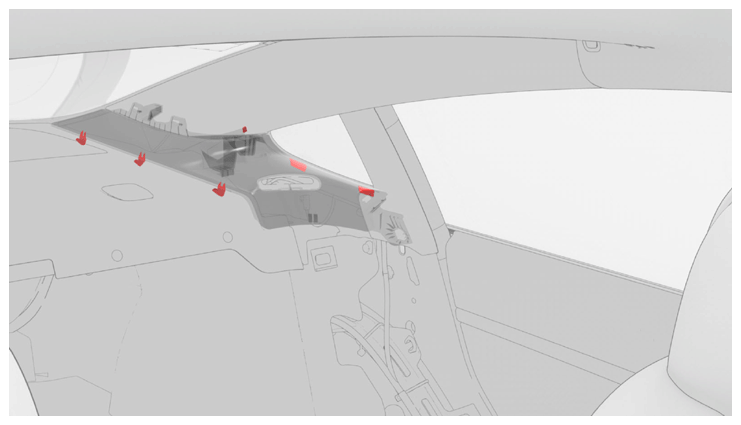 Courtesy of TESLA, INC. Courtesy of TESLA, INC.
|
- Disconnect the 12V noise filter antenna connector on the RH side of the vehicle.
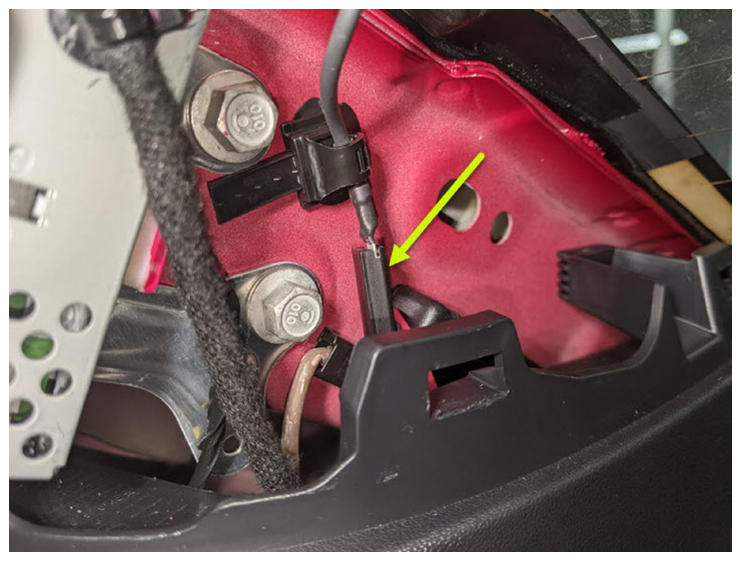 Courtesy of TESLA, INC. Courtesy of TESLA, INC.
|
- Release the RH side backlight busbar harness from the body.
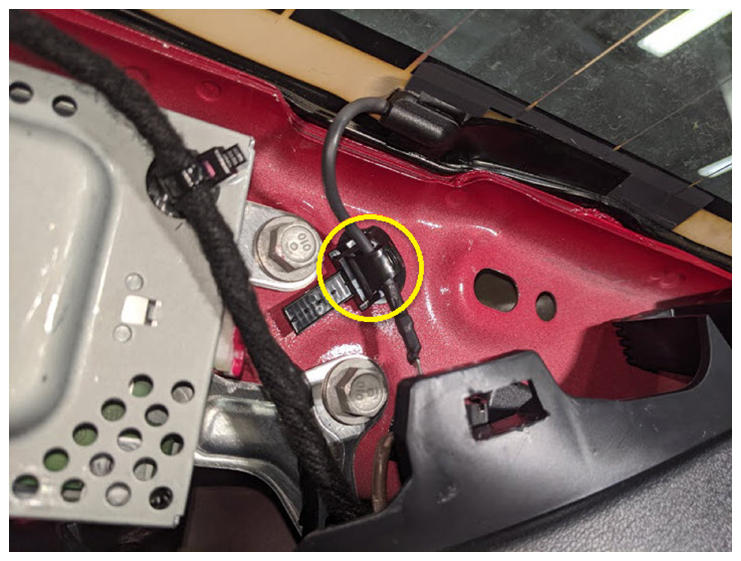 Courtesy of TESLA, INC. Courtesy of TESLA, INC.
|
- Disconnect the backlight electrical harness connector from the tuner on the RH C-pillar.
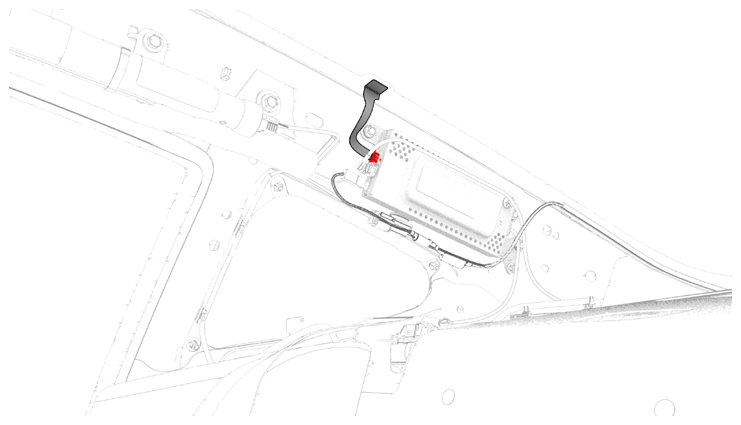 Courtesy of TESLA, INC. Courtesy of TESLA, INC.
|
- Remove the package tray trim. See TRIM - PACKAGE TRAY (REMOVE AND REPLACE)
.
- Use masking tape to tape the backlight glass antenna connectors to the backlight glass.
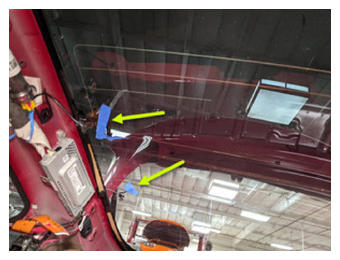 Courtesy of TESLA, INC. Courtesy of TESLA, INC.
|
- Use the exterior switch to open the trunk.
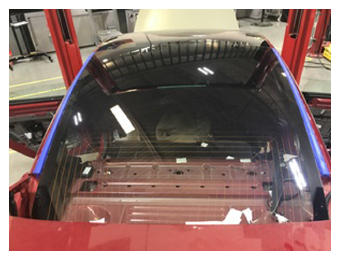
- Apply masking tape to the exterior of the LH and RH roof pillars to protect the paint from damage.
 Courtesy of TESLA, INC. Courtesy of TESLA, INC.
|
- Cut a suitable length of square wire to use with T-handles.
- Secure the wire to the starter tool and push the tool through the urethane at the lower side of the RH C-pillar.
- Remove the wire from the starter tool and remove the tool from the urethane.
- Secure each end of the wire with a T-handle.
- With an assistant, use the T-handles to cut the urethane that attaches the backlight glass to the body. Cut in a counter-clockwise motion over the top of the backlight glass to the lower side of the LH C-pillar. Return to the starting point in a clockwise motion and continue past the bottom of the backlight glass to the lower side of the LH C-pillar.
CAUTION:
Use caution when working around the headliner area.
- Cut the square wire and remove the T-handles.
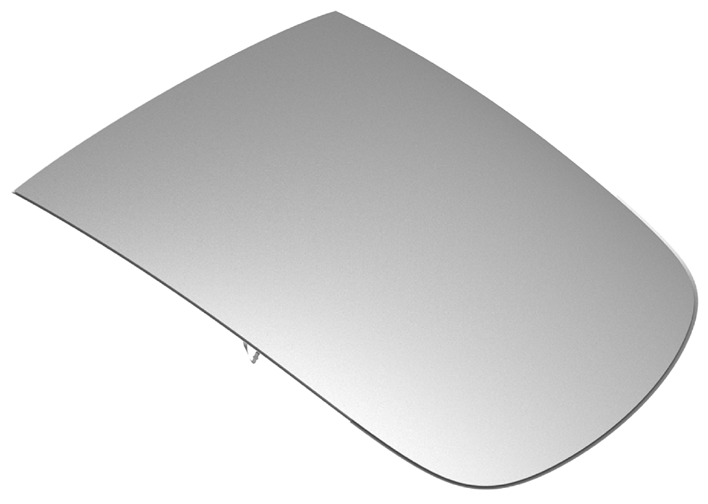
- Attach suction cups to the LH and RH sides of the backlight glass.
- With an assistant, remove the backlight glass from the vehicle.
 Courtesy of TESLA, INC. Courtesy of TESLA, INC.
|
- Use a scraper to carefully remove the old urethane from the body.
- Use an IPA wipe to clean the urethane path on the vehicle. Allow 1 minute for the IPA to dry.
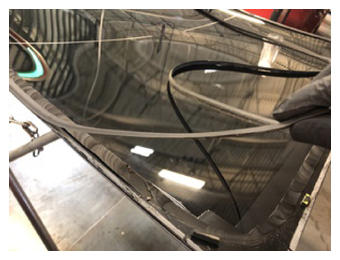
- Use a scraper to carefully remove the old seal from the backlight glass.
 Courtesy of TESLA, INC. Courtesy of TESLA, INC.
|
- Use a scraper to remove the old urethane from the backlight glass.
- Use an IPA wipe to clean the surface of the backlight glass. Allow 1 minute for the IPA to dry.