- Open all four doors
NOTE:
If vehicle is being powered down, Latch rear doors to prevent accidental closure
- Lower all four windows
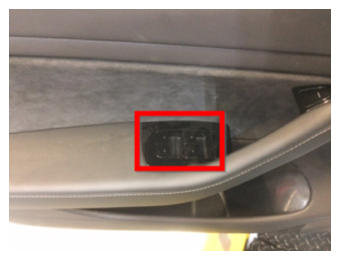 Courtesy of TESLA, INC. Courtesy of TESLA, INC.
|
- Move RH front seat backward
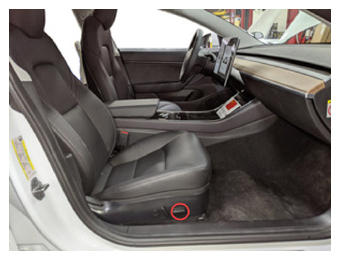 Courtesy of TESLA, INC. Courtesy of TESLA, INC.
|
- Open hood
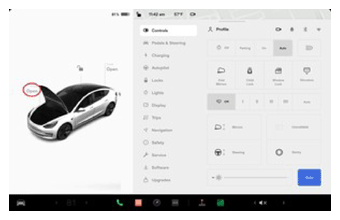 Courtesy of TESLA, INC. Courtesy of TESLA, INC.
|
- Remove rear apron
NOTE:
12x clips, only store the rear apron visible face upwards
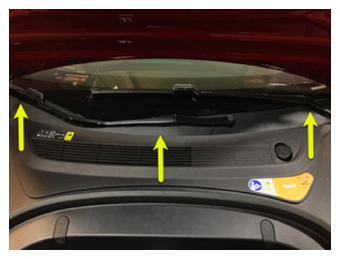 Courtesy of TESLA, INC. Courtesy of TESLA, INC.
|
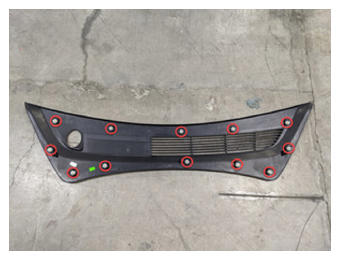 Courtesy of TESLA, INC. Courtesy of TESLA, INC.
|
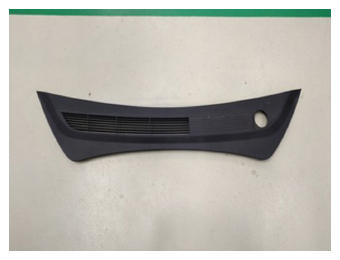 Courtesy of TESLA, INC. Courtesy of TESLA, INC.
|
- Power off vehicle from center display
NOTE:
Via Controls > Safety & Security > Vehicle Power > Power Off, Confirm power off at warning dialogue box
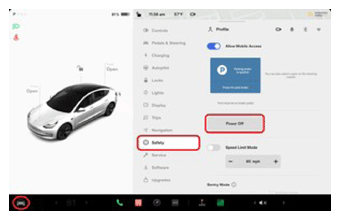 Courtesy of TESLA, INC. Courtesy of TESLA, INC.
|
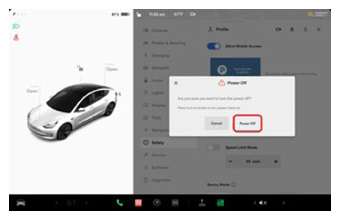 Courtesy of TESLA, INC. Courtesy of TESLA, INC.
|
- Disconnect LV battery
NOTE:
2x connectors, Lift up and release green locking tab, Pull black connector lock outwards to release connection
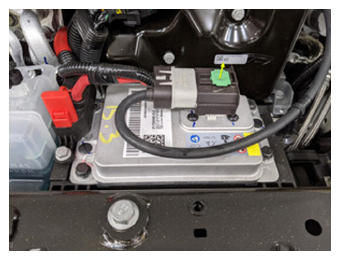 Courtesy of TESLA, INC. Courtesy of TESLA, INC.
|
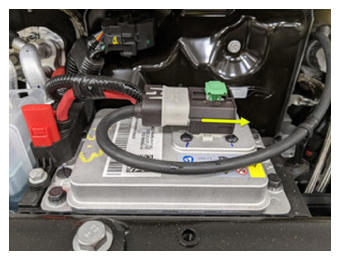 Courtesy of TESLA, INC. Courtesy of TESLA, INC.
|
- Disconnect service disconnect
NOTE:
1x connector, Release locking tab
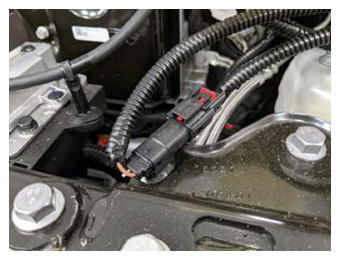 Courtesy of TESLA, INC. Courtesy of TESLA, INC.
|
- Remove RH IP end cap
NOTE:
3x clips
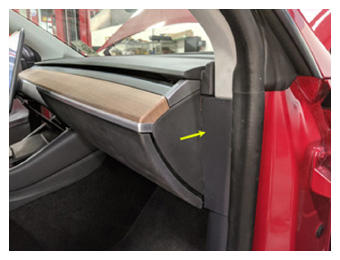 Courtesy of TESLA, INC. Courtesy of TESLA, INC.
|
- Remove RH mid A-pillar assembly
NOTE:
1x clip, 1x tab, Release the upper clip then pull mid A-pillar upward to remove
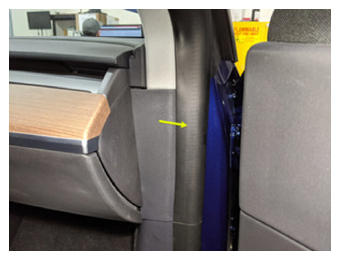 Courtesy of TESLA, INC. Courtesy of TESLA, INC.
|
- Remove clip for RH lower A-pillar trim
NOTE:
1x push clip
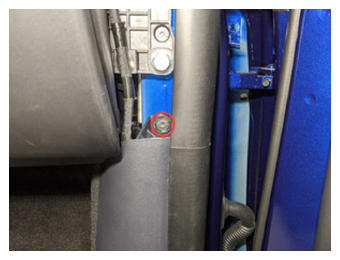 Courtesy of TESLA, INC. Courtesy of TESLA, INC.
|
- Remove RH lower A-pillar trim
NOTE:
1x clip, 2 guide tabs, Pull rear of lower A-pillar upward to release clip then pull rearward to release front tabs from carpet
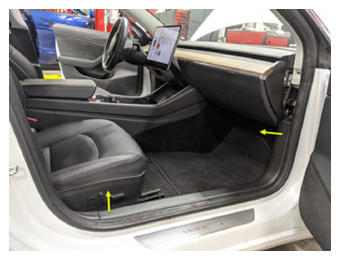 Courtesy of TESLA, INC. Courtesy of TESLA, INC.
|
- Remove RH front floor mat
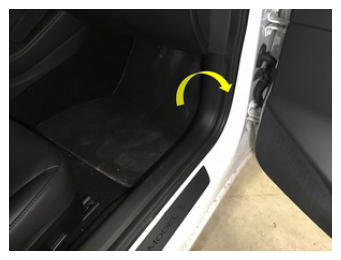 Courtesy of TESLA, INC. Courtesy of TESLA, INC.
|
- Remove RH console side panel carpet
NOTE:
12x clips, Use trim tool starting at rear edge to release upper clips, Pull bottom to release remaining clips
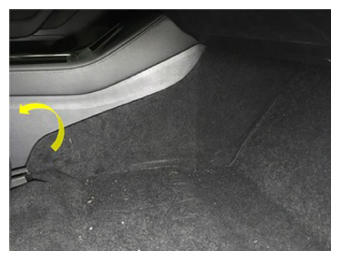 Courtesy of TESLA, INC. Courtesy of TESLA, INC.
|
- Remove clips securing RH footwell assembly
NOTE:
4x push clips
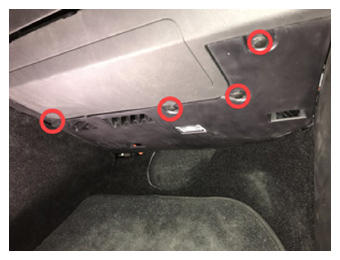 Courtesy of TESLA, INC. Courtesy of TESLA, INC.
|
- Disconnect RH foot well assembly connectors and remove from vehicle
NOTE:
2x electrical connectors
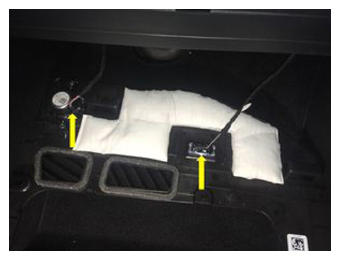 Courtesy of TESLA, INC. Courtesy of TESLA, INC.
|
- Remove the fasteners securing passenger knee airbag to vehicle
NOTE:
4x patch bolts, T30, 8 N.m (5.9 ft-lbs), Discard after removal, 2x screws, T20, 2 N.m (1.47 ft-lbs.), Newer vehicles have 4x patch bolts, E10, Discard after removal, Support the knee air bag while lowering, The connector/harness length is very short
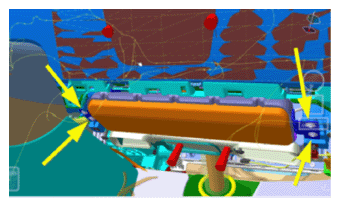 Courtesy of TESLA, INC. Courtesy of TESLA, INC.
|
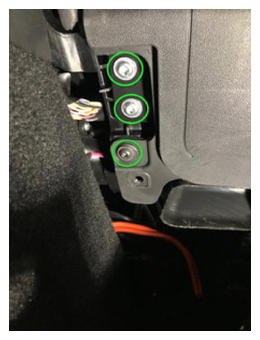 Courtesy of TESLA, INC. Courtesy of TESLA, INC.
|
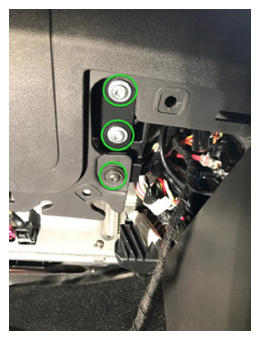 Courtesy of TESLA, INC. Courtesy of TESLA, INC.
|
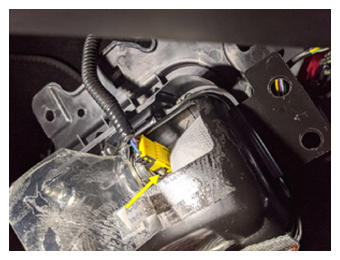
- Remove the passenger knee air bag from vehicle
NOTE:
1x connector, Release locking tab, Connector release may vary
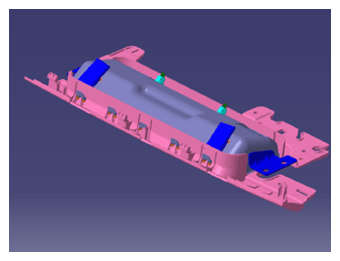 Courtesy of TESLA, INC. Courtesy of TESLA, INC.
|
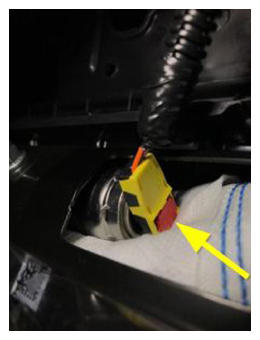 Courtesy of TESLA, INC. Courtesy of TESLA, INC.
|
 Courtesy of TESLA, INC. Courtesy of TESLA, INC.
|
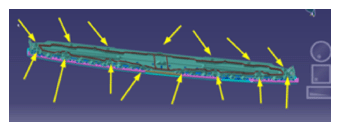
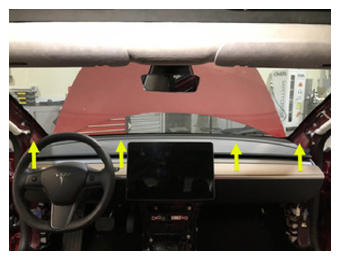
- Remove main decor assembly
NOTE:
15x clips, Entire decor does not need to come off for glove box removal, If you lift RH side of decor then you will have access to 3x torx screws securing top of glove box, Replace securing clips as needed
 Courtesy of TESLA, INC. Courtesy of TESLA, INC.
|
 Courtesy of TESLA, INC. Courtesy of TESLA, INC.
|
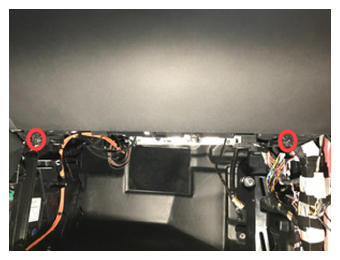
- Remove screws securing glove box assembly to IP carrier
NOTE:
6x screws, T20, 2.3 N.m (1.69 ft-lbs.)
 Courtesy of TESLA, INC. Courtesy of TESLA, INC.
|
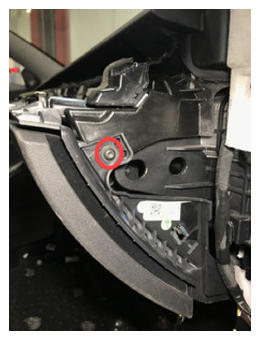 Courtesy of TESLA, INC. Courtesy of TESLA, INC.
|
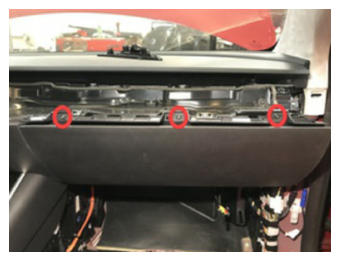 Courtesy of TESLA, INC. Courtesy of TESLA, INC.
|
- Disconnect glove box assembly connectors
NOTE:
3x electrical connectors
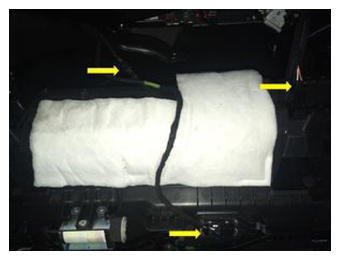 Courtesy of TESLA, INC. Courtesy of TESLA, INC.
|
- Disconnect glove box USB cable from car computer
NOTE:
1x connector, Depress latch on top of USB cable to release internal latches, then release from car computer
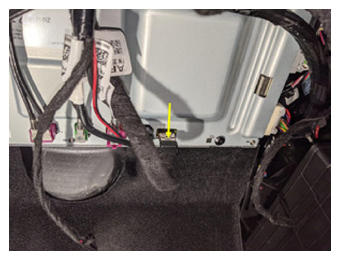 Courtesy of TESLA, INC. Courtesy of TESLA, INC.
|
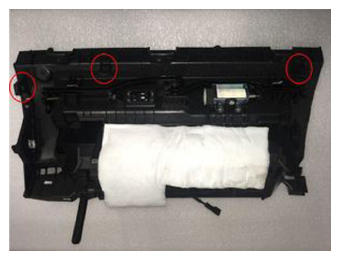
- Remove the glove box from IP carrier
NOTE:
3x clips
 Courtesy of TESLA, INC. Courtesy of TESLA, INC.
|
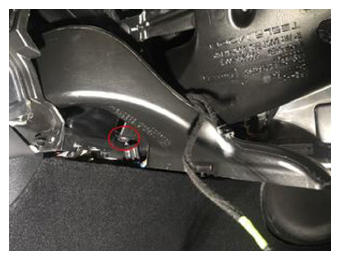
- Remove the passenger footwell air duct
NOTE:
1x push clip
 Courtesy of TESLA, INC. Courtesy of TESLA, INC.
|
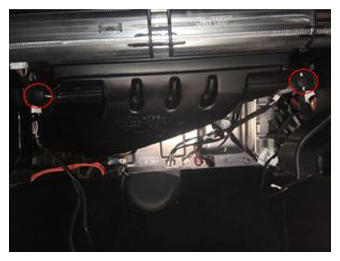
- Remove the RH IP air wave duct
NOTE:
2x push clips
 Courtesy of TESLA, INC. Courtesy of TESLA, INC.
|
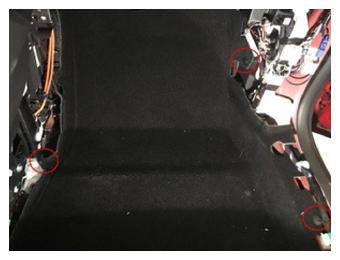
- Remove clips securing RH front main cabin carpet to footwell area
NOTE:
3x push clips, Number of clips may vary on older vehicles
 Courtesy of TESLA, INC. Courtesy of TESLA, INC.
|
- Fold the RH front main cabin carpet aside for access
NOTE:
2x clips, Lift the center piece and pull the carpet back, Release seat harness from clips to allow the carpet to fold back more
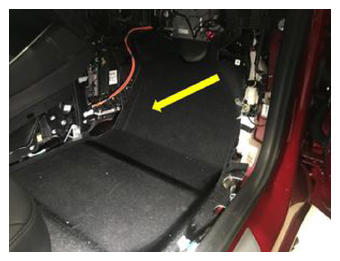 Courtesy of TESLA, INC. Courtesy of TESLA, INC.
|
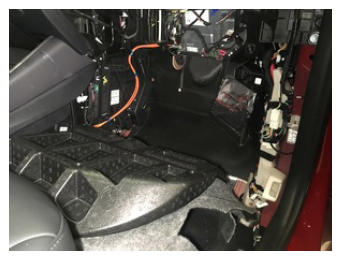 Courtesy of TESLA, INC. Courtesy of TESLA, INC.
|
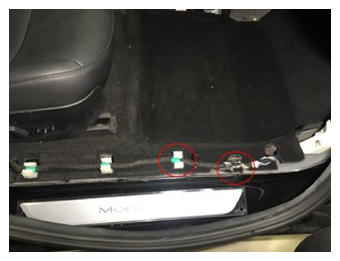 Courtesy of TESLA, INC. Courtesy of TESLA, INC.
|
- Remove the nuts securing RH carpet locator bracket
NOTE:
2x nuts, 10 mm, 2.5 N.m (1.84 ft-lbs.), Newer vehicles may use clips instead of nuts
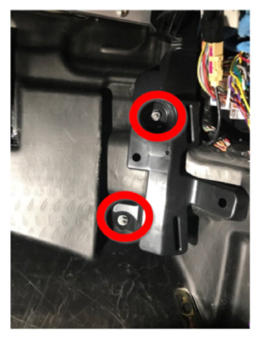 Courtesy of TESLA, INC. Courtesy of TESLA, INC.
|
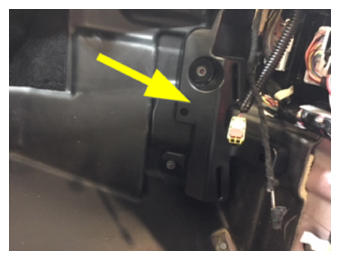
- Remove the RH carpet locator bracket from vehicle
 Courtesy of TESLA, INC. Courtesy of TESLA, INC.
|
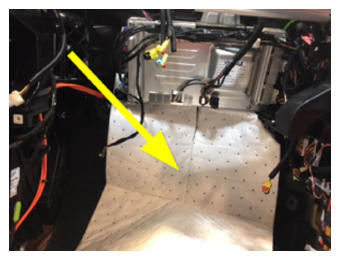
- Place absorbent material beneath car computer to catch any spilled coolant
 Courtesy of TESLA, INC. Courtesy of TESLA, INC.
|
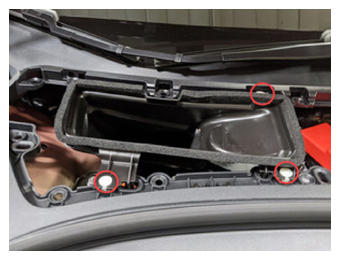
- Remove cabin intake upper duct assembly
NOTE:
3x clips, Older vehicles may be equipped with 4x clips
 Courtesy of TESLA, INC. Courtesy of TESLA, INC.
|
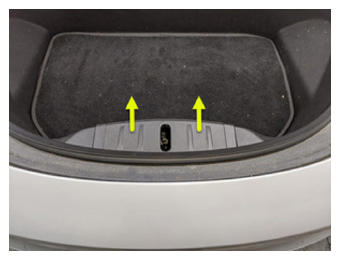
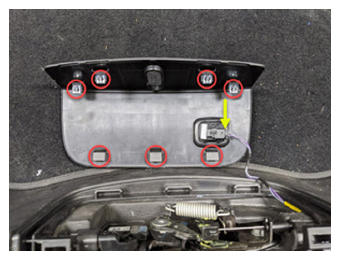
- Remove the close out panel from frunk assembly
NOTE:
4x clips, 1x connector, Frunk safety switch, 3x guide tabs, Grab the closeout panel from the bottom then pull it upward to release clips
 Courtesy of TESLA, INC. Courtesy of TESLA, INC.
|
 Courtesy of TESLA, INC. Courtesy of TESLA, INC.
|
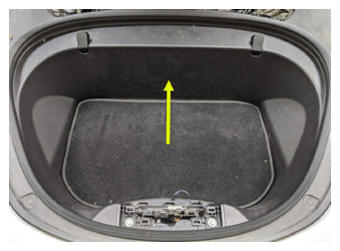
- Remove frunk assembly carpet
 Courtesy of TESLA, INC. Courtesy of TESLA, INC.
|
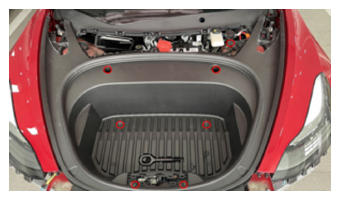
- Remove fasteners securing the frunk assembly
NOTE:
7x bolts, 10 mm, 5 N.m (3.68 ft-lbs.), Lift up the RBN covers to access the upper fasteners, Newer vehicles may not be equipped with covers
 Courtesy of TESLA, INC. Courtesy of TESLA, INC.
|
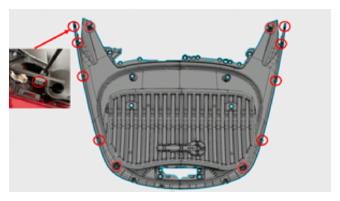
- Remove frunk assembly from vehicle
NOTE:
12x clips, Replace any clips if broken or missing, Number of clips may vary on older vehicles
 Courtesy of TESLA, INC. Courtesy of TESLA, INC.
|
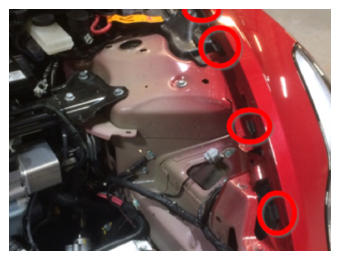 Courtesy of TESLA, INC. Courtesy of TESLA, INC.
|
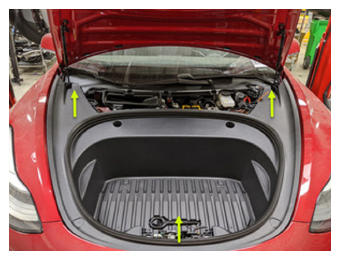 Courtesy of TESLA, INC. Courtesy of TESLA, INC.
|
- Remove HVAC plenum duct
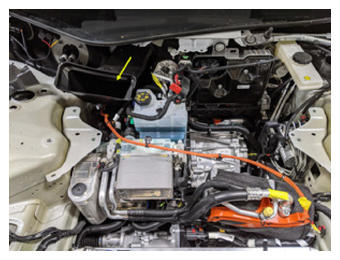 Courtesy of TESLA, INC. Courtesy of TESLA, INC.
|
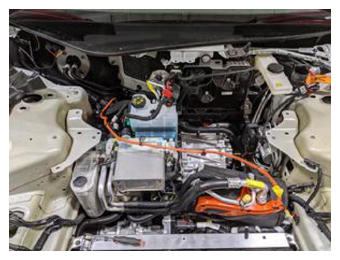 Courtesy of TESLA, INC. Courtesy of TESLA, INC.
|
- Place absorbent material below car computer coolant hose connection points to collect any spilled coolant
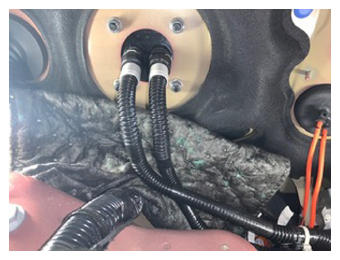 Courtesy of TESLA, INC. Courtesy of TESLA, INC.
|
- Release coolant hoses from car computer
NOTE:
2x spring clips
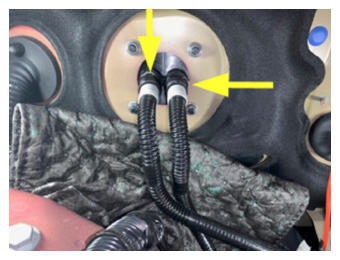 Courtesy of TESLA, INC. Courtesy of TESLA, INC.
|
- Install coolant plugs into coolant outlets of car computer that is being removed from vehicle
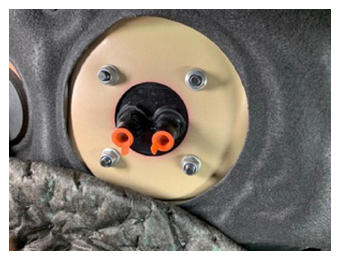 Courtesy of TESLA, INC. Courtesy of TESLA, INC.
|
- Install coolant plugs in hoses
NOTE:
2x plugs, Do not need to engage spring clips
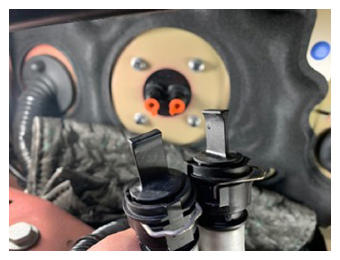 Courtesy of TESLA, INC. Courtesy of TESLA, INC.
|
- Remove and discard nuts securing car computer to bulkhead
NOTE:
6x nyloc nuts, 7.1 N.m (5.23 ft-lbs.), Discard nuts after removal
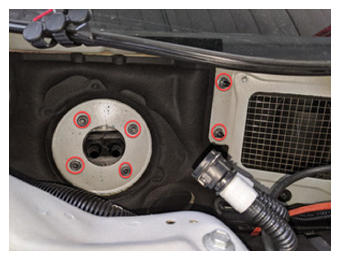 Courtesy of TESLA, INC. Courtesy of TESLA, INC.
|
- Disconnect connectors for passenger air bag assembly
NOTE:
3x connectors, 2x connectors for regions other than North America, Connector release may vary
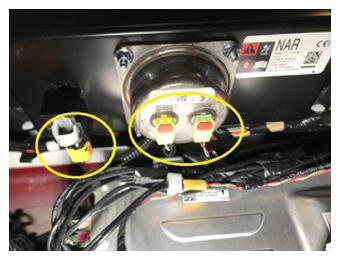 Courtesy of TESLA, INC. Courtesy of TESLA, INC.
|
- Remove bolts securing passenger air bag assembly to cross car beam
NOTE:
4x patch bolts, T30, 8 N.m (5.9 ft-lbs), Newer vehicles have 4x E10 patch bolts, Discard after removal
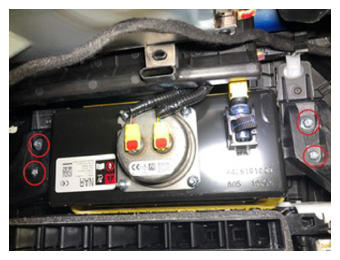 Courtesy of TESLA, INC. Courtesy of TESLA, INC.
|
- Remove car computer from bulkhead
NOTE:
With right hand on top of car computer, and left hand under car computer use back of right hand to help push air bag assembly up and towards back of vehicle. Take care to not damage air bag connections, or wiring harnesses.
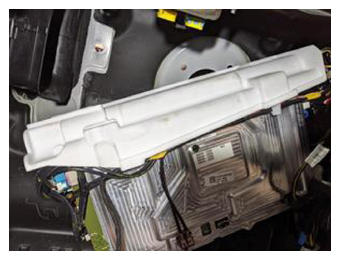 Courtesy of TESLA, INC. Courtesy of TESLA, INC.
|
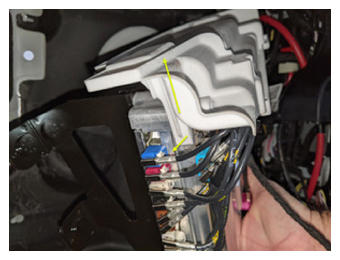
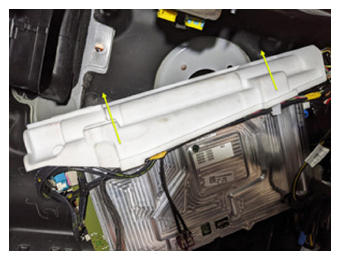
- Remove visor from car computer
NOTE:
4x clips Pull tab on left side of computer away from computer and lift visor up and way.
 Courtesy of TESLA, INC. Courtesy of TESLA, INC.
|
 Courtesy of TESLA, INC. Courtesy of TESLA, INC.
|